How to Use Tuya Homebridge Plugin - tuya/tuya-homebridge GitHub Wiki
With the Tuya Homebridge plugin, you can easily control smart devices connected to the Tuya IoT Cloud by using HomeKit. This tutorial describes how to install the Tuya official Homebridge plugin to connect smart devices and develop Homebridge plugins.
Click to watch the video on youtube.
-
You have installed Homebridge. Check out the Official Homebridge docs and install Homebridge on your preferred system. We have it installed on macOS and use the built-in Terminal to run commands. The following lists the options for installing Homebridge:
- You have created a cloud project of Smart Home PaaS type on the Tuya IoT Platform, added at least one device or one virtual device, and authorized your project to use related smart home APIs. For more information, see Tuya IoT Platform Configuration Guide Using Smart Home PaaS.
Note: You must use a cloud project created on or after May 25, 2021. If your cloud project of Smart Home PaaS type is created before May 25, 2021, you need to create a new project.
-
Open the Terminal on your Mac.
-
Install Tuya Homebridge plugin.
Note: If you encounter any problems with the installation, you may need to preface this command with
sudoto make it run as an administrator.-
Install plugins.
npm install homebridge-tuya-platform -
Wait for the plugin to install and check whether the installation is successful. For more information, see the video below.
-

Before you run the plugin, you need to edit the config.json file of the Homebridge plugin.
-
Navigate to the directory
homebridge-tuya-platform/config.cd ./node_modules/homebridge-tuya-platform/config -
Edit the
config.jsonfile.vim config.json -
Specify values for
options.-
usernameandpassword: The username and password of the Tuya Smart or Smart Life app that you used to link devices on the Tuya IoT Platform. -
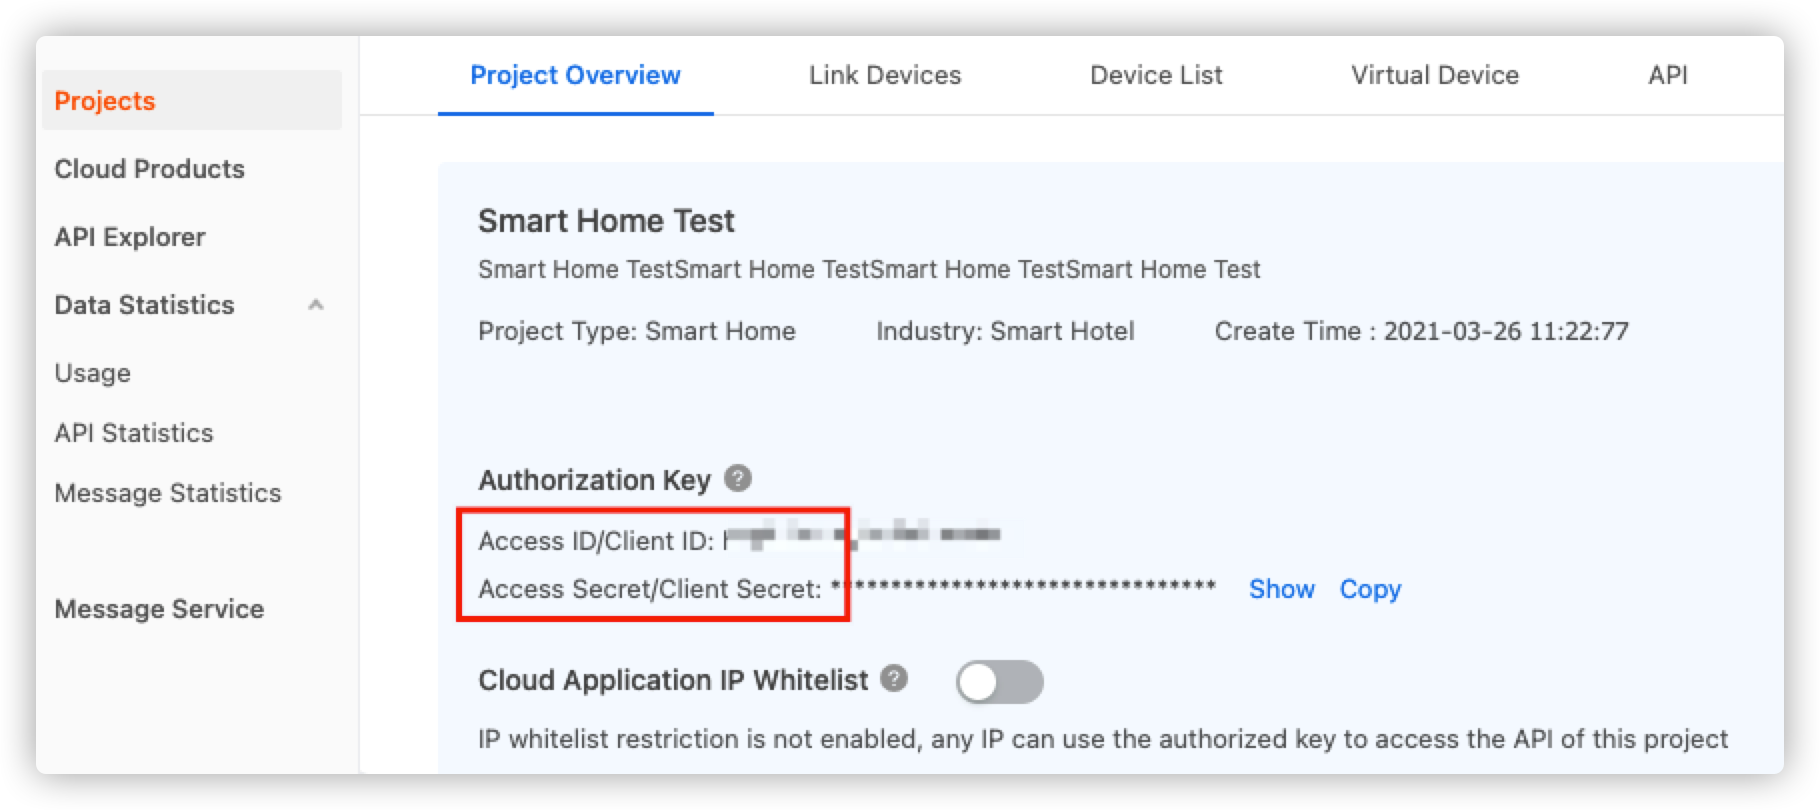
accessIdandaccessKey: The Access ID and Access Secret of your cloud project respectively. Go to the Tuya IoT Platform and select your cloud project. Click Project Overview and find the Access ID and Access Secret. -
lang: Keep the default valueen. -
endPoint: The availability zone of your cloud project that is available to the region of your Tuya Smart or Smart Life app account (Now no need to select the endpoint, Plugin will automatically fetch it for you). For more information about the availability zones, see Correspondence of regions and availability zones.Availability zone Endpoint America https://openapi.tuyaus.com China https://openapi.tuyacn.com Europe https://openapi.tuyaeu.com India https://openapi.tuyain.com Eastern America https://openapi-ueaz.tuyaus.com Western Europe https://openapi-weaz.tuyaeu.com -
projectType: The development method you chose when creating a project. For more information about the development method, see Development Method.- 1: Custom development
- 2: Smart home PaaS
-
appSchema: The mobile app you used to link devices on the Tuya IoT Platform.-
tuyaSmart: Tuya Smart app -
smartLife: Smart Life app
-
-
countryCode: The code of the country you select on logging in to the Tuya Smart or Smart Life app.
-
-
Save and exit.

-
Navigate to the directory
homebridge-tuya-platform.cd .. -
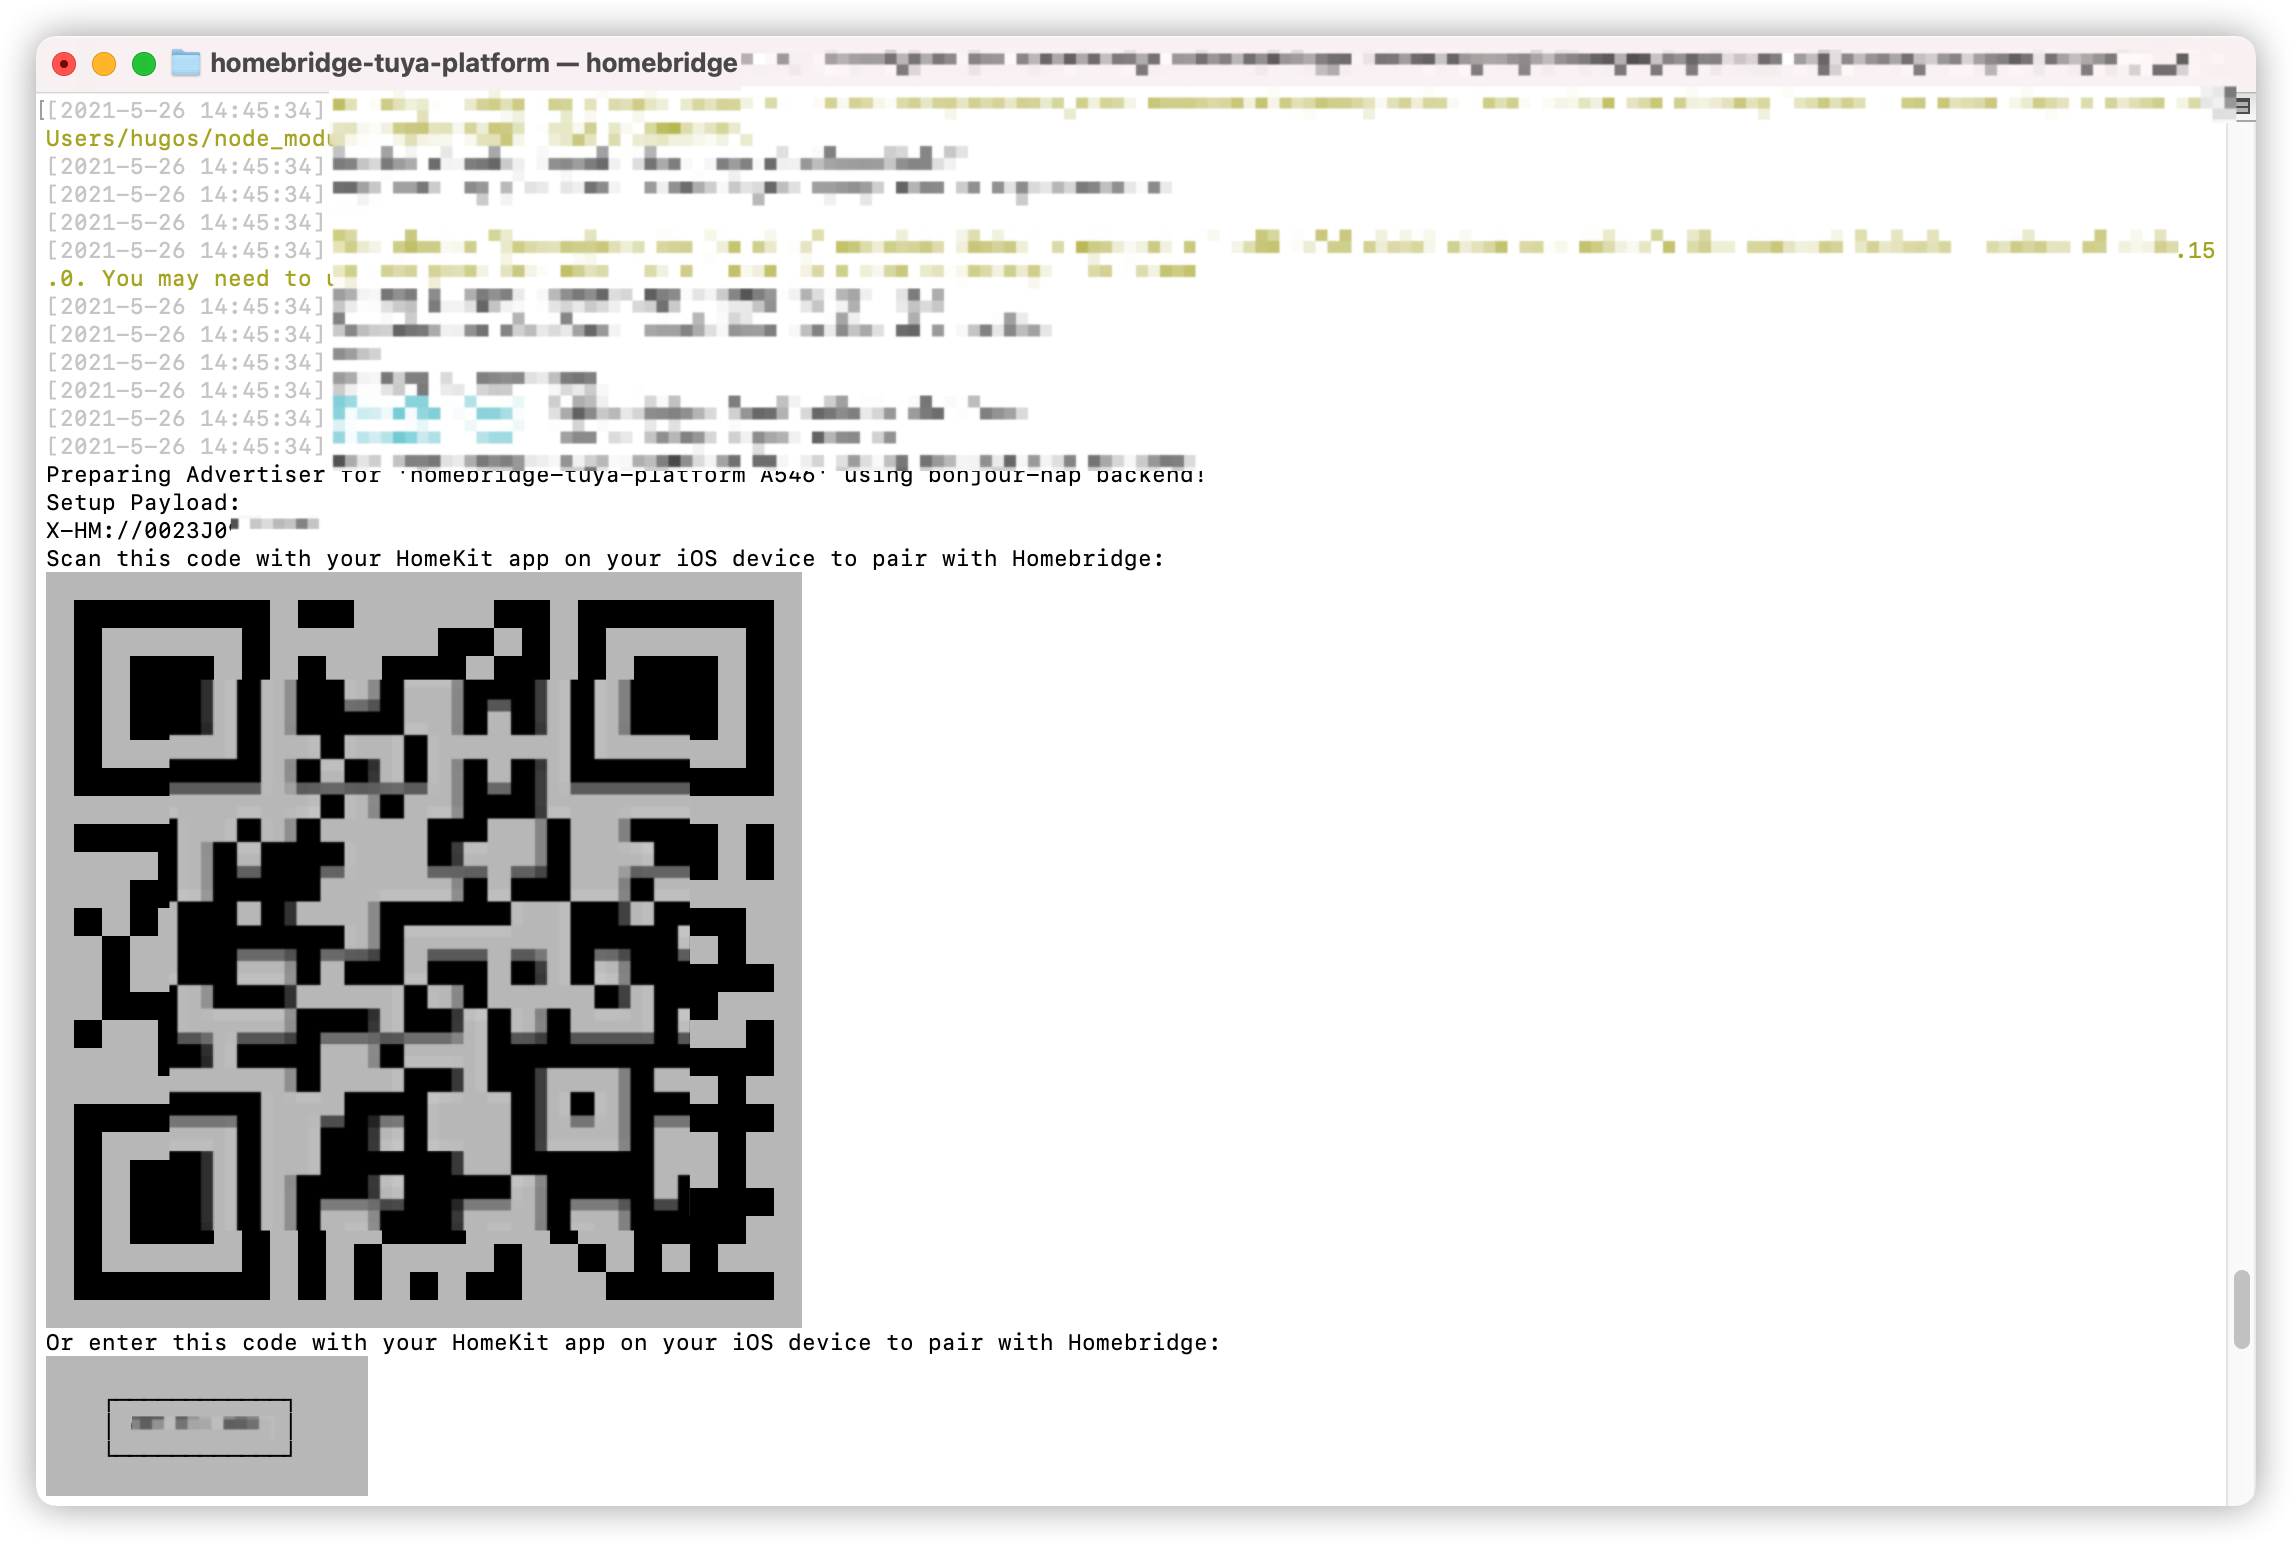
Run the plugin.
homebridge -D -U ./config/ -P ./

-
Open the Home app on your Apple device.
-
Pair with Homebridge by scanning the QR code printed in the step of running the plugin, or entering the 8-digit PIN code. You can also find the PIN code in the
config.jsonfile.
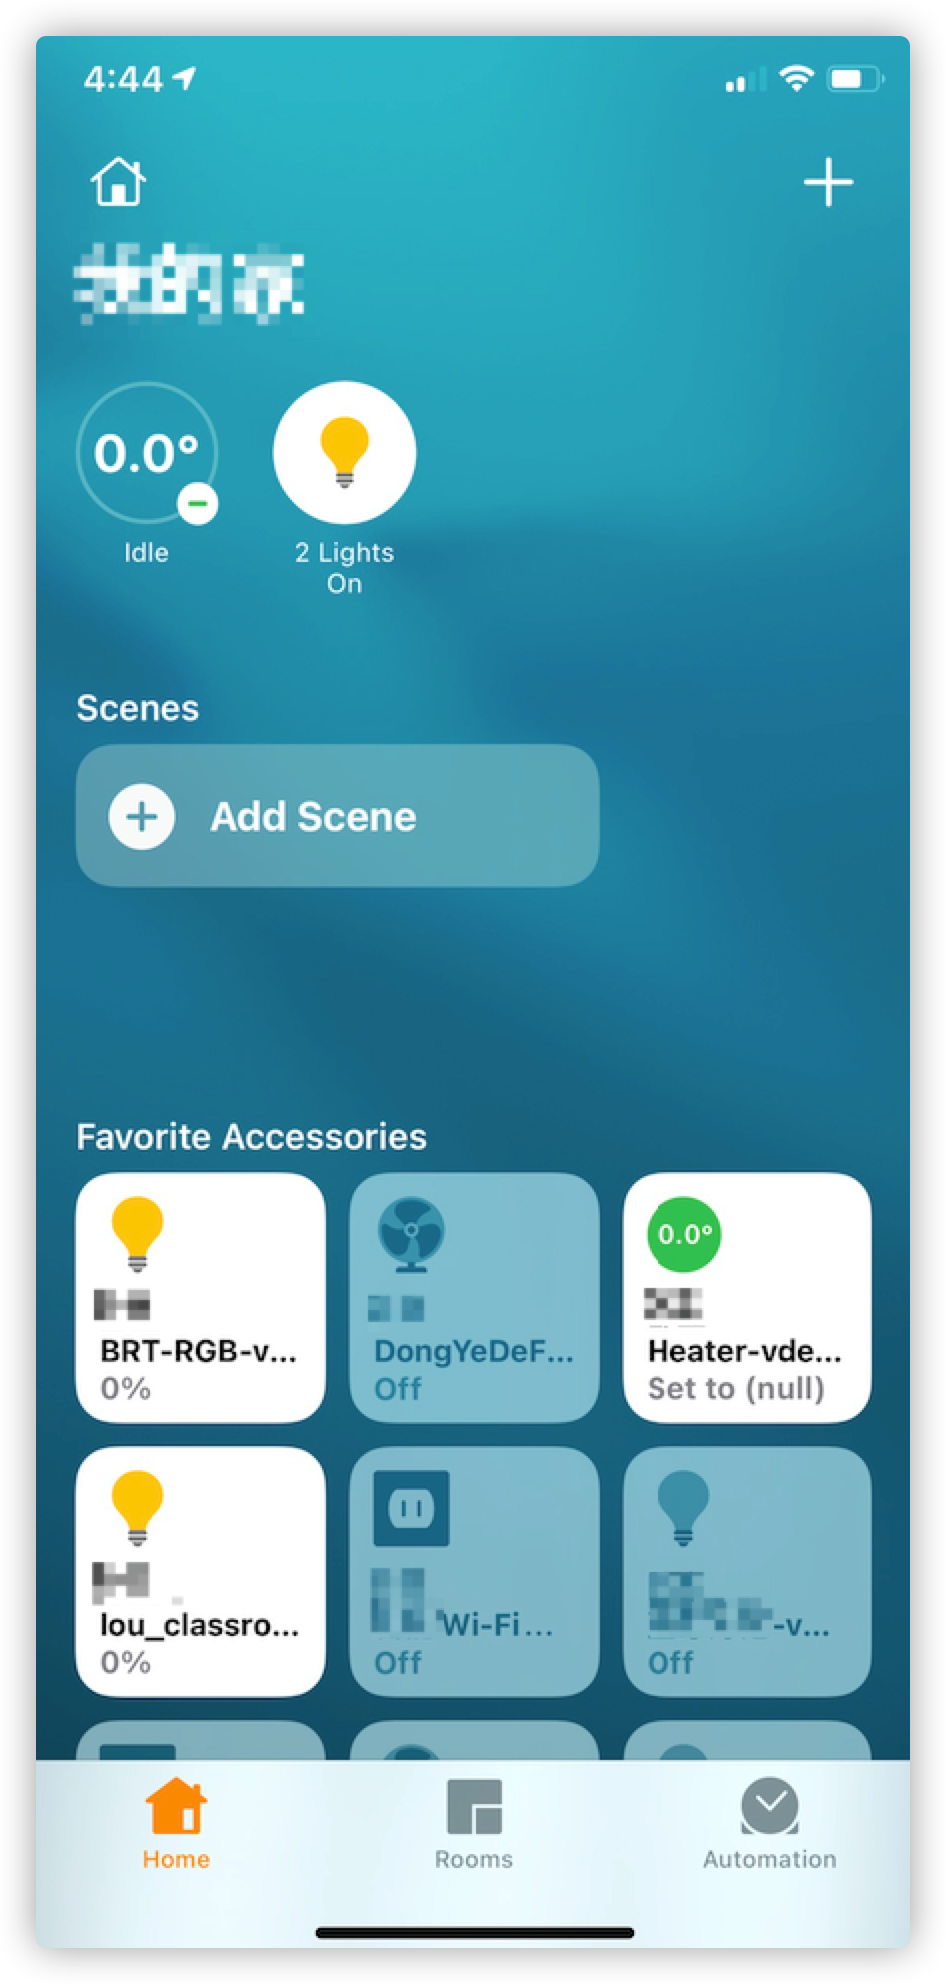
Now, you can see and control all the smart devices connected to the Tuya Smart or Smart Life app on the HomeKit dashboard.
| Error code | Error message | Troubleshooting |
|---|---|---|
| 1004 | sign invalid | Incorrect accessId or accessKey. To fix the error, see Edit config.json file. |
| 1106 | permission deny |
|
| 1100 | param is empty |
username or appSchema is empty: See Edit config.json file and enter the correct parameter. |
| 2017 | schema does not exist | Incorrect appSchema in config.json: See Edit config.json file and enter the correct parameter. |
| 2406 | skill id invalid |
|
| 28841105 | No permissions. This project is not authorized to call this API | You have not authorized your cloud project to use the required APIs. Subscribe to the following required API products and authorize your project to use them.
|
Q: Will I be billed after the 1-year free trial of the API product expires?
A: After expiration, you can renew the subscription for free. The Trial Edition allows you to use all free API products but puts limits on the quota of API calls. For more information about the quota, see Pricing.