Special Effects - theripper93/canvas3dcompendium GitHub Wiki
Token Animations
Start an animation through the UI
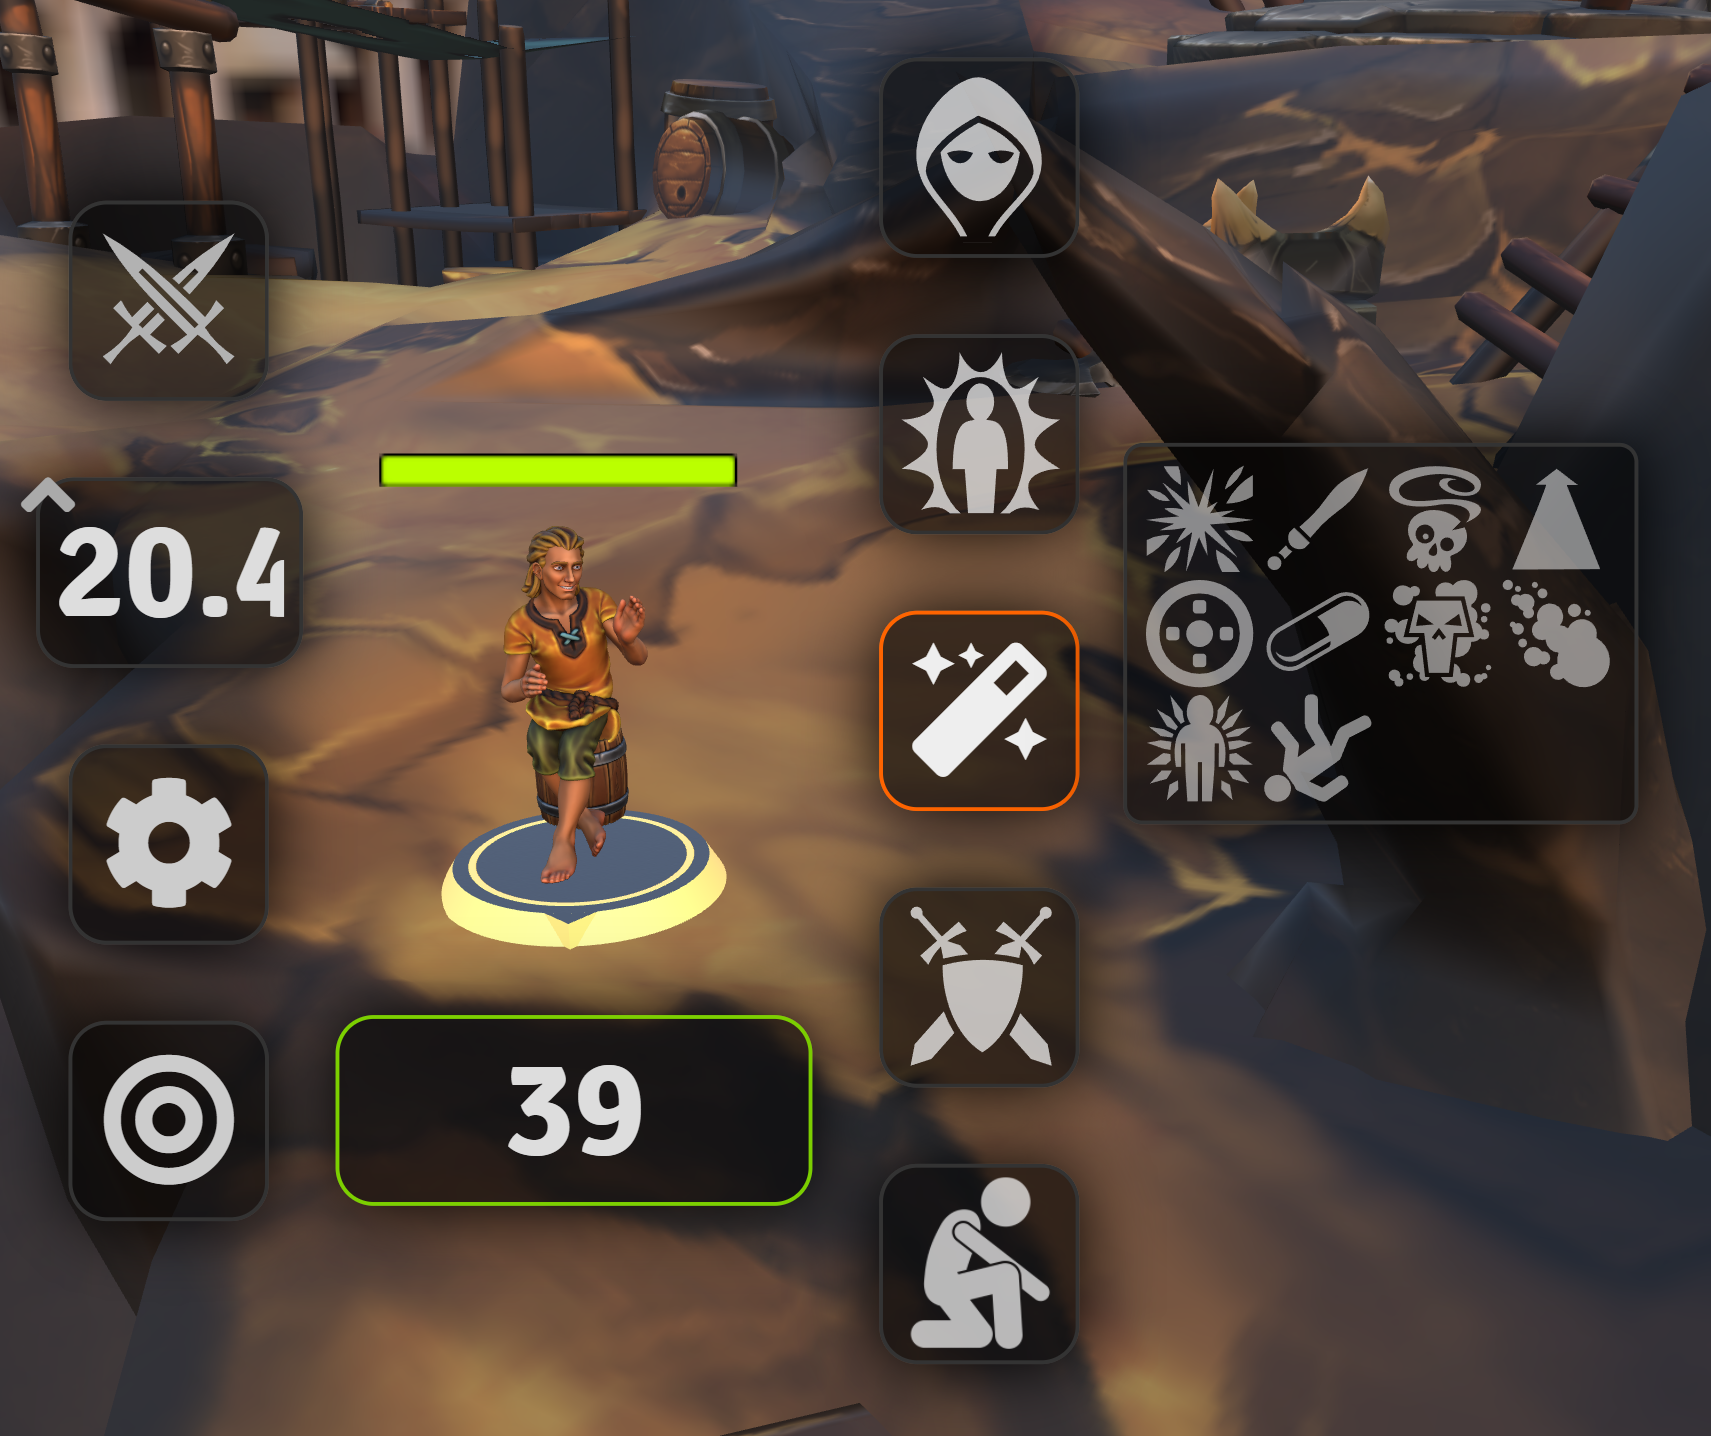
You can access the Token Aimations by Right clicking your token to open the Token Hud, you will see a Magic Wand icon on the right, click it to open the availeble animations. Clicking on an animation will play the animation for all clients. Some animations might not work if the token is Prone or Defeated.
Start animation with macros
To play an animation with a macro, first create a script macro, then use the following commands to play your desired animation.
game.Levels3DPreview.playTokenAnimation(tokens, animationId, options)
tokens
This parameter can be a single token object, an array of token objects, a single token ID or an array of token IDs, the animation will play on all these targets.
animationId
The identifier for the animation, you can find all the animation IDs by typing game.Levels3DPreview.CONFIG.tokenAnimations in the console and hitting Enter.
Options
This is optional, an object containing additional parameters
{
  repeats: 1, // How many times you want the animation to play
  resetTime: milliseconds, // Force the time that the animation takes to reset to the original position once it ends
}
Example Macro
This macro will play the Twirl animation, 3 Times, on all Selected Tokens
game.Levels3DPreview.playTokenAnimation(canvas.tokens.controlled, "twirl", {repeats: 3})
Weather
You can set the Weather of your 3D Scene in the 3D Tab of the scene configuration under the "Particles" Section.
Particle System
3D Canvas includes a particle system meant for spell effects, the system is highly customizable but also very simple to use for basic projectiles.
No Scripting usage
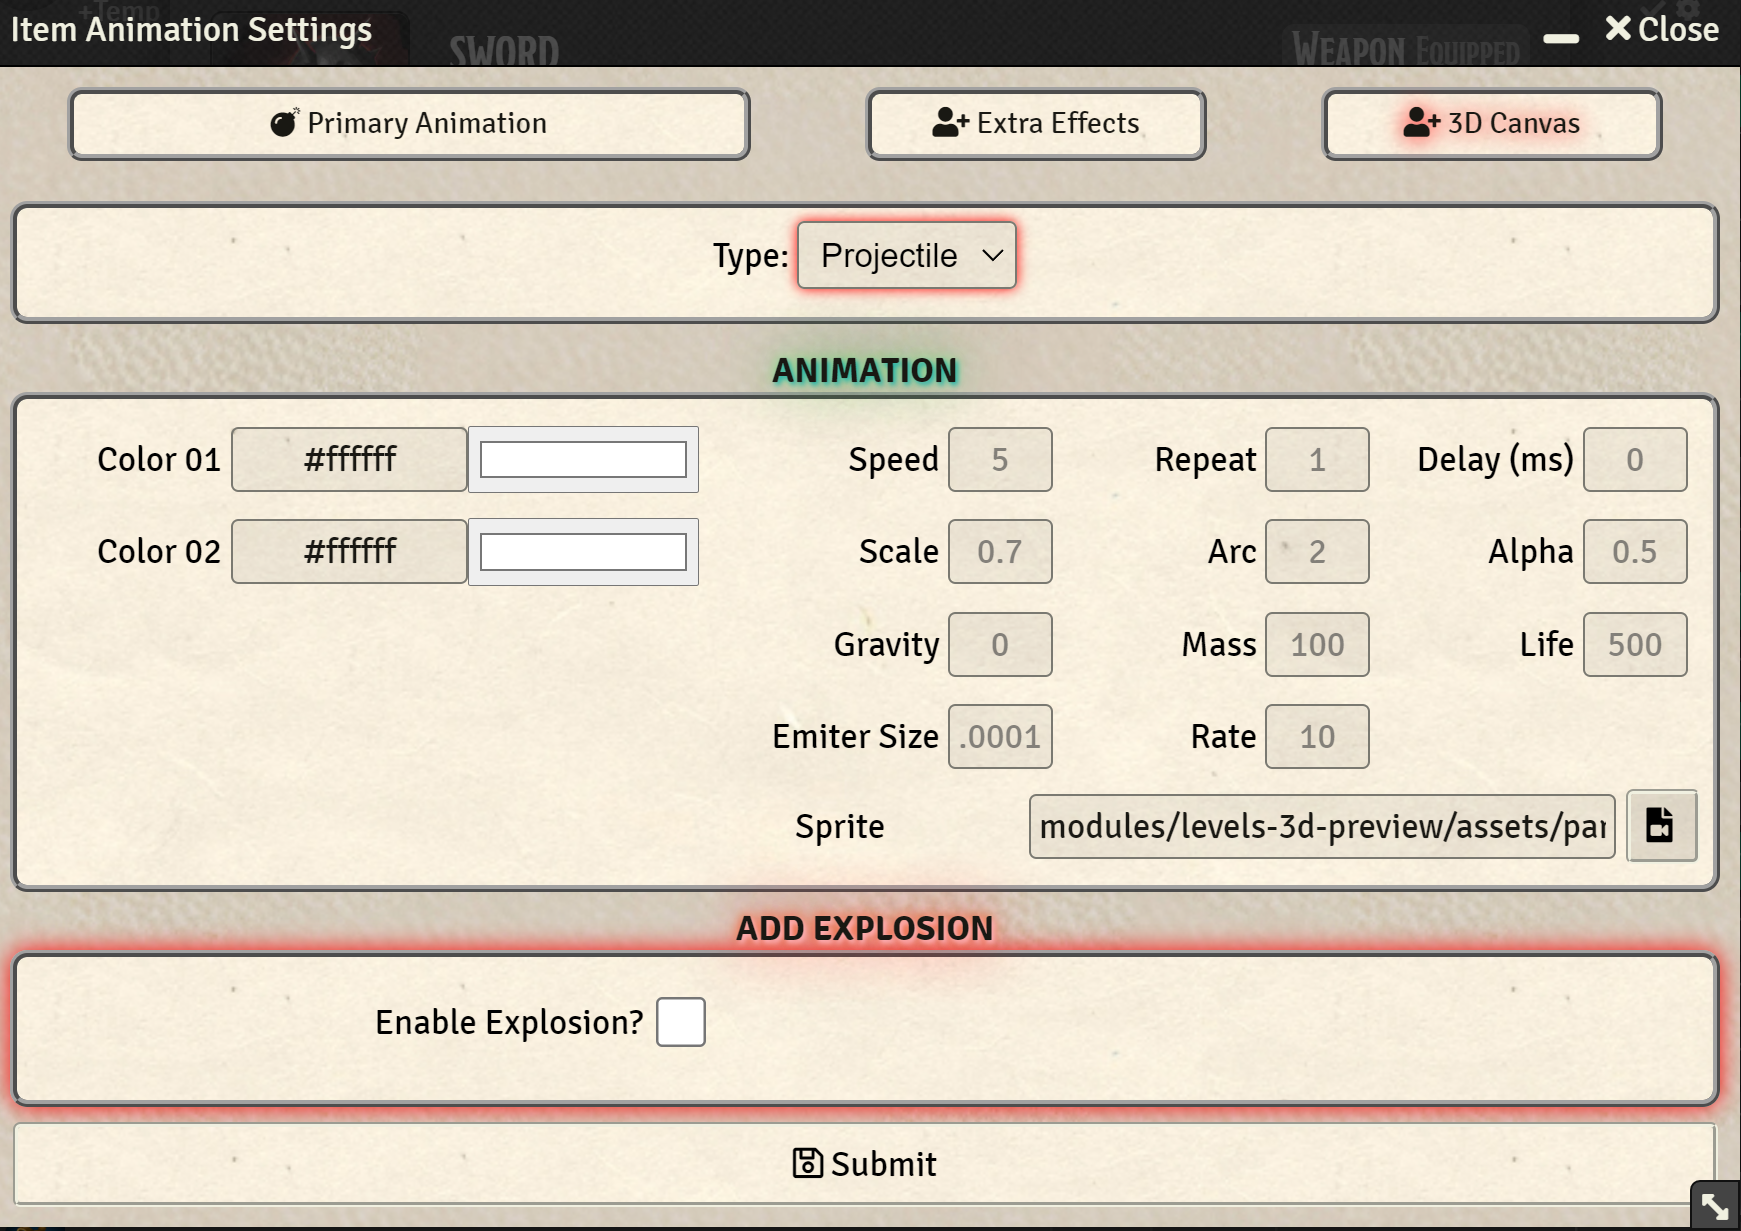
If you don't want to dig into the scripting aspect, the module Automated Animations provides a graphical interface to setup 3D Canvas Particle Effects.
Creating an Effect
First create a Script Macro, then to start creating your effect simply call
new Particle3D(type)
type is the type of particle effect, at the moment the options are:
| Effect | type | type(short) |
|---|---|---|
| Projectile | "projectile" | "p" |
| Sprite | "sprite" | "s" |
| Ray | "ray" | "r" |
| Explosion | "explosion" | "e" |
If no type is provided the default is "p"
Note that "Sprite" also accepts 3D Models as particles!
Now you can start chaining properties, similar to how Sequencer works. Every time you call a .method() on a Particle3D it will always return the Particle3D object, allowing for chaining. The only exception is the .start() method that will return the ID if the Particle3D
First we must provide an origin and a destination.
new Particle3D(type)
  .from(origin)
  .to(destination)
.from() & .to()
These two methods are required on every effects, each one can take a single Token or an array of Tokens or a single Position or an array of them. Non Token placeables are also supported.
A Position is defined by { x:0, y:0, z:0 } where z is in elevation units.
Explosion effects are the exception as they do not require a .from()
Note: You can omit both .from() and .to() when creating an effect inside .onEnd(). In that case the .to() will be set as the target of that particular effect (usefull for exploding bolts for example)
Let's set up our origin as the selected token and the destination as our targets
new Particle3D(type)
  .from(token)
  .to(Array.from(game.user.targets))
At this point we can .start() our Particle3D to play the effect and the default settings will be used (it will look like a firebolt)
new Particle3D(type)
  .from(token)
  .to(Array.from(game.user.targets))
.start()
.start()
The .start() method takes no arguments and will simply start the effect. After using this method you should NOT interact with the Particle3D anymore. Use the returned ID instead if you wish to stop the effect, see the Stopping an Effect section below.
If you wish you can call .start(false) to only play the effect locally.
Stopping an Effect
When creating an effect, the effect will return it's id. You can use this Id later to stop the effect. You can also execute Particle3D.stop("all") to stop all effects.
If you used the .name() property on effect creation you can also .stop(name) to stop all effects with that name.
Try it yourself!
These are several examples showcasing the Particle3D system that are a good starting point for understanding the system and creating your own custom effects. Create new Script Macros in your game with the code blocks below to try them out in 3DCanvas and see the different effects. You can adjust the variables to see how those influence the effects. These macros are also all available to import directly in the 3D Canvas Particle Effects macro compendium!
Simply select a token, target some tokens and run the macros, you will see them in action!
Examples:
Frostbolt:
new Particle3D("p")
  .from(token)
  .to(Array.from(game.user.targets))
  .sprite("modules/levels-3d-preview/assets/particles/star_09.png")
  .speed(10)
  .color("#0f4fff","#4dd5ff")
  .scale(0.7)
.start()
Bouncing Frostbolt (onEnd Example):
Note: the .onEnd() parameter accepts another Particle3D, don't forget that you must not call .start() on the Particle3D inside the .onEnd() - The Particle3D insde the .onEnd() can have an .onEnd() as well, allowing for infinite chaining
new Particle3D("p")
  .from(canvas.tokens.controlled)
  .to(Array.from(game.user.targets))
  .speed(10)
  .color("#0f4fff","#4dd5ff")
  .scale(0.8)
  .onEnd(
        new Particle3D("p")
          .from(Array.from(game.user.targets))
          .to(canvas.tokens.controlled)
          .speed(10)
          .color("#0f4fff","#4dd5ff")
          .scale(0.8)
  )
.start()
Magic Missile:
Note: The .arc() parameter will make each projectile curve in a different direction!
new Particle3D("p")
  .from(token)
  .to(Array.from(game.user.targets))
  .speed(8)
  .repeat(3)
  .arc(1)
  .delay(300)
  .color("#ffffff","#2e4aff")
  .scale(0.7)
.start()
Shocking Grasp
Note: Ray Effects tend to require a larger amount of particles, don't forget to set .rate()!
new Particle3D("r")
  .from(token)
  .to(Array.from(game.user.targets))
  .sprite("modules/levels-3d-preview/assets/particles/spark_04.png")
  .color("blue","#2e4aff")
  .scale(0.7)
  .rate(100,1)
.start()
Scorching Ray
new Particle3D("r")
  .from(token)
  .to(Array.from(game.user.targets))
  .sprite("modules/levels-3d-preview/assets/particles/flame_01.png")
  .color("red","orange")
  .scale(0.5)
  .repeat(3)
  .duration(250)
  .delay(600)
  .rate(100,1)
.start()
Dubstep Gun:
Note: The .color() parameter can accept Arrays of colors.
new Particle3D("p")
  .from(token)
  .to(Array.from(game.user.targets))
  .sprite("modules/levels-3d-preview/assets/particles/slash_03.png")
  .repeat(3)
  .delay(200)
  .speed(10)
  .color(["red","blue"],["green","yellow"])
.start()
Fireball Explosion:
Note: Explosion effects do not need a .from(), this is the only exception.
new Particle3D("e")
  .to(Array.from(game.user.targets))
  .sprite("modules/levels-3d-preview/assets/particles/dust.png")
  .speed(0)
  .color("red","orange")
  .scale(2,2)
  .gravity(2)
  .life(700)
  .rate(10,1)
  .emitterSize(1)
  .alpha(0.1,0)
  .mass(400)
.start()
Wall of fire (stop example):
Note: Notice how the new Particle3D() is assigned to a variable, then a set timeout stops the effect after 1000 milliseconds. With the same logic you could store the Id and stop an effect on concentration end.
const effectId = new Particle3D("r")
  .from(token)
  .to(Array.from(game.user.targets))
  .sprite("modules/levels-3d-preview/assets/particles/flame_01.png")
  .color("red","orange")
  .scale(1.5)
  .duration(Infinity)
  .rate(100,1)
  .gravity(-5)
.start()

setTimeout(()=>{Particle3D.stop(effectId)}, 1000)
Wall of fire (stop with name example):
Note: Once you assign a name you can stop the effect from a completely different macro.
const effectId = new Particle3D("r")
  .from(token)
  .to(Array.from(game.user.targets))
  .sprite("modules/levels-3d-preview/assets/particles/flame_01.png")
  .color("red","orange")
  .name("Wall of Fire")
  .scale(1.5)
  .duration(Infinity)
  .rate(100,1)
  .gravity(-5)
.start()

//In a different macro later on - we stop the effect
Particle3D.stop("Wall of Fire")
Spirit Bolt (Explosion Chaining example)
Note: The .to() is omitted from the .onEnd() explosion effect so that the explosion plays on the target hit.
new Particle3D("p")
  .from(token)
  .to(Array.from(game.user.targets))
  .speed(15)
  .arc(1)
  .color("#c034eb","#5819b5")
  .scale(1)
  .onEnd(
new Particle3D("e")
  .sprite("modules/levels-3d-preview/assets/particles/dust.png")
  .speed(0)
  .color("#c034eb","#291547")
  .scale(0.9,0.9)
  .gravity(-5)
  .life(1700)
  .force(3)
  .rate(50,1)
  .emitterSize(0.05)
  .alpha(0.1,0)
  .mass(200)
        )
.start()
Magic Missile (MIDI-QOL on use Macro)
const lastArg = args[args.length-1]
const casterToken = canvas.tokens.get(lastArg.tokenId)
const targets = lastArg.hitTargets
new Particle3D("p")
  .from(casterToken)
  .to(targets)
  .speed(8)
  .repeat(3)
  .arc(1)
  .delay(200)
  .color("#ffffff","#2e4aff")
  .scale(0.7)
.start()
Particles Properties & Behaviours
We can now add properties to the effect in any order to alter it's appearance
.alpha(start,end)
This property requires start and end to be numbers between 0 and 1 - sets the starting and ending opacity of particles
.arc(integer)
This property takes an integer and indicates how many times the projectile will curve before reaching it's destination. Default is 0
.color(start,end)
This will determine the starting and ending color of the effect, only start can be provided. start and end can also be arrays of colors (eg .color([color1,color2],[color3,color4]).
If an array of colors is provided for start\end the system will pick one of those colors randomly as the starting\ending color - it will NOT create a multicolor gradient.
The colors can be in any format, HEX is recomended but you can use any CSS compatible color - even using "red" will work.
.delay(milliseconds)
If .repeat() is set, this will be the delay between each repeat.
.duration(milliseconds)
Duration in milliseconds of the effect, valid only for "ray". Default is 300 milliseconds
.emitterSize(number)
Radius of the area of emission in grid squares (so 1 would be 1 grid square), the larger the number the more spread out the particles will be in their starting point. Default is 0
.force(number)
If using an explosion, set the force of the explosion, default is 15. This will determine the force with which the particles are propelled from the origin. Higher numbers will result in faster particles.
.gravity(number)
Gravity affecting the particles - 1 is Earth gravity. Higher numbers means particles will travel down faster depending on their mass. Negative gravity is also possible if you want particles to go up instead.
.life(min, max)
Range in milliseconds of the lifetime of a particle, bigger numbers will equal to longer trails. default (100,500). A single value is also accepted.
.mass(number)
The Mass of the particle, this will affect how much gravity pulls down the particle. Default is 100.
.miss()
If added to the effect, it will miss the target. You can also call .miss(Boolean) if you prefer.
.name(string)
You can give a name to an effect, if you do so, you can call the .stop() method using this name and all effects with this name will be stopped.
.onEnd(particle3D)
You can pass another particle3D or an array of particle3d to the .onEnd method, if you do so, these effects will be played when the main effect ends, you can nest this how many times you want but DO NOT call the .start() method on Particle3D inside the .onEnd() method. Does not trigger when the effect is terminated by .stop()
.playAnimation(animationData)
Play a 3D Animation, the animation data is formatted as floows
{
  from: { // The from property specifies which animation should be played on the origin of the particle effect (usually the caster or attacker)
    id: "twirl", // The id of the animation to play
    start: true, //If the animation should be played on start of the effect
    end: false, // If the animation should be played when the effect ends (like a projectile reaching it's target)
  },
  to: { // The from property specifies which animation should be played on the origin of the particle effect (usually the caster or attacker)
    id: "shake",
    start: true,
    end: false,
  },
}
.push(dx,dy,dz)
The pushing force affecting the particles, this is a method generally used internally for fixed emitters - it will create an effect on the particles as if a force was pushing them in a specific direction. Default is (0,0,0).
.rate(particles,milliseconds)
The Rate of the emitter, where particles is the amount of particles in the system and milliseconds is how often the system creates a particle. Default (12, 16)
.repeat(integer)
The number of times to repeat the effect
.rotation(x,y,z)
Rotation in degrees of the particle, only used if using a 3D Model as particle
.up(x,y,z)
A unit vector (eg .up(1,0,1) ) representing the direction of the "tip" of the model (eg, an arrow or a dagger), only used if using a 3D Model as particle
.rotateTowards()
Instead of a projectile, do a swinging motion, only used if using a 3D Model as particle
.scale(min,max)
The starting and ending size in in grid squares of a single particle. Default is (0.8,0)
.speed(number)
The speed of the projectile. Default is 10.
.sprite(pathToFile)
The path to the image to be used as particle. Default is "modules/levels-3d-preview/assets/particles/emberssmall.png" you can find many particles in that same folder.
.startAfter(milliseconds)
Delay the start of the effect by the specified milliseconds