Camera: Wyze v2 ‐ Neos SmartCam ‐ ATOM Cam 1 - themactep/thingino-firmware GitHub Wiki
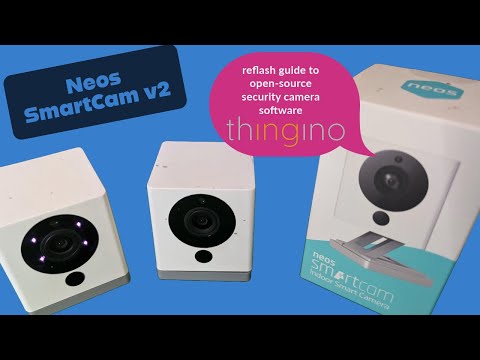
Wyze v2 / Neos SmartCam /ATOM Cam 1
These cameras are very popular and have been hackable for quite some time via a numerous other (mostly defunct?) projects. There are much better contemporary cameras that offer greater value for the cost, so don't go out and buy these, but if you already own them they are relatively easy to get up on Thingino firmware.
Features
- Ingenic T20X
- 16 MB of NOR SPI (ZB25VQ128ASIG)
The device itself is very simple, it has an SD card slot, a Setup button and a Status light to the right of the power input. There is a USB-A socket for accessories and debugging and a MicroUSB for power.
Support status
This camera is fully supported by Thingino. Grab the latest release from releases, or use sysupgrade -p for an in-place upgrade if you're already running Thingino.
Installation
You can follow along with the process at this video or proceed with written instructions. note that the instructions at the installer repository override any other source!
- Download the Zip file from this repo
- Use a SD card burner application like Rufus or Raspberry Pi Imager to write the image to an SD. Most will handle the zip file directly without needing to extract it manually.
- Insert the SD card into the Camera.
- Press and Hold the SETUP button, and power on the camera.
- After 5 seconds and the light changes, release the button.
- Wait for the flash process to complete. The process takes just under 4 minutes all up, and the camera should audible announce that it is ready to be configured.
Congratulations, Thingino should now be installed. You can remove the SD card from the device.
Wifi setup.
Use your mobile or Computer, search for a Wifi network called Thingino_xxxx and connect to it. Your device should automatically take you to the provisioning page, if not you can open your browser and go to 172.16.0.1.
Configure a device name, root password, Wifi SSID + Password, click save, confirm the details and save to let the device reboot. Once it has rebooted and is connected to your wifi, tap the SETUP button again and it will read out it's IP address. You can now log in via that IP using the username root and the password you provided during the setup.
Camera Bricked/Not Responding?! Use this method to flash the device directly via USB.
Once again, we have a video walking you through this process
In order to use this tool, you'll need to open the camera. This usually breaks the seals, so it's possible the camera won't be "exterior proof" anymore.
Software setup.
First you will need to configure the Cloner tool on your computer. Download the file, extract it, somewhere on your machine.
Connect the USB socket and ensure the device is connected and device driver is detected correctly. Reference to this here in the Cloner wiki.
Open the cloner tool, Open Config.
In the Info tab, select Platform T and T20, for board select writer_full
In the Policy tab, click the 3 dot menu, select the thingino firmware file you want to flash.
Click Save for the Config.
Physical Setup
Now you need to open the device. Here is a video tutorial.
Disassembly Instructions:
- Flip the device over, remove the two silver screws.
- Pry from the front/lens side of the device, the bottom has 2 clips to the rear that hold the movable foot and base in place.
- Gently pry the edges of the back panel from the two side panels, there are 4 clips per side and two at the top. You my need to apply some force.
- Gently maneuver the backplate out of the way being mindful of the speaker cable and backplate.
Now you need to understand a little bit about how to get the device into bootloader mode. On this device there is a small chip beside the Ingenic chip where we need to bridge the Pins 5&6 while booting to initialize correctly.
The device has 2 USB sockets on it, a Micro-USB for power and a USB-A connection for accessories and debug/flashing. You will need to find a USB cable to connect the USB-A to your computer. You may need a USB-A to USB-A or you may need to create one yourself. Shorting the pins above enables this USB-A socket, the Micro-USB cannot be used to flash the device.
Now you have the device ready and understand how to short the pins, the driver ready and the cloner software ready. Lets get ready to flash.
Flashing instructions
- Remove the camera from USB.
- Click Start on the cloner utility, tail the log/window, observe the
start burnermessage. (note: the device should not be connected to the computer yet) - Bridge the pins 5&6 listed above.
- Connect the USB device to the computer.
- Wait 5-10 seconds with the connected pins, Observe the boot progress bar moving
- Wait for both
bootandfull imageprogress bars to complete - Remove the USB
Power on the device, congratulations Thingino should be installed, follow the Wifi setup details from the non-intrusive Disk 4 step above to get it connected to Wifi.
Here is a more generic guide of this in Video form.
Which Firmware Version Do I Need?
There are 2 image sensors used in these cameras (JXF22 and JXF23). Identifying which version you have is difficult, but it's very easy to switch to the "right" version for your particular camera. Installing the "wrong" version is just fine, and won't brick your device. You can access the device and interact with it, the only problem is that you won't see an actual image from the camera. If this is the case, just switch to the other version
- Install one of the versions - just pick one. If you're not sure, or can't flip a coin to choose, just grab the JXF23 version.
- Follow the standard Thingino install instructions.
- Log into the camera via web interface. If you see the image on the preview page, you're all set! Otherwise continue with the next steps.
- If you don't see an image from your camera, you need to switch to the other version.
- Grab the JXF22 firmware image, rename it to autoupdate-full.bin and copy it to a blank sd card
- Boot with the sd card inserted and the device will automatically flash.
Q & A
Thingino seems to be installed but I cant see it on my Wifi? How can I reset the configuration? How do I reset the Wifi ?
You can perform a factory reset bu unplugging the camera, holdoing down the SETUP button, pluggig the power in, and releasing the button after 5 seconds. Remember, the SSID and password are both case sensitive!
Do you support the Wyze Sensors?
No not yet, we are looking for community contributions to continue to support this hardware.
Videos
NEOS/Wyze V2 "No Tools" Installer Thanksgiving Update - Faster, easier, more reliable!
Neos SmartCam - Continue using this camera after they shut it down! ONVIF & Home Assistant support!
Neos SmartCam - firmware free upgrade to open source Thingino