IOS 遠程推播 - t104360088/InternRecord GitHub Wiki
在做推播之前,先來了解一下,推播的目的是什麼,才能了解自己是否真的需要『 推播 』
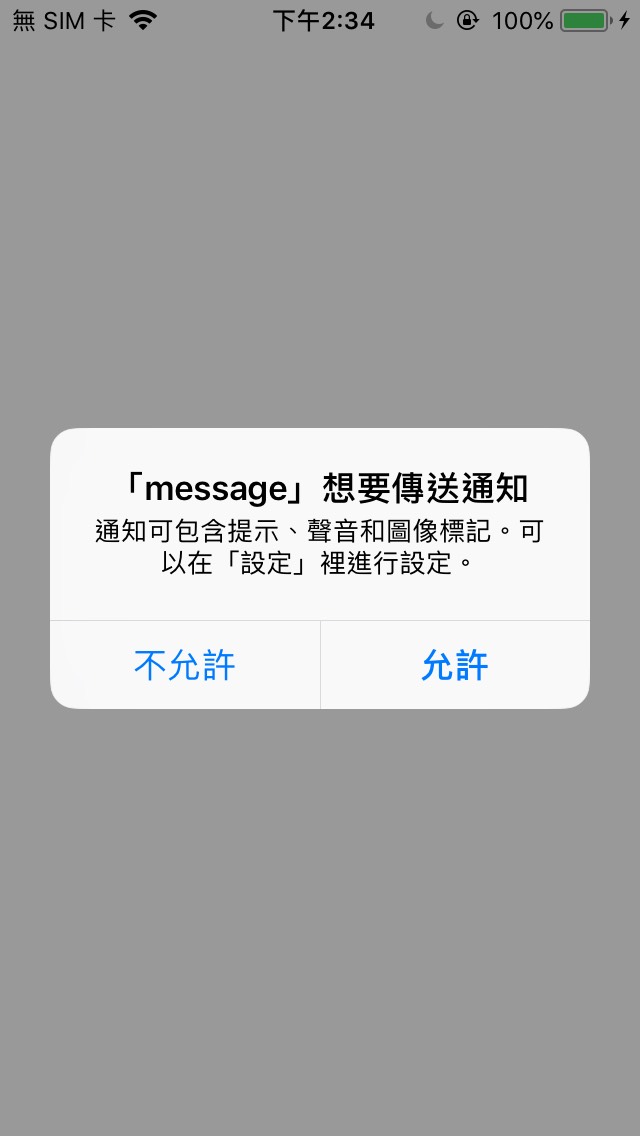
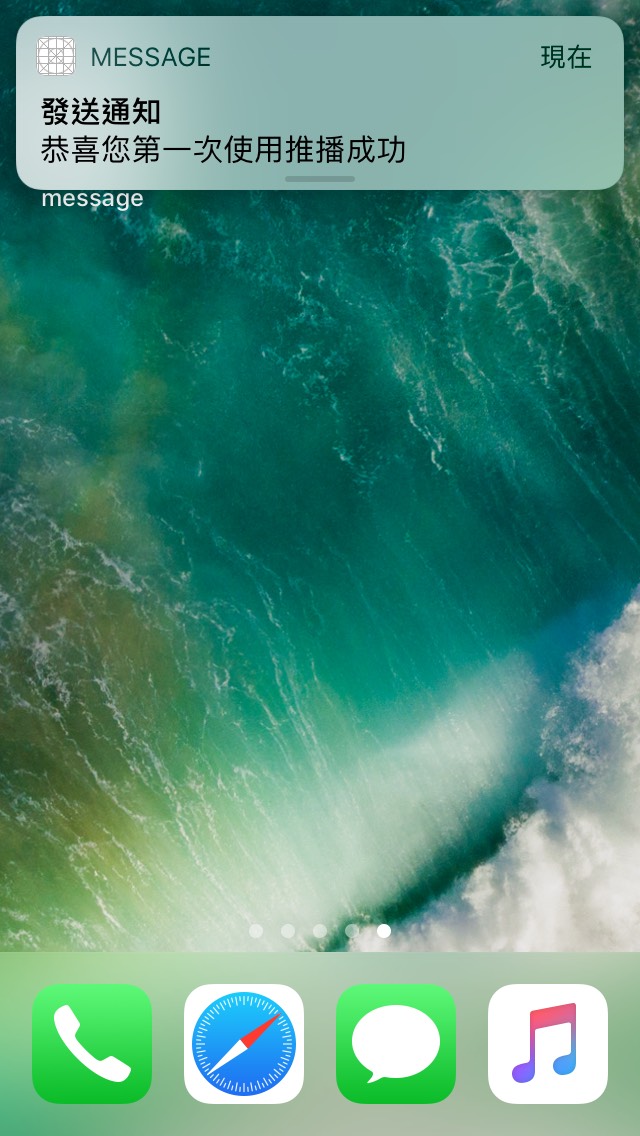
所謂的『 推播 』就是發送通知給裝有這個App的裝置,如右圖推播顯示
但這並不代表App用戶 (以下簡稱User) 一定收得到訊息,因為我們無法知道每個User的使用方式
有可能User不給予App權限、網路未開啟、伺服器堵塞等等的問題,都會導致收不到通知
所以當需要通知使用者某些事情時,可以用『 推播 』完成大多數提醒的動作
但真的有非常重要的提醒時,還是發送email吧!這樣更能確保對方收到資訊
推播簡單分成以下兩種
- 本地推播:不需透過伺服器發送,而是實作在App中,因此不需網路且只能發送給自己
- 遠程推播:需藉由伺服器發送,因此需要網路且可以發送給他人,但也比較複雜
因此可依照需求來選擇推播類型,但目前大部分App都是使用遠程推播,因為提醒的對象選擇較多
所以這篇文章只會提到遠程推播的實作方式,如果想使用本地推播可以觀看這篇文章本地推播實作
現在已經了解是否需要推播,以及該使用哪種類型之後,馬上就來看看遠程推播的原理吧!
在iOS中開發遠程推播並不難,但往往讓人覺得麻煩,它就如同上架一樣需要設定、製作證書
零零總總的步驟包含:App端註冊與處理推播、製作Apple證書或金鑰、伺服器架設與發送推播
但是不用緊張,下面會依依實作給大家看,在了解原理之前,先解釋幾個待會會出現的專有名詞
- DeviceToken:類似一種識別證,推播發送後就是用它來辨別要發送給誰
- SSL憑證:全名SecureSocketsLayer,安全通訊技術,防止兩個系統間發送的資料被讀取及修改
- APNs:全名ApplePushNotificationService,Apple提供連線服務的伺服器
- Provider:產生推播的工具,如伺服器
以下是推播的原理概述
- 手機開啟App後,App向User請求推播權限,允許推播後,手機會發送裝置的ID給APNs
- APNs確認該ID的SSL憑證正確後建立通道(Socket)並回送一個DevcieToken
- 手機將DeviceToken給App進行處理,一般來說會將它存到雲端資料庫,當要發送推播時再取得
- 當要發送推播時,Provider取得雲端資料庫中的DeviceToken,將推播內容交給APNs
- APNs會統一控管所有推播,取得推播內容中的DeviceToken,最後發送給指定的裝置


- IDE:Xcode 9
- iOS Version:10 and the above
- Programming Language:Swift
- Server:Firebase Function (以下簡稱FF)
- Provider:Firebase Cloud Message (以下簡稱FCM)
- IDE:Visual Studio Code
- Programming Language:Node.js (JavaScript)
選用FF作為Server有兩個原因:(1) 有API與SDK可省去開發時間 (2) 可發送跨平台推播
FCM是Google新推出的雲端推播服務,它可以藉由FF觸發,或從控制台 (Firebase Message) 發送
然後要特別說一下為什麼要強調iOS版本需要10以上,因為在10之後使用的推播方式已不同以往
Apple整合並重構了原本複雜的SDK,所以以下的程式碼都是10之後的版本
- 擁有一台iPhone手機 (因為推播只能用實機測試)
- 擁有開發者帳號 (因為要製作證書以及實機測試所以要有開發者帳號)
- 證書製作
- App、Server配置FCM
證書製作與App配置FCM的部分可以觀看這篇文章FCM推播服務,之後也會補充證書的相關內容
以上兩個都完成後,馬上就來配置Server吧!
一、首先安裝Node.js
二、開啟終端機到專案底下輸入指令安裝NPM
npm install
三、在終端機輸入NPM指令安裝Firebase CLI
npm install -g firebase-tools
四、輸入CLI指令登入Firebase帳號
firebase login
五、輸入CLI指令初始化專案
firebase init
此時終端機會詢問要安裝哪個功能到檔案中,請選擇Functions

Project Setup請選擇要連接雲端控制台中的哪個專案,這裡就選前面App配置FCM時的專案

Functions Setup請選擇要使用哪種伺服器語言,這裡選擇JavaScript

ESLint暫時不要,安裝NPM的相依模組選Y (也可之後再安裝),接下來就會開始載入NPM模組

結束後會顯示 Firebase initialization complete! 表示初始化完成
打開資料夾會發現自動產生了很多檔案,這裡提一下比較重要的檔案
index.js是撰寫程式碼的檔案,而package.json裡面放著相依模組的版本

配置完成就能開始實作,此範例會從App端傳送資料到Firebase Database (以下簡稱DB)
當DB一有資料就觸發FF,然後FF會取得DB中的Token,發送推播訊息到該裝置
所以要先到App專案下的Podfile加入這段pod 'Firebase/Database'
然後再開啟終端機到專案下輸入pod install下載模組
範例連結
使用範例需安裝CocoaPods、NPM、配置Firebase專案
創建一個MessageManager類,裡面放著與推播相關的內容,如:權限、註冊、接收
DeviceToken會更新,例如:當App被卸除,所以每次都應註冊推播獲取新的Token
FCMToken是FCM專用的,也類似DeviceToken,所以它也會隨DeviceToken而更新
import Foundation
import UserNotifications
import Firebase
class MessageManager: NSObject,
UNUserNotificationCenterDelegate, MessagingDelegate {
private static var mInstance: MessageManager?
var isMessageEnable = true
private override init() {
//註冊推播,告訴APNs這個App要註冊推播,每次啟動App都應調用,因token會不定期更換
UIApplication.shared.registerForRemoteNotifications()
}
// MARK: Public method
static func sharedInstance() -> MessageManager {
if mInstance == nil {
mInstance = MessageManager()
}
return mInstance!
}
//取得User設定的通知權限(denied拒絕、authorized允許、notDetermined沒有決定)
func getMessengerStatus() {
UNUserNotificationCenter.current().getNotificationSettings { (settings) in
self.isMessageEnable = (settings.authorizationStatus != .denied) ? true : false
if settings.authorizationStatus == .notDetermined {
DispatchQueue.main.async {
self.setupMessenger()
}
}
}
}
//取得FCMToken,deviceToken是屬於APNs辨識用,在FCM中也有專屬的Token
func getFcmToken() -> String? {
return Messaging.messaging().fcmToken
}
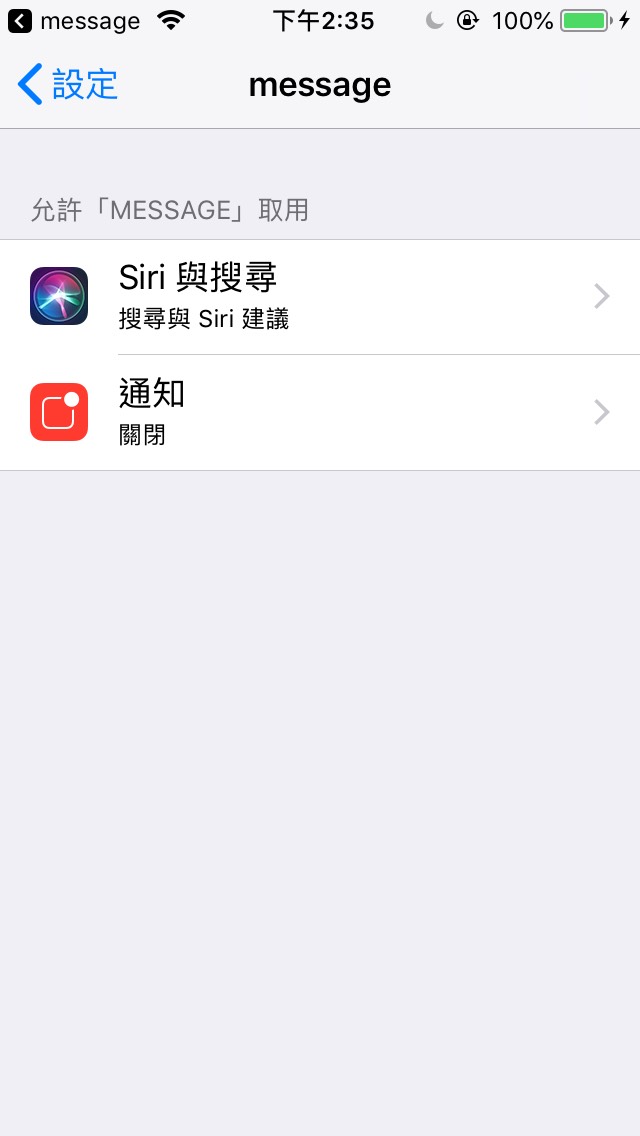
//開啟App推播權限設定畫面
func openAppSetting() {
let url = URL(string: UIApplicationOpenSettingsURLString)!
if UIApplication.shared.canOpenURL(url) {
UIApplication.shared.open(url, options: [:], completionHandler: nil)
}
}
//向使用者請求推播權限,通常在第一次使用App就會詢問
private func setupMessenger() {
UNUserNotificationCenter.current().delegate = self
//要求推播中的哪些權限(alert提示內容、badge角標數字、sound音效)
let authOptions: UNAuthorizationOptions = [.alert, .badge, .sound]
UNUserNotificationCenter.current().requestAuthorization(
options: authOptions,
completionHandler: {_, _ in })
Messaging.messaging().delegate = self //FCM委派
}
//當App在前景模式下收到推播時的處理,這裡設定成也同樣顯示推播
func userNotificationCenter(_ center: UNUserNotificationCenter, willPresent notification: UNNotification, withCompletionHandler completionHandler: @escaping (UNNotificationPresentationOptions) -> Void) {
completionHandler([.badge, .sound, .alert])
}
//當User點擊推播後的處理,預設為開啟App
func userNotificationCenter(_ center: UNUserNotificationCenter, didReceive response: UNNotificationResponse, withCompletionHandler completionHandler: @escaping () -> Void) {
completionHandler()
}
}創建一個DatabaseManager類,主要實現將FCMToken上傳到雲端資料庫
import Foundation
import Firebase
class DatabaseManager: NSObject {
private static var mInstance: DatabaseManager?
private var dbRef: DatabaseReference?
override private init() {
super.init()
self.dbRef = Database.database().reference()
}
// MARK: Public method
static func sharedInstance() -> DatabaseManager {
if mInstance == nil {
mInstance = DatabaseManager()
}
return mInstance!
}
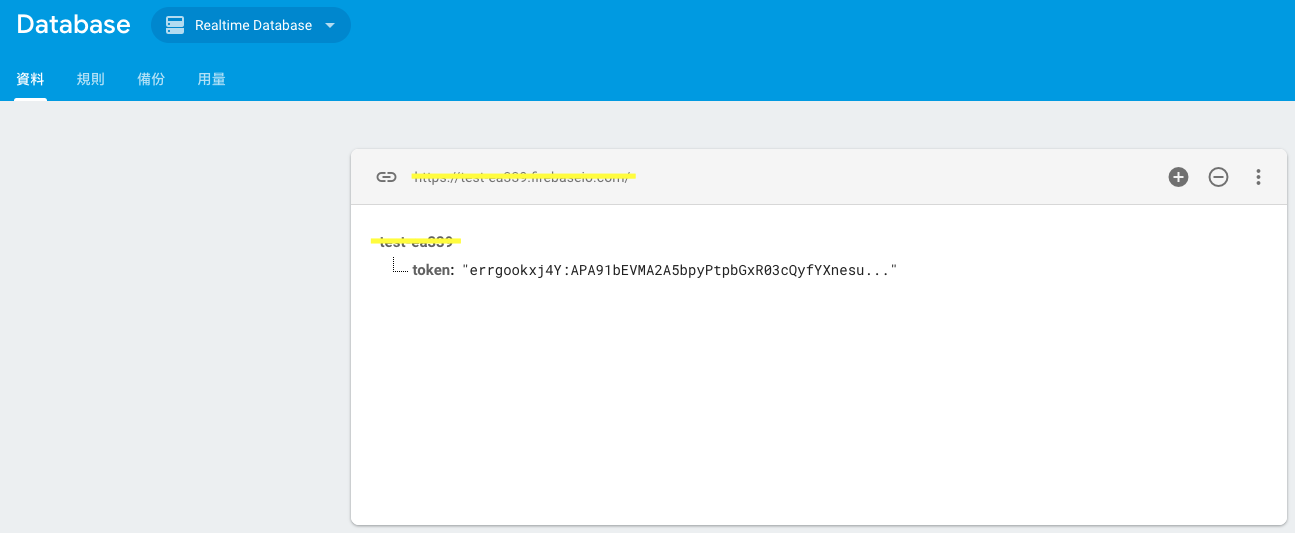
func uploadToken(_ token: String) {
dbRef?.child("token").setValue(token)
}
}創建一個AlertHelper類,來擴充UIAlertController類,主要擴充了警告視窗的相關操作
import Foundation
import UIKit

typealias AlertActionType = (UIAlertAction?) -> ()
extension UIAlertController {

    //MARK: Alert
    class func alert(title: String? = "提示", message: String?) -> UIAlertController  {
        let alertController = UIAlertController(title: title, message: message, preferredStyle: .alert)
        return alertController
    }

    //MARK: Actions
    func cancelHandle(title: String? = "取消", style: UIAlertActionStyle? = .cancel, alertAction: AlertActionType?) -> UIAlertController {

        let alert = UIAlertAction(title: title, style: style!) { (action) in
            if alertAction != nil{
                alertAction!(action)
            }
        }
        self.addAction(alert)
        return self
    }

    func otherHandle(title: String? = "確定", style: UIAlertActionStyle? = .default, alertAction: AlertActionType?) -> UIAlertController {
        let alert = UIAlertAction(title: title, style: style!) { (action) in
            if alertAction != nil{
                alertAction!(action)
            }
        }
        self.addAction(alert)
        return self
    }

    func show(currentVC: UIViewController)  {
        currentVC.present(self, animated: true, completion: nil)
    }
}修改AppDelegate類,增加Firebase配置、啟動App時取得推播權限狀態、上傳FCMToken
import UIKit
import Firebase //匯入Firebase模組

@UIApplicationMain
class AppDelegate: UIResponder, UIApplicationDelegate {

    var window: UIWindow?

    func application(_ application: UIApplication, didFinishLaunchingWithOptions launchOptions: [UIApplicationLaunchOptionsKey: Any]?) -> Bool {
        FirebaseApp.configure() //配置Firebase
        MessageManager.sharedInstance().getMessengerStatus() //取得推播權限狀態
        return true
    }

    func applicationWillResignActive(_ application: UIApplication) {
    }

    func applicationDidEnterBackground(_ application: UIApplication) {
    }

    func applicationWillEnterForeground(_ application: UIApplication) {
    }

    func applicationDidBecomeActive(_ application: UIApplication) {
    }

    func applicationWillTerminate(_ application: UIApplication) {
    }

    //當推播註冊成功就會調用,並取得deviceToken,一有deviceToken就會產生FCMToken
    func application(_ application: UIApplication, didRegisterForRemoteNotificationsWithDeviceToken deviceToken: Data) {
        let fcmToken = MessageManager.sharedInstance().getFcmToken() //取得FCMToken
        DatabaseManager.sharedInstance().uploadToken(fcmToken!) //上傳到Firebase
    }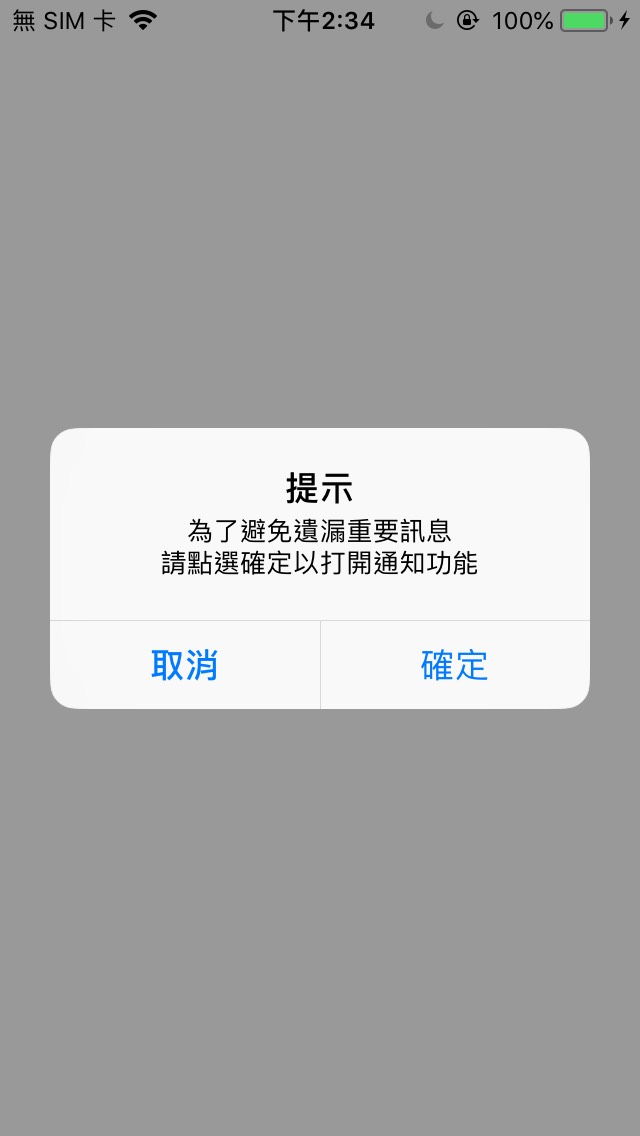
}修改ViewController類,增加未開啟推播時的提醒視窗
import UIKit

class ViewController: UIViewController {

    override func viewDidLoad() {
        super.viewDidLoad()

        //確保在主線程中執行
        DispatchQueue.main.async {
            //判斷推播權限設定的狀態,如果是不允許則跳出提醒,按確定後前往設定權限畫面
            if !MessageManager.sharedInstance().isMessageEnable {
                self.showAlert(message: "為了避免遺漏重要訊息\n請點選確定以打開通知功能", completion:
                    {
                        MessageManager.sharedInstance().openAppSetting()
                })
            }
        }
    }

    override func didReceiveMemoryWarning() {
        super.didReceiveMemoryWarning()
    }

    //提醒視窗
    func showAlert(message: String!, completion:@escaping () -> Void) {
        UIAlertController.alert(message: message).otherHandle(alertAction: { (action) in
            completion()
        }).cancelHandle(alertAction: nil ).show(currentVC: self)
    }
}開啟index.js,增加FF的觸發方式、推播訊息內容
完成後開啟終端機到functions資料夾下輸入firebase deploy將程式部署到Firebase
//引用模組
const functions = require('firebase-functions');
const admin = require('firebase-admin');

//管理員初始化
try {admin.initializeApp();} catch(e) {}

//Functions控制台顯示名稱、當DB的token被創建則觸發
exports.onCreateLeave = functions.database.ref('token')
  .onCreate(snap => {
    if (!snap.val()) {
      return console.log('No Leave data!');
    }
    const token = snap.val().toString();
    sendMessage(token);
  });

  function sendMessage(recipient) {
    var messageTitle = "發送通知";
    var messageBody = "恭喜您第一次使用推播成功";
    sendMessageContent(messageTitle, messageBody, recipient);
  }

  function sendMessageContent(messageTitle, messageBody, recipient) {
    if (recipient == null) { return }

    //APNs推播格式
    var message = {

      apns: {
        headers: {
          'apns-priority': '10'
        },
        payload: {
          aps: {
            alert: {
              title: messageTitle,
              body: messageBody,
            },
            sound: 'default',
          }
        }
      },
      token: recipient
    };

    //管理員寄送推播後的回應顯示在控制台
    admin.messaging().send(message)
      .then((response) => {
        // Response is a message ID string.
        console.log('Message send: ', recipient, ',ID: ', response);
      })
      .catch((error) => {
        console.log('Error sending message:', error);
      });
  }

這個問題在使用npm安裝套件的時候常常出現,其實只是因為沒有權限安裝
可以再指令前方加上sudo,表示以管理員權限執行,此時終端會要求輸入密碼

在import模組的時候有可能會發生這個小問題,可再次下載模組並匯入
如果確定有模組,可以嘗試使用command+B重新Build一次專案
DeviceToken委派問題
DeviceToken相關介紹
彼得潘推播教學
法蘭克FCM教學
法蘭克本地推播
推播相關教學
取得User推播權限狀態
Apple官方推播文件
FirebaseAdminFCM官方文件