installing wp ultimo v2 - superdav42/wp-multisite-waas GitHub Wiki
Installing Multisite Ultimate (v2)
IMPORTANT NOTE: This article refers to Multisite Ultimate version 2.x.
NOTE: This tutorial assumes that you already have your WordPress Multisite installed and configured. To see how you can install and configure WP Multisite, take a look at this tutorial by WP Beginner.
The time has come!
You finally have everything you need to get started building your online business with WordPress Multisite and Multisite Ultimate.
Now, how do you install Multisite Ultimate?
Getting the plugin's .zip file
After finishing your Multisite Ultimate purchase, you will receive an email with the .zip file of our plugin and your license key.

Keep in mind this download link expires after some time, so if you want to download Multisite Ultimate after the link expires, you would need to do it by signing into your Freemius account and downloading it from there.

Remember to also have your license key ready, since you will need it to activate Multisite Ultimate.
Where to find your license key
You can find your License key on the email you received after the purchase and inside your Freemius account. Just click on the Licenses tab and your license will be shown there.

How to install Multisite Ultimate
After getting the file, go to your network Dashboard and access the Plugins page where you can manage all the plugins you have.

There, click Add New and then, Upload Plugin.
 Choose the .zip file of Multisite Ultimate and click Install Now .
 You should receive a confirmation message. Right below this message click to Network Activate your plugin, since Multisite Ultimate is a multisite plugin and needs to be activated network-wide.

That will redirect you to our Setup Wizard.
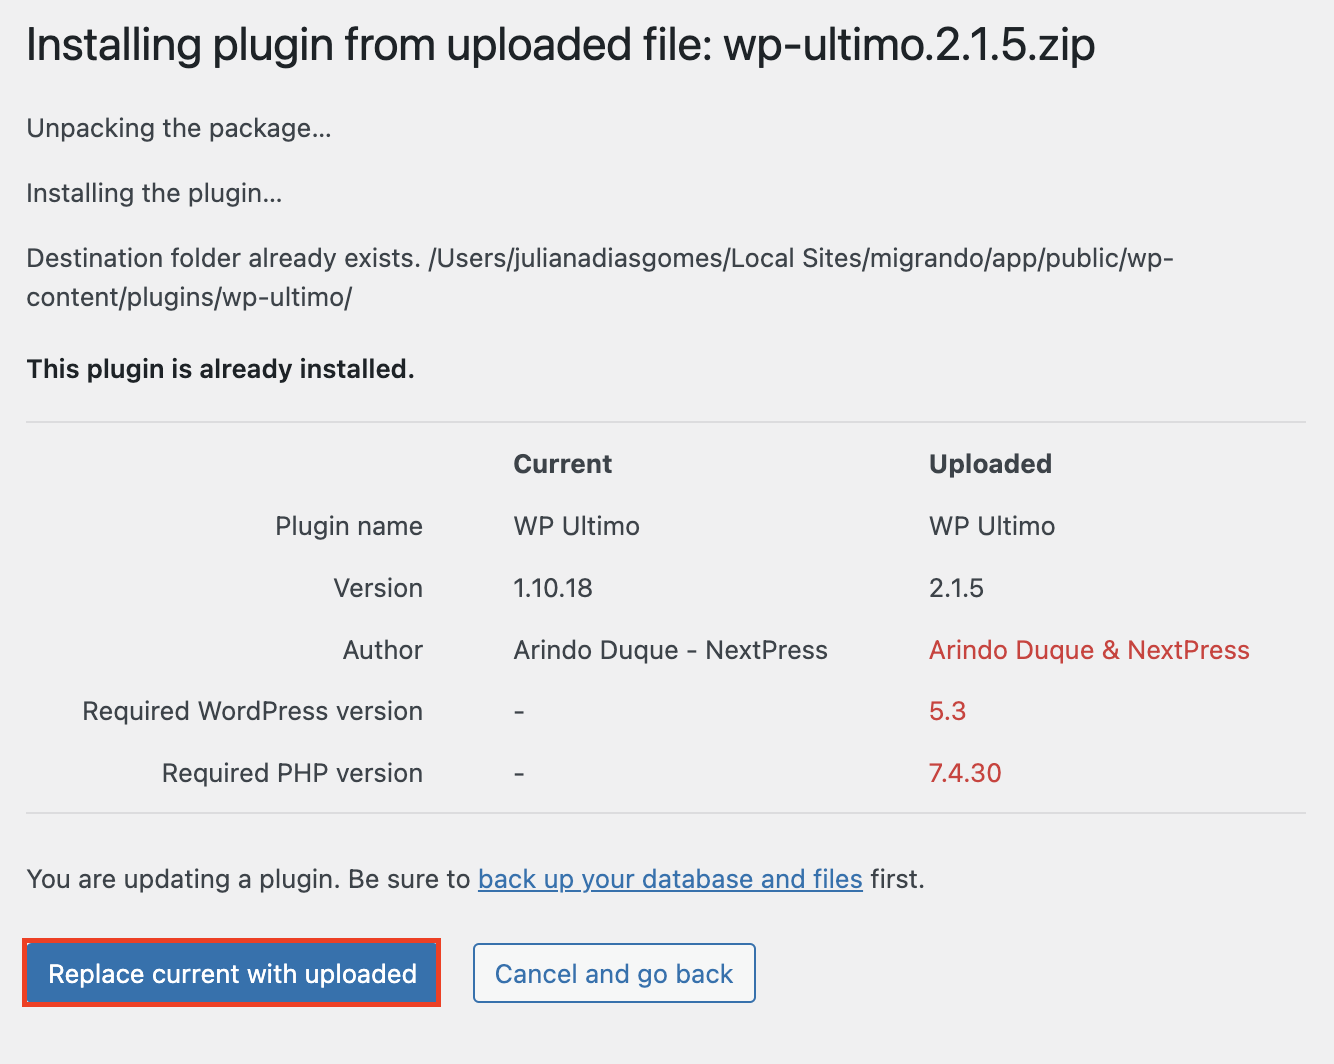
NOTE: If you have Multisite Ultimate 1.x installed on your Multisite, you'll have the option to replace the plugin with the version you've just downloaded. Please, go ahead and click to Replace current with uploaded.
Setup Wizard
Here you are able to set up your network in a few minutes by clicking Get Started.

This will redirect you to the Pre-Install Checks where you can find your System Information and WordPress installation. This will tell you if it meets Multisite Ultimate's requirements. If everything is ok, click to Go to the Next Step.

The next step is to key in your Multisite Ultimate license key (that Freemius sent you by email or that you downloaded on your Freemius dashboard) and activate the plugin. This will ensure that all the features including add-ons will be available on your site.
After putting in your key, click Agree & Activate_._

After license activation, you can start the actual installation by clicking Install on the next page. This will automatically create the necessary files and database for Multisite Ultimate to function.

The next step is to configure basic settings like filling in your company information and default currency.
After you set these parameters, click Continue to go to the next step.

The following page will allow you to install predefined templates, products, etc. This will help you get started and serve as your guide to familiarize yourself with managing Multisite Ultimate features.

And this is all it takes! You can click Finish and start navigating Multisite Ultimate from the left-hand side of your network Admin Dashboard.
 Go ahead and have some fun!