엔코더 및 모터 클래스 작성하기 - suakii/oddMotorStudy GitHub Wiki
모터를 구동시키고 엔코더 값을 확인하기 위하여 다음과 같은 코드를 작성하였습니다.
이번 작업은 이러한 코드를 클래스화 시키는 것을 목표로 합니다.
이는 다음의 링크에 있는 것을 모두 참조 하였습니다
https://github.com/1988kramer/motor_control
기존 코드
/*
 * one cycle rotation
 * [email protected]
 */

int pulses;
int pulsesChanged;
int encoderA = 2;//아두이노2번핀 -- 모터의 3번핀 Encoder A Phase
int encoderB = 4;//아두이노4번핀 --- 모터의 4번핀 Encoder B Phase
int motorPlus = 5;//아두이노5번핀 -- 모터 드라이버의 A-1A
int motorMinus = 6;//아두이노 6번핀 --모터 드라이버의 A-1B

int total =2100;//모터가 1회전 하기 위한 펄스 수
int motorSpeed = 200;//모터 구동 pwm value
void setup() {
  pinMode(encoderA, INPUT_PULLUP);//인코더 값을 읽기 위하여 내부 풀업 저항 사용
  pinMode(encoderB, INPUT_PULLUP);

  /*
   0번은 아두이노에서는 디지털2번핀에 부여된 인터럽트 기능을 말하는 것임
   여기에서의 인터럽트는 소프트웨어적이 아닌 하드웨어 인터럽트를 감지하는 것이며
   마치 윈도우의 callback 함수처럼 2번핀에 신호의 CHANGE가 발생하였을 때(즉 엔코더가 회전하면서 rising, falling)
   특정함 수를 연결하는 것임 여기서는 A_CHANGE
  */
  attachInterrupt(0, A_CHANGE, CHANGE);//
   //attachInterrupt(digitalPinToInterrupt(interruptPin), A_CHANGE, CHANGE);//함수로 핀을 지정해도 됨.

  analogWrite(motorPlus, 0);//초기 모터 정지
  analogWrite(motorMinus, 0);

  Serial.begin(115200);//시리얼로 값을 보내기 위한 작업

}
void loop() {

  if (pulses == total)
    analogWrite(motorPlus, 0);//모터 정지
  else {
    if (pulses > total)
      analogWrite(motorPlus, 0);//모터 정지
    else if (pulses < total)
      analogWrite(motorPlus, motorSpeed);//모터 구동
  }
  if (pulsesChanged != 0) {//펄스 값의 변화가 발생했다면 이 값을 전송

	Serial.print(pulses);
    Serial.print("\n");
    pulsesChanged = 0;
  }
}
void A_CHANGE() {
  if ( digitalRead(encoderB) == 0 ) {
    if ( digitalRead(encoderA) == 0 ) {
      // A fall, B is low
      pulses--; // Moving forward
    } else {
      // A rise, B is high
      pulses++; // Moving reverse
    }
  } else {
    if ( digitalRead(encoderA) == 0 ) {
      pulses++; // Moving reverse
    } else {
      // A rise, B is low
      pulses--; // Moving forward
    }
  }
  pulsesChanged = 1;
}
기존의 코드를 클래스화 시키는 과정은 다음과 같습니다.
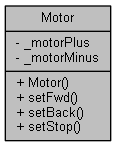
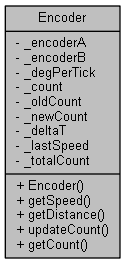
먼저 모터의 클래스화 및 엔코더의 클래스화 입니다.
Motor Clas
Encoder Clas
EncoderTest 아두이노 파일의 구조
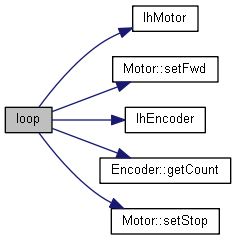
보다 자세한 구조는 아래 코드를 보시면 알 수 있습니다. https://github.com/suakii/oddMotorStudy/tree/master/Chapter2_EncoderClass/EncoderTest