Getting Started with GTP3 and the OpenAI API - strohne/Facepager GitHub Wiki
This Getting Started provides an introduction for fetching data from GTP3, a language model that can produce human-like text. The OpenAI API provides access to GTP-3 for text completion, text classification, searching in documents or answering questions on the basis of documents. In Facepager, the OpenAI API can be used via the Generic Module.
Access restrictions & registration
In order to use OpenAI's API, you need to register. A secret API key is generated, which can be used in all API requests as an access token. Note: Open AI uses tokens (numeric representation of words) as usage fees. Each model has different pricing rates. As a new user you get free credits, however limited. If you reached the limit of 18$, you have to pay for requests.
First steps with Facepager
-
Create database: Click
New Databasein the Menu Bar. -
Setup query: Open the Generic Module. Depending on your task, you will need a different query setup. Facepager provides Presets for text completion and classification, which should be helpful at the beginning. Choose and apply one of those presets by clicking
Presetsin the Menu Bar. -
Authorize with your access token: Getting data from OpenAI API requires an access token. You will find your access token in the account settings on the OpenAI page. With Facepager, the access token will be sent as a header. Make sure that
headeris selected at theAuthorizationdrop-down menu and thatAuthorizationis entered asName. After pasting your secret API key into theAccess tokenfield, Facepager is ready to fetch data, you don’t have to click any other login buttons. -
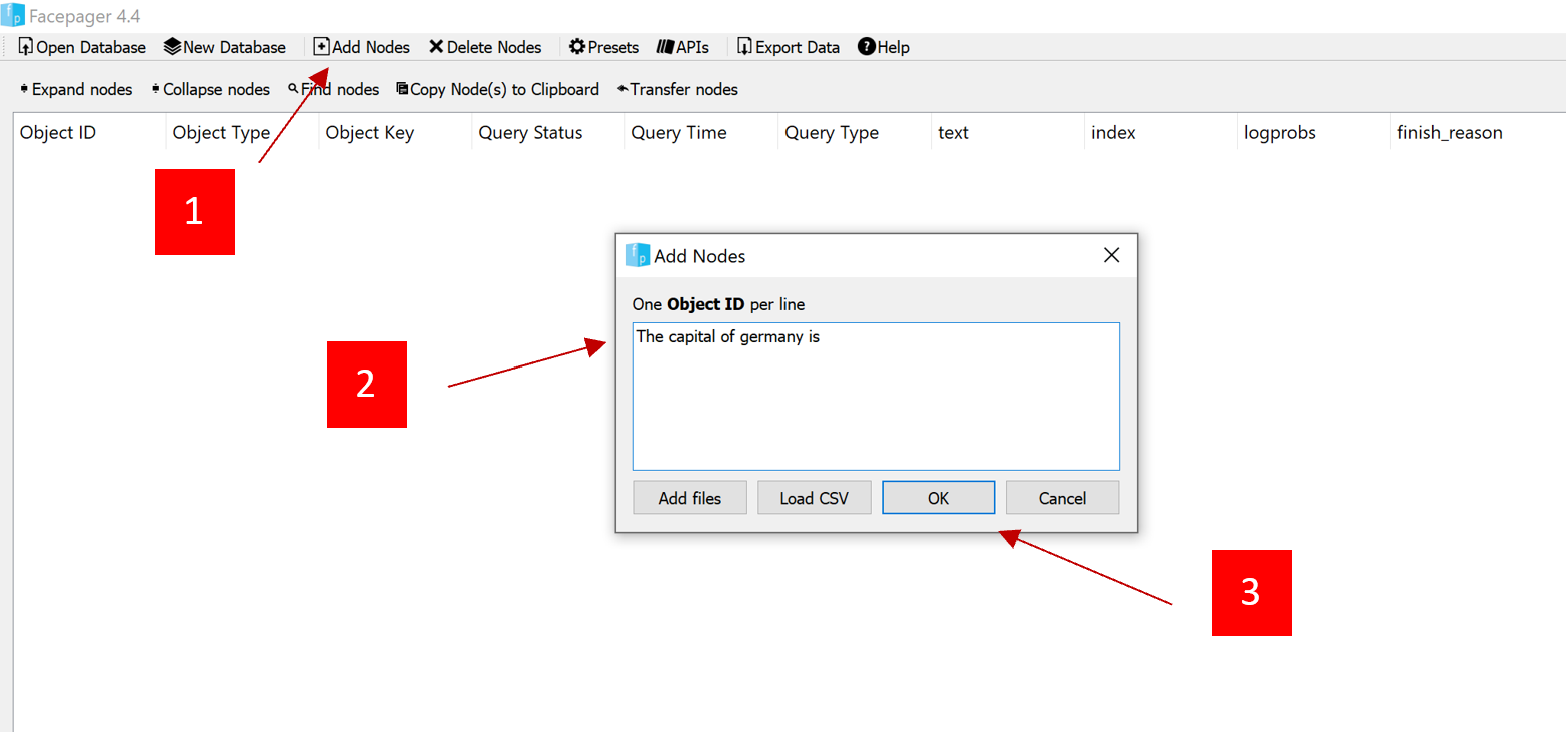
Add nodes: To fetch data, whether you want to complete or classify text, you need to add a seed node. The seed node contains the text that should be completed or classified. Click
Add nodesin the Menu Bar and add for example "The capital of germany is".
-
Fetch data: Select the added seed node in the Nodes View and click
Fetch data. -
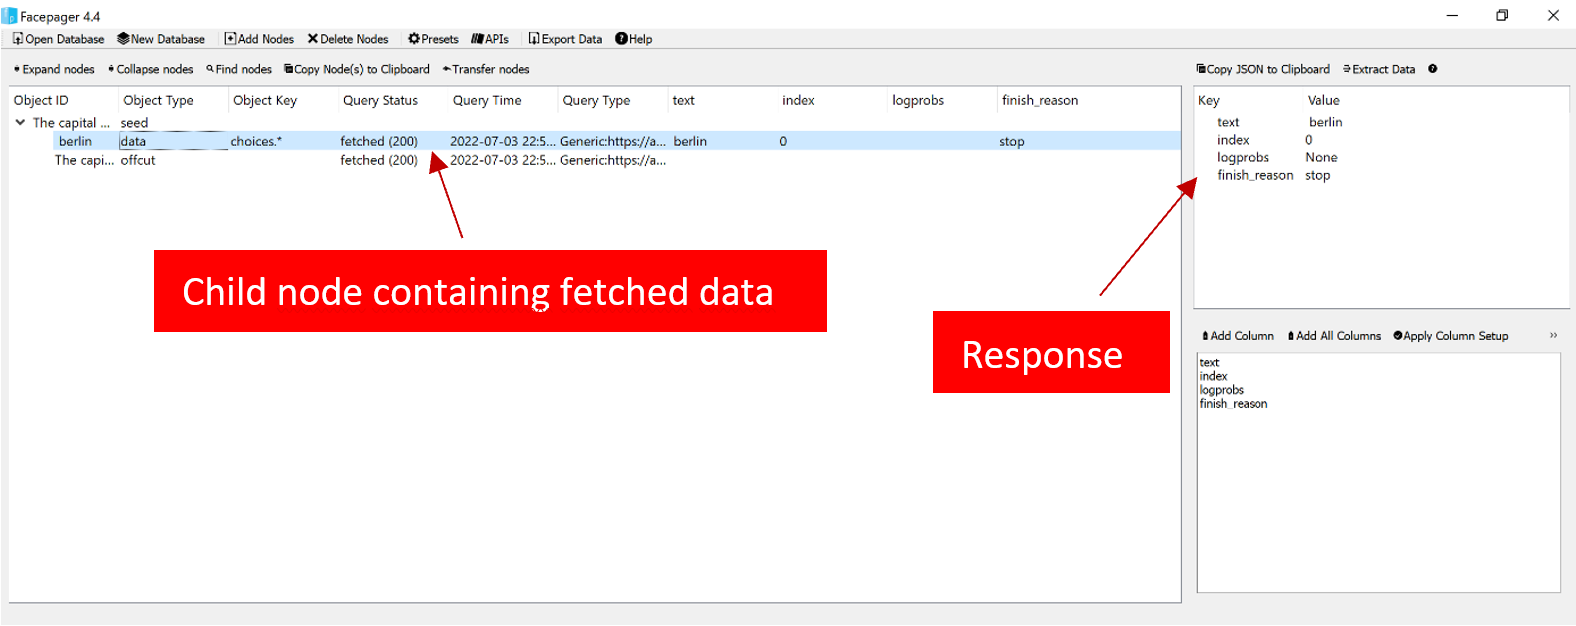
Inspect Data: Expand the seed node or click
Expand nodesin the Menu Bar to open all nodes. New childnodes that contain the response were created. The raw data is shown in the Data View to the right.
-
Setup columns: The columns you see in the Nodes View are defined by the preset you applied. You can change the columns in the Columns Setup. Click
Clear Column Setupbelow the Custom Table Columns area. Change the columns according to your needs by adding keys found in the raw data into the Custom Table Columns area. You can useAdd Columnafter you clicked on the specific key or just useAdd All Columnsfor all keys. Don't forget to clickApply Column Setupto add your defined columns in the Nodes View. If the columns don't show up, make sure to scroll right or to resize the columns (click between the headers). -
Export data: Click
Export Datato get a CSV file. Notice the options in the export mode field of the export dialog. You can open CSV files with Excel or any statistics software you like.