AZ 7798 - stodev-com-br/Tasmota GitHub Wiki
This feature is not included in precompiled binaries.
To use it you must compile your build. Add the following to user_config_override.h:
#ifndef USE_AZ7798
#define USE_AZ7798          // Add support for AZ-Instrument 7798 CO2 datalogger (+1k6 code)
#endif
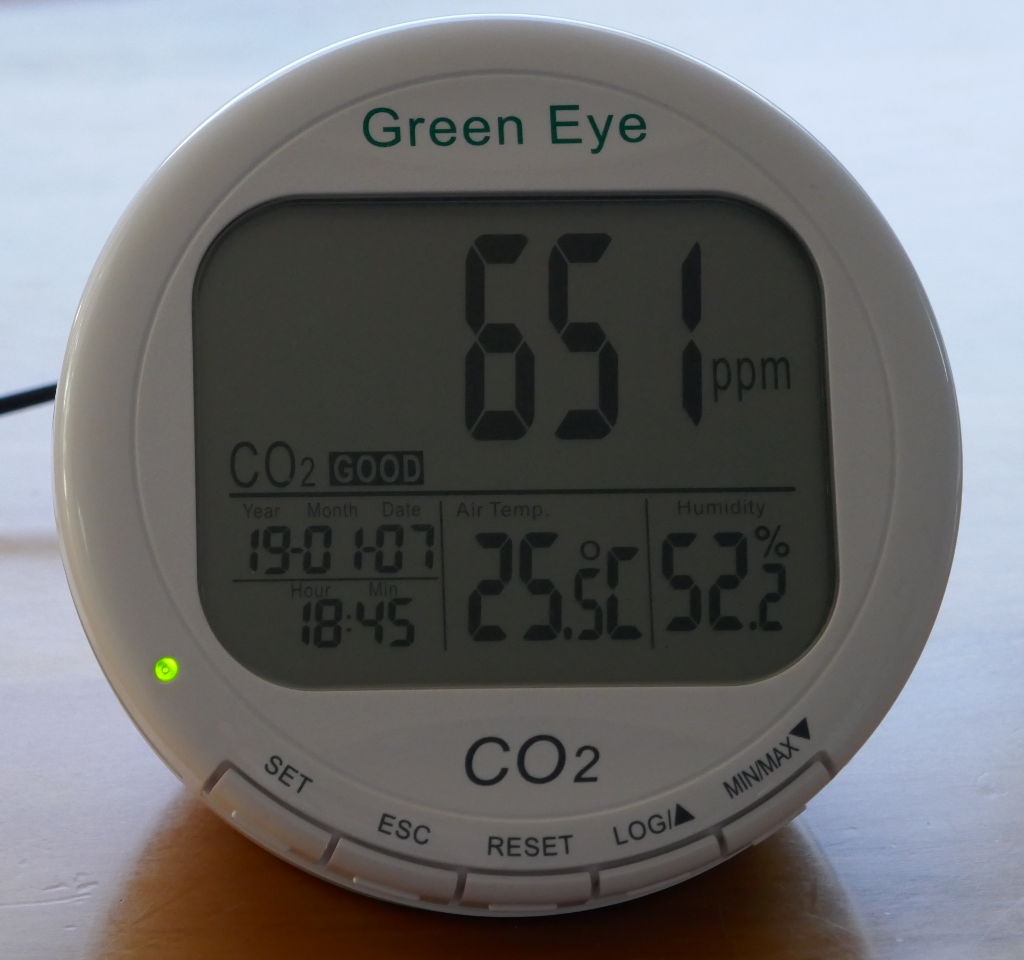
The AZ7798 CO2 Meter/Datalogger appears to be made by AZ Instrument, but other branded versions exist.
The CO2 meter is already provided with a PC interface in the form of a logic-level (3V3) serial port, accessible through a 2.5mm stereo jack on the back. The Wemos D1 Mini is connected to this serial port instead, and the PC interface is no longer available.
The Wemos D1 Mini is fitted inside the meter enclosure. This requires the enclosure to be opened. There are four screws. Two of the screws are hidden behind the type label. Use the tip of a small knife to cut holes in the label.
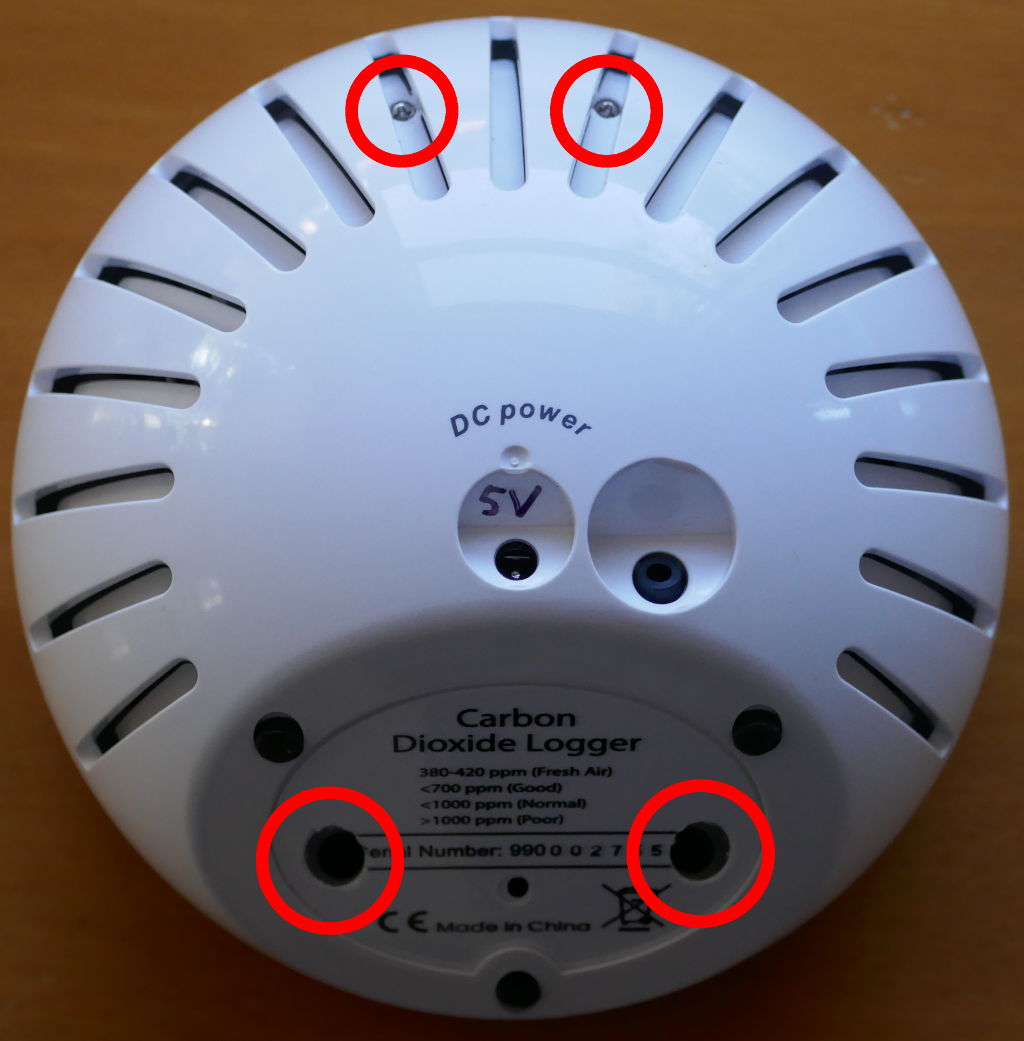
There are also two clips at the top of the enclosure. To release those, gently pry apart the bottom of the enclosure a small amount. The grey band between the two halves can now be lifted up and pushed aside a little and expose the clips near the top. A push with a flat-blade screwdriver will then release the clips.
Once the enclosure is opened, disconnect the two serial port wires from the socket on the back panel. The black wire (0V) can remain connected. Now connect these two wires to TX and RX of the Wemos D1 Mini.
| Wemos D1 Mini | AZ7798 |
|---|---|
| TX | wire with stripe |
| RX | wire without stripe |
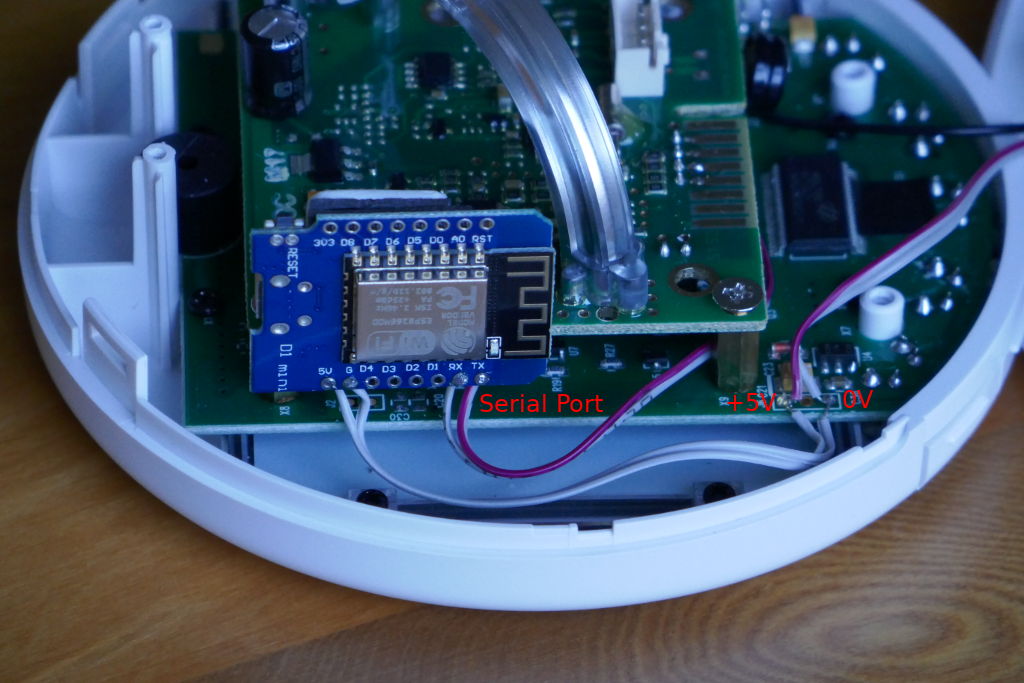
The power supply for the Wemos D1 Mini is taken directly from the power supply for the meter, which is a 5V external power supply. Solder two wires to the incoming power supply and connect the other ends to the 5V and G terminals on the Wemos D1 Mini.
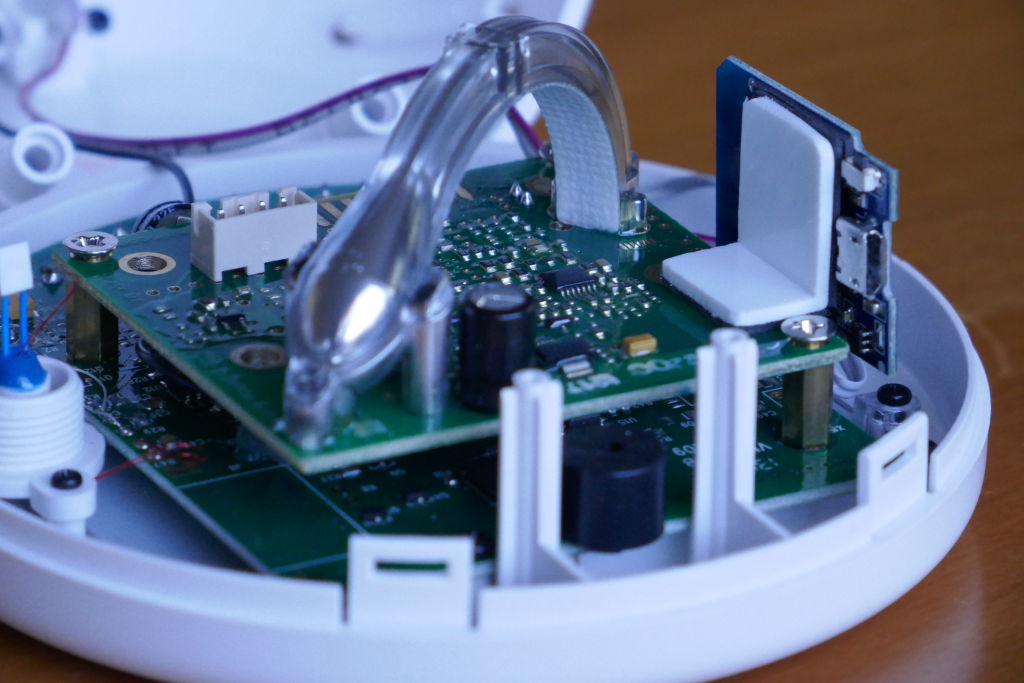
Make a small right-angle bracket for mounting the Wemos D1 Mini to the meter board. Use double-sided tape to hold everything together.
In the Configuration -> Configure Module page assign:
- D1 TX to
AZ Tx (117) - D3 RX to
AZ Rx (118)
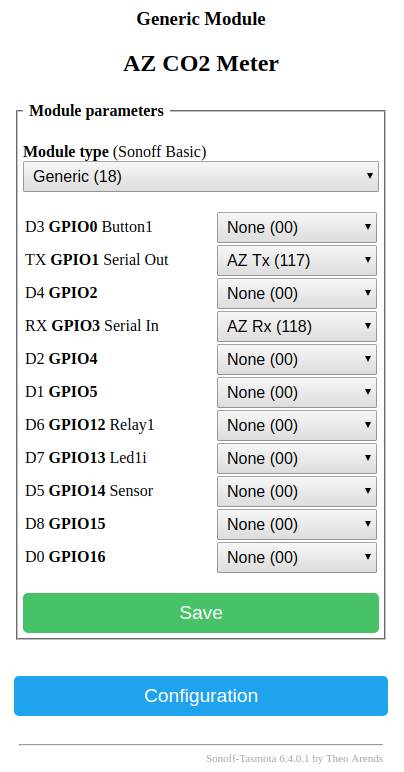
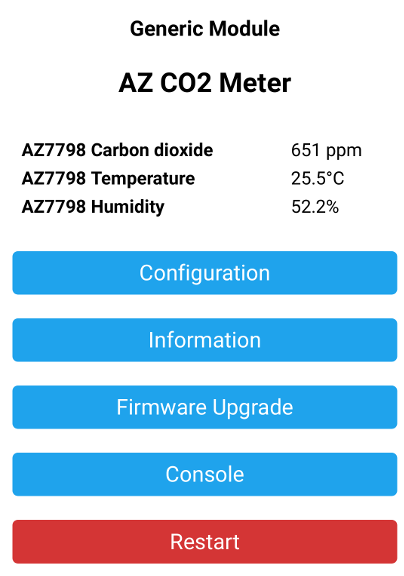
After reboot of the device the AZ7798 measurements are shown.
