Enclosure and PA Heatsink - softerhardware/Hermes-Lite2 GitHub Wiki
For proper heat dissipation during full power transmit, you must use the recommended enclosure or other means of PA heat sinking. In all cases, do not operate the Hermes-Lite 2.0 if the onboard temperature sensor registers 60 degrees Celsius or higher.
The recommended and tested enclosure for the Hermes-Lite 2 is brand SZOMK model number AK-C-C12. A raw finish (no powder coating) is recommended for best thermal dissipation. These enclosures are available from AliExpress, Ebay and Amazon. Equivalent enclosures can be found by searching for "55*105*150 aluminum" or "55*106*150 aluminum" on Google. Different permutations of 55*105*150 and substituting x for * will lead to more hits. Note that some makers specify this enclosure at 106mm width and others at 105mm width. For best results, ensure that the slot is at least 1.6mm tall. Some sources are:
- Amazon1 raw aluminum
- Amazon2
- Ebay unknown finish, MOQ 10
- Ebay raw aluminum, MOQ 1
- AliExpress
Because of variation in PCB thickness and width, as well as in enclosure width and slot height, it is possible to have PCBs that don't fit well into the enclosure. It is easy to sand the sides of the PCBs to make them slightly narrower. Three or four strokes on a finer 100 to 200 grit sand paper is enough. It is harder if the PCB is too thick. If this is the case you may need to sand the slots of your enclosure, or use a dremel tool to make the slots taller. It may be easier to buy another enclosure with specified taller slots. Two such options are:
- YGS-010-2
- AK-C-C69 with shorter overall height, one solid aluminum endplate which can be difficult to tool.
PA Thermal Dissipation
There is one hole in the PCB near the PA is to provide some mechanical pressure between the PCB and the enclosure slot to improve thermal dissipation. This is a 3.3mm diameter for standard fit of M3 size hardware. Other similar hardware, including M2.5, M2 or imperial, may be used.
A countersunk M3 screw is recommended to provide the mechanical pressure for thermal dissipation. This requires drilling a countersunk hole in your enclosure, but can be done in a way that keeps the bottom of the enclosure flat and smooth. To determine the correct position for this hole, you can slide in and position your Hermes-Lite 2.0 and then use a center punch through the PCB hole to mark on the enclosure where to drill the hole. Finally, apply some thermal grease on the bottom edge of the PCB near the PA that contacts with the enclosure to further improve thermal dissipation. It is also helpful to sand the groove slightly to remove the black finish where the PA contacts the enclosure grrove. This can be done with a small file or a thin metal ruler wrapped with sand paper.


Some mechanical drawings of the hole position were posted on Googe Groups.
If you fully enclose the Hermes-Lite 2.0, you may need to add a small fan to provide proper ventilation. There are various plans for 3D printer end caps on github. One preferred way top operate a Hermes-Lite is to just use half of the recommended enclosure for thermal dissipation and no end caps. This allows easy access and viewing of the Hermes-Lite as well as decent airflow. This is what is pictured above.
The AD9866 may run hot in some builds of the Hermes-Lite 2.0 or at some locations. There are small heat sinks such as this or this which may be used to help cool the AD9866. The size of the AD9866 is 9mm by 9mm, so care must be taken to not short pins if any heat sink that size or larger is used. There are heat sink kits, intended for the Raspberry Pi, which can be repurposed for the Hermes-Lite 2.0. The larger heat sink can be used on the FPGA, and the smaller heat sink can be used on the AD9866.
There are other 4 mounting holes on near each corner which are for optional mounting in custom enclosures; these holes also have a 3.3mm diameter. Only M3 (or smaller) screws with smaller heads, such as cheesehead, should be used here as there is limited clearance.
HL2 With End Plates
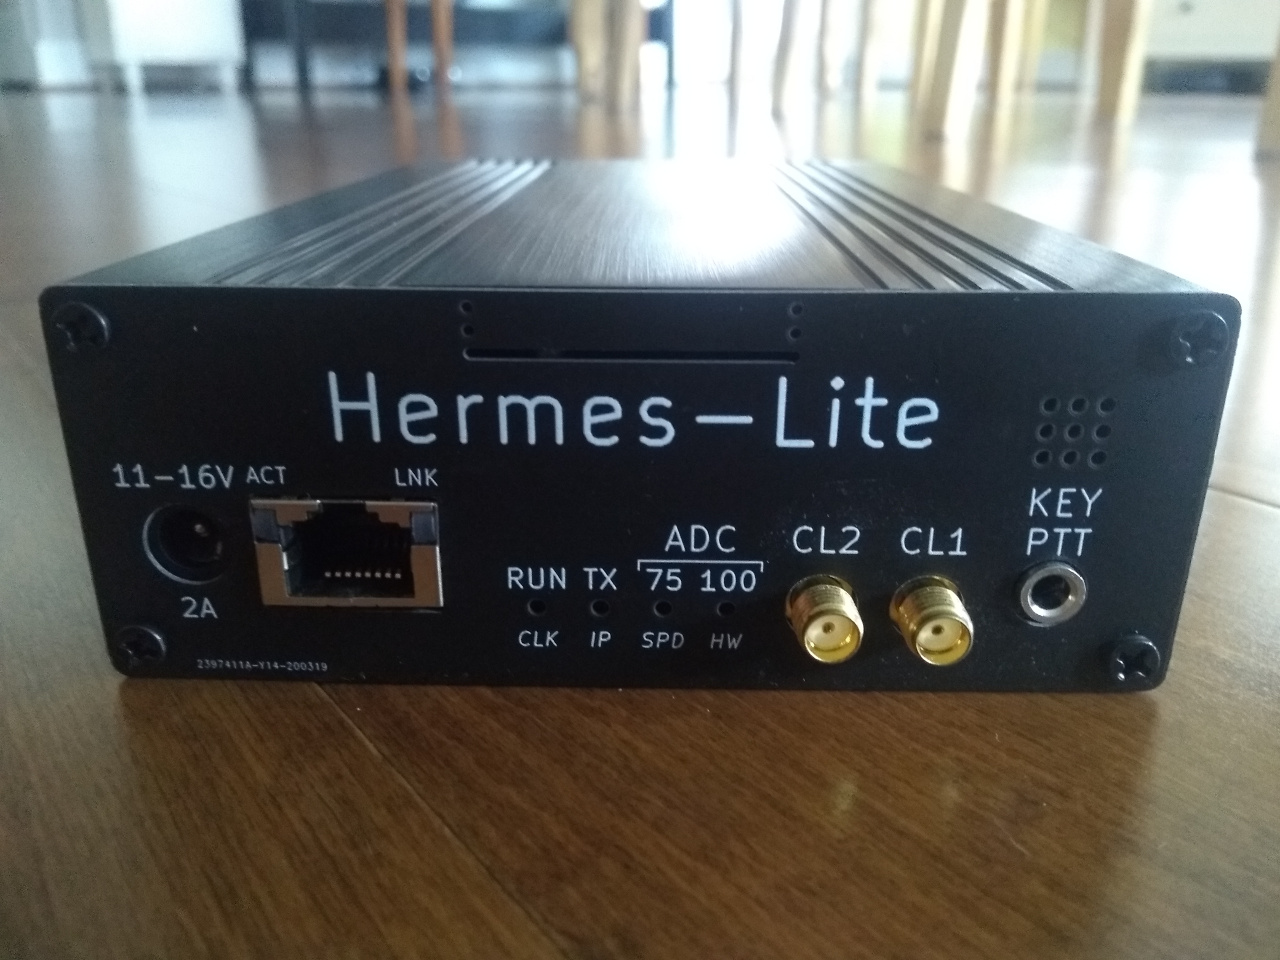
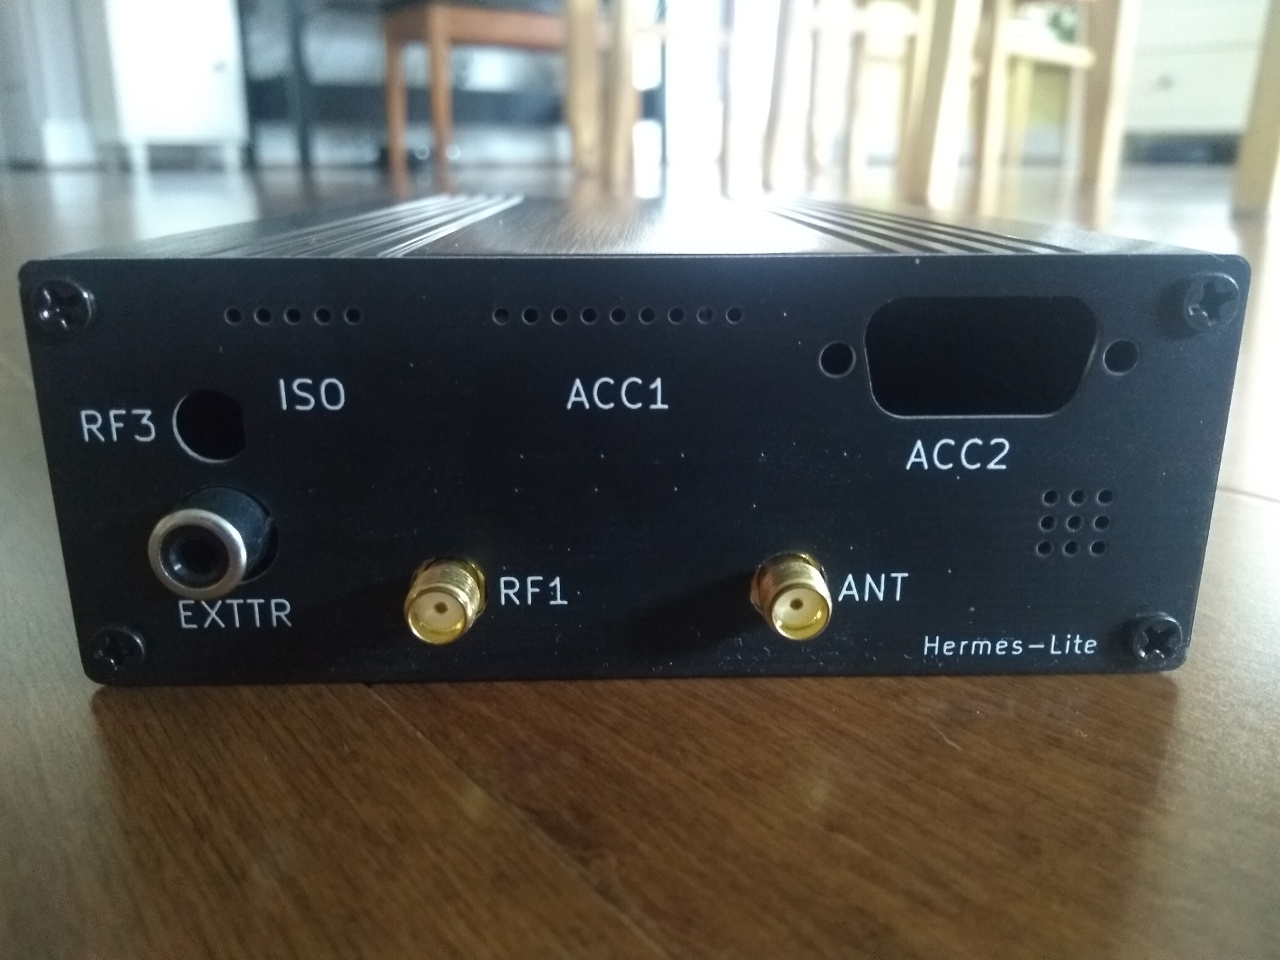
Cutouts for optional IO exists on the rear end plate.