Signs and Labels - saraoswald/lettering-tutorials GitHub Wiki
Outline:
- Choosing a Label Font
- To Retouch or Not to Retouch
- Placing Labels in InDesign
- Placing Labels in Photoshop
- Masking in Photoshop
Choosing a Label Font
Part of localizing signs and labels in English is using fonts that look natural in context. For reference, here's a list of fonts that are commonly used in the English-speaking world.
| Usage | Font Name | FFCU |
|---|---|---|
| Phone - Android | Roboto | Y |
| Phone - iOS | San Francisco | N |
| Computer - Mac OS X | Helvetica Neue | N |
| Computer - Windows | Segoe UI | N |
| Computer - Ubuntu | Ubuntu | Y |
| Command Line - Unix | Ubuntu Mono | Y |
| Command Line - Windows | Lucida Console | N |
| Google Search | Arial | * |
| Google Products (YouTube, Gmail, etc) | Roboto | Y |
| Blog Titles - Sans Serif | Oswald | Y |
| Blog Titles - Serif | Playfair | Y |
*Note: While Arial isn't technically FFCU, it is available on both Mac and Windows, so you're probably fine to use it.
For websites like Twitter and Facebook, most of the time they default to the operating system's font, and Helvetica Neue and Arial are the fallback fonts.
To Retouch or Not to Retouch
For the most part, your editor or script will tell you whether or not to fully retouch a label. Here are some cases where you might consider placing a label as a subtitle or margin note instead:
- The label will be very difficult to recreate with your skillset or deadline
- There are a lot of labels to recreate, and this might impact your ability to meet a deadline
- The label is calligraphy or overly ornate, and replacing it would detract from the art
Always check with your client if you're ever unsure about retouching a label
Placing Labels in InDesign
Placing in InDesign is ideal if you want to keep labels editable, live text, but you can also place labels in Photoshop.
Signs and labels are pretty straightforward. Here are some tips and tools that can make placing them easier:
- Pseudo-Stroke.js, which makes up for InDesign's horrible strokes (demo here). I have this set to
Shift + alt + Son my keyboard. - Skew Frame.js, which you can assign to a keyboard shortcut to both skew and rotate at the same time (demo here)
- Add Keyboard Shortcuts for
Object > Transform's Scale, Rotate, and to make your life easier (Edit > Keyboard Shortcuts...)
Masking in InDesign
You can make a mask in InDesign by placing a text frame inside of another frame.
- Place and scale a text frame as you want it to appear.
- Using the
Pen Tool (P), draw a path that surrounds the area that you want to appear.
- Select your text frame from Step 1, and Cut (
Cmd+X). - Select your path from Step 2, right-click, and select
Paste Into(alt + cmd + V). The path should now hide portions of the text frame
Reusing Labels in InDesign
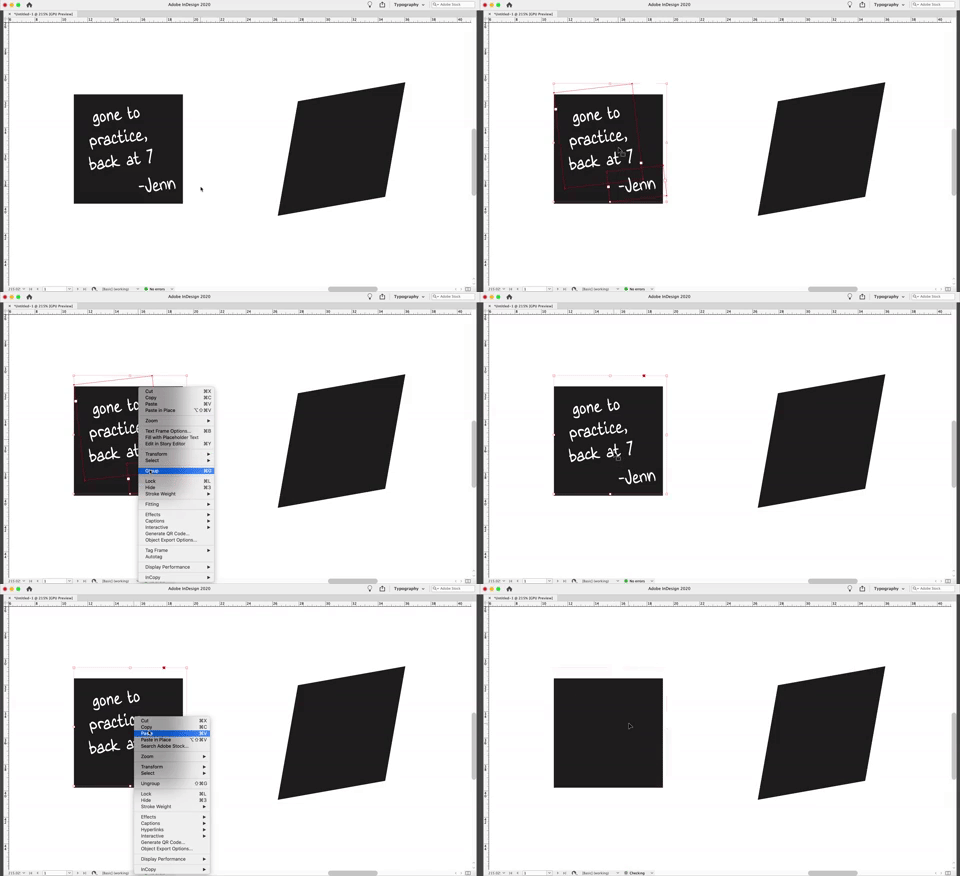
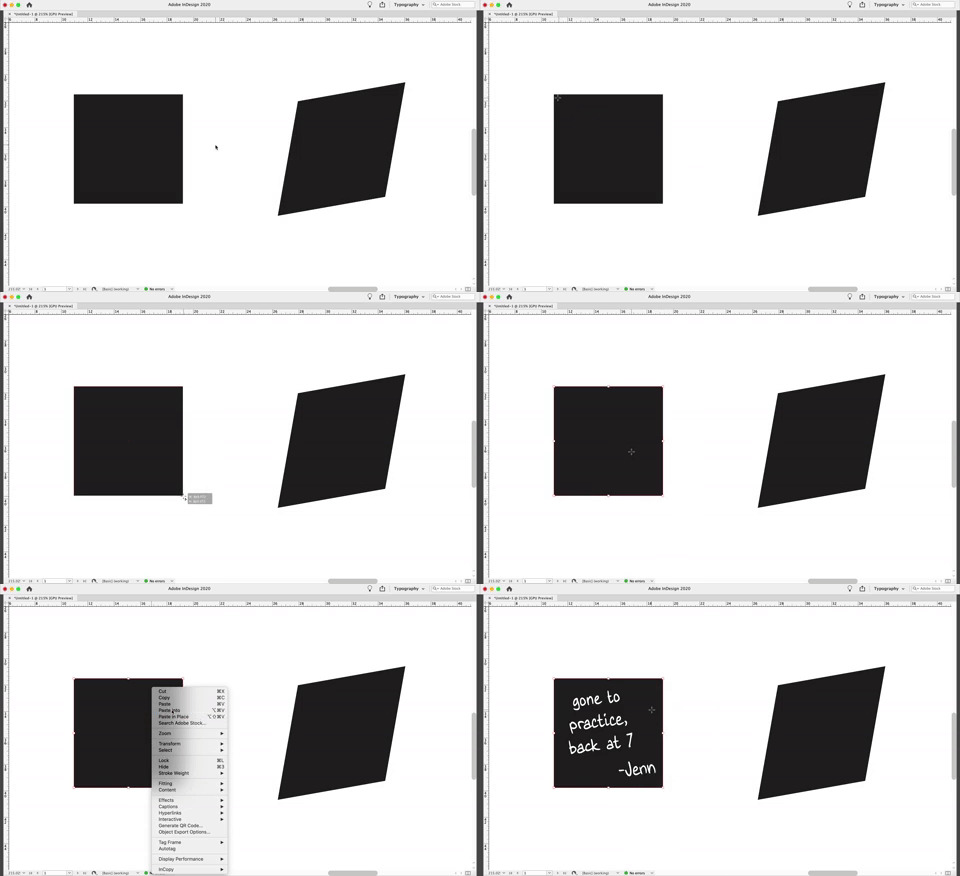
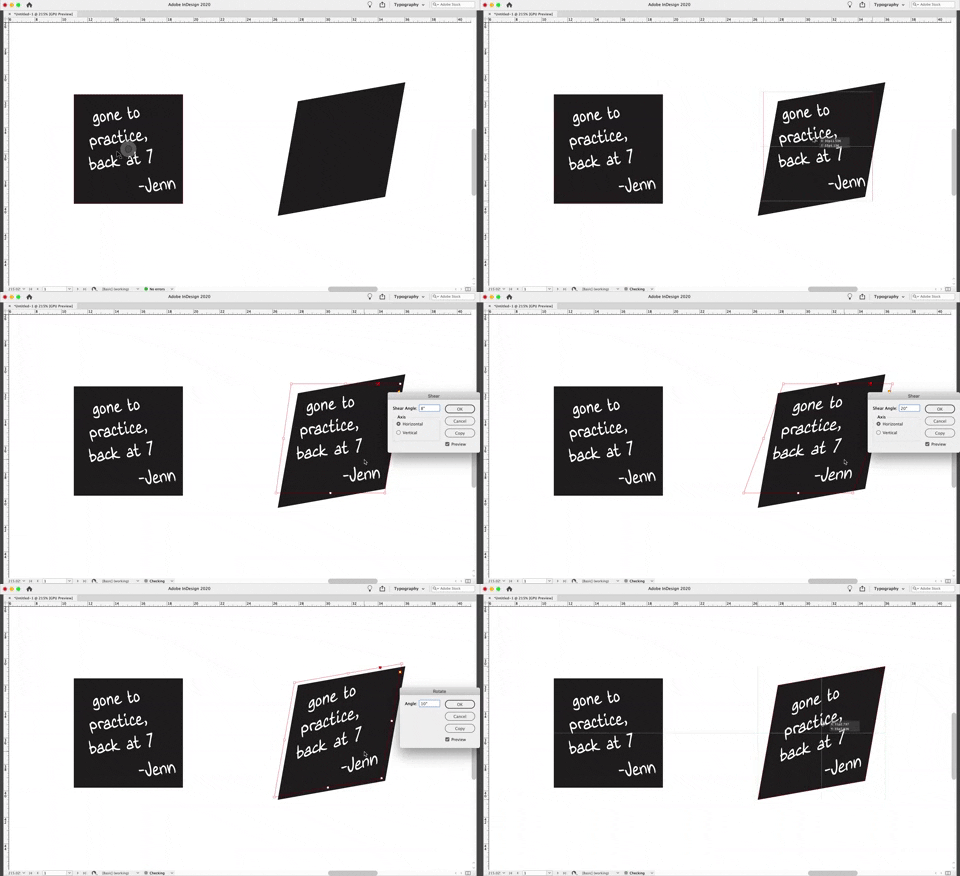
When signs with multiple text frames are reused across several pages, it's nice to keep the same proportions from different perspectives. (original tweet thread)
It's really easy to do this in InDesign if you use a frame as the reference for how to place it. Here's how:
- Select all the elements of a label, group them, and Cut.

- Use the
Rectangle Frame Tool (F)to draw a frame around the original sign. Right-click on this new frame, and selectPaste Into(alt + cmd + V) to place your grouped elements.

- Use the
Selection Tool (V, Escape), holding thealtkey, to drag a new copy to the second sign. - Use the frame as a reference to align the text with the second sign, distorting it with Shear, Rotate, dragging the handles while holding Command, etc

Placing Labels in Photoshop
tbd