Placing and sizing art - saraoswald/lettering-tutorials GitHub Wiki
Outline:
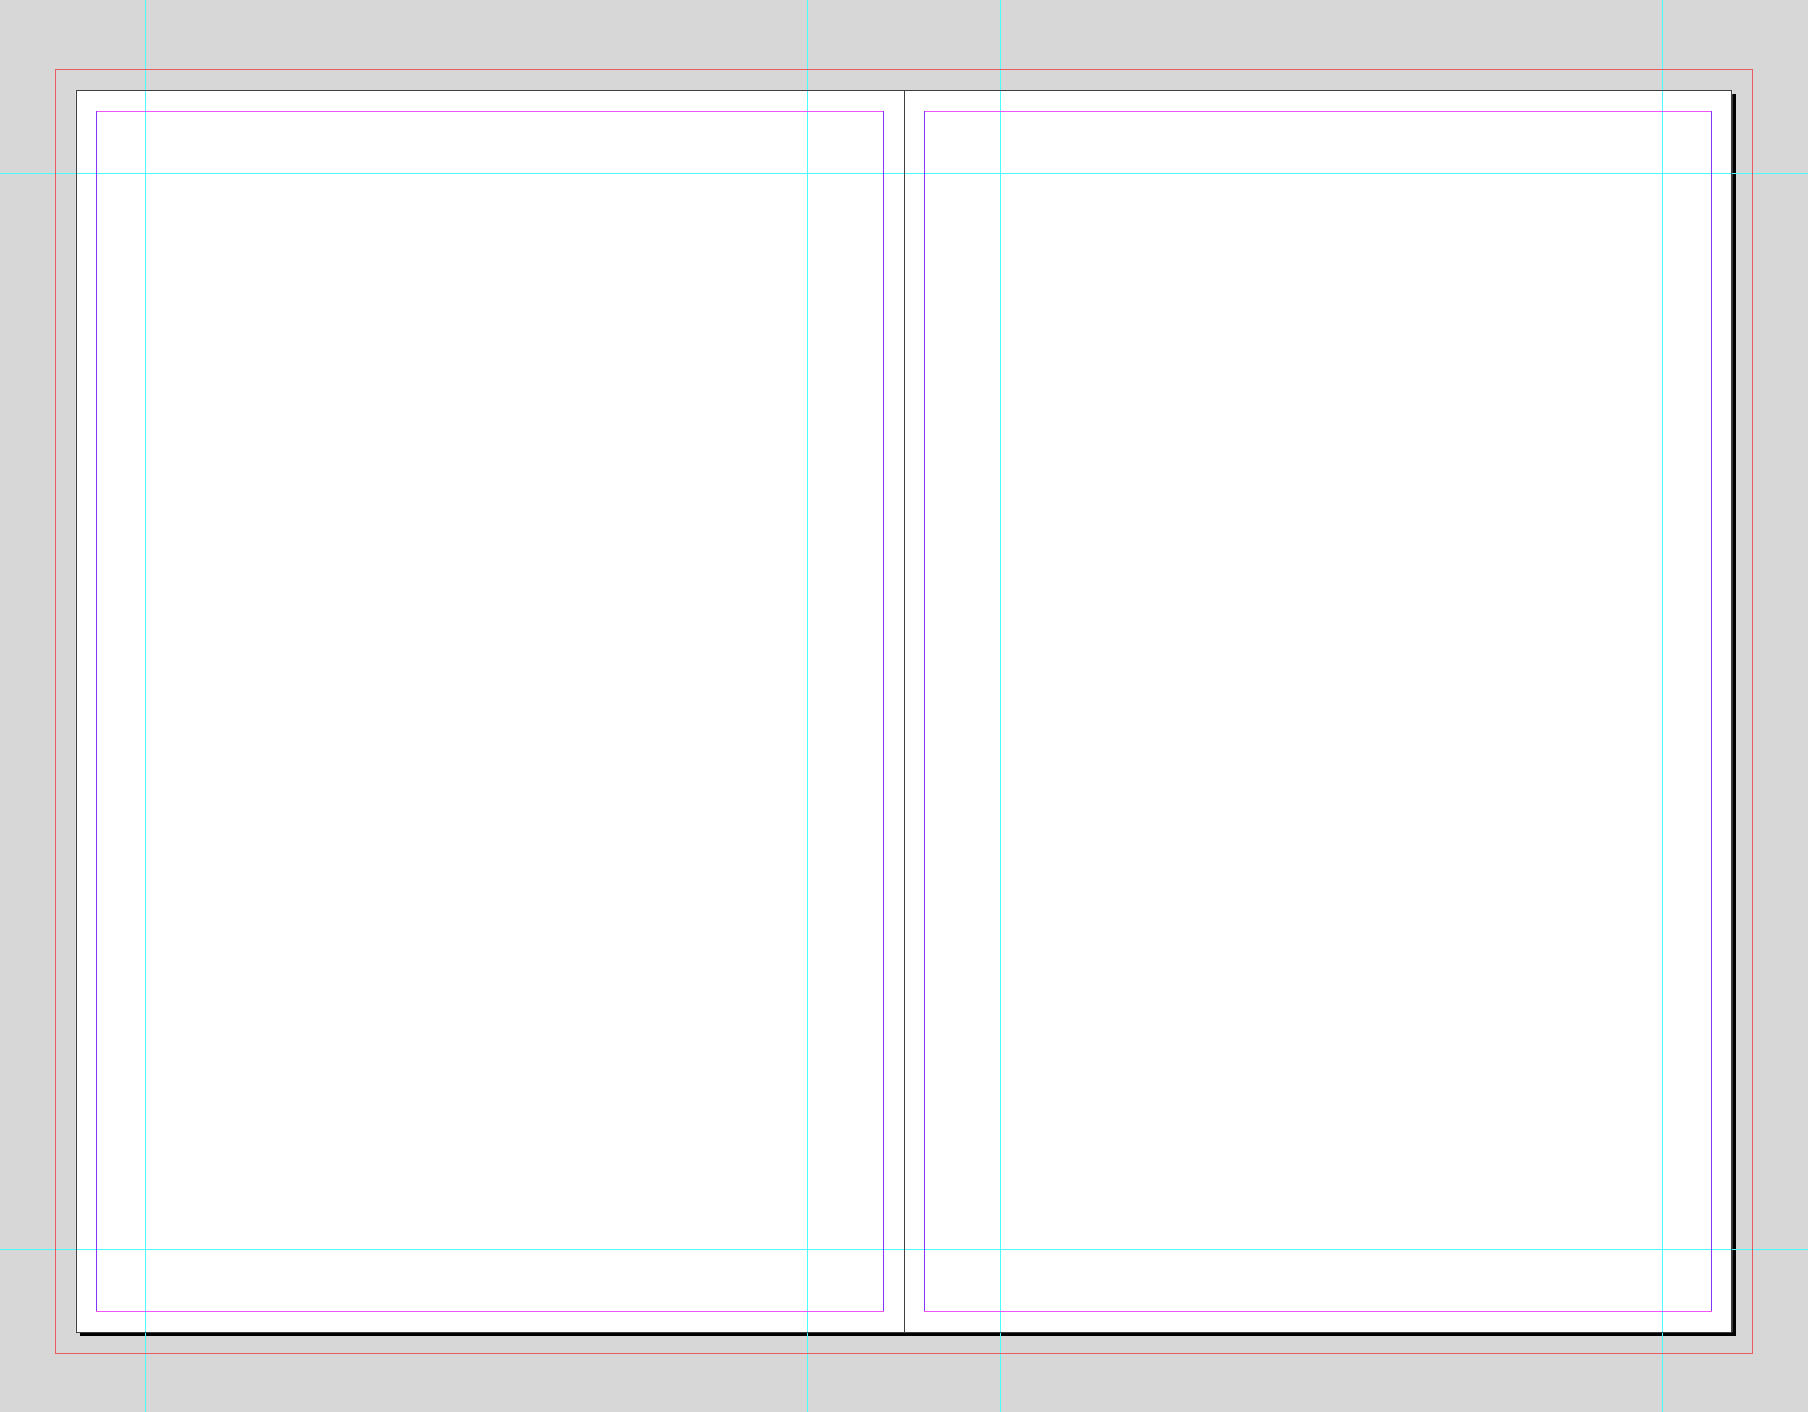
- What are all these lines?
- Placing the art
- Sizing the art
- Resizing a Book's Trim
- Resizing a Lettered Page
- General Placement Comments
When we set up our InDesign document, we set a bleed and margin value. Those are important in printing because pages shift as they're cut, and you can read more on bleed here.
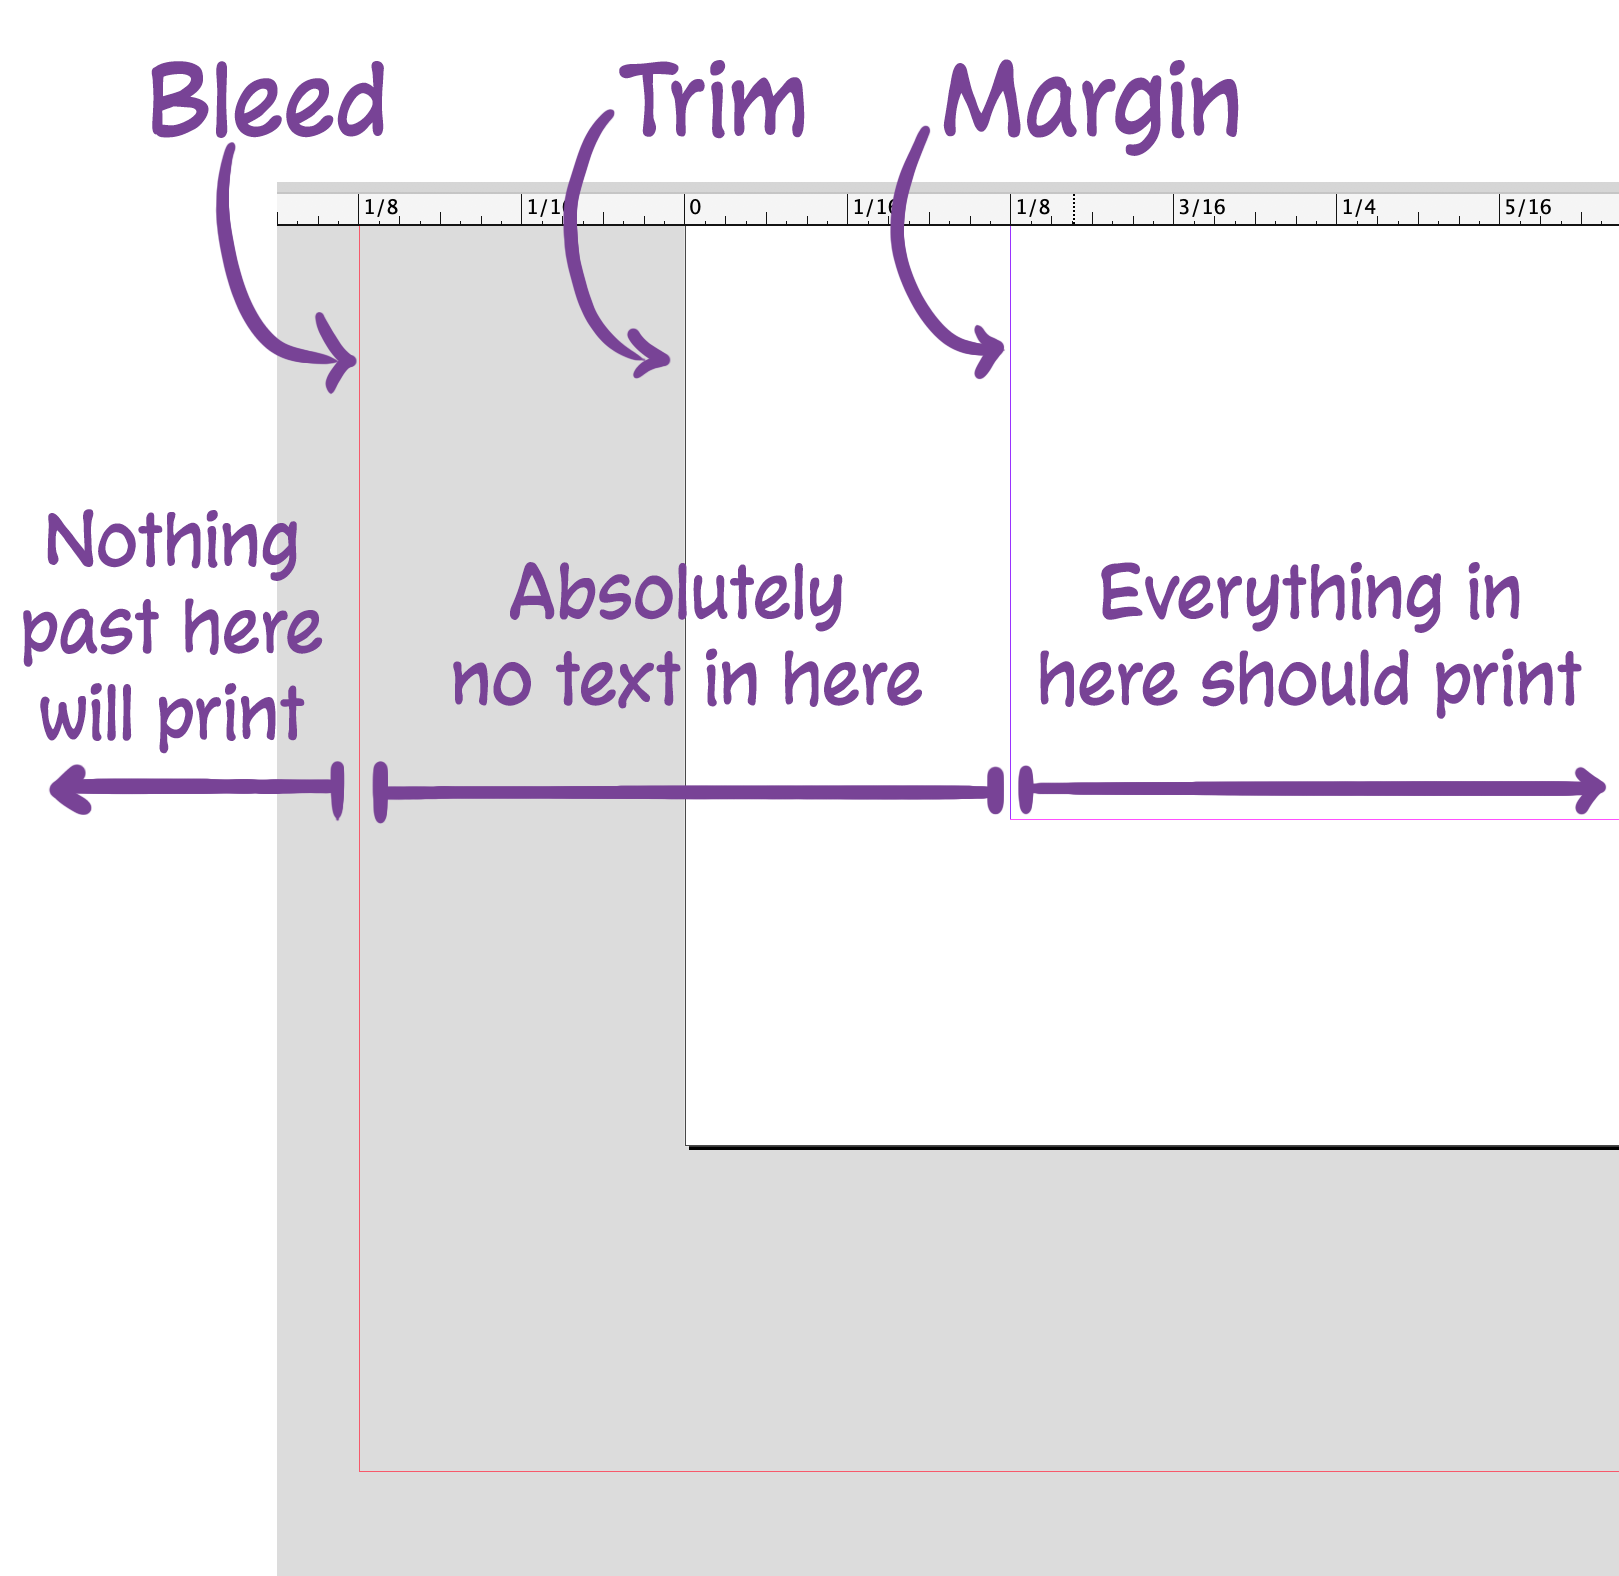
The space inside of the margin is sometimes referred to as the safety, so anything "placed outside the safety" is past the margin line in InDesign.
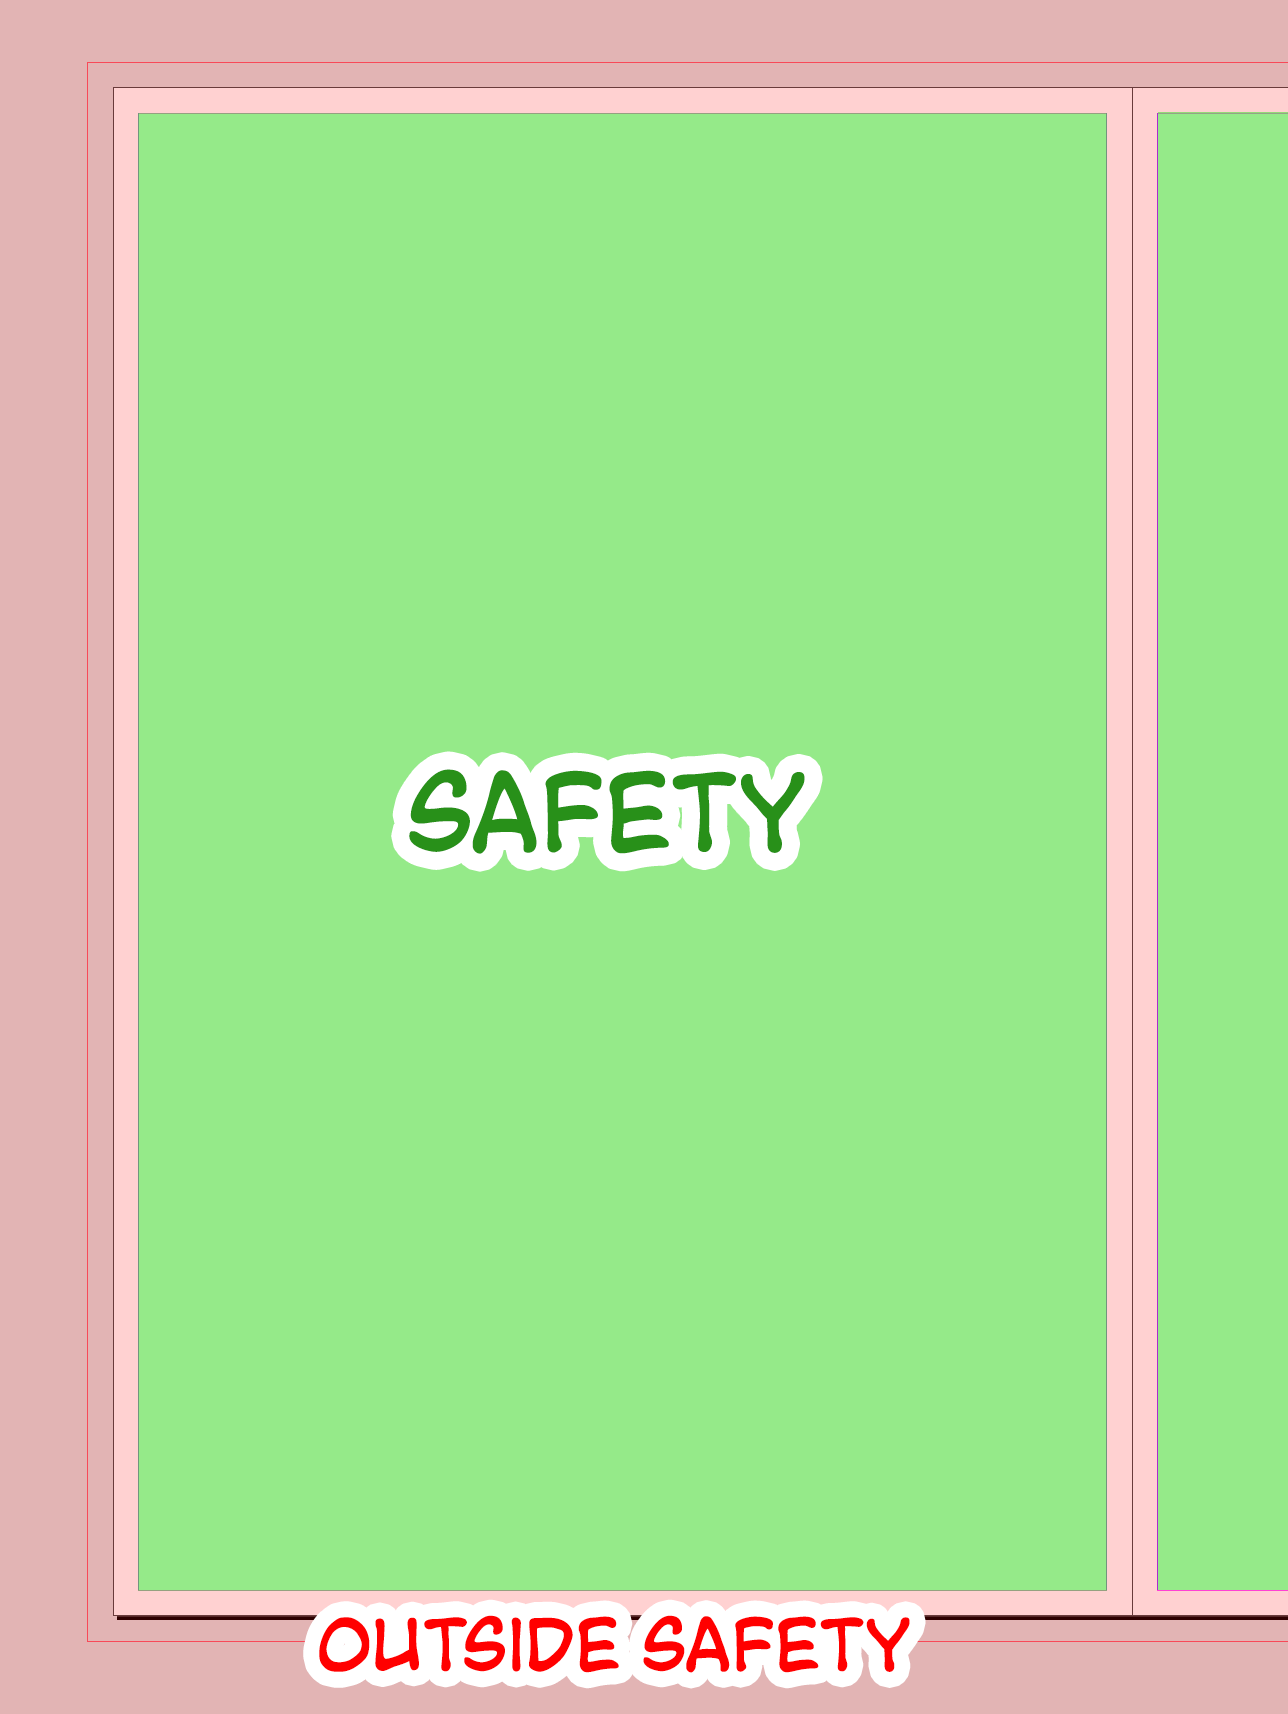
If you're provided a template from your publisher, or you use the Initialize Document script below, you may see additional guides on the inside of each page. This is the Text Safety. Its purpose is to prevent text from being at the very very edge of a printed page.
Try your best not to place text beyond the text safety, but it's not mandatory. Every page and every project is different, so ask your editor if you're ever unsure.
Note: PDF Exports may change the color of the bleed, trim, and margin lines compared to how they appear as in InDesign. Sometimes proofreaders will mark corrections in the PDF referring to the color of the line, and you should figure out which line in InDesign this corresponds to.
The easiest way to place art is to use a script. Sometimes it doesn't work, but you should always try this first.
- Create a new document with the correct size specifications. (See Making a preset)
- Run Place Art.js. (See How to use scripts in InDesign)
- Select your art files from the selection menu.
- Wait for the art to be placed. You should see images appearing on the pages and links appearing in the Links Panel. If not, you might need to place the art manually.
NOTE: IF you notice that all of the pages have a black border around them, that's coming from your document settings. To fix this, open the Object Styles window, right-click on Basic Graphics Frame, select Edit "[Basic Graphics Frame]". Under Basic Attributes, select Stroke, and then select [None] to remove the stroke. Select OK, and the border should be gone from your frames.
- Create a new document with the correct size specifications. (See Making a preset)
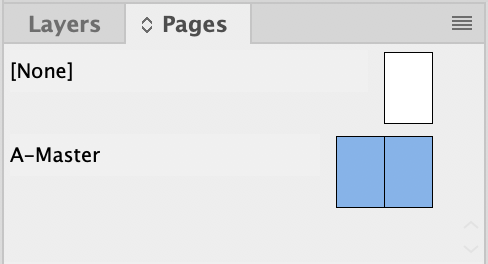
- From the Pages Panel (
Window > Pages), double-click on the spread for A-Master to bring you to the master spread.
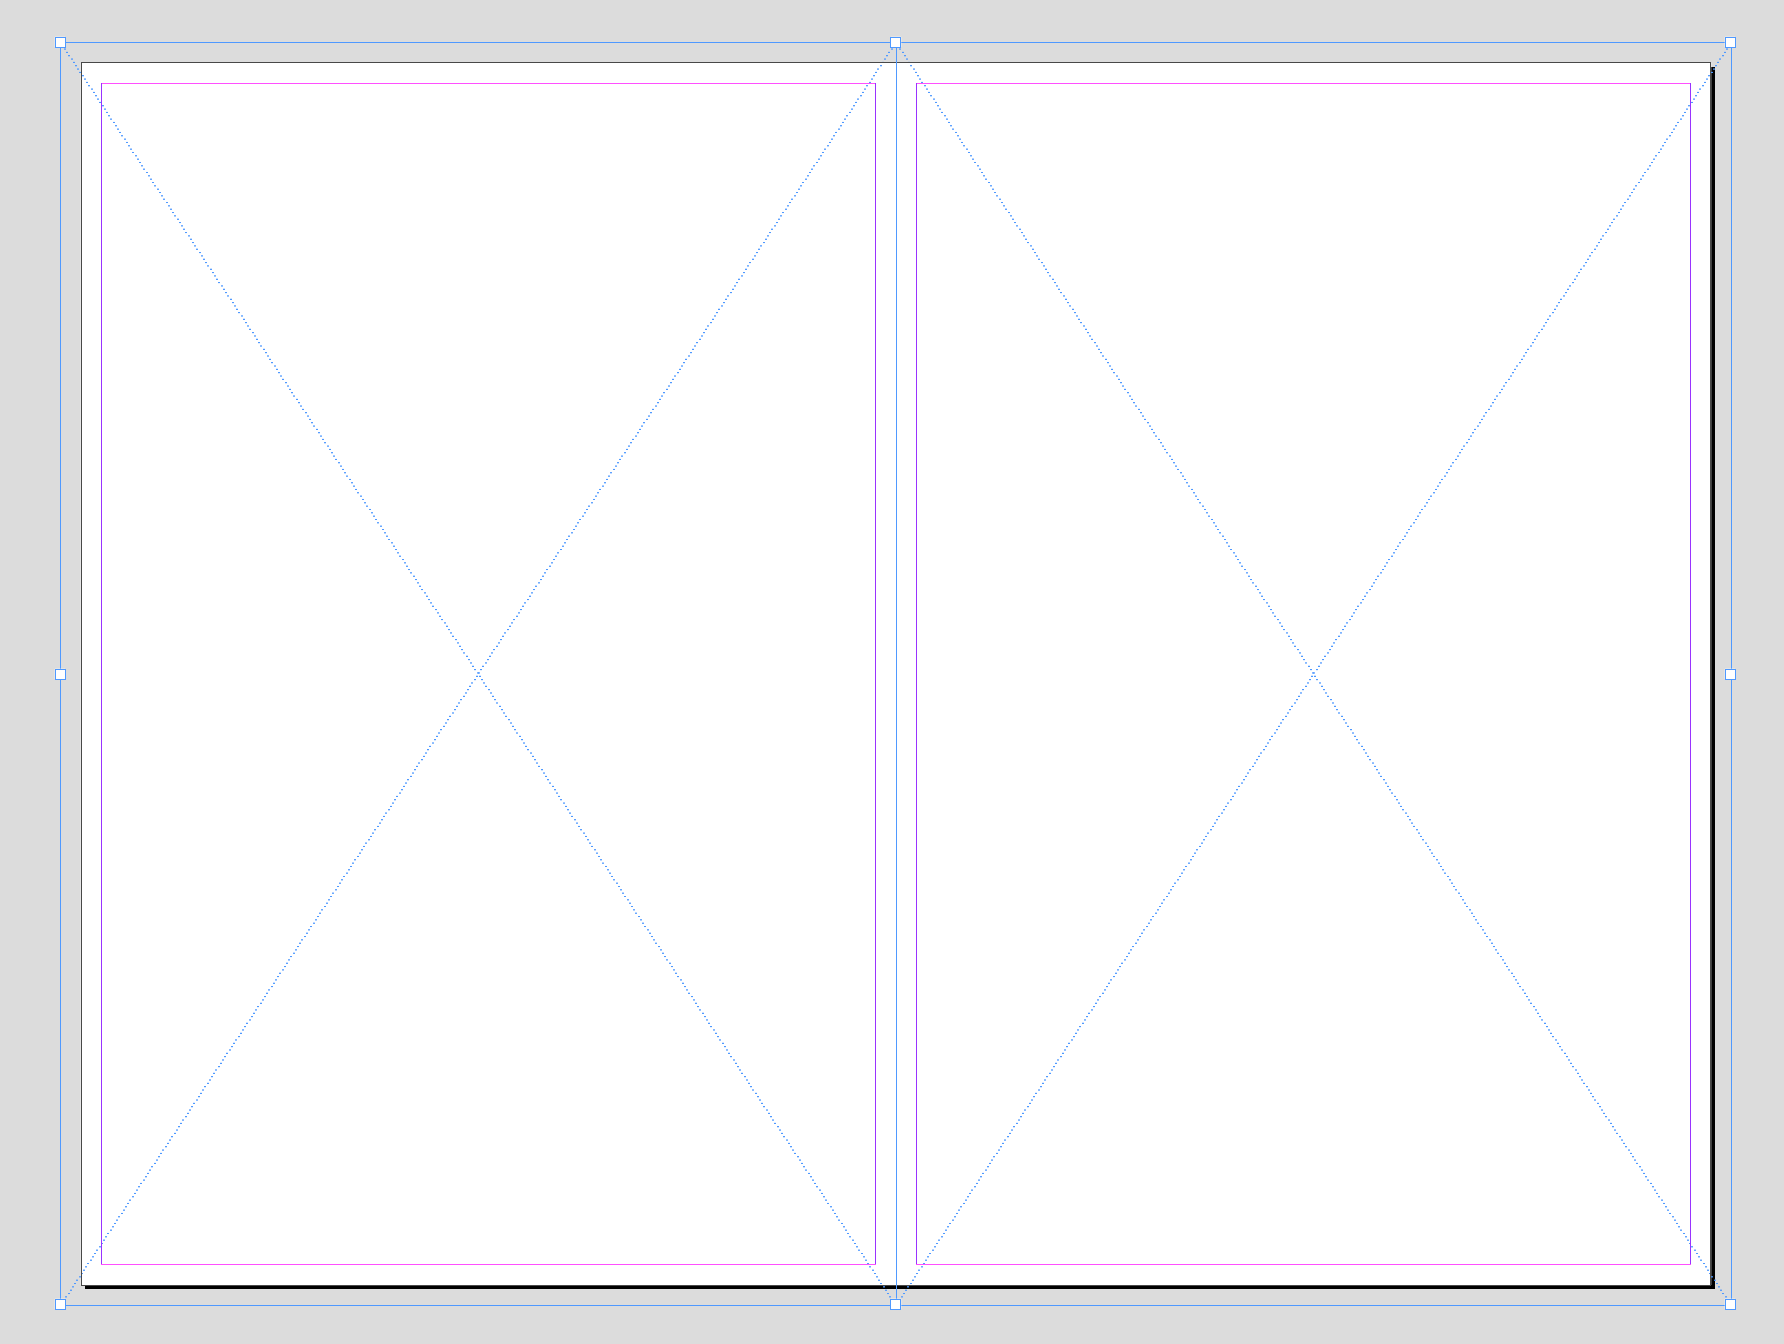
- In the Layers Panel, make sure you have the Art layer selected (or whichever layer you want to place the art on). Using the Rectangle Frame Tool (
F), draw a frame around both pages on the spread. Make sure to the frames go all the way to the bleed lines.
- Use the Pages Panel again to return to Page 1. (Alternatively,
CMD+Jopens the Go to Page feature, where you can type in1) - Make sure that your InDesign document has the correct number of pages. Use
Layout > Pages > Insert Pages...to insert more pages, making sure to apply the A-Master master we just edited. - Use
File > Place...(CMD+D), and select the folder containing the art you want to place.- if the art is in multiple folders, you can either:
- consolidate all the art into one folder
- repeat Steps 6 - 7 multiple times for each folder
- if the art is in multiple folders, you can either:
- With your art loaded, you can click the frame we created on each page to place it. The art should be named to match the page number it corresponds to, though not always. Consult your reference book/PDF to make sure all your pages are placed as intended.
Some tips:
-
Cmd+Zworks in this tool, so feel free to use it if you mess up. - If your file is set up Right to Left, you can use the Links Panel to confirm the art is placed on the right page (e.g. 012.tif should show that it's placed on page 12 in the document)
-
This guide assumes you are not printing at the same dimensions as the original Japanese, and that you aren't working off of the original INDD files. This process is varies across publishers and even across editors, so take this section with a grain of salt.
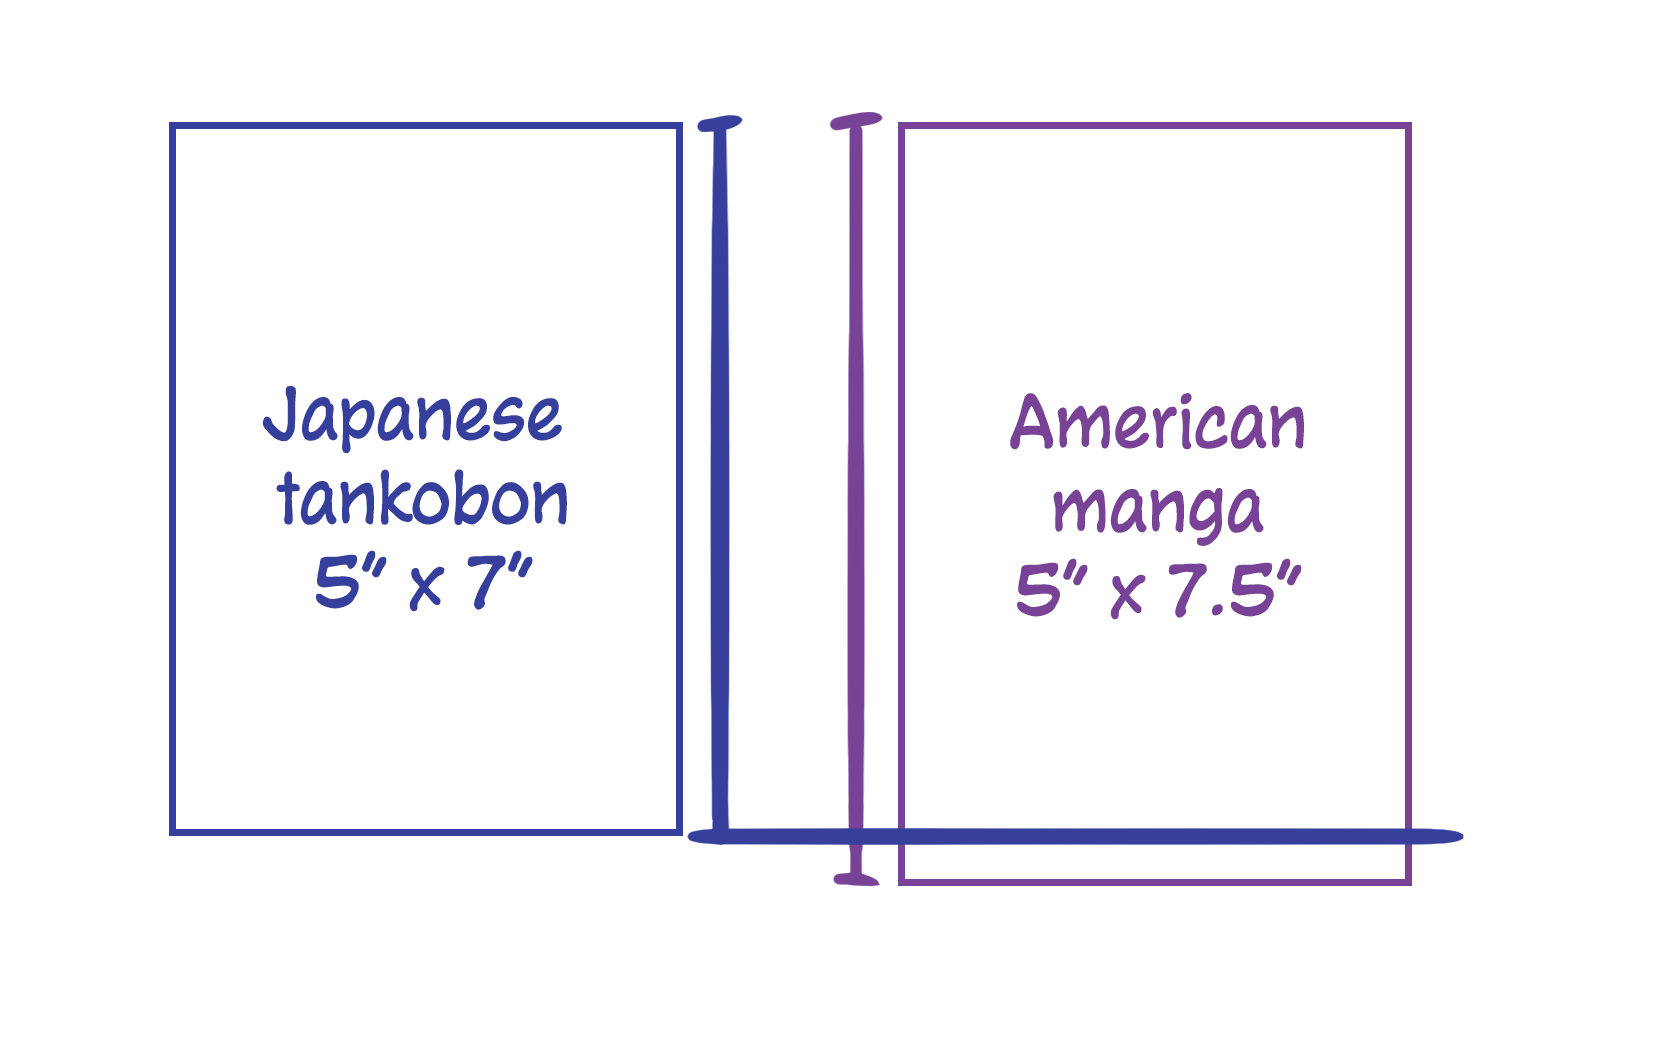
American book sizes generally have a skinnier dimension compared to a Japanese tankobon, and some art doesn't have much leeway in the bleed to allow you to move the page around. A perfect 1:1 with the Japanese edition isn't always going to happen, but try your best and ask your editor for guidance.
Consider, for example, how a book originally published as 5" x 7" will have to be scaled up to be able to meet the bleed on 5" x 7.5" trim.
- After art files have been placed correctly across the book, select a spread to use as your reference. Try to pick a spread that has a panel composition representative of most pages in the book.
- Use the Selection Tool (
V) to select the art inside of the frame (either double-click, or single-click the concentric circle icon that appears as you hover over the frame). - Scale the art using the Scale X Percentage tool at the top of the window. We will adjust the exact position later, so just focus on getting a good scale size. While scaling, these dimensions should always be constrained proportionally, and therefore should always be the same percentage
- Determine a good scale to use across the whole book. You might need to test it out on a couple pages.
- Run Position.js. (See How to use scripts in InDesign)
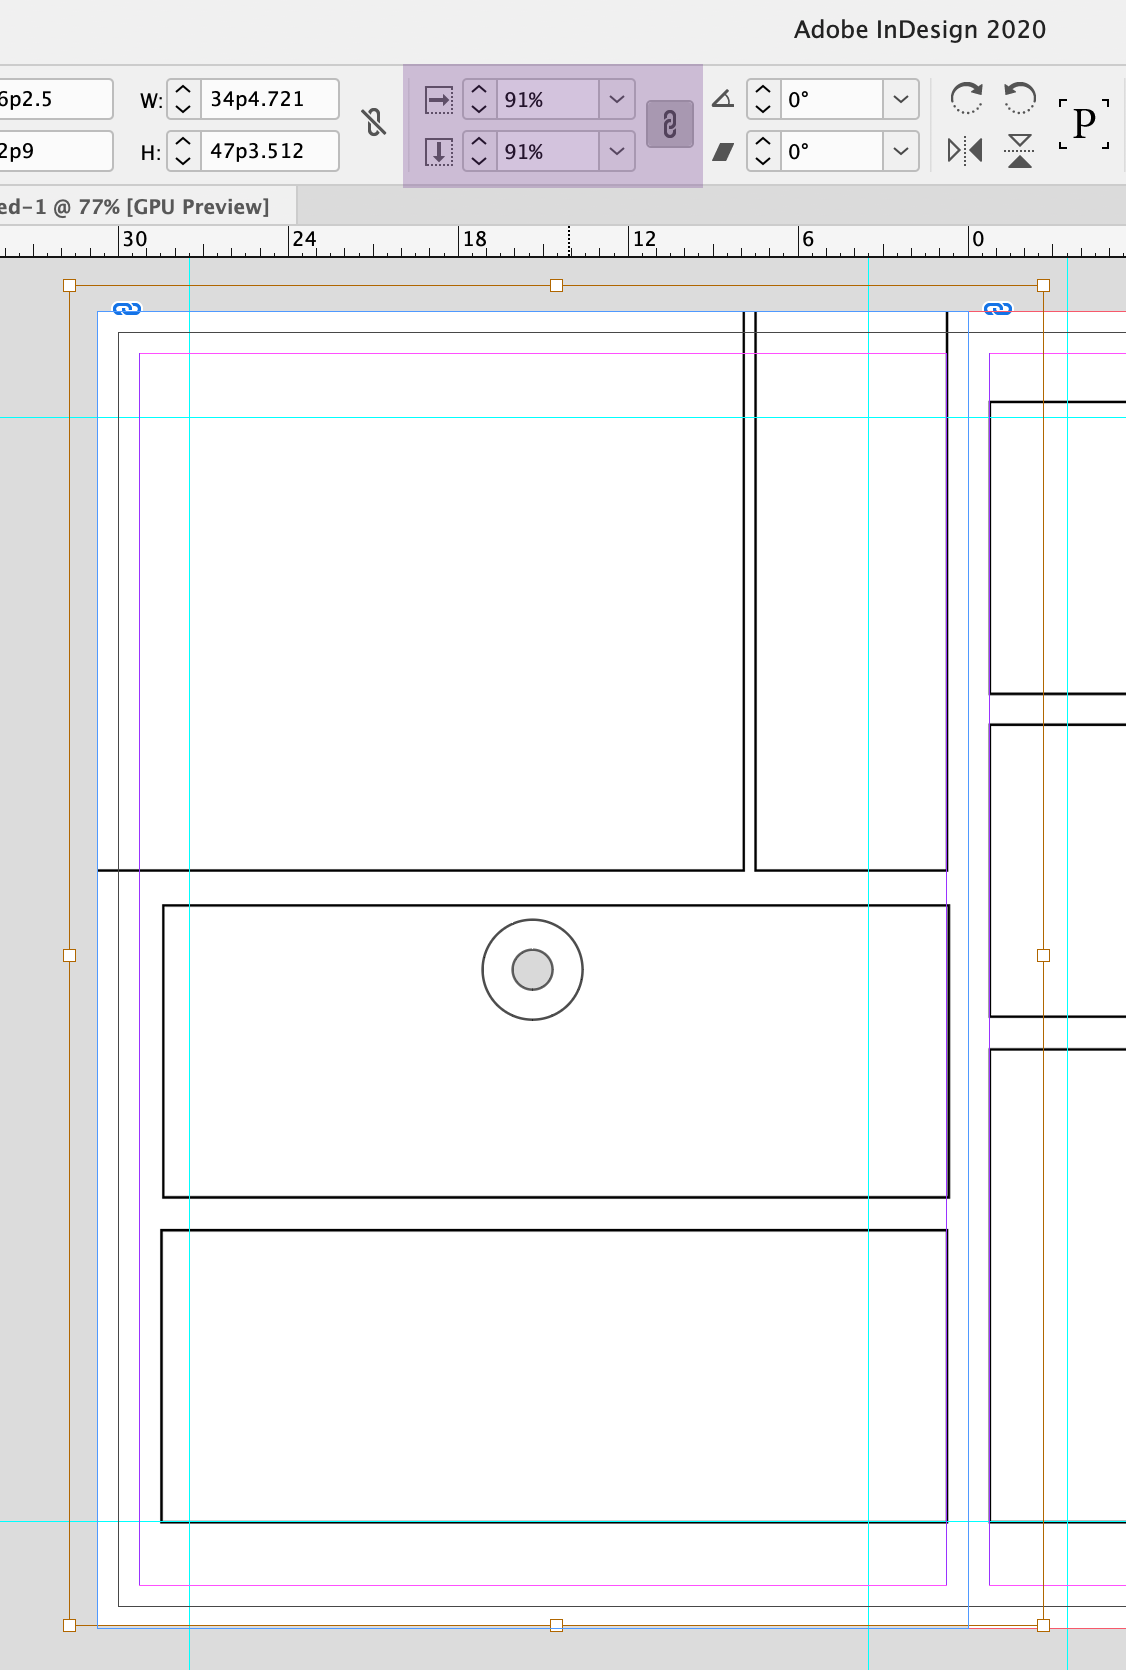
- Enter the scale(s) you calculated before, check the
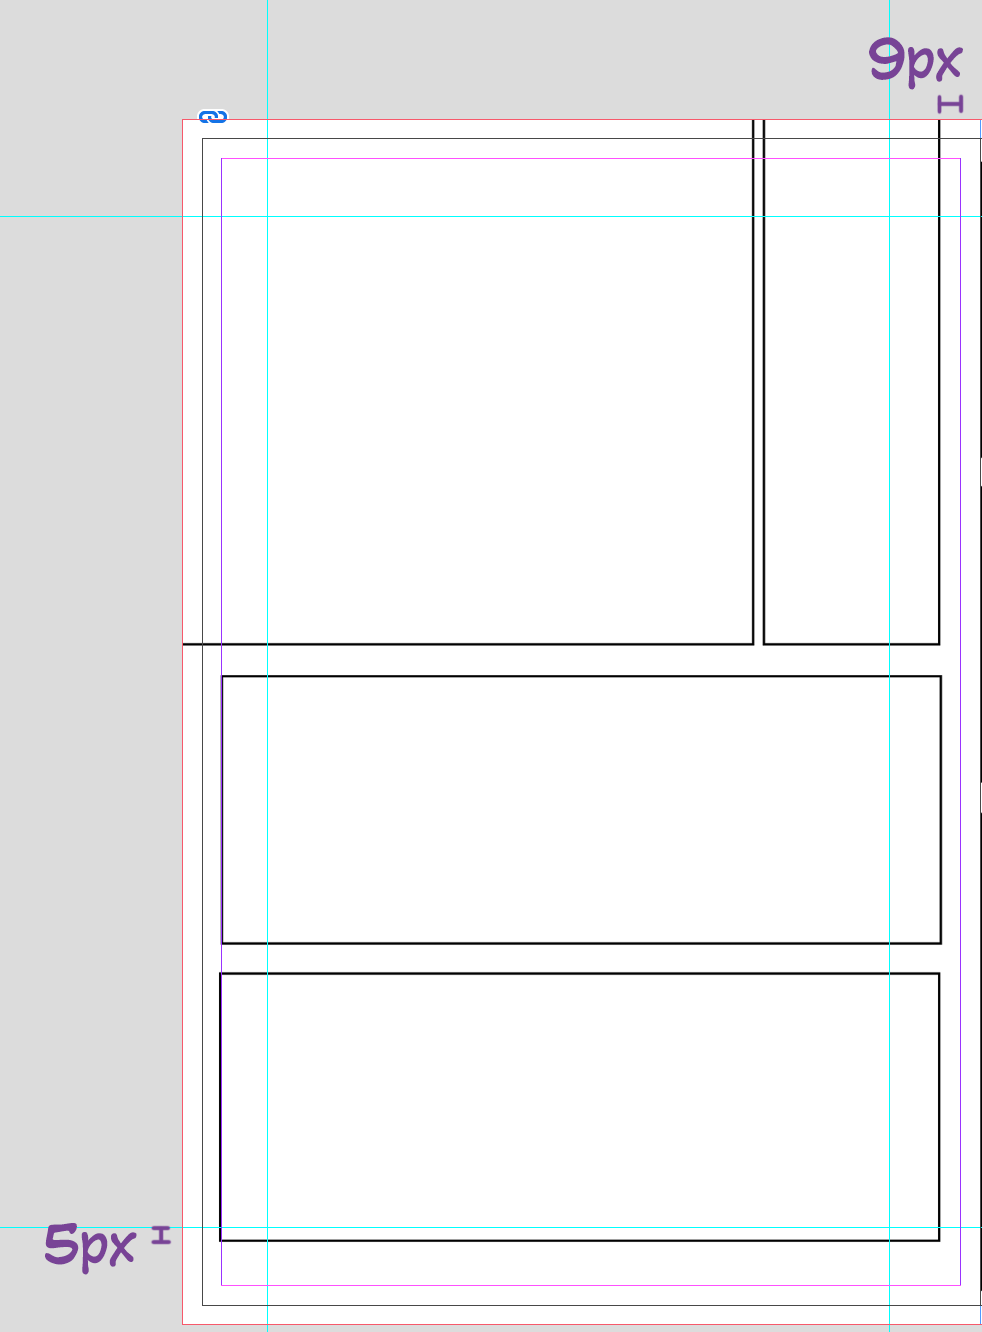
Scalecheckboxes, and hitOK. - Use Position.js in combination with trial and error to adjust the position of the pages. For example, though the scaling was correct on this page, it needed to be shifted 5px up and 9px right to meet the guides. Consistent placement makes page numbering easier.
- Go through the book spread by spread, manually adjusting pages as needed.
The steps below are done so that all of the odd pages are sized, and then all of the even pages are sized.
- Determine a good scale to use across the whole book. You might need to test it out on a couple pages.
- On the first odd-numbered page, use the Selection Tool (
V) to select the art inside of the frame (either double-click, or single-click the concentric circle icon that appears as you hover over the frame). - Go to
Object > Transform > Scale..., and enter the scale percentage you calculated. Make sure theConstrain proportions for scalingis turned on. - (optional) Go to
Object > Transform > Move, and nudge the horizontal and vertical position so that the trim matches your reference book/PDF. - Go to the next page down (the next odd page), select the art frame as in Step 2, and go to
Object > Transform Again > Transform Sequence Again(alt + CMD + 4). - Repeat Step 5 for all the remaining odd pages.
- Repeat Steps 1-6, except for all the even pages now.
- Go through the book spread by spread, manually adjusting pages as needed.
Occasionally, you may be asked to resize a book that was lettered at the incorrect trim size. For example, the book may have been lettered as 5x7.5", but the final trim size actually needed to be 7x10". You can do this pretty quickly in InDesign.
If the book you're resizing hasn't already been lettered, you can skip to Change the Document Size.
NOTE: You should save a backup version of your document before you start any of these steps.
- Open the file in InDesign, and navigate to the base Master/Parent spread (
A-Masteris the default name in English InDesign) - Select the Page Tool from the toolbar. The keyboard shortcut is shift + P
- Select both the left and right pages of the Master spread.
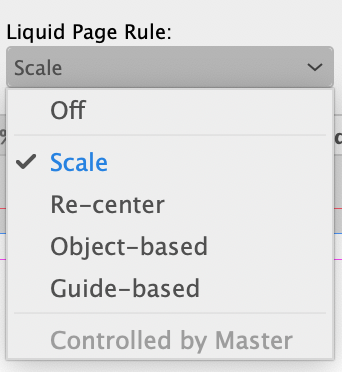
- In the top menu bar for the Page Tool, change the
Liquid Page Ruleto beScale:
- Repeat Steps 2 - 4 for any remaining Master Spreads that are not based on the first Master.
If you have a complicated InDesign file, you can manually set the liquid page rule for every page with this script.
- Open the file in InDesign.
- Run this script (See How to use scripts in InDesign. You may need to save this as a file like
Set Liquid Page Rule to Scale.js):
app.activeDocument.pages.everyItem().layoutRule = LayoutRuleOptions.SCALE;After you've changed the liquid page rule to be "Scale" for every page in your document (see above), you can now resize the document
- Open the Document Setup by navigating to
File > Document Setup... - Change the Page Size, Margins, and Bleed settings as necessary. You might want to uncheck
Previewwhile you do this so that your computer doesn't slow down. - Press OK.
- Make sure that the resize operation performed as expected.
The document settings are the right size, but the art is off. How do I scale the art up/down by a couple percentage points?
Head to the section on Resizing a Lettered Page with Scripts for instructions on how to use Scale Pages.js
Only pages with the base Master applied scaled correctly, and all the other Masters' pages didn't scale. How do I make them all scale regardless of what Master is applied?
You need to start over from the beginning, and make sure you set the liquid page rule with a script this time. This will make sure that every page has the liquid page rule set to
Scale.
Is there a way to unlock all the items in the document so that they're scaled with the page?
Yes, you can run this script to unlock every page item in the document:
app.activeDocument.pages.everyItem().pageItems.everyItem().locked = false;You can also combine this with the liquid page rule script from above, like so:
app.activeDocument.pages.everyItem().pageItems.everyItem().locked = false;
app.activeDocument.pages.everyItem().layoutRule = LayoutRuleOptions.SCALE;Once a page has been lettered, adjusting the size and position of the art can be tricky in InDesign. All of the text on the page has to be scaled at the same time as the background image, but the base image frame should be kept the same size.
- Select everything on the page, dragging your mouse with the Selection Tool (
V,Escape). Hold shift and select the art inside of the base image frame.- (Optional) Use Select All on Page to do this automatically
- Use
Object > Transform > Scale...to change the scale of the page, andObject > Transform > Move...(or the Selection Tool and arrow keys) to shift the page around- (Optional) Set
Scale...to a Keyboard Shortcut for fast access
- (Optional) Set
This method is essentially the same process as above, but the computer does everything for you.
- Run Scale Pages.js (See How to use scripts in InDesign)
- Lock any layers that you do not want to be adjusted with this script.
- In the popup, provide a factor by which to scale page items and a range of pages. This script ignores page binding settings, so page 1 to the script is Page 1 to InDesign.
- Click
OK.
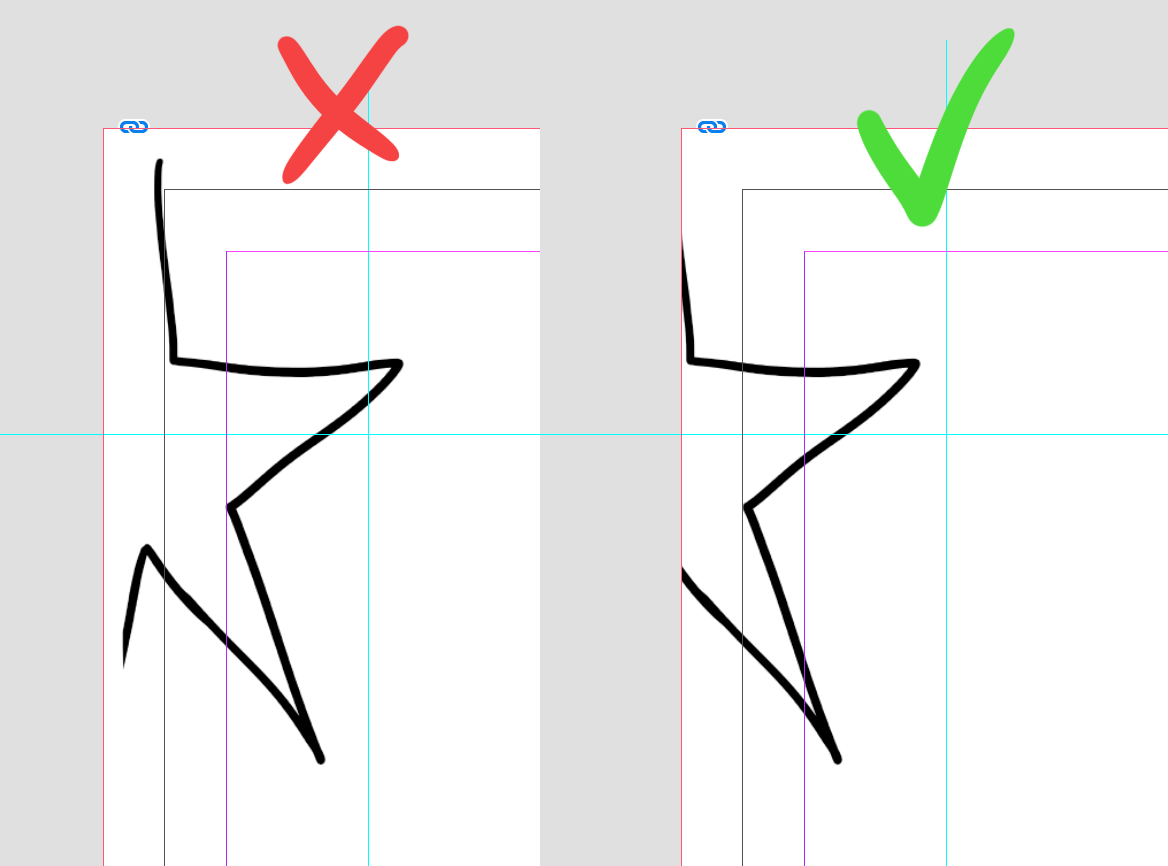
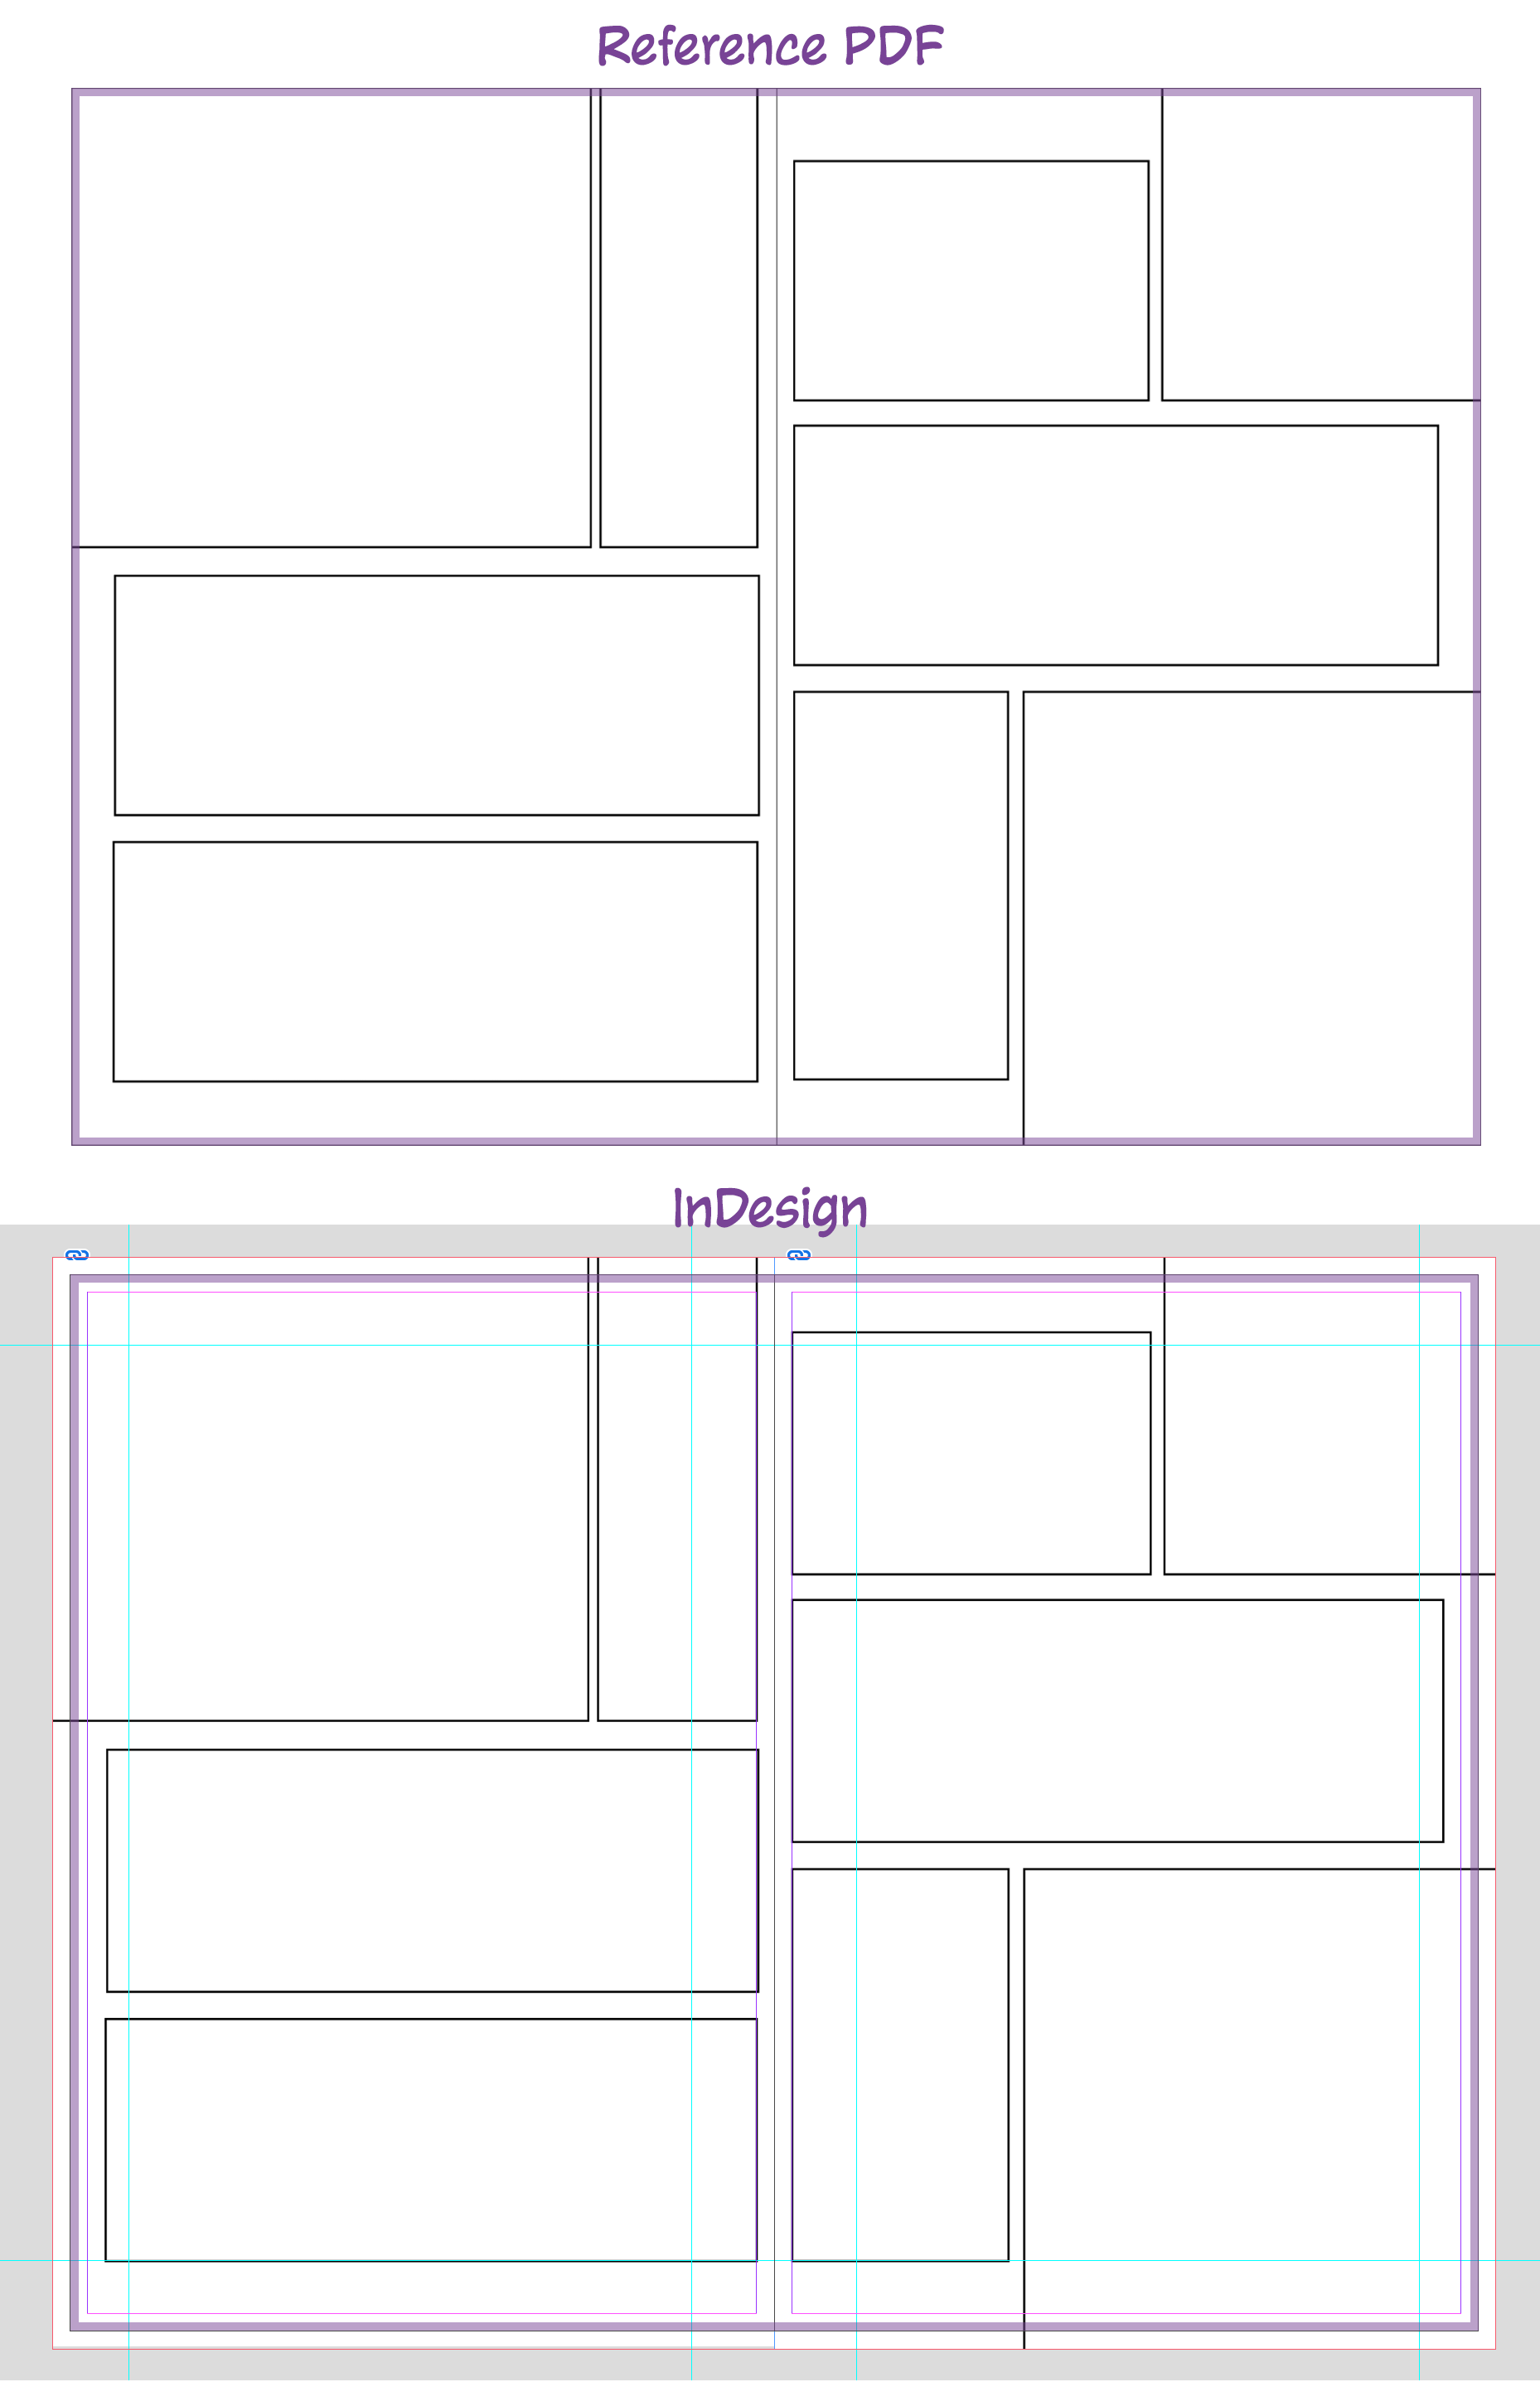
- Use the Japanese version provided to you (either physical or PDF) as a reference on where the art should be placed. You want the trim line in InDesign to match up with the edge of your reference.
- Do not let unfinished art show up. This can be halftone, lineart, panel borders, etc. Everything showing inside of the bleed line should be finished art.