Simple, Free, and Reliable Website Hosting via GitHub Pages - sahajss/knowledge_base GitHub Wiki
Why Website Hosting?
One of my first aspirations upon taking a Web App Development course was creating and maintaining a personal website. When I finished the actual coding behind my own, I was surprised to find that there was no way to easily host it on a customized domain. A few popular services such as Weebly and Wordpress require you to use their personal templates and do not allow you to upload your own source code. While I do love that us TJ students have access to our "https://www.tjhsst.edu/~2016yourname/" domains, I had a few issues with implementing a custom URL, such as jakecui.com. That is the main motivation behind this piece; below is a simple guide on how to easily implement a custom domain on a website hosted on GitHub pages. While GitHub does have a lengthy tutorial on this subject, I hope this quick and dirty entry will be able to benefit you guys in your research and personal endeavors.
Note: This tutorial assumes that you have created your own website and published it onto GitHub.
Step 1: Purchasing your custom domain
The obvious first step is finding and purchasing the domain you want to use. An excellent existing service for this is Namecheap, which actually has existing implementation with GitHub pages. Simply search up your domain of interest, and purchase it. 
Step 2: CNAME
Once you have purchased your domain, you will have to include a CNAME file on your GitHub directory specifying the domain. This image was found from another Namecheap tutorial that goes into much detail regarding CNAME implementation and can be found here.
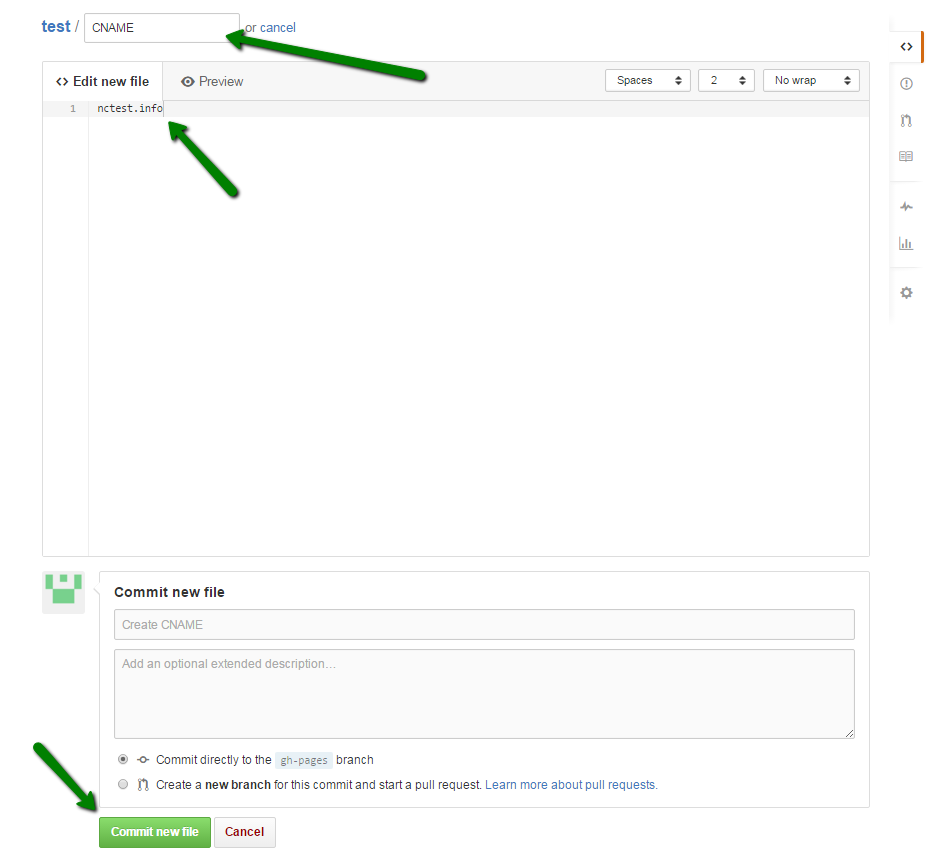 Assuming you bought the domain test.info on Namecheap, you would simply include a file titled "CNAME" inside of your GitHub repo. Inside that file, the only text you would include would be your actual URL.
Step 3: Linking up Namecheap
Here's where the process gets somewhat tedious. You'll have to head to your Namecheap account where you purchased your domain, and click the "Manage" button next to your domain. Then, you'll have to select "Advanced DNS" where you will have to add the following three domains:
- Type: "A Record" || Host: "@" || Value: "192.30.252.153"
- Type: "A Record" || Host: "@" || Value: "192.30.252.154"
- Type: "CNAME Record" || Host: "www" || Value: "Your username.github.io"
And that's all! After you've completed these steps, it usually will take a while (up to thirty minutes I believe) for Namecheap to register your new domain. However, once you actually try viewing your custom domain, it will pull up your website hosted on GitHub.