React ~ Testing ~ Cypress - rohit120582sharma/Documentation GitHub Wiki
End-to-end testing is a technique that tests the entire software product from beginning to end to ensure the application flow behaves as expected. It defines the product’s system dependencies and ensures all integrated pieces work together as expected.
Cypress has two ways to share common code commands and tasks
Cypress comes with its own API for creating custom commands and overwriting existing commands. The built in Cypress commands use the very same API that's defined below.
A great place to define or overwrite commands is in your cypress/support/commands.js file.
Cypress.Commands.add('login', (email, pw) => {})
Cypress.Commands.overwrite('visit', (orig, url, options) => {})
Execute code in Node via the task plugin event.
// in plugins file
module.exports = (on, config) => {
    on('task', {
        log(message) {
            console.log(message)
            return null;
        },
    });
}
With Cypress we can have a comparison of screenshots as output from the tests. Typically it takes an image snapshot of the entire application under test or a specific element, and then compare the image to a previously approved baseline image. If the images are the same (within a set pixel tolerance), it is determined that the web application looks the same to the user. If there are differences, then there has been some change to the DOM layout, fonts, colours or other visual properties that needs to be investigated.
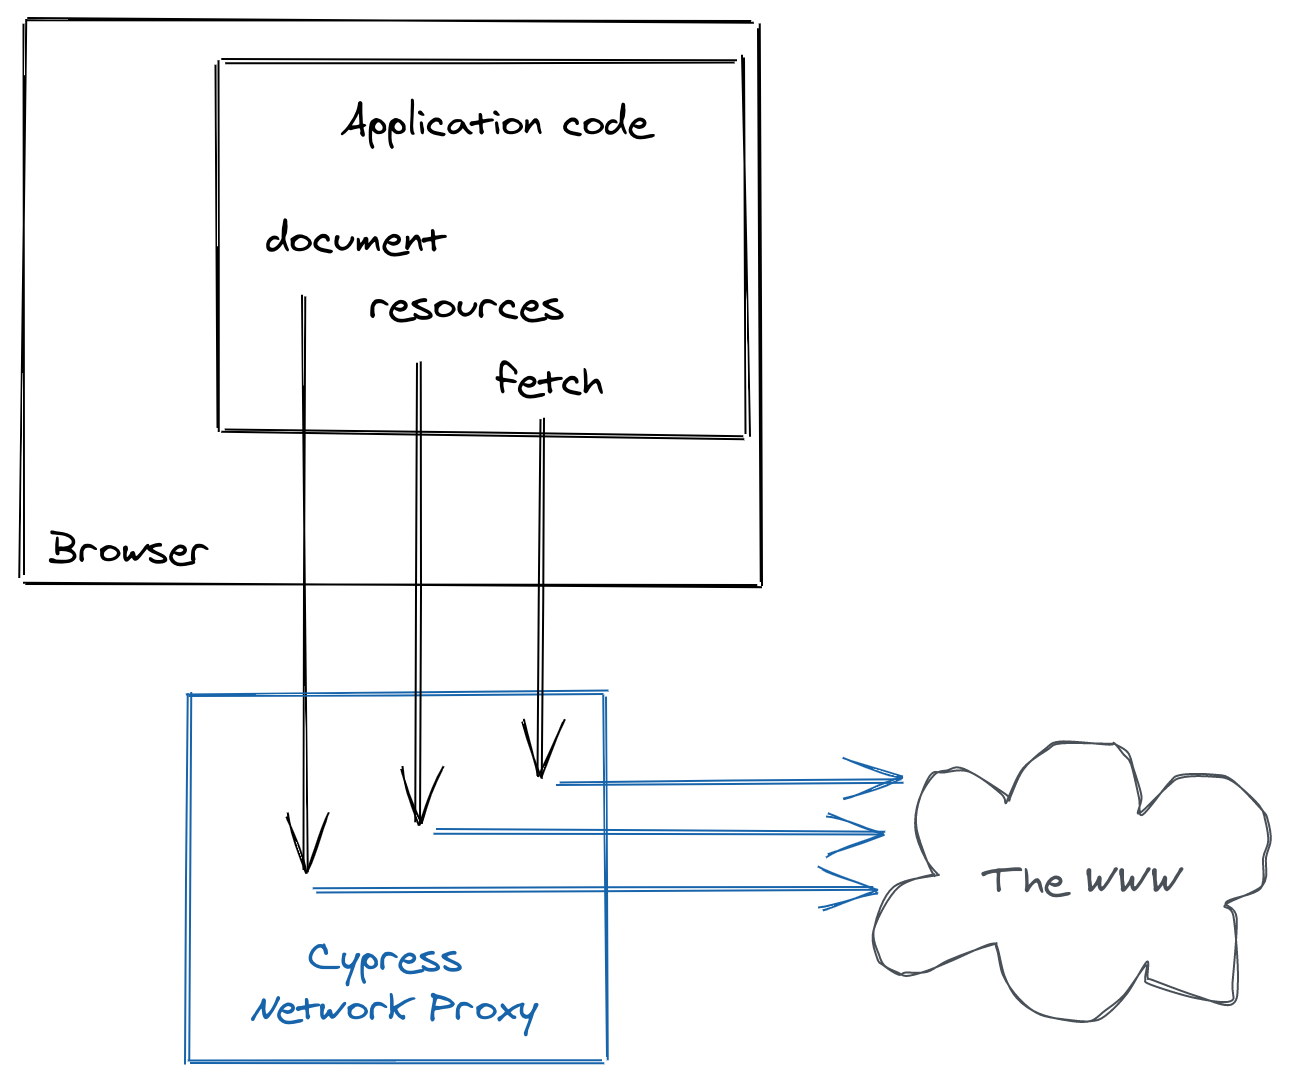
With Cypress we can intercept network requests and stubbing the server response to test following things:
- Application making a request to the correct URL
- Application correctly processing the response
- Application inserting the results into the DOM
A diagram for flow and mechanism of network requests in Cypress:
To install cypress you just have to use this command
$ npm install cypress
To do testing we have the following options:
-
To run all the tests in your day to day before a PR
$ npm run cypressWith this command the viewport is adapted to 1920x1080.
-
To develop a test or to debug a test
$ npm run cypress:openOpens the Cypress Test Runner (a GUI for running the tests where you can choose which tests or run all).
With this command you probably have problems with the viewport and taking snapshot. Use it only for developing or debugging tests. Develop all the tests with this command and at the end when you want to take snapshot use the first command.
The problem with the viewport is that Cypress takes the size of your browser when you do the tests. Also, Cypress removes a few pixels from where it puts its toolbar.
-
Run only one test
$ npx cypress run --browser chrome --headless --spec .\cypress\integration\38.spec.js -
Execute overwriting configuration
$ npx cypress run --config viewportWidth=2560,viewportHeight=1440$ npm run cypress -- --config baseUrl=https://community.alpha.zonehaven.com --env configFile=alpha,NODE_ENVIRONMENT=ALPHAWith this command you can set environment variables and overwrite hard code configuration in the code. Environment variables can be changed easily - especially when running in CI.
The cypress configuration is in the cypress.json file. If you want to change any of these settings, for example, changing environment to beta just edit this file.
{
    "projectId": "xf2vy7",
    "ignoreTestFiles": [
        "**/__snapshots__/*",
        "**/__image_snapshots__/*"
    ],
    "baseUrl": "http://localhost/",
    "defaultCommandTimeout": 60000,
    "viewportWidth": 1920,
    "viewportHeight": 1080,
    "downloadsFolder": "cypress/data/downloads/",
    "screenshotsFolder": "cypress/data/screenshots/",
    "snapshotsFolder": "cypress/data/snapshots/",
    "videosFolder": "cypress/data/videos/"
}
To take the snapshots we use the cypress-image-snapshot package which links the jest-image-snapshot image differentiation logic with a Cypress command.
{
    failureThreshold: 1,
    failureThresholdType: "percent",
    customDiffConfig: { threshold: 0.1 },
    capture: "viewport",
    allowSizeMismatch: true
}
The settings for each snapshot can be modified separately.
cy.matchImageSnapshot(options);