React Native ~ TestFlight: iOS Beta Testing - rohit120582sharma/Documentation GitHub Wiki
Apple defines two types of testers for TestFlight:
- Internal Tester: This is an iTunes Connect user that has an Admin, App Manager, Legal, Developer, or Marketer role with access to your app. This is usually a team member or a client for whom you’re developing an app. You can add up to 25 internal testers.
- External Tester: This is any user outside of your team that wants to test your app. An external tester has no access to your iTunes Connect account in any way, and can only download and install the app. You can add up to 10,000 external testers.
Before your external testers can test your app, you must submit your app to Apple for review, exactly as you would with a normal App Store submission. These reviews tend to go faster than normal app reviews, although you shouldn’t count on it, and once it’s approved, you can let external testers test your app.
Internal testers, on the other hand, are instantaneously notified about new builds as soon as they are uploaded and processed within iTunes Connect.
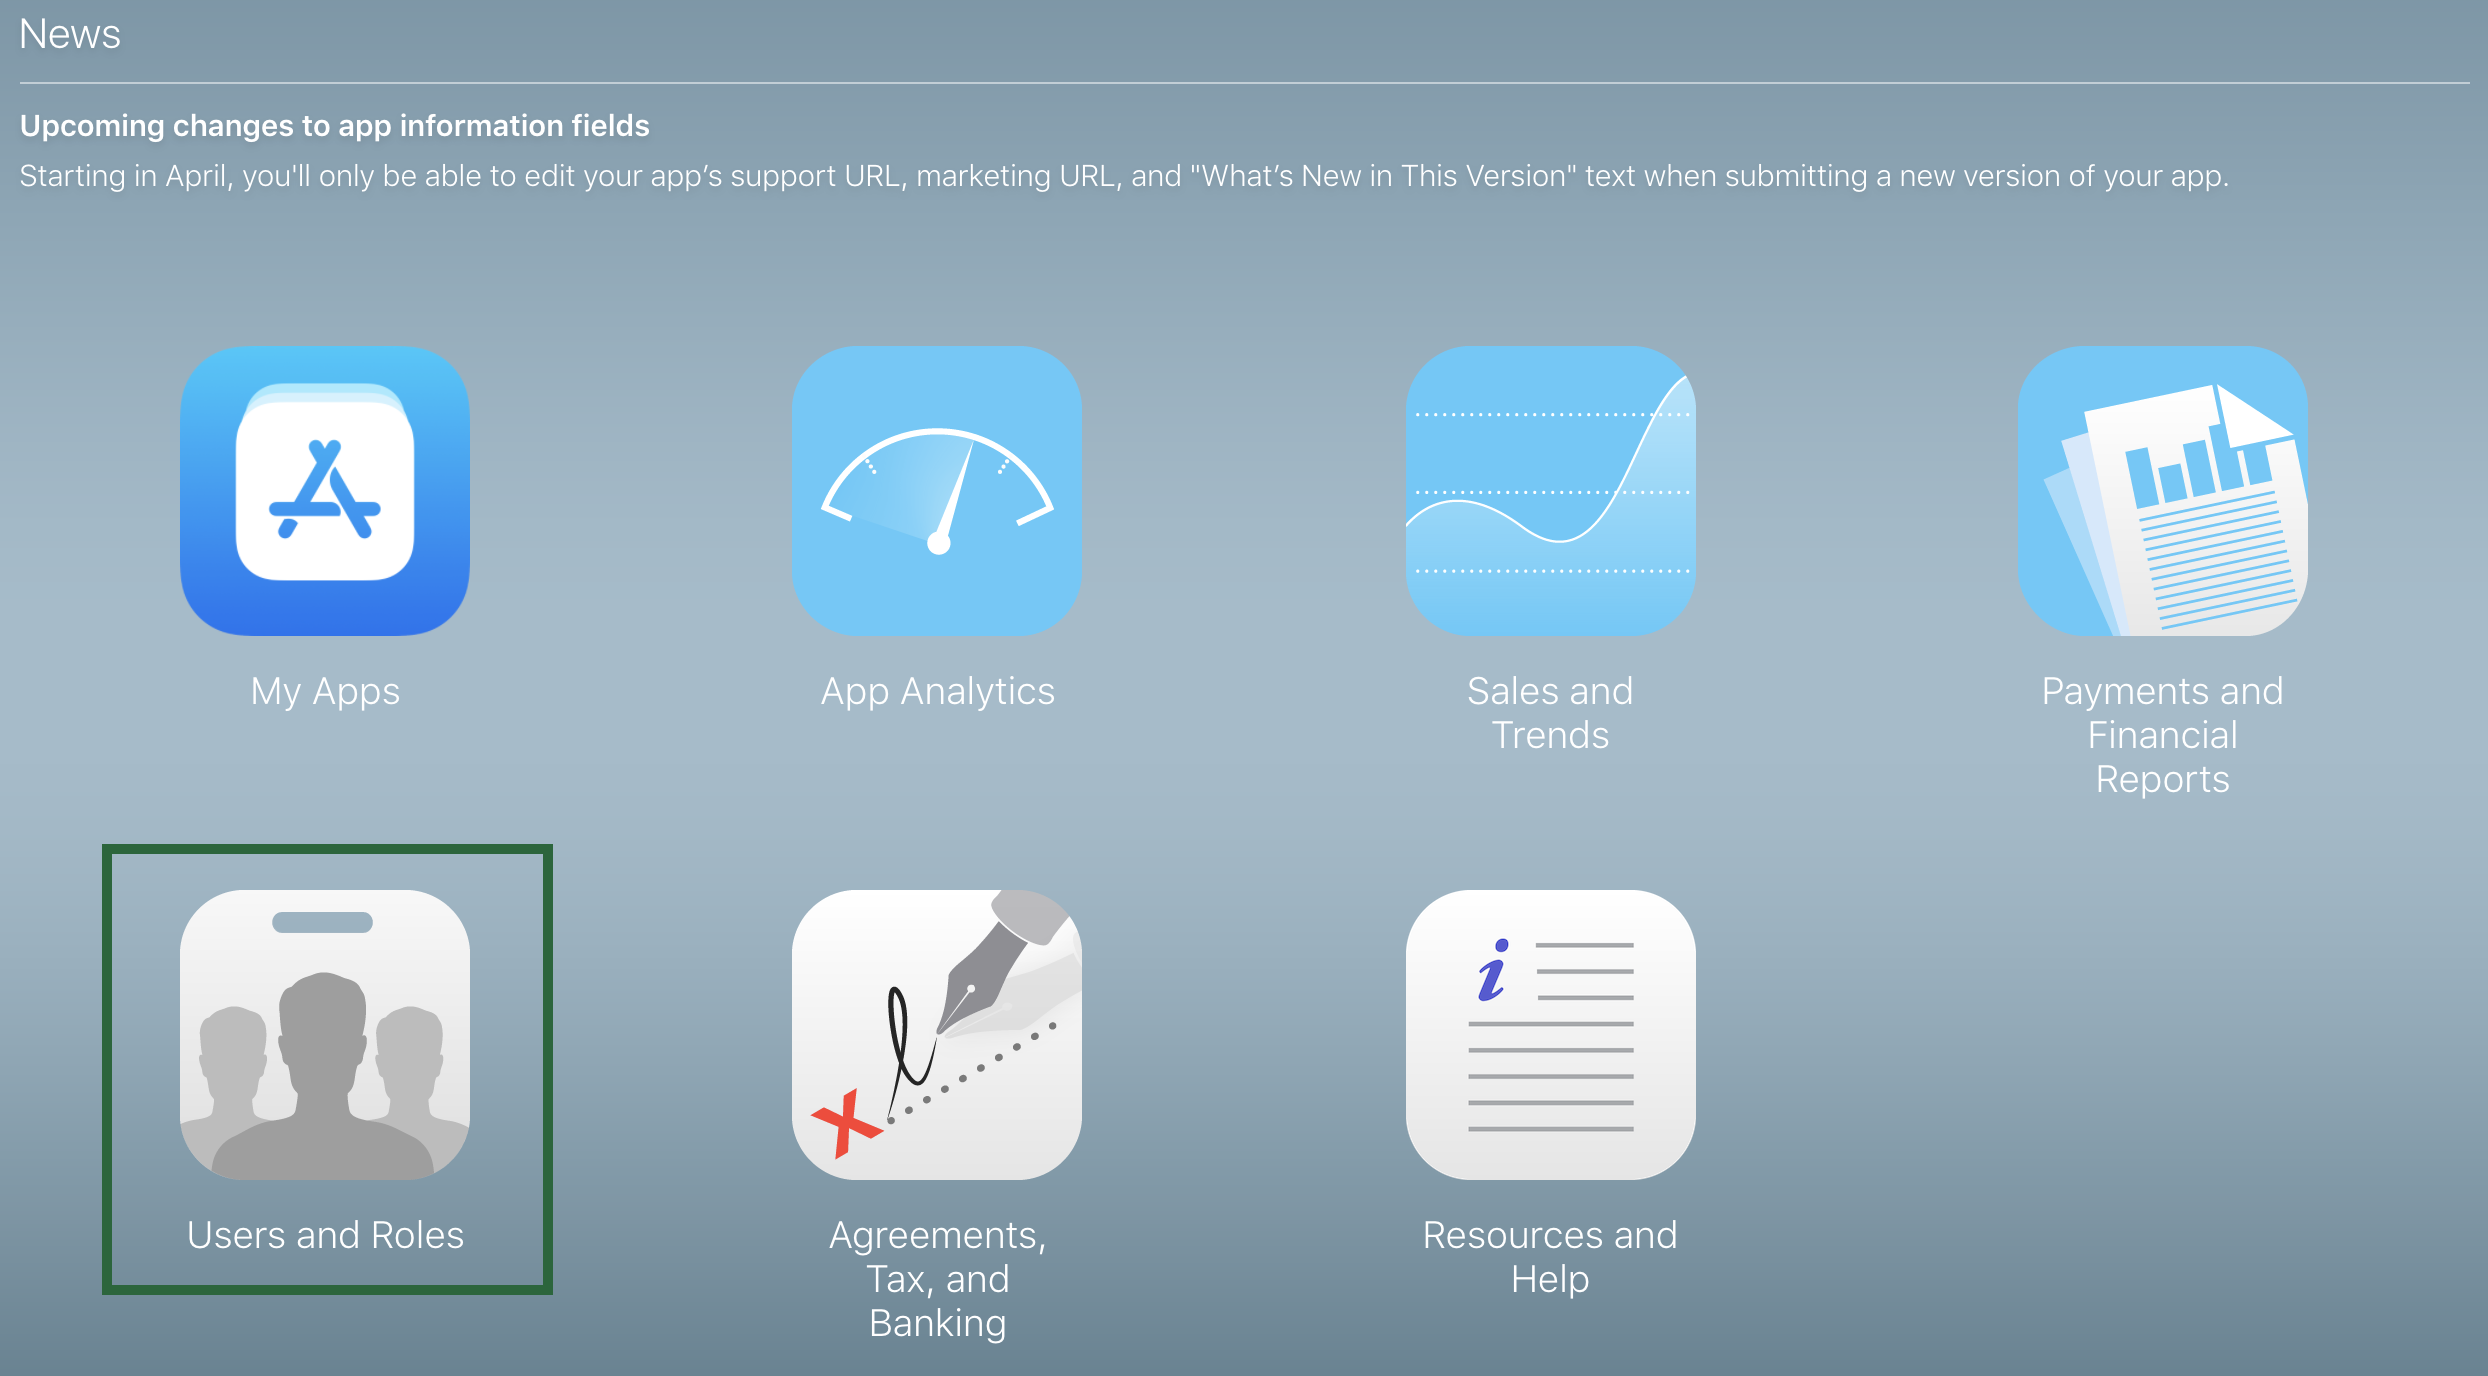
To add an internal tester, head to the Users and Roles section in iTunes Connect:
Note: If the email address entered is not associated with an Apple ID, your tester will have to create an Apple ID to accept the invitation. This only applies to Internal Testers as they need to access iTunes Connect.
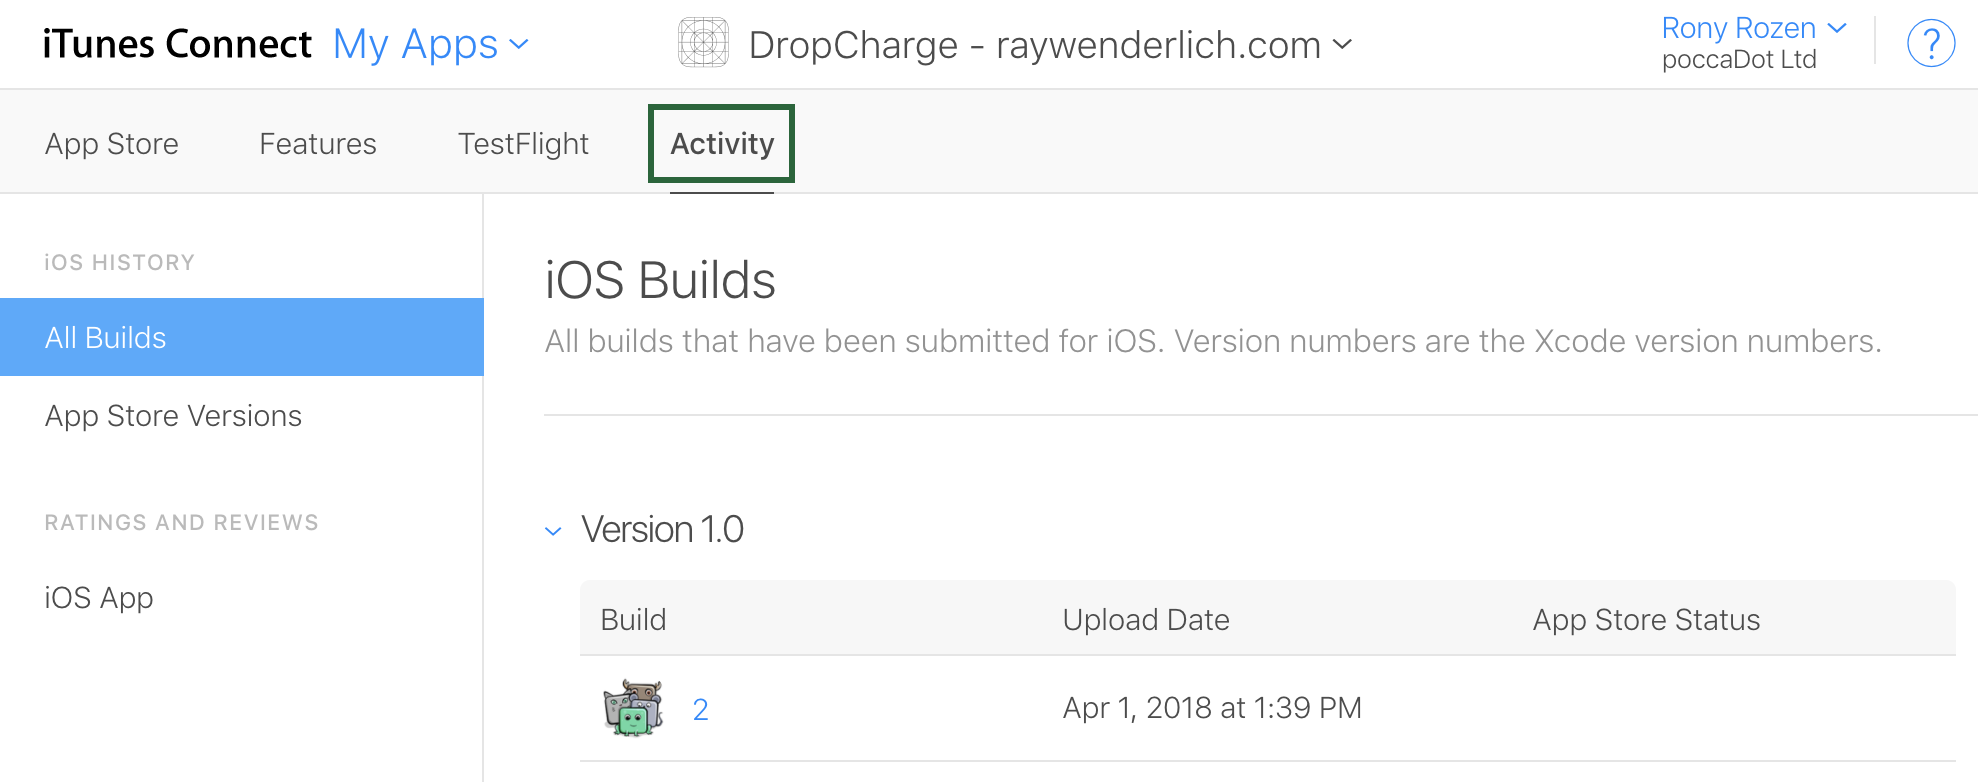
To start beta testing of your app, go to the My Apps section on the iTunes Connect home page and click on your app.
Select the Activity tab. This is where you’ll find the build you uploaded earlier.
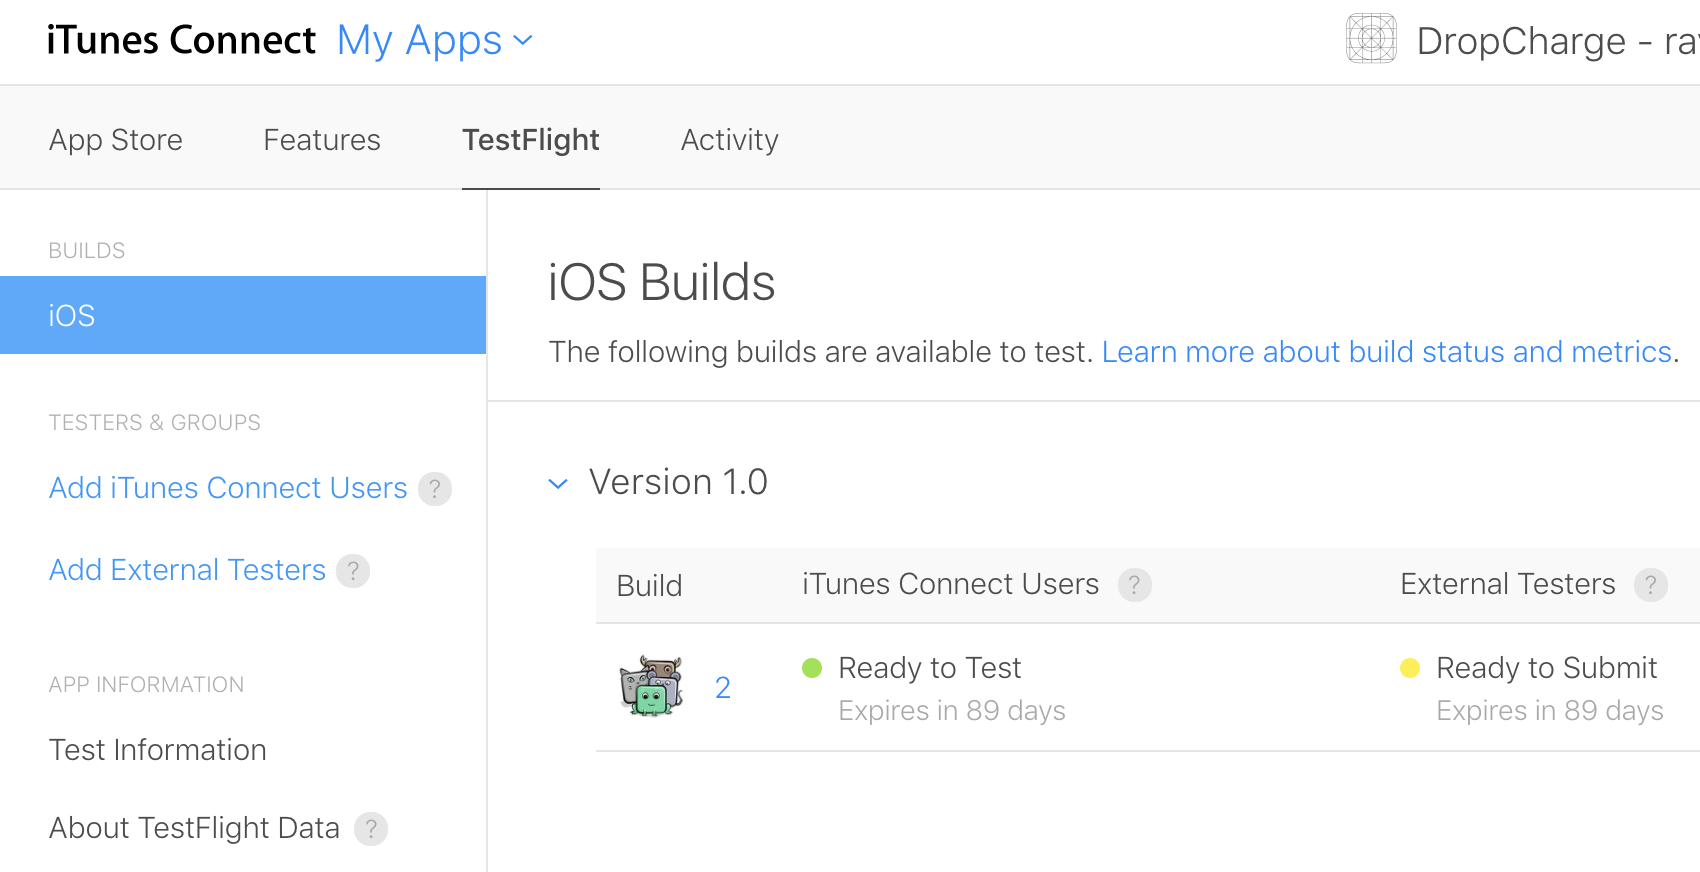
Next, click the TestFlight tab. Once you’re done, the build status will change to Ready to Test:
Next, click Add iTunes Connect Users in the left side menu. You’ll then see a list of your internal testers. Select the ones you’d like to add as internal testers for this build and click Add.
All selected testers now receive an email with a link to download and install this build via the TestFlight app.
First, click Test Information in the left side menu, and fill in all of the necessary information. At a minimum, this includes:
- Beta App Description
- Feedback Email
- Contact Information
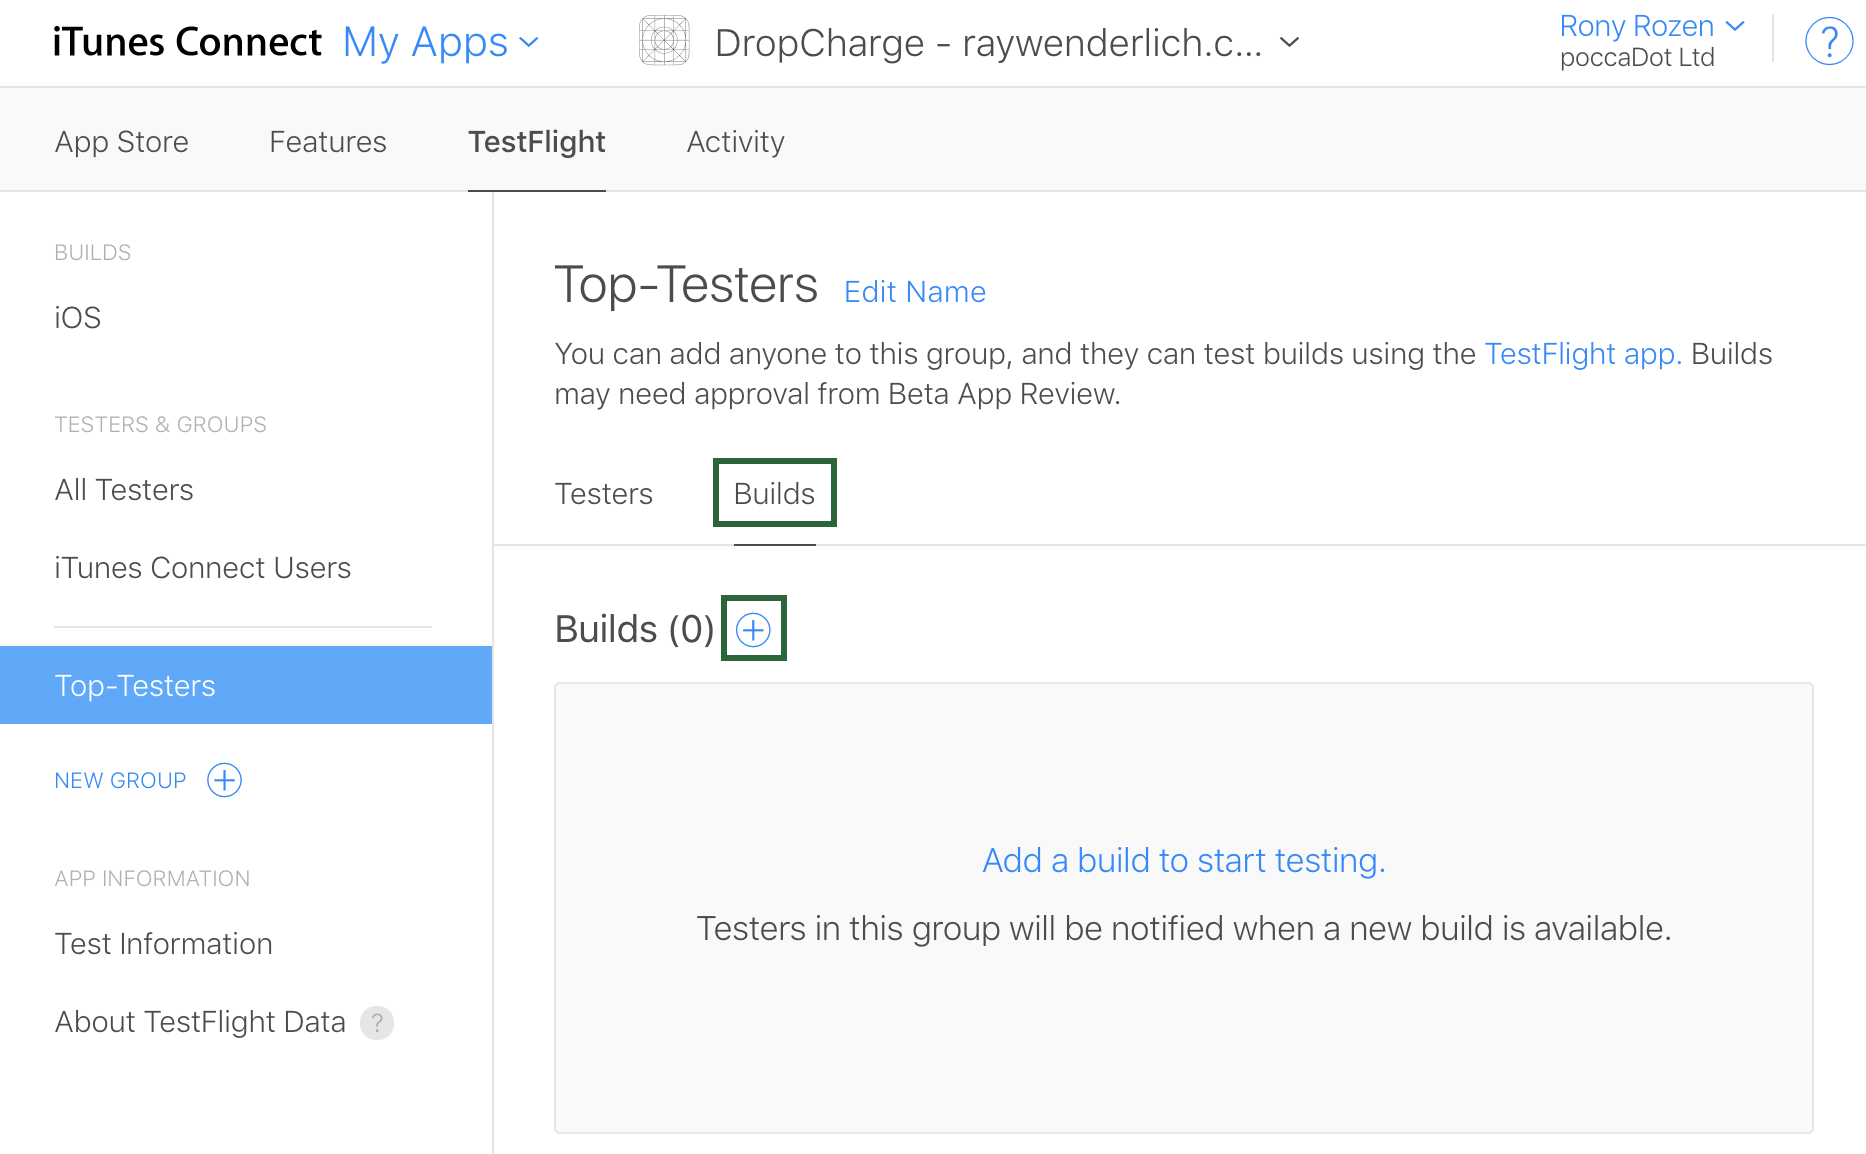
Now, click Add External Testers in the left side menu. iTunes Connect asks you to create a new testing group. Once you’ve created the group, you can start adding external testers to it. Click Add Testers in the pop-up.
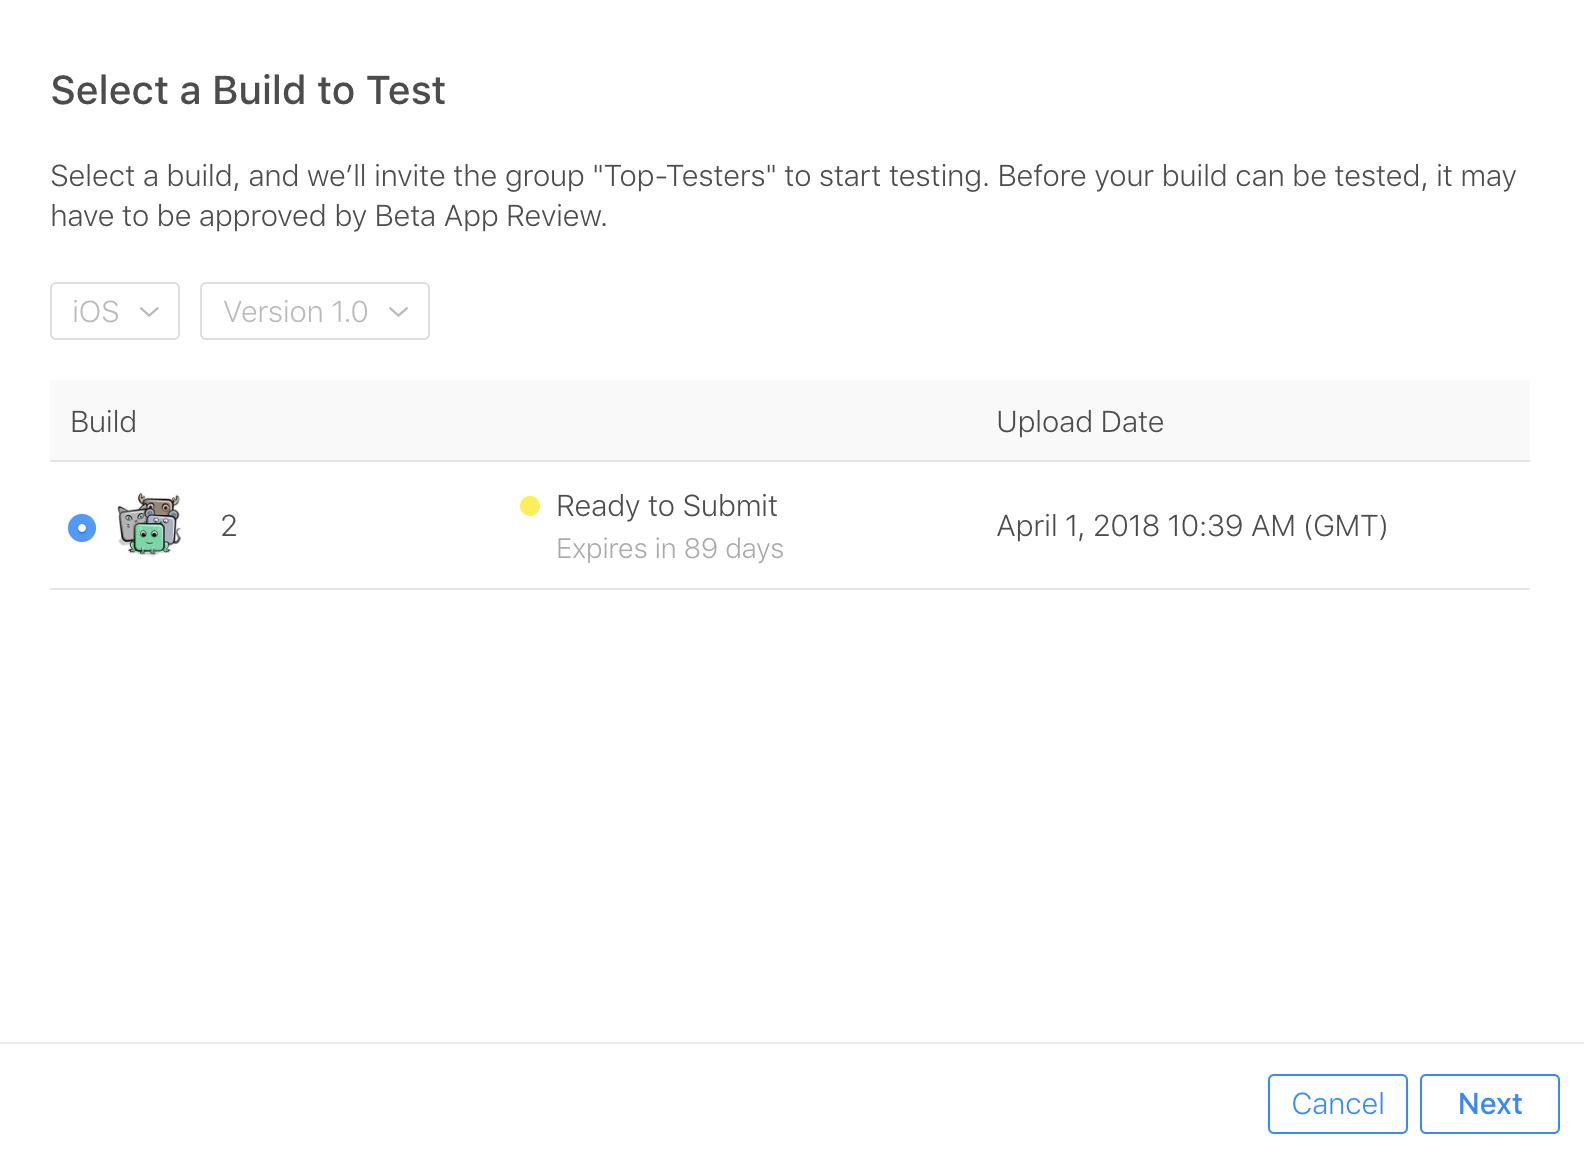
You now need to select a build for your external testers. On the Builds tab, click the + button. Then, select your build and click Next:
iTunes Connect checks the Automatically notify testers check box by default.
This section will walk you through the steps required from your tester in order to access the build you have just made available.
The TestFlight app is available on the AppStore. If you haven’t already, open the AppStore and search for TestFlight. Download the TestFlight app and launch it.
When a build becomes available, or when you add a new tester, the tester receives an invitation to test the build via TestFlight.
Open the email on your testing device, then click View in TestFlight. This will launch TestFlight and redeem the invitation using the Apple ID currently in use in the TestFlight app. You’ll then see the app preview page for your app.
Now tap INSTALL and the app will download and appear on your home screen! It’ll have an orange dot near the name in Springboard to indicate it’s a TestFlight install.
From now on, whenever a new version of this app is available, you’ll see a notification from TestFlight. All you need to do is update your app and run the latest version.