React Native ~ Splash Screen - rohit120582sharma/Documentation GitHub Wiki
- Go ahead and download Icon Set Creator. Alternatively you can use Ape Tools - Image Gorilla.
- Drag a 1024x1024 version of your icon onto the application and hit go.
- Find AppIcon in Images.xcassets folder in the main project folder and start dragging and dropping the icons on the appropriate placeholders (tiles).
-
Use Ape Tools - Image Gorilla link to generate splash screen
-
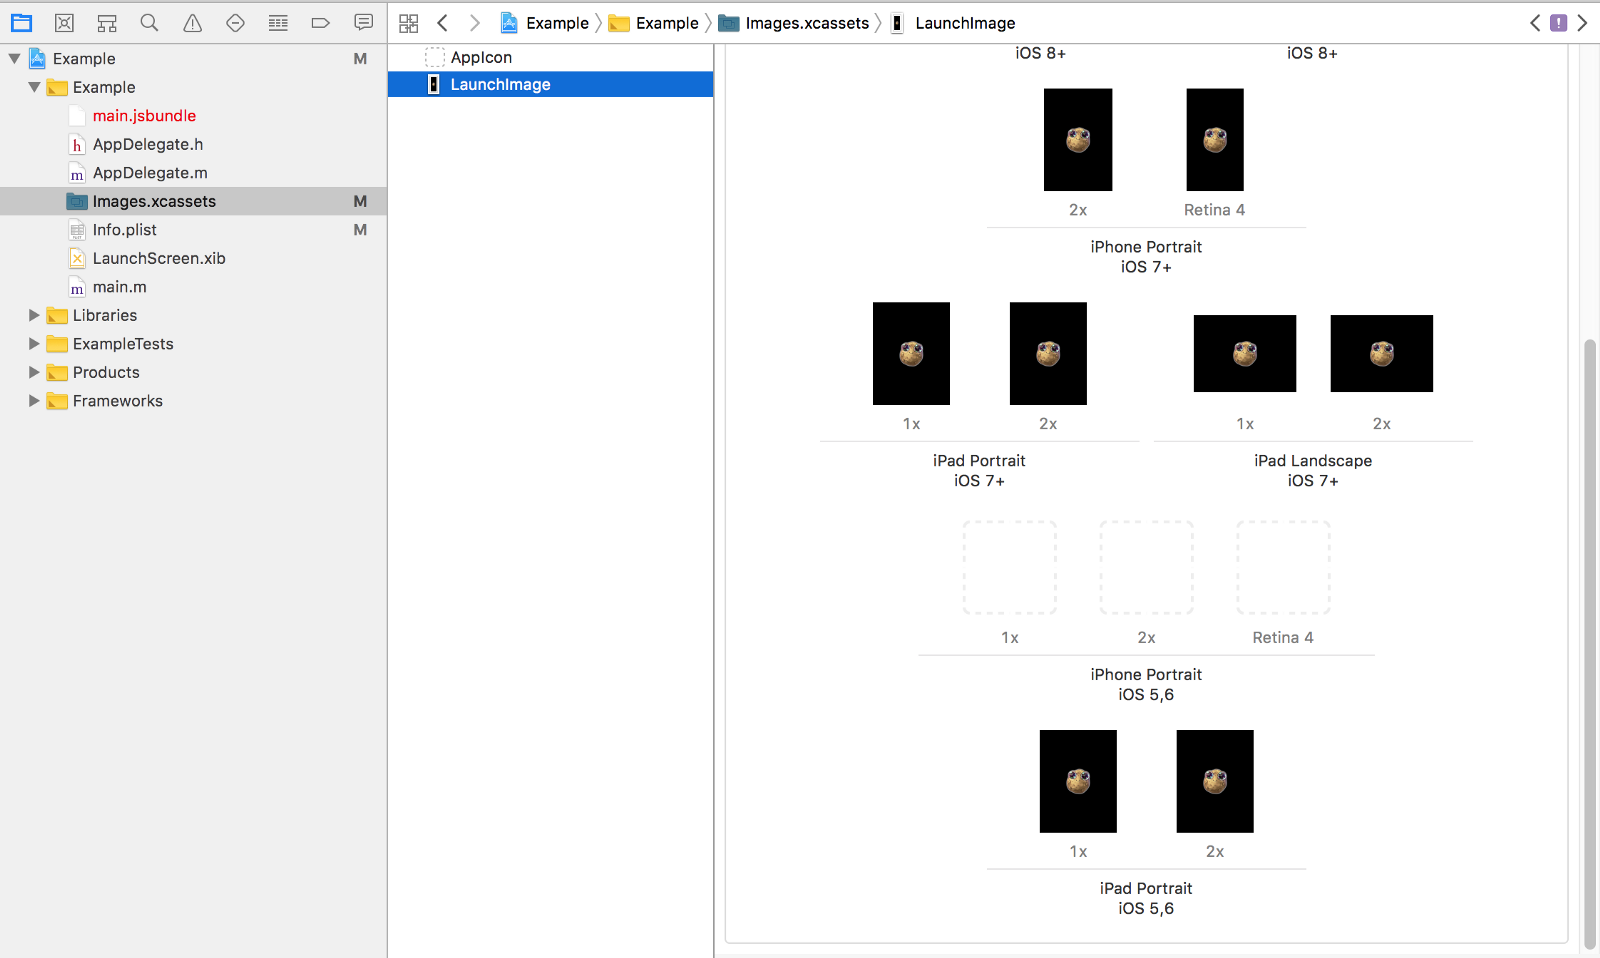
Open your Xcode project in
/ios/{you-project-name}.xcodeproj.At your project folder, create a new Launch Image in
Images.xcassets.Add your assets to this Launch Image.
-
Remove the default React Native Launch Screen by removing the key-value pairs
UILaunchStoryboardNameinInfo.plist -
Apply the Launch Image at
Tab General > App Icons and Launch ImagesChange
Launch Images Sourceto the newly createdLaunchImage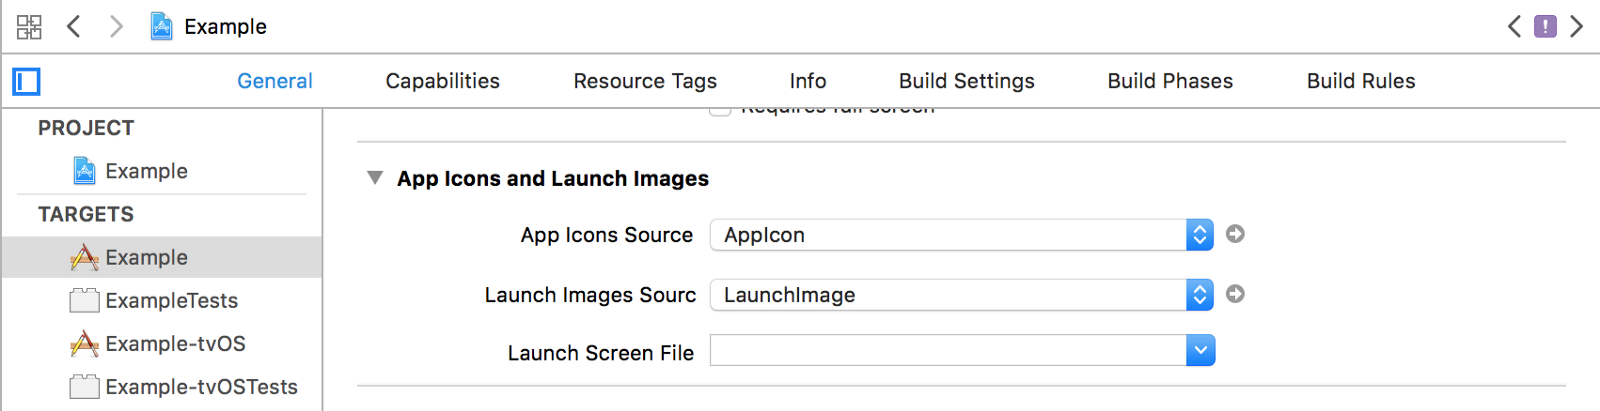
- Hop on over to Android Asset Studio to make all of your Android Icons. Alternatively you can use Ape Tools - Image Gorilla.
- Drag the same icon file you used for the iOS icons (1024x1024) and edit away, and hit the download button in the upper right hand corner.
- Open up android->app->src->main->res. You should see a bunch of folders in here called mipmap-hdpi, mipmap-mdpi etc. The folder you downloaded from Android Asset Studio will have those same folders. Just replace those files and you’ll be all set for Android icons.
-
Use Ape Tools - Image Gorilla link to generate splash screen
-
Copy and overwrite your own assets to
/android/app/src/main/res/ -
Create a new layout file
android/app/src/main/res/drawable/launch_screen_bitmap.xmlwith the below content.Replace
@mipmap/launch_screenwith your assets name.<layer-list xmlns:android="http://schemas.android.com/apk/res/android" android:opacity="opaque"> <item android:drawable="@color/splashBackground"/> <item> <bitmap android:src="@mipmap/launch_screen" android:gravity="center"/> </item> </layer-list> -
Create/modify
android/app/src/main/res/values/colors.xmlfile with your splash screen background color<?xml version="1.0" encoding="utf-8"?> <resources> <item name="splashBackground" type="color">#FFFFFF</item> </resources> -
Create/modify
android/app/src/main/res/values/styles.xmlfile<resources> <!-- Base application theme. --> <style name="AppTheme" parent="Theme.AppCompat.Light.NoActionBar"> <!-- Customize your theme here. --> <item name="android:windowBackground">@color/splashBackground</item> </style> </resources> -
Modify the
android/app/src/main/java/com/example/MainActivity.javaby overriding the createSplashLayout method provided by RNNpackage com.example; import android.graphics.drawable.Drawable; import android.support.v4.content.ContextCompat; import android.widget.LinearLayout; import com.reactnativenavigation.controllers.SplashActivity; public class MainActivity extends SplashActivity { @Override public LinearLayout createSplashLayout() { LinearLayout splash = new LinearLayout(this); Drawable launch_screen_bitmap = ContextCompat.getDrawable(getApplicationContext(),R.drawable.launch_screen_bitmap); splash.setBackground(launch_screen_bitmap); return splash; } }