React Native ~ RN CLI - rohit120582sharma/Documentation GitHub Wiki
If you are already familiar with mobile development, you may want to use the React Native CLI. This requires Android Studio or Xcode in order to get started. If you already have these installed, you should be up and running within minutes. If not, you should expect to spend an hour or so on installing and configuring them.
Note! If you are using a Windows or Linux machine, you won't be able to build the iOS device, but you can build the Android app.
For getting started, follow the React Native CLI quickstart in the getting started guide.
Or refer following links for the dev-env setup:
First install Homebrew. You can skip below command if brew is already installed on your machine
/usr/bin/ruby -e "$(curl -fsSL https://raw.githubusercontent.com/Homebrew/install/master/install)"
Then install Node.js which is a JavaScript runtime, to build your JavaScript code. Node comes with
npm, which lets you install the other dependencies and tools. Make sure Node version is 8.3 or newer.brew install node
Then Watchman which is a file watcher from Facebook. This is used by React Native to figure out when your code changes and rebuild accordingly. It’s like having Xcode do a build each time you save your file.
brew install watchman
This installs the react-native-cli globally. We'll be using this to create a new project.
sudo npm install -g react-native-cli
Now that we've got all the environment prep out of the way, let's get started and create our application. Open your terminal and run:
$ npx react-native init my-new-projectHere, npx is a command line utility that's bundled with npm (installed with Node.js) and allows you to run command line programs from npm without globally installing them. react-native init my-new-project tells the cli tool to create a new project called my-new-project. You can use a different name if you prefer.
Now it's time to run the project! For native projects, we need to do two things:
- start the packager that inserts our JavaScript code into our app
- build the native app
First, lets start the packager:
$ cd my-new-project
$ npm run start
You can omit this step if you want, since the run command does also open a new window with and starts packager automatically, but I always do it explicitly, since I like knowing that the packager is up to.
Install the node dependencies:
$ cd my-new-project
$ npm install
Do linking third-party libraries. Some library are pure JavaScript, and you only need to require it. Other libraries also rely on some native code, in that case you'll have to add these files to your app.
$ react-native link <library-name>Open a new terminal window and run:
$ cd my-new-project
$ npx react-native run-ios
This will run new app in the iOS Simulator shortly. It usually takes a little while to build, but once done it'll open your default simulator.
react-native run-ios is just one way to run your app. You can also run it directly from within Xcode or Nuclide.
The run-ios command will always launch the app on your default simulator. However you might want to test your app on a different simulator. To do this, you can use the --simulator command line argument. For example to run run the app on your iPhone XR simulator, you can do the following:
$ npx react-native run-ios --simulator="iPhone XR"First, connect your phone to your MacBook. If you've never done this before, you should get a prompt from iTunes permission dialog:

After you click "continue", you should get an alert on your phone asking you to confirm.
Now you'll need to find you your phone's name. To do this, open your terminal (with the phone plugged in) and do:
$ instruments -s devicesThis will list all the devices (real and simulated) available on your computer.
Now open the terminal in your project root directory (inside my-new-project) and run:
$ npx react-native run-ios --device="your’s iPhone"Note that this will take a little while to build, and you have to make sure your device is unlocked while the installation is taking place.
If you get an error when launching your app, please try these commands:
$ npm install --save-dev @babel/core
$ npm install --save-dev @babel/runtime
Thereafter, try running the app again (=> react-native run-ios). If that fails, simply run it again - the first run does some initialisation work.
First, we need to open an emulator. iOS simulator gets opened automatically, but for Android you'll have to do it yourself. Open Android Studio, click on the "Configure" option and choose "AVD Manager". AVD stands for "Android Virutal Device" and this is the menu where you can install, delete, edit and run emulators from.
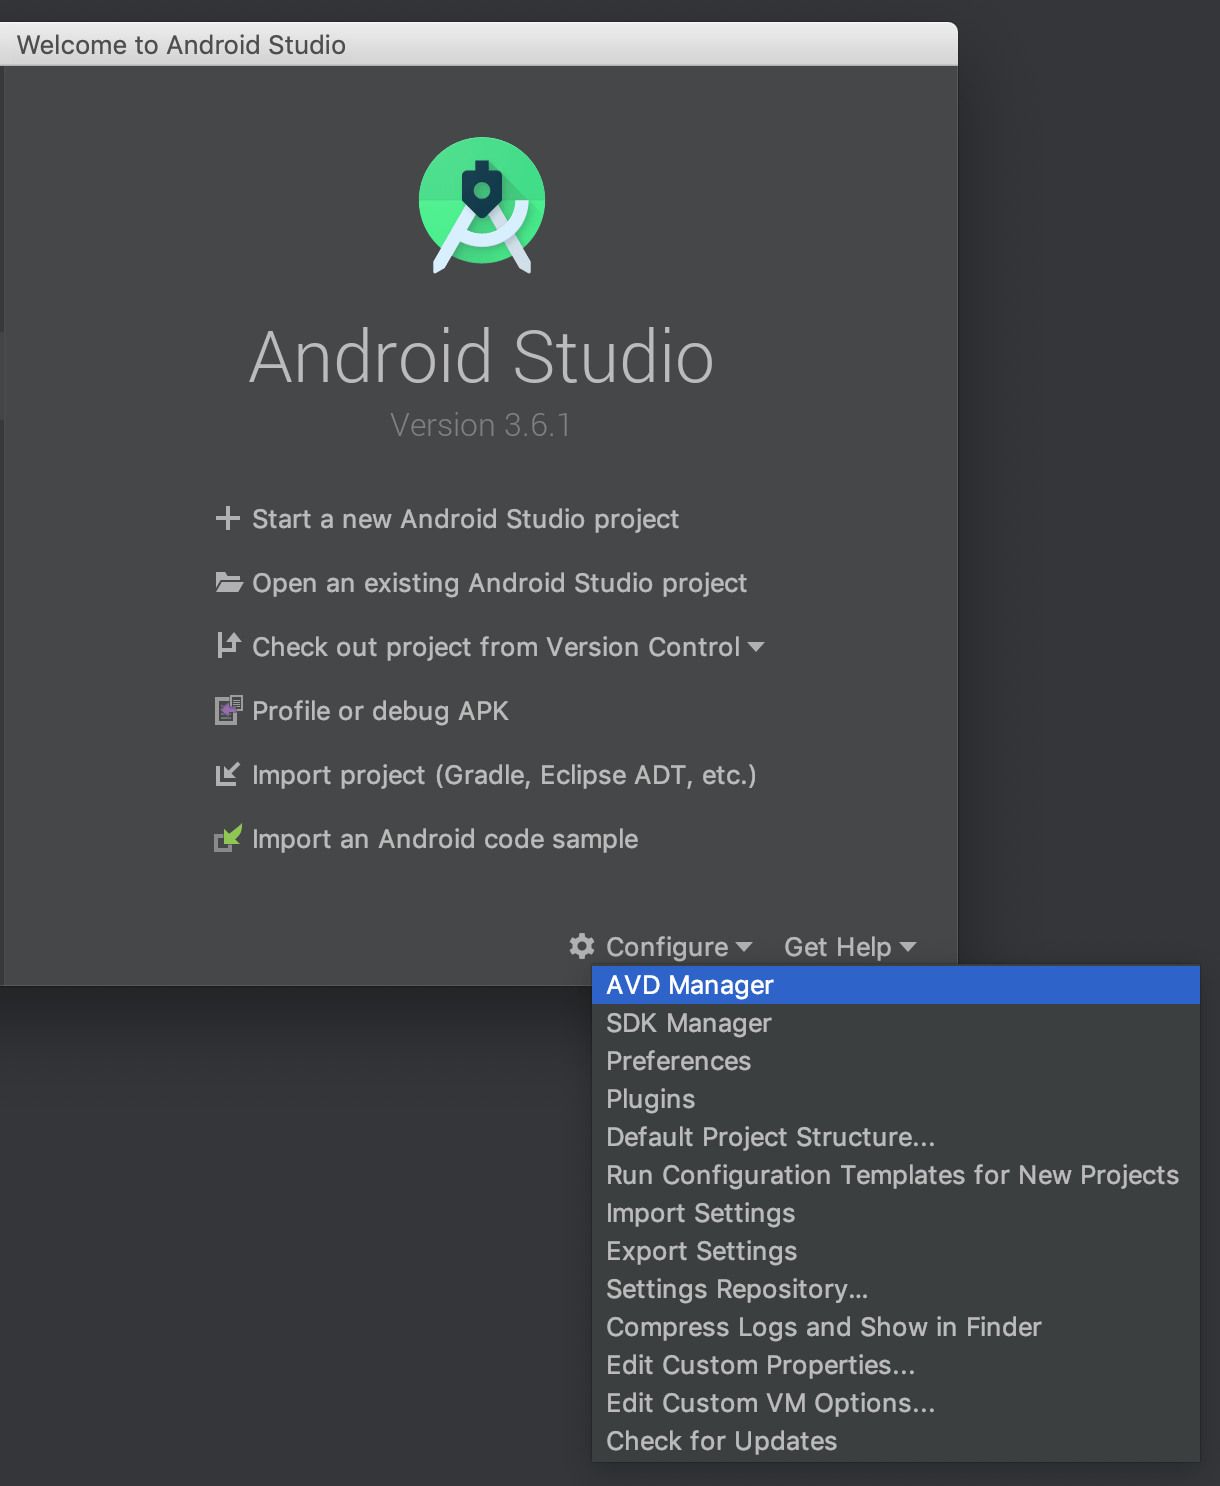
Here you can create a new virtual device if you don't have on yet. Once you have a device, double click on it to launch.
Now that the emulator is running, open a new terminal window, and run:
$ cd my-new-project
$ npx react-native run-androidIn order to run your app on your device:
- close the Android emulator (if you had it open)
- plug in your phone via USB
- enable USB debugging*
To enable USB debugging on your device, you will first need to enable the "Developer options" menu by going to Settings → About phone and then tapping the Build number row at the bottom seven times. You can then go back to Settings → Developer options to enable "USB debugging".