React Native ~ Android Setup - rohit120582sharma/Documentation GitHub Wiki
/usr/bin/ruby -e "$(curl -fsSL https://raw.githubusercontent.com/Homebrew/install/master/install)"
brew install node
brew install watchman
sudo npm install -g react-native-cli
React Native requires a version 8 of the Java SE Development Kit (JDK). Download and install Oracle JDK 8.
-
java -version -
If Java version is higher than 8 and you want to downgrade the version than uninstall Java on my Mac first
sudo rm -fr /Library/Internet\ Plug-Ins/JavaAppletPlugin.plugin sudo rm -fr /Library/PreferencePanes/JavaControlPanel.prefPane sudo rm -fr ~/Library/Application\ Support/Oracle/Java -
Navigate to
/Library/Java/JavaVirtualMachinesand remove the directory whose name matches the following formatcd /Library/Java/JavaVirtualMachines/jdkmajor.minor.macro[_update].jdk rm -rf jdk1.8.0_06.jdk -
export JAVA_HOME=$(/usr/libexec/java_home -v 1.8)
/usr/libexec/java_home -V
This is the development environment for Android and it comes with all the tools you need to run Android apps on a simulator or a real device.
Download and install Android Studio. Choose a "Custom" setup when prompted to select an installation type. Make sure the boxes next to all of the following are checked:
Android SDKAndroid SDK PlatformPerformance (Intel ® HAXM)Android Virtual Device
Then, click "Next" to install all of these components.
If the checkboxes are grayed out, you will have a chance to install these components later on.
Once setup has finalized and you're presented with the Welcome screen, proceed to the next step.
The Android SDK Manager helps you download the SDK tools, platforms, and other components you need to develop your apps.
Android Studio installs the latest Android SDK by default. Building a React Native app with native code, however, requires the Android 8.0 (Oreo) SDK in particular. Additional Android SDKs can be installed through the SDK Manager in Android Studio.
The SDK Manager can be accessed from the Welcome to Android Studio → Configure → SDK Manager screen.
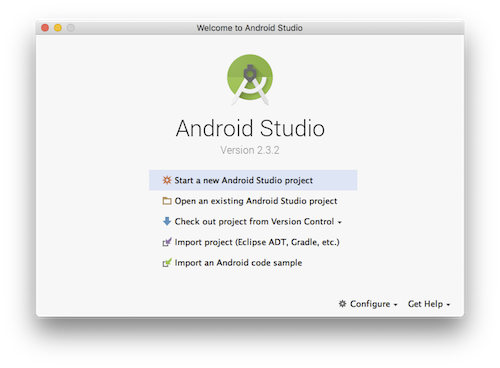
The SDK Manager can also be found within the Android Studio "Preferences" dialog, under Appearance & Behavior → System Settings → Android SDK.
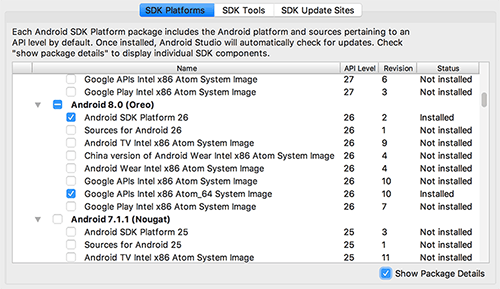
Select the SDK Platforms tab from within the SDK Manager, then check the box next to Show Package Details in the bottom right corner. Look for and expand the Android 8.0 (Oreo) entry, then make sure the following items are all checked:
Android SDK Platform 26Google APIs Intel x86 Atom_64 System Image
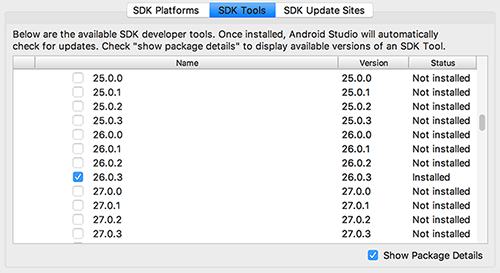
Next, select the SDK Tools tab and check the box next to Show Package Details here as well. Look for and expand the Android SDK Build-Tools entry, then make sure the following items are all checked:
Android SDK Build-Tools → 26.0.3Android EmulatorAndroid SDK Platform-ToolsAndroid SDK ToolsIntel x86 Emulator Accelerator (HAXM installer)Support Repository → Android Support RepositorySupport Repository → Google Repository
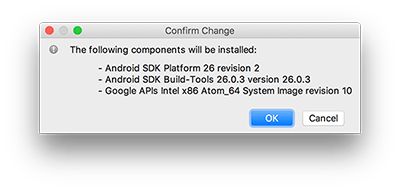
Finally, click Apply to download and install the Android SDK and related build tools.
To execute React Native command and run the react native app in emulator you need to setup the ANDROID_HOME environment variable.
- First open the terminal and type
androidand hit enter. - If you are getting error with 'Command not found', that means; still the path has not been configured properly or yet.
- Repeat the same above step for identifying the adb. Open the terminal and type
adband hit enter. - If you are getting error with 'Command not found', that means; still the path has not been configured properly or yet.
- Now type
vi ~/.bash_profileon terminal and hit enter. - I am assuming my android SDK installed under below location. It could be different in your case.
/Users/rohit.sharma/Library/Android/sdk - Now press
ithe bash_profile file will become editable. - Now add below lines to your config file:
export ANDROID_HOME=$HOME/Library/Android/sdk
export PATH=$PATH:$JAVA_HOME/bin
export PATH=$PATH:$ANDROID_HOME
export PATH=$PATH:$ANDROID_HOME/tools
export PATH=$PATH:$ANDROID_HOME/tools/bin
export PATH=$PATH:$ANDROID_HOME/platform-tools
export PATH=$PATH:$ANDROID_HOME/emulator
- Now in order to save and exit file, perform below key actions -
- Press escape (esc) key.
- Type
:wqand hit enter.
- Now type
source ~/.bash_profileon console in order updates profile.
.bash_profileis specific tobash. If you're using another shell, you will need to edit the appropriate shell-specific config file.
-
adb deviceson console and hit enter to check command is available -
androidon console, it open up the Android SDK Manager echo $PATH
Please make sure you use the correct Android SDK path. You can find the actual location of the SDK in the Android Studio "Preferences" dialog, under Appearance & Behavior → System Settings → Android SDK.
You will need an Android device to run your React Native Android app. This can be either a physical Android device, or more commonly, you can use an Android Virtual Device which allows you to emulate an Android device on your computer.
An Android Virtual Device (AVD) is a configuration that defines the characteristics of an Android phone, tablet, Wear OS, or Android TV device that you want to simulate in the Android Emulator. The AVD Manager is an interface you can launch from Android Studio that helps you create and manage AVDs.
To open the AVD Manager, do one of the following:
- Select Tools > AVD Manager.
- Click AVD Manager the toolbar.
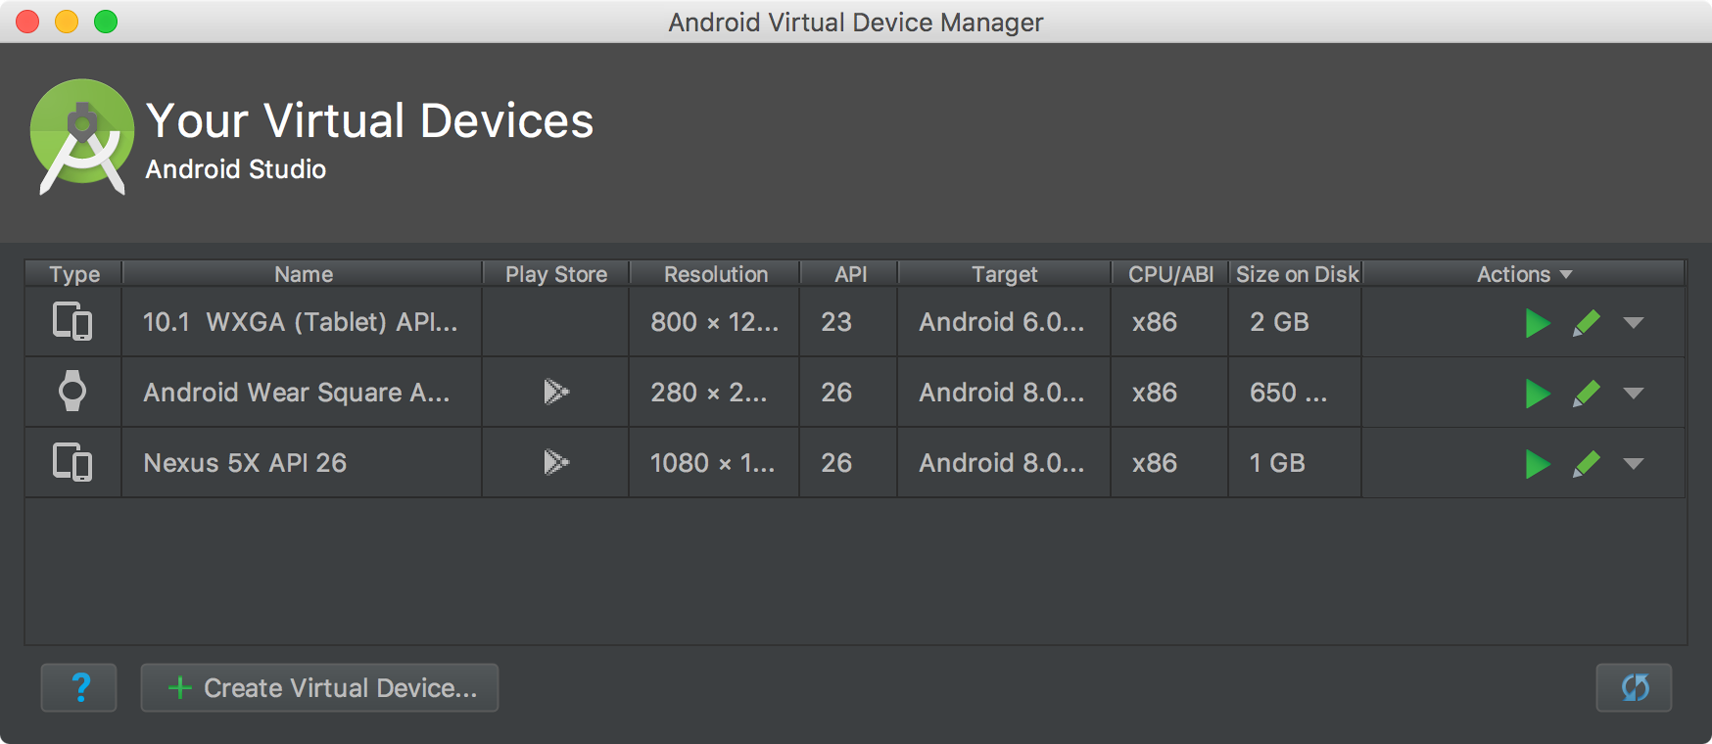
If you use Android Studio to open ./AwesomeProject/android, you can see the list of available Android Virtual Devices (AVDs) by opening the "AVD Manager" from within Android Studio.
If you have just installed Android Studio, you will likely need to create a new AVD. Select "Create Virtual Device...", then pick any Phone from the list and click "Next".
Select the "x86 Images" tab, then look for the Oreo API Level 26, x86_64 ABI image with a Android 8.0 (Google APIs) target.
Click "Next" then "Finish" to create your AVD. At this point you should be able to click on the green triangle button next to your AVD to launch it, then proceed to the next step.
If you have a physical Android device, you can use it for development in place of an AVD by plugging it in to your computer using a USB cable and following the instructions here.
This will create a directory called AwesomeProject inside the current working directory. Inside AwesomeProject, this will generate the initial project structure and install all of its dependencies.
react-native init AwesomeProjectcd <project-name> npm install
Some library are pure JavaScript, and you only need to require it. Other libraries also rely on some native code, in that case you'll have to add these files to your app.
react-native link <library-name>
cd AwesomeProject
react-native run-android
If everything is set up correctly, you should see your new app running in your Android emulator shortly.
react-native run-android is just one way to run your app - you can also run it directly from within Android Studio or Nuclide.
npm install --save-dev @babel/core
npm install --save-dev @babel/runtime
Thereafter, try running the app again (=>
react-native run-android). If that fails, simply run it again - the first run does some initialization work.
Resolved this issue by changing the import statment in <project>/app/src/main/java/com/MainApplication.java
-
The previous import was like below:
import com.reactnativenavigation.NavigationReactPackage; -
and new import is below (difference is bridge part of package name)
import com.reactnativenavigation.bridge.NavigationReactPackage;
The library com.google.android.gms:play-services-basement is being requested by various other libraries at 15.0.1,15.0.1, but resolves to 16.0.1. Disable the plugin and check your dependencies tree using ./gradlew :app:dependencies.
Refer below for sort description and this link for complete details.
Add following code in android/build.gradle
ext {
	...
	googlePlayServicesVersion = "15.0.1"
}
This error only seems to appear on Android when you aren’t running in Debug JS Remotely mode
-
First install
es6-symbolnpm install --save es6-symbol -
And then just add the following to the top of your entry point(ie. index.android.js)
import 'es6-symbol/implement';
Refer this link for details.