DevOps ~ Dockerise an app - rohit120582sharma/Documentation GitHub Wiki
Writing a Dockerfile is the first step to containerizing an application. You can think of these Dockerfile commands as a step-by-step recipe on how to build up your image.
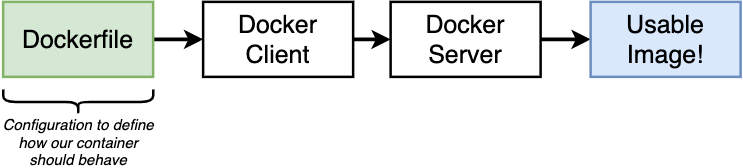
Dockerfile is essentially a plain text file with instructions to create the Docker image which defines how our container should behave.
# Use the official image as a parent/base image
FROM node:alpine

# Set the working directory
WORKDIR /usr/src/app

# Copy the file from your host to current location in image filesystem
COPY package.json ./

# Run the command inside your image filesystem to install dependencies
RUN npm install

# Copy the rest of your app's source code from your host to your image filesystem
COPY ./ ./

# Inform Docker that the container is listening on the specified port at runtime
EXPOSE 8080

# Set a default command to run on container startup
CMD ["npm", "start"]Now that you have some source code and a Dockerfile, it’s time to build the Docker image.
By running the following command, it passes the file to above pipeline:
$ docker build -t <username/image-name> -f Dockerfile .Here the --tag or -t parameter is for tagging an image-name and . parameter is for build context.
Finally, Docker-Server build a useable image that can be used to start up a container.
Anytime a request comes in to port 5000 on my local machine then redirects it to port 8080 inside the container.
The port mapping is specified at runtime not inside the Dockerfile.
The port from the source machine/network that we are mapping from to the port inside the container do not have to be identical.
$ docker run -p 5000:8080 <image-name>