custom web development guide - restarone/violet_rails GitHub Wiki
Since Violet Rails uses ComfortableMexicanSofa as a CMS, This guide is based on: https://github.com/comfy/comfortable-mexican-sofa/
For custom web development using the included Ember.js framework, see here: https://github.com/restarone/violet_rails/wiki/Ember.js-on-Violet-Rails
The editor is powered by Redactor 2 (by Imperavi), and features 2 modes. WSIWYG for editing text, and code-mode for well-- code editing.
In this mode you can change text easily, but to make adjustments to the layout, colours or HTML/CSS/Javascript, you will need to click on the code button.

Clicking on the button pointed out below will toggle between HTML and WSIWYG modes

Bootstrap 4 and jQuery are included out of the box. To override Bootstrap styles, use the default layout. To write custom CSS you can use <style> tags on pages where you need custom styling. So for example, you can set a custom CSS class like this below:
<style>
.bg-img{
	  background: url('{{ cms:file_link 30 }}');
	  background-repeat: no-repeat;
  	  background-position: center;
	  background-size: cover;
        }
</style>
This will set the background to a file that is in the CMS (notice the single quotes wrapping the snippet {{ cms:file_link 30 }}
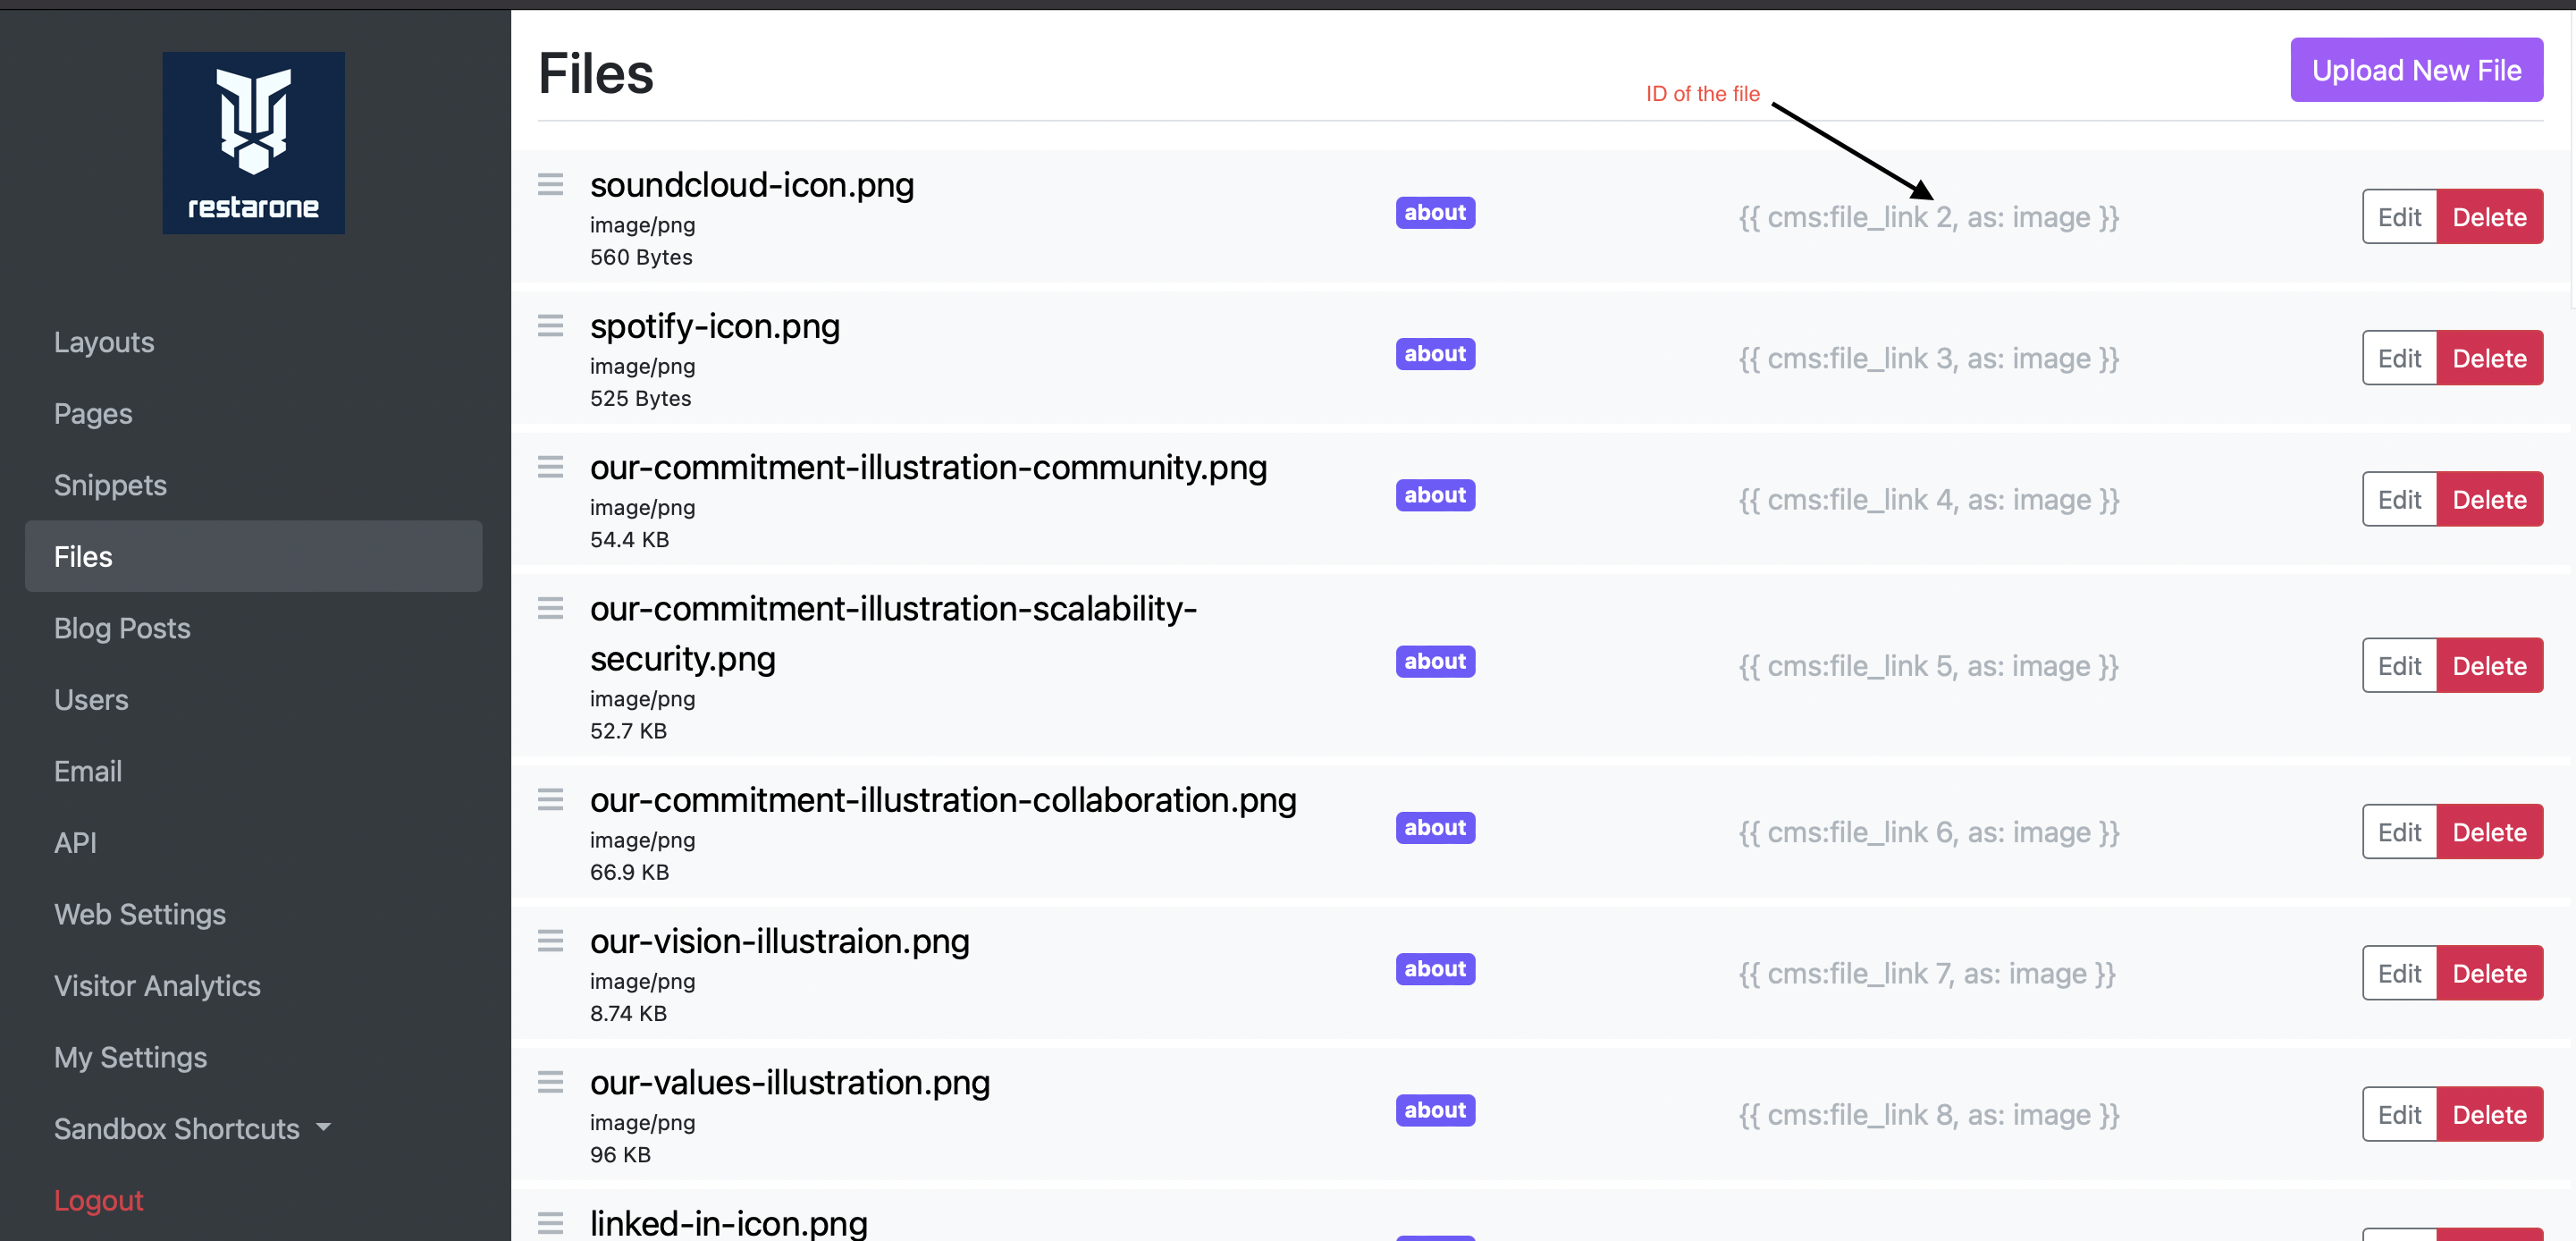
To safely link assets, without redactor -- well, redacting your code. Follow this pattern in your HTML (note the 5 is the ID of the file you want to link):
<div class="container">
  {{ cms:file_link 5, as: image, class:"img-fluid img1" }}
</div>
This will generate the following HTML:
<div class="container">
  <img src="https://dynamically-generated-url-here.com" class="img-fluid img1" alt="filename.file-extension"  />
</div>These are always cool, as seen here. Credits go to Pralish Kayastha and his original gist.
-
Using the poster attribute causes the video to show up instantly after it finishes downloading.
-
Use both webm and mp4 format to support different browsers and devices
-
Convert your video to webm format. It reduces the size significantly
-
Wrap the video element with a container
    <div id="video-container">
	<video id="video" muted autoplay playsinline>
        	<source src=" {{ cms:file_link 38 }}" type="video/webm">
        	<source src="{{ cms:file_link 4 }}" type="video/mp4">
	</video>
</div>- Add background image to the container
#video-container {
  background-image: url("{{ cms:file_link 34}}");
  background-size: cover;
} - Set the video's opacity to 0 and add your desired transition ;
#video {
  opacity: 0;
  transition: opacity 2s ease;
}- Add an event listener for the play event (that is triggered automatically because of
autoplayandplaysinline). Change the opacity when the event is triggered.
$("#video").bind('play', function (e) {
   $("#video").css('opacity', 1.0);
});-
Safari might not autoplay the video. One of the workarounds would be to use the
tag.
-
Note: No other browsers support video url in img tag.
-
Add an img tag with the video url as it's src inside the video container.
    <div id="video-container">
	      <video id="video" muted autoplay playsinline>
        	  <source src=" {{ cms:file_link 38 }}" type="video/webm">
        	  <source src="{{ cms:file_link 4 }}" type="video/mp4">
	      </video>
        <img id="img-tag" class="h-100 w-100" style="object-fit: cover;" src="{{ cms:file_link 4 }}">
</div>- Create a function to toggle between video and img based on the browser.
function browserDetection() {
    if (navigator.userAgent.search("Safari") >= 0 && navigator.userAgent.search("Chrome") < 0) {
        document.getElementById('video').style.display= "none";
    } else {
        document.getElementById('img-tag').style.display= "none";
    }
}

browserDetection();These are built in templated form helpers with recapcha protection. See example here. In your HTML, you can render one of these forms by their ID (check the table under call to actions to copy the snippet specific to your application)
{{ cms:helper render_call_to_action, 1 }}- To render a search field, use the following helper in your HTML.
{{ cms:helper render_search_field }}- next, add a search handler with an inline script or under the Javascript section in your layout
const onSearchFormSubmit = (e) => {
  e.preventDefault()
  query = $(e.target).find('input[type=text]').val()
  $.ajax({
    type: e.target.getAttribute('method'),
    url: e.target.getAttribute('action'),
    data: { query: query },
    dataType: 'json',
    success(data) {
      // handle the response from the endpoint
      console.log(data);
      return false;
    },
    error(data) {
      console.log(data);
    }
  })
}- in the above example we are using the form to call the handler directly, if you'd like to be more adventurous you can skip the form and use ajax only:
$.ajax({
  type: 'POST',
  url: '/query',
  data: { query: "test" },
  dataType: 'json',
  success(data) {
    console.log(data);
    return false;
  },
  error(data) {
    console.log(data);
  }
})Each page has a preview content form. Enter your HTML markup there and the API will return it in the response

Active links highlight the page the user is on in the navbar tab.
Add this to your navbar snippet. Credits go to Pralish Kayastha and his original gist.
<script>
    var url = window.location.href;
    $('.nav-link').filter(function() {
        return this.href == url;
    }).addClass('current');
</script>
Update your css accordingly
.nav-link.current {
 color: #13aff0;
}Our very own Restarone.com uses the API system to deliver a large file after page load. See it in action here (video):
https://user-images.githubusercontent.com/35935196/168428398-7fc5fde4-40b4-4857-9127-0154b1c04ce7.mov
Lottie library can be used to parse and load JSON-based animation.
Create an API namespace for the animation that you want to render

In your Javascript (in the layout, or in a page), you can make an AJAX call to fetch that animation data. The GET API endpoint for an API namespace, my_awesome_animation, would be exposed in the layout/page as /api/1/my_awesome_animation/describe.

async function loadAnimation() {
  try {
    const animationData = await getAnimationData(
      "/api/1/home_anim_data_desktop/describe"
    );

    const config = {
      container: document.querySelector(".animation-container"),
      renderer: "svg",
      loop: false,
      autoplay: false,
      rendererSettings: {
        progressiveLoad: true,
      },
      animationData: animationData,
    };

    lottie.loadAnimation(config);
  } catch (error) {
    console.error(error.message);
  }
}

async function getAnimationData(url) {
  try {
    const response = await fetch(url);
    const data = await response.json();
    return JSON.parse(data.properties.stringified_json_animation);
  } catch (error) {
     console.log(error);
  }
}