Installation Guide - quandis/qbo3-Documentation GitHub Wiki
Powershell Installation
To install qbo3 via Powershell:
- Download the
qbo4.InfrastructurePowershell module - Obtain a copy of qbo3 installation artifacts
- Install the database
- Install the website
Download the qbo4.Infrastructure Powershell module
Run Powershell or Powershell ISE in Administrator mode:
install-module qbo4.Infrastructure
import-module qbo4.Infrastructure
If you encounter an error with
import-module, it's likely that your Powershell instance had already loaded older versions of Microsoft dlls used byqbo4.Infratructure. If that's the case, open a new Powershell instance, and ensure that you callimport-module qbo4.Infrastructurefirst.
Obtain a copy of qbo3 installation artifacts
The database artifacts are a series of .dacpac files, and the web artifact is a Microsoft Web Deployment package. These artifacts are built as part of Quandis' CI/CD pipeline. If you do not have access to Quandis' Azure Devops environment, please email your Quandis technical point of contact for copies of these artifacts.
Install the database
This step assumes you have a SQL Server available to create a database in, and that you have a connection string with sufficient privileges to create a database and a variety of tables, indexes, and other typical artifacts of a database installation. The qbo4.Infrastructure publish-qbosqldatabase command will use Microsoft's DAC library to install a new database, or upgrade an existing database.
From Powershell:
publish-qboSqlDatabase -database '{your-db-name}' -connectionString '{your-connection-string}' -dacpacpath'{path to the fintech.dacpac}'
| Parameter | Description |
|---|---|
| database | Name of the target database. Any valid SQL Server database name is acceptable. |
| connectionString | Connection string used to create or update the database and associated structures. DML permissions are required. A connection string typically looks like: Server=ServerA\InstanceB;Database=myDatabase;[email protected];PWD=SomeT$ing!;Connection Timeout=30. |
| dacPacPath | Physical path to the .dacpac artifacts, such as c:\downloads\quandis\fintech.dacpac |
The
qbo4.InfrastructurePowershell module includes the components needed to install.dacpacfiles on a SQL database. You should not need to pre-install any other SQL tools for this to work.
Install the website
Using IIS Manager, you may create a new website, or install QBO to an existing website (such as Default Web Site).
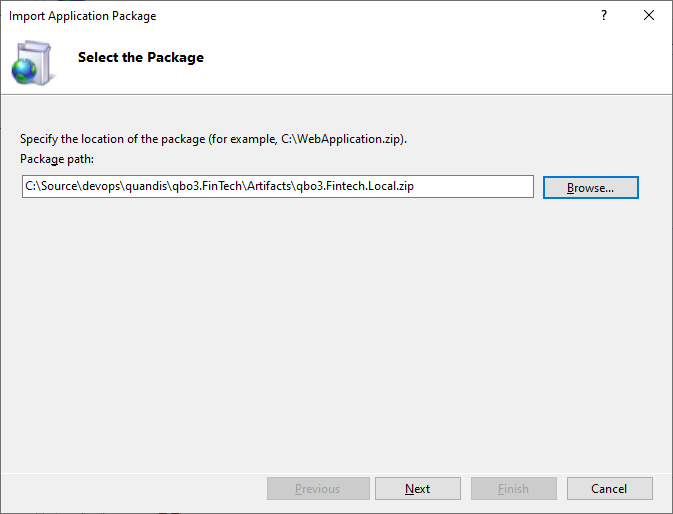
- Right-click on the website you wish to install qbo3 into, and choose Deploy > Import Application

- Select the web deployment package artifact (.zip file):
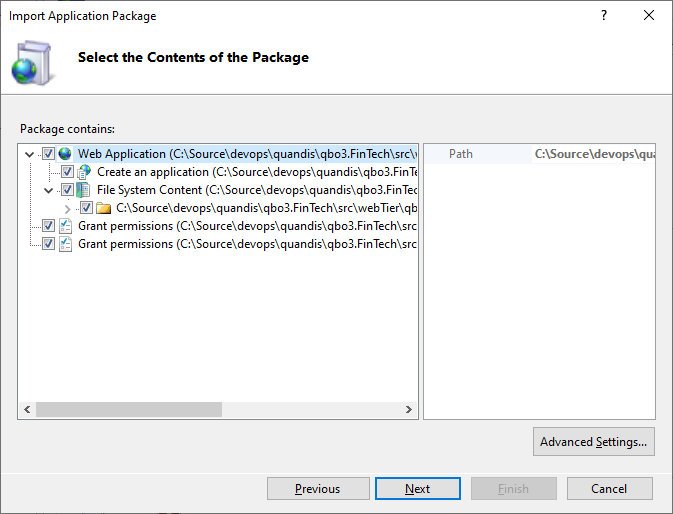
- Select all contents (the default setting):
- Set application properties

- qbo3 is normally installed in the root of the website; Application Path should be empty
SetupSystemshould be True if this is the first time the website is being run against a brand-new database, False otherwise.qbo.Default-Web.configconnection string: the connection string the qbo3 application will useqbo.AdHoc-Web.configconnection string: the connection string used for ad-hoc queries (if you choose to enable them)
After clicking the next button, the package will be installed to the target website.
Lastly, ensure permissions are set up correctly on the target website using a qbo4.Infrastructure Powershell command:
set-qbowebsite -name {the website name}
This will ensure the qbo3 application can write rolling logs, and modify web.config via Configuration Monitoring.
Developer Installation
Prerequisites
To get a basic qbo3 installation running locally, ensure you meet the following prerequisites:
- Visual Studio 2017 (or later)
- including IIS Express and MSSQL localdb
- Add
https://nuget.quandis.net/nugetto available package sources
Create a Web application
From Visual Studio, create a new, empty Web Application
- From
File > New > Project, chooseASP.NET Web Application (.NET Framework)- Select the
Emptytemplate and click OK
- Select the
- From
Tools > Nuget Package Manager > Manage Nuget Packages for Solution, and click on the Browse tab- Install
qbo3.Fintech - Install plugins that you might use, such as
qbo3.Queuing,qbo3.Amazon,qbo.Azure, etc. - alternatively, you can install
qbo.Fintech.Fullwhich includes a full suite of standard plugins
- Install
- Click on the Debug button using
IIS Express- log in using the credentials:
[email protected] / PillowClip2004$
- log in using the credentials:
You are now running an instance of qbo3 under IIS Express, with a copy of a qbo3 database running on MSSQL localdb.
Production Installation
A typical QBO3 installation includes:
- At least 1 MSSQL database,
- At least 1 IIS website, and
- At least 1 installation of the qbo Queue Service (a Windows service)
A recommended production QBO3 installation includes:
- 2 instances of MSSQL 2012 or later
- cold standby with log shipping is cost effective
- 1 regression-tested QBO3 image that can be "spun up" into a virtual environment (e.g. AWS AMI)
- this image will be used for both web and app servers
- an app server is identical to a web server except that the "Queue Service" windows service is started, and the machine is not on a load balancer
- 2 web servers
- based on the above QBO3 image
- Queue Service disabled
- minimum of 2 CPUs and 4GB memory
- 2 app servers
- based on the above QBO3 image
- Queue Service enabled
- minimum of 2 CPUs and 4GB memory
Auto-scaling of both web and app servers can be configured to handle load that exceeds the capacity of 4 machines.
Prerequisites:
- Database: Microsoft SQL Server running SQL 2008 or later
- TCP/IP protocol recommend
- Web Server: Microsoft Internet Information Server 7.5 or later
- must include .NET framework 4.71 or later
- Powershell 4 recommened
- WebDeploy 3 or later recommended
- The following IIS components are commended:
- Web-WebServer
- Web-Common-Http
- Web-Default-Doc
- Web-Http-Errors
- Web-Static-Content
- Web-Http-Redirect
- Web-Health
- Web-Http-Logging
- Web-Custom-Logging
- Web-Log-Libraries
- Web-ODBC-Logging
- Web-Stat-Compression
- Web-Dyn-Compression
- Web-Security
- Web-Basic-Auth
- Web-CertProvider
- Web-Cert-Auth
- Web-Url-Auth
- Web-App-Dev
- Web-Net-Ext
- Web-Net-Ext45
- Web-Asp-Net
- Web-Asp-Net45
- Web-ISAPI-Ext
- Web-ISAPI-Filter
- Web-Includes
- Web-WebSockets
- Web-Mgmt-Tools
- Web-Scripting-Tools
- Web-Mgmt-Service
- App Server: Microsoft Windows 2008 or later for installation of the qbo Queue Service
- same setup as Web Server
For a DEV installation, the SQL, IIS and Queue Service may run on the same server. Production installation should following standard Microsoft guidelines on scalability.
Installation order
- Installing a QBO database
- Installing the IIS website
- selection of desired plugins
- modification of web.config and related configuration files
- Installing the qbo Queue Service
Database Installation
Quandis uses a Visual Studio SQL Project (.sqlproj) to manage the QBO database. The database solution can be found in Quandis source: Trunk > qbo.3 > qbo.DB > qbo.DB.sln. This solution may be use to publish directly to a SQL server, or to generate a script to update a target SQL server to the current version of the QBO schema.
As of this post, the qbo.Fintech.Db solution includes the following projects:
Core: this contains the core tables required for all QBO installationMortgage: this referencesqbo.Standard, and includes mortgage industry related tablesDebt: this referenceqbo.Standard, and includes debt industry related tablesCredit: this referencesqbo.Standard, and included credit reporting related tablesCourtCase: this referencesqbo.Standard, and included court case related tablesLogging: contains logging tables
Installing qbo.Mortage will include all qbo.Standard components.
To set up a QBO database:
- Open the
qbo.Fintech.DBsolution - Right-click on the
qbo.Fintechproject, and choose Preview or Publish- follow the publish wizard to connect to your target database
- enter the locations for the files to be created for the various file groups (see below)
- preview will generate a script that you may run manually against your DB; publish will execute the generated script
Publishing to Azure databases need to include the following settings:
BlockOnPossibleDataLoss=false
AllowIncompatiblePlatform=true
ExcludeObjectType=FileGroups
File groups
Large QBO installations can push a SQL server pretty hard. To optimize performance, Quandis has created several FileGroups to help manage SQL Server's performance. In a PROD environment, the files for each file group should be on a different physical drive. For a DEV environment, this is far less important. However, the QBO schema will create the file groups, regardless of environment. The SQL projects in the qbo.DB solution will prompt you for a physical location for the files in each of the file groups that the schema will create.
- For a DEV installation, you are welcome to place all the files on the same drive.
- For a PROD installation, strongly consider specifying a separate physical drive for each file group
File groups include:
FGData: contains the data for most tablesFGHistoryData: stored audit trail information, generally heavy on writing, light on readingFGIndex: index data for most tablesFGHistoryIndex: stored audit trail information, generally heavy on writing, light on readingFGBlogData: blob data is stored hereFGHistoryBlogData: stored audit trail information, generally heavy on writing, light on readingFGObjectAccessData: used for row-level access control data, including a very large number of "narrow" rowsFGObjectAccessIndex: used for index storage of row-level access control data
Seeding Login Data
To log into a QBO database for the first time, a minimum set of seed data must be created. This data includes an administrator role and user account, along with basic permissions. QBO source code include a Powershell script and initialization SQL script to create this data. To install, open Powershell and navigate to the Publish folder of QBO source code, and:
. .\qbo.ps1
Confirm-qboDbSetup -dbserver "mydb.mycompany.com" -dbname "mydatabasename"
Note that the Confirm-qboDbSetup function accepts the following parameters:
dbServer: name or ip address of the SQL server containing the QBO databasedbName: name of the databaseadmin: (optional, defaults to [email protected]) QBO3 username for initial administrative accountpassword: (optional, defaults to password) QBO3 password for initial administrative account
The script will prompt you for credentials to connect to the data server. These credentials are SQL Server credentials, not QBO credentials. These SQL credentials will be encrypted and cached on the developer's machine for future deployments. Should you need to change or remove these credentials, you can do so by executing:
Remove-qboLogin DB-{your db server name or ip}
Web Server Installation
Quandis' application and web tiers are built in C# and ASP.NET project files. The target web server should have IIS 8+ installed, including a TLS/SSL certificate mapped to the target website. Quandis recommends publishing using Web Deploy via MSBuild, using QBO MSBuild targets. Review the qbo3.Sample.proj file in Source > Trunk > qbo.3 > Publish. This sample file will publish:
qbo.Coreprojects: including application, accounting, decision, message, attachment, security, etc.qbo.Mortgageprojects: including mortgage, debt, credit and skiptraceqbo.Amazonprojects: plugins including S3, SES, SQS interfacesqbo.Queuingprojects: plugins including Service Brokerqbo.AttachmentPluginsprojects: plugins including Aspose, ABCPDF, Google, DotNetZipqbo.ScorePluginsprojects: including document classification
For a given client installation, a customized version of qbo3.Sample.proj (qbo3.{Client}.proj) should be created and used to manage deployments. Customization entails:
- Identifying an theme to use (overrides of standard XSLTs)
- Identifying additional plugins to install
Instructions for running the MSBuild file are found in qbo3.Sample.proj, but executing from Powershell looks something like this:
& 'C:\Program Files (x86)\MSBuild\14.0\Bin\amd64\MSBuild' .\qbo3.Sample.proj /p:"Server=1.2.3.4,User=myUserName,Pwd=secret"
Configuration File Modifications
QBO contains several configuration files that will need to be created or updated to make a QBO installation work correctly. The web.config file will be found in the root of the web application, but all other configuration files will be found in the Config folder just under the root.
By default, the QBO web projects do not including several required .config files as content. This is a pattern we adopted to allow developers to publish without worrying about overwriting a custom configuration.
Web.config
For an initial installation, a 'base' version of web.config will be created. Settings to consider tweaking:
qbo.Application.Properties.Settings / BaseUrl: set this to be the base URL of your website (e.g. https://{client}.quandis.net)qbo.Application.Properties.Settings / LoadBalancerHeader: this defaults toX-Forwarded-Proto(for AWS); change if your load balancer uses a different value- note that the
HttpsRequiredsetting only applies if the request is not over https and there is no load balancer header present
- note that the
qbo.Application.Properties.Settings / XsltCacheDuration: set this to 0 if you are in 'development' mode, making frequent XSLT changesloggingConfiguration / listeners: modify this to use the Enterprise Library or custom logging sinks you prefersystem.web / machinekey: ensure that all servers in a server farm use the same machine key
Custom or Plugin Web Projects
When including custom web projects, ensure that any web.config files are set with a Build Action of None, so that deployment does not overwrite a target's image web.config file.
ConnectionStrings.config
For an initial installation, copy the ConnectionStrings.config found in qbo.Core > Web tier > qbo.ApplicationWeb > Config to your web application's Config folder.
Typical setup include two entries:
qbo.Default: the connection string used by the applicationqbo.AdHoc: an optional connection string if you wish to enable adhoc queries viaReport.ashx/AdHoc
Caution: using
SSPIconnections on servers running bothIISandQueueServicecan result in ad-hoc errors:
Cannot open database "***" requested by the login.
This appears to occur when two applications use the same
SSPIconnection concurrently. In a PROD environment, theQueueServicewould be running on dedicated app servers, not the web server, soSSPIshould be fine in that case. We recommend using SQL authentication instead of SSPI for DEV/UAT machines.
Credential.config
This file contains the "system" credentials used to communication between the QBO application tier an resources that required credentials. Examples include:
- credentials to an SMTP server for outbound email processing
- credentials to a UNC share on a corporate SAN
- credentials to an sFTP site used for client data file exchanged
A sample can be found in qbo.Core > Web Tier > qbo.ApplicationWeb > Config.
FileObject.config
This file determine where document images are saved. This must always be customized to your site. See a sample file in qbo.Core > Web Tier > qbo.AttachmentWeb > Config.
Typically, you should include:
- An
Internetfile object for reading files over HTTP - A
Databasefile object if you wish to copy data files to your data server for access by the SQL engine or SSIS - A file object that implements the
IAppendinterface to support scratchpad space for user uploads - A permanent repository such as Amazon S3, Azure Storage, Google Drive, or your corporate SAN for user created images
MailOutbound.config
This file determine where outbound emails are sent. This must always be customized to your site. See a sample file in qbo.Core > Web Tier > qbo.MessageWeb > Config.
Queue Service Installation
The Queue Service is a Windows services that handles all asynchronous processing for QBO. The MSI for this service can be found in Trunk > qbo.3 > Installation.
- For DEV installations, you can simply install this service on the web server.
- For PROD installations, clone the web server machine, install the qbo Queue Service
- the service will read the same configuration files you set up for IIS
- you may optionally top the Word Wide Web Publishing Service
The qbo.QueueService.exe.config file must be modified to point to the web.config file that you configured for the web site.
Verifying Installation
A given installation may be verified from Design > Specifications, Application > Configuration. This spec will fetch a list of all installed modules, and instantiate each, do a search against the db, and report any errors encountered. It is intended to catch:
- Consistency between the app tier and data tier (expected tables and column structures), and
- Verify all plugins referenced in each module's configuration file can be instantiated
Note: that not all errors reported by this spec may pose a problem for you installation. For instance, if you have configured the Entity view to ignore some modules, the Summary check for the module will fail.
Troubleshooting
- Ensure Web Management Service is installed and running on your target web server
- Ensure it has permission to execute
runCommands: see qbo3 > Public > qbo3.Powershell.targets
- Ensure it has permission to execute
- Ensure
{website}/Config/Setup.ps1is run to set permission on the web root for error handling and configuration monitoring- The
qbo3.Powershell.targets PsSetuptarget handles this by callingMSDeploy runCommand
- The
- Ensure
{website}/Config/ConnectionStrings.confighas a valid connection string to a QBO database
AWS
For information about hosting, automated deploys, and continuous integration for QBO3 in AWS, please review this guide.