AppLovin MAX Mediation - pubnative/pubnative-hybid-android-sdk GitHub Wiki
AppLovin MAX supports both bidding and waterfall mediation with Verve HyBid SDK. Currently the following ad formats are supported:
- Banner
- MRECT
- Fullscreen Interstitial (including video)
- Fullscreen Rewarded Video
Native ad format will be supported in a future release. This is the Android integration guide. For iOS please follow our iOS AppLovin MAX Mediation integration guide.
Bidding
For bidding, please follow the official AppLovin documentation.
Always use the most recent SDK versions available from AppLoving MAX and verve Group:
Waterfall
Waterfall mediation is only supported via AppLovin MAX's custom network adapters.
AppLovin SDK Integration
Please follow the official AppLovin SDK Integration documentation. This step is identical to bidding setup.
We recommend that you also complete steps 2 and 3 for a complete AppLovin MAX SDK bidding setup. This will ensure that your app contains all components required to enable bidding in parallel to waterfall mediation without further app changes required.
Custom Network Adapter Integration
Add the following to your app-level build.gradle file:
repositories {
    google()
    mavenCentral()
    maven { url "https://verve.jfrog.io/artifactory/verve-gradle-release" }
    ⋮
}
dependencies {
    implementation 'com.applovin:applovin-sdk:+'
    implementation 'com.applovin.mediation:verve-adapter:+' // for bidding mediation
    implementation 'net.pubnative:hybid.adapters.applovin:+' // for waterfall mediation
    ⋮
}
Custom SDK Network Integration Guide for Waterfall Mediation
This page gives you step-by-step instructions to show you how you enable Verve HyBid SDK as an ad network.
These instructions are based on Custom SDK Network Integration Guide in AppLovin MAX documentation.
Step 1. Add Custom SDK Network Settings
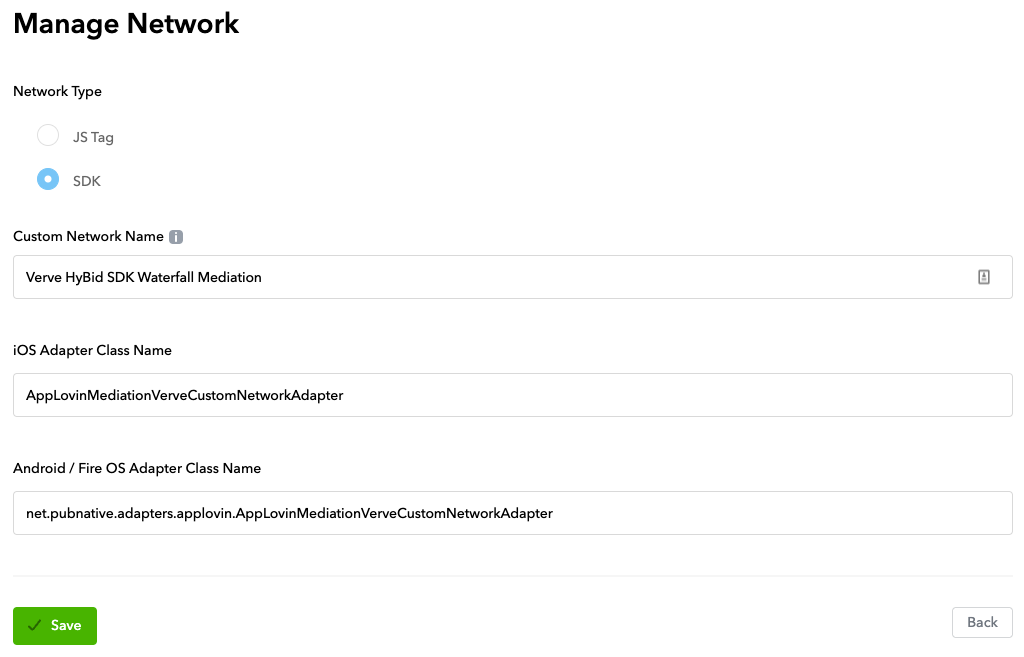
In the MAX Dashboard, select MAX > Mediation > Manage > Networks. Then click Click here to add a Custom Network at the bottom of the page. The Create Custom Network page appears. Add the information about Verve SDK custom network:
- Network Type: choose SDK.
- Name: Verve HyBid SDK Waterfall Mediation
- iOS Adapter Class Name:*
AppLovinMediationVerveCustomNetworkAdapter - Android / Fire OS Adapter Class Name:
net.pubnative.adapters.applovin.AppLovinMediationVerveCustomNetworkAdapter
Please note: iOS and Android Class Names must be entered exactly as indicated above.

Press Save to create the SDK network. This concludes the initial SDK setup. no further changes will be required to your mobile app. Please continue with the following steps to setup or change any ad units.
Ad Unit Setup for Verve SDK Waterfall Mediation
This page gives you step-by-step instructions for how you set Verve live as an ad network on the MAX Mediation platform.
Step 1: Obtain Application Token and Zone ID from PubNative Publisher Dashboard
- Ask your dedicated Verve Group Account Manager for the AppToken and Zone ID of the Ad Unit you wish to configure
Step 2: Enable Verve SDK network in your MAX Account
- When you have the Verve AppToken and Zone ID values you need, log in to your MAX account and select MAX > Manage > Ad Units.
- Click the MAX ad unit placement on which you want to enable Verve.
- Locate section Custom Networks & Deals and unfold Custom Network (SDK) - Verve HyBid SDK Waterfall Mediation
- Enable the Status toggle switch
- For Placement ID enter your Zone ID value from PubNative Publisher Dashboard
- For Custom Parameters enter the following JSON String:
{"pn_app_token":"YOUR APPTOKEN FROM PUBNATIVE PUBLISHER DASHBOARD"} - For CPM Price consult your Verve Account Manager to choose the correct value.
Please note: Use your actual appToken from PubNative Publisher Dashboard instead of the placeholder text written above.

Repeat these steps for each Ad Unit separately.