YOLO: Real Time Object Detection - pjreddie/darknet GitHub Wiki

You only look once (YOLO) is a system for detecting objects on the Pascal VOC 2012 dataset. It can detect the 20 Pascal object classes:
- person
- bird, cat, cow, dog, horse, sheep
- aeroplane, bicycle, boat, bus, car, motorbike, train
- bottle, chair, dining table, potted plant, sofa, tv/monitor
YOLO is joint work with Santosh, Ross, and Ali, and is described in detail in our paper.
https://elody.com/scenario/plan/88
All prior detection systems repurpose classifiers or localizers to perform detection. They apply the model to an image at multiple locations and scales. High scoring regions of the image are considered detections.
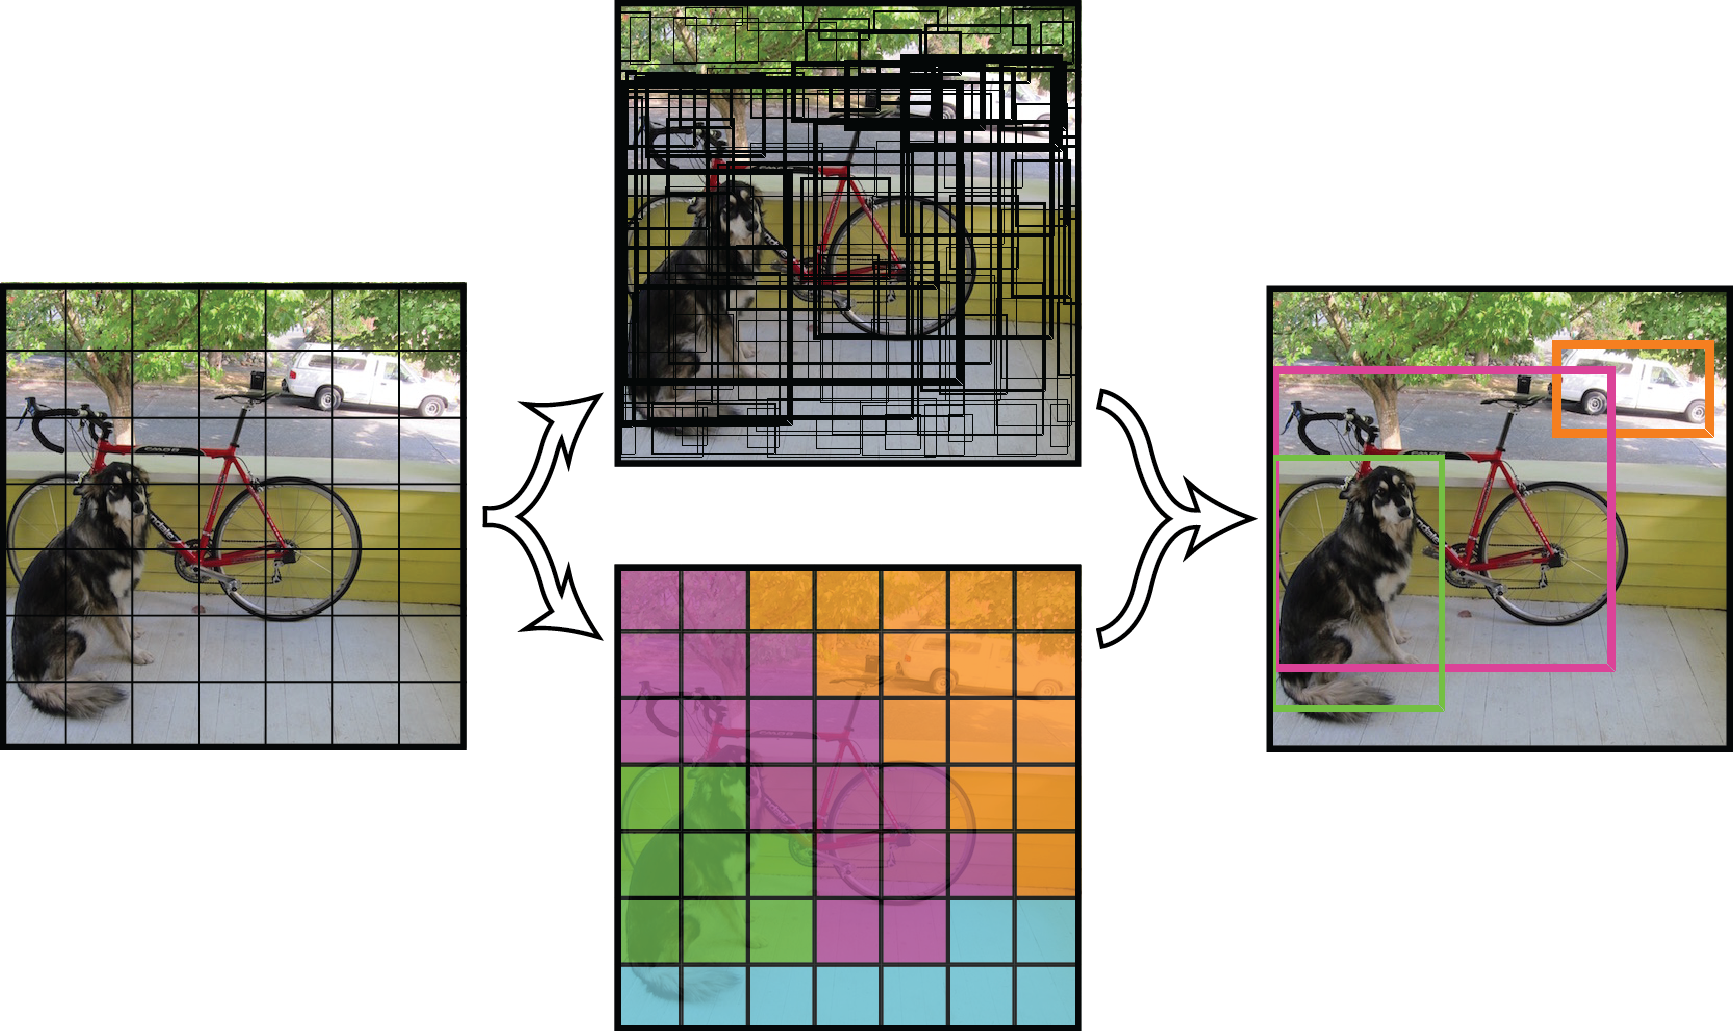
We use a totally different approach. We apply a single neural network to the full image. This network divides the image into regions and predicts bounding boxes and probabilities for each region. These bounding boxes are weighted by the predicted probabilities.
Finally, we can threshold the detections by some value to only see high scoring detections:

Our model has several advantages over classifier-based systems. It looks at the whole image at test time so its predictions are informed by global context in the image. It also makes predictions with a single network evaluation unlike systems like R-CNN which require thousands for a single image. This makes it extremely fast, more than 1000x faster than R-CNN and 100x faster than Fast R-CNN. See our paper for more details on the full system.
This post will guide you through detecting objects with the YOLO system using a pre-trained model. If you don't already have Darknet installed, you should do that first.
You already have the config file for YOLO in the cfg/ subdirectory. You will have to download the pre-trained weight file here (1.0 GB).
Now you can run the Darknet yolo command in testing mode:
./darknet yolo test cfg/yolo.cfg <path>/yolo.weights <image>
I've included some example images to try in case you need inspiration. Try data/eagle.jpg, data/dog.jpg, data/person.jpg, or data/horses.jpg! Assuming your weight file is in the base directory, you will see something like this:
./darknet yolo test cfg/yolo.cfg yolo.weights data/dog.jpg
0: Crop Layer: 448 x 448 -> 448 x 448 x 3 image
1: Convolutional Layer: 448 x 448 x 3 image, 64 filters -> 224 x 224 x 64 image
....
27: Connected Layer: 4096 inputs, 1225 outputs
28: Detection Layer
Loading weights from yolo.weights...Done!
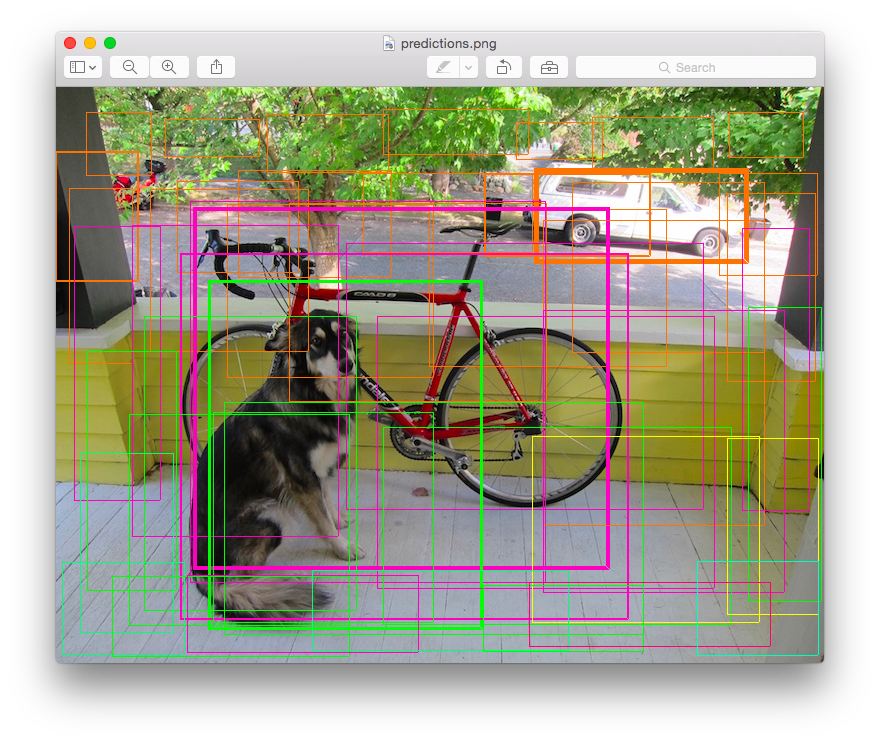
data/dog.jpg: Predicted in 8.012962 seconds.
0.941620 car
0.397087 bicycle
0.220952 dog
Not compiled with OpenCV, saving to predictions.png instead
Darknet prints out the objects it detected, its confidence, and how long it took to find them. Since we are using Darknet on the CPU it takes around 6-12 seconds per image. If we use the GPU version it would be much faster.
We didn't compile Darknet with OpenCV so it can't display the detections directly. Instead, it saves them in predictions.png. You can open it to see the detected objects:

Hooray!!
Instead of supplying an image on the command line, you can leave it blank to try multiple images in a row. Instead you will see a prompt when the config and weights are done loading:
./darknet yolo test cfg/yolo.cfg yolo.weights
0: Crop Layer: 448 x 448 -> 448 x 448 x 3 image
1: Convolutional Layer: 448 x 448 x 3 image, 64 filters -> 224 x 224 x 64 image
....
27: Connected Layer: 4096 inputs, 1225 outputs
28: Detection Layer
Loading weights from yolo.weights...Done!
Enter Image Path:
Enter an image path like data/eagle.jpg to have it predict boxes for that image. Once it is done it will prompt you for more paths to try different images. Use Ctrl-C to exit the program once you are done.
The original YOLO model uses a lot of GPU memory. If you have a smaller graphics card you can try using the smaller version of the YOLO model, yolo-small.cfg. You should already have the config file in the cfg/ subdirectory. Download the pretrained weights here (359 MB). Then you can run the model!
./darknet yolo test cfg/yolo-small.cfg yolo-small.weights
The small version of YOLO only uses 1.1 GB of GPU memory so it should be suitable for many smaller graphics cards.
The yolo-tiny.cfg is based on the Darknet reference network. You should already have the config file in the cfg/ subdirectory. Download the pretrained weights here (172 MB). Then you can run the model!
./darknet yolo test cfg/yolo-tiny.cfg yolo-tiny.weights
The tiny version of YOLO only uses 611 MB of GPU memory and it runs at more than 150 fps on a Titan X.
-
yolo.cfgis based on theextractionnetwork. It processes images at 45 fps, here are weight files foryolo.cfgtrained on 2007 train/val+ 2012 train/val, and trained on all 2007 and 2012 data. -
yolo-small.cfghas smaller fully connected layers so it uses far less memory. It processes images at 50 fps, here are weight files foryolo-small.cfgtrained on 2007 train/val+ 2012 train/val. -
yolo-tiny.cfgis much smaller and based on the Darknet reference network. It processes images at 155 fps, here are weight files foryolo-tiny.cfgtrained on 2007 train/val+ 2012 train/val.
By default, YOLO only displays objects detected with a confidence of .2 or higher. You can change this by passing the -thresh <val> flag to the yolo command. For example, to display all detection you can set the threshold to 0:
./darknet yolo test cfg/yolo.cfg yolo.weights data/dog.jpg -thresh 0
Which produces:
If you compile Darknet with CUDA then it can process images waaay faster than you can type them in. To efficiently detect objects in multiple images we can use the valid subroutine of yolo.
First we have to get our data and generate some metadata for Darknet. The VOC 2012 test data can be found here but you'll need an account! Once you get the file 2012test.tar you need to run the following commands:
tar xf 2012test.tar
cp VOCdevkit/VOC2012/ImageSets/Main/test.txt .
sed 's?^?'`pwd`'/VOCdevkit/VOC2012/JPEGImages/?; s?$?.jpg?' test.txt > voc.2012.test
These commands extract the data and generate a list of the full paths of the test images. Next, move this list to the darknet/data subdirectory:
mv voc.2012.test <path-to>/darknet/data
Now you are ready to do some detection! Make sure Darknet is compiled with CUDA so you can be super fast. Then run:
./darknet yolo valid cfg/yolo.cfg yolo.weights
You will see a whole bunch of numbers start to fly by. That's how many images you've run detection on! On a Titan X I see this as the final output:
....
10984
10992
Total Detection Time: 250.000000 Seconds
There are 10,991 images in the VOC 2012 test set. We just processed them in 250 seconds! That's 44 frames per second! If you were using Selective Search it would take you 6 hours to even extract region proposals for all of the images. We just ran a full detection pipeline in 4 minutes. Pretty cool.
The predicted detections are in the results/ subdirectory. They are in the format specified for Pascal VOC submission.
If you are interested in reproducing our numbers on the Pascal challenge you should use this weight file (1.0 GB) instead. It was trained with the IOU prediction we describe in the paper which gives slightly better mAP scores. The numbers won't match exactly since I accidentally deleted the original weight file but they will be approximately the same.
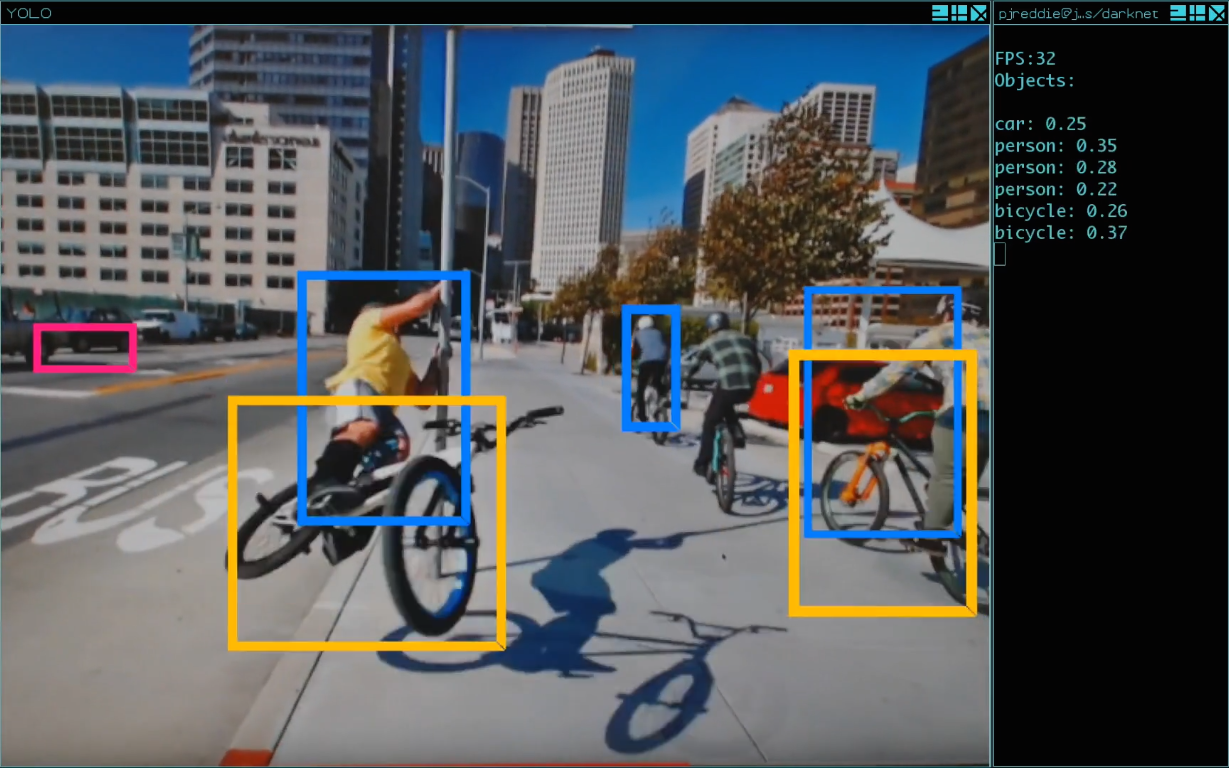
Running YOLO on test data isn't very interesting if you can't see the result. Instead of running it on a bunch of images let's run it on the input from a webcam! Here is an example of YOLO running on a webcam that we then pointed at YouTube videos:

To run this demo you will need to compile Darknet with CUDA and OpenCV. You will also need to pick a YOLO config file and have the appropriate weights file. Then run the command:
./darknet yolo demo cfg/yolo.cfg yolo.weights
YOLO will display the current FPS and predicted classes as well as the image with bounding boxes drawn on top of it.
You will need a webcam connected to the computer that OpenCV can connect to or it won't work. If you have multiple webcams connected and want to select which one to use you can pass the flag -c <num> to pick (OpenCV uses webcam 0 by default).
You can train YOLO from scratch if you want to play with different training regimes, hyper-parameters, or datasets. Here's how to get it working on the Pascal VOC dataset.
To train YOLO you will need all of the VOC data from 2007 to 2012. You can find links to the data here. To get all the data, make a directory to store it all and from that directory run:
curl -O http://pjreddie.com/media/files/VOCtrainval_11-May-2012.tar
curl -O http://pjreddie.com/media/files/VOCtrainval_06-Nov-2007.tar
curl -O http://pjreddie.com/media/files/VOCtest_06-Nov-2007.tar
tar xf VOCtrainval_11-May-2012.tar
tar xf VOCtrainval_06-Nov-2007.tar
tar xf VOCtest_06-Nov-2007.tar
There will now be a VOCdevkit/ subdirectory with all the VOC training data in it.
Now we need to generate the label files that Darknet uses. Darknet wants a .txt file for each image with a line for each ground truth object in the image that looks like:
<object-class> <x> <y> <width> <height>
Where x, y, width, and height are relative to the image's width and height. To generate these file we will run the voc_label.py script in Darknet's scripts/ directory. Let's just download it again because we are lazy.
curl -O http://pjreddie.com/media/files/voc_label.py
python voc_label.py
After a few minutes, this script will generate all of the requisite files. Mostly it generates a lot of label files in VOCdevkit/VOC2007/labels/ and VOCdevkit/VOC2012/labels/. In your directory you should see:
ls
2007_test.txt   VOCdevkit
2007_train.txt  voc_label.py
2007_val.txt    VOCtest_06-Nov-2007.tar
2012_train.txt  VOCtrainval_06-Nov-2007.tar
2012_val.txt    VOCtrainval_11-May-2012.tar
The text files like 2007_train.txt list the image files for that year and image set. Darknet needs one text file with all of the images you want to train on. In this example, let's train with everything except the validation set from 2012 so that we can test our model. Run:
cat 2007_* 2012_train.txt > train.txt
Now we have all the 2007 images and the 2012 train set in one big list. That's all we have to do for data setup!
Now go to your Darknet directory. We will have to change the train subroutine of yolo to point it to your copy of the VOC data. Edit src/yolo.c, lines 54 and 55:
57     char *train_images = "/home/pjreddie/data/voc/test/train.txt";
58     char *backup_directory = "/home/pjreddie/backup/";
train_images should point to the train.txt file you just generated and backup_directory should point to a directory where you want to store backup weights files during training. Once you have edited the lines, re-make Darknet.
For training we use convolutional weights that are pre-trained on Imagenet. We use weights from the Extraction model. You can just download the weights for the convolutional layers here (54 MB).
If you want to generate the pre-trained weights yourself, download the pretrained Extraction model and run the following command:
./darknet partial cfg/extraction.cfg extraction.weights extraction.conv.weights 25
But if you just download the weights file it's way easier.
You are finally ready to start training. Run:
./darknet yolo train cfg/yolo.cfg extraction.conv.weights
It should start spitting out numbers and stuff.
If you want it to go faster and spit out fewer numbers you should stop training and change the config file a little. Modify cfg/yolo.cfg so that on line 3 it says subdivisions=2 or 4 or something that divides 64 evenly. Then restart training as above.
After every 128,000 images Darknet will save a training checkpoint to the directory you specified in src/yolo.c. These will be titled something like yolo_12000.weights. You can use them to restart training instead of starting from scratch.
After 40,000 iterations (batches) Darknet will save the final model weights as yolo_final.weights. Then you are done!
Good luck!!