Getting Started (Creators) - photonle/Photon-v2 GitHub Wiki
Looking to get started on creating your own vehicles, components, or other Photon 2 content? You're in the right place.
Like Photon LE, Photon 2 is heavily code-centric when it comes to creating and editing content. However, you generally do not need to know programming to get started (although it does help). Photon 2 is written in and works with Lua. JSON support is in-progress and a graphical editor remains a long-term goal.
This guide will show you the first steps using Photon's Lua API (the recommended method).
1. Text Editor
Before looking at or opening any code, you're going to need a text editor. I strongly recommend the free and open-source VSCode. It's what Photon 2 was written with, and Photon 2's internal documentation relies on a VSCode plugin (see below).
Sumneko's Lua Extension for VSCode
If you are using VSCode, I also highly recommend Sumneko's Lua language server extension. Photon 2 uses annotations internally (specially formatted comments), which allows for auto-complete suggestions and code validation. Setting up the extension to utilize this functionality is covered below.
2. Clone the Photon 2 Repository
This step is not required if you are not using VSCode with the Sumneko Lua extension, although it is still necessary if you wish to use the latest Photon 2 builds. Otherwise the Photon 2 Workshop addon is all that's strictly required.
If you are using VSCode and the Sumneko Lua extension, you need to clone the repository in order to take advantage of the annotation and auto-suggest features.
A. Download the GitHub Desktop Client
Create a GitHub account and download the desktop client here.
B. Clone the Repository
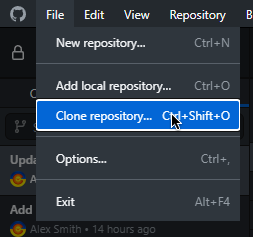
Go to File -> Clone Repository.
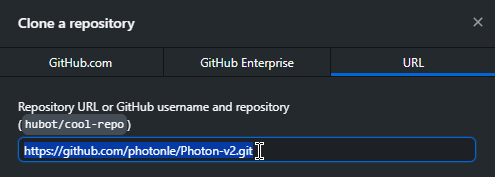
Copy and paste the repository URL https://github.com/photonle/Photon-v2.git into the URL field.
Set the Local Path to the location of your Garry's Mod addons folder ...\steamapps\common\GarrysMod\garrysmod\addons\. (If you are unsure where this is, the default location on Windows is C:\Program Files (x86)\Steam). At the end of addons\ ensure it says Photon-v2, which is the final destination folder.
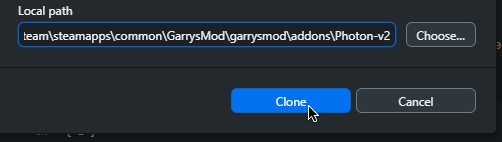
Then press Confirm and wait for the repository to download.
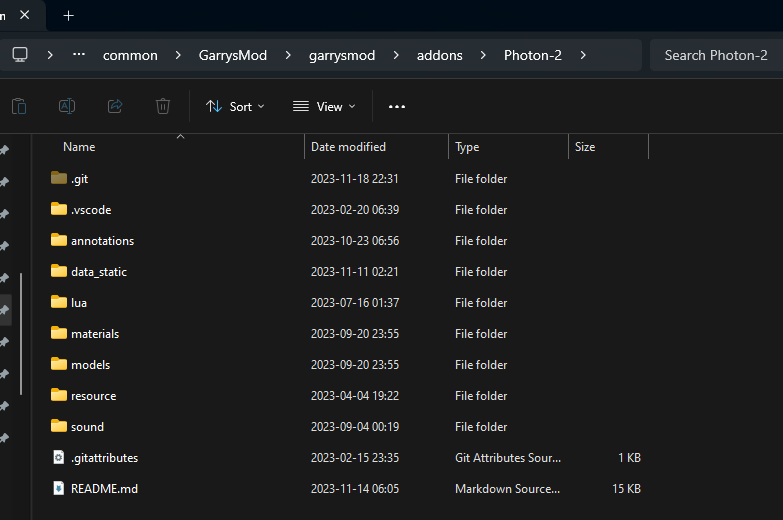
Open ...\steamapps\common\GarrysMod\garrysmod\addons\Photon-v2 and ensure the file structure looks like this:
3. Create a Custom Addons Folder
In order to easily export and share your content, you need to create a new dedicated addons folder. (As you begin to manage multiple custom addons, will repeat this process to keep your files separated).
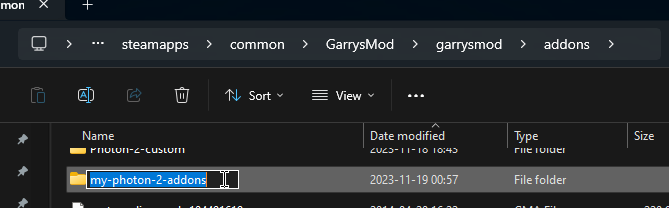
In the Windows file explorer, navigate to ...\steamapps\common\GarrysMod\garrysmod\addons\ (up one level from Photon-v2). Now, create a new folder. The name is up to you, but we will be creating a folder called my-photon-2-addons for the purposes of this guide.
To allow Photon 2 to detect and load your content, we need to create a few more directories -- each inside the other. Now create the following paths:
my-photon-2-addons\luamy-photon-2-addons\lua\photon-v2my-photon-2-addons\lua\photon-v2\library
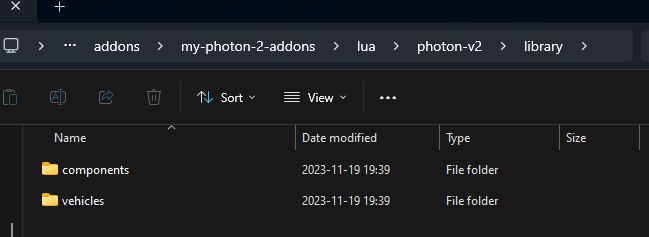
Now, inside the \library\ folder, we'll create two more folders (there are more folders you can have in the library but we will ignore them for now):
my-photon-2-addons\lua\photon-v2\library\vehiclesmy-photon-2-addons\lua\photon-v2\library\components
The vehicles library is for vehicle profiles, which are typically spawned from the Vehicles tab on the spawn menu. They define equipment a spawned vehicle should receive, as well as body groups, materials, and more. The components library is for individual components. Components are a type of entity (such as a lightbar or siren speaker) managed by Photon
When complete, your file explorer should look like this:
4. Setup Text Editor
Once you have the initial folders setup, we will open our new custom addon folder as a project inside VSCode (if you're not using VSCode, most editors work in a similar manner).
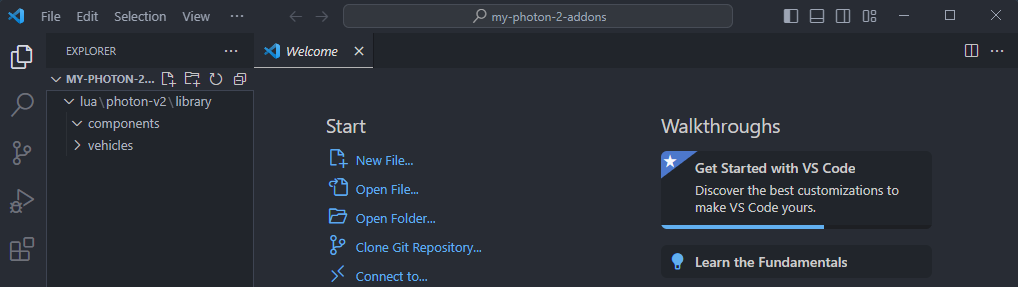
Locate the root, custom folder we created at ...\steamapps\common\GarrysMod\garrysmod\addons\my-photon-2-addons inside the addons folder, then right-click on folder (if on Windows 11, then click "Show more options"), then click "Open with Code" to open to the folder as a project inside VSCode.

VSCode should then open to a the welcome screen with your created folders on the left sidebar.
Setup the Sumneko Lua Extension
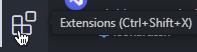
In order to take advantage of the Sumneko Lua extension, we need to configure a few settings. Start by opening the VSCode extensions panel on the left sidebar by clicking the icon with four blocks.
Next, locate the Sumneko Lua extension entry in the list (if you just installed VSCode, it's probably at the top). Then click the Manage gear icon on the bottom right of the entry.
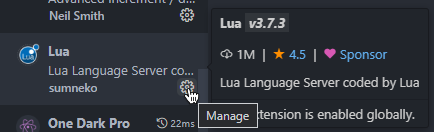
Then click the "Extension Settings" option on the context menu.

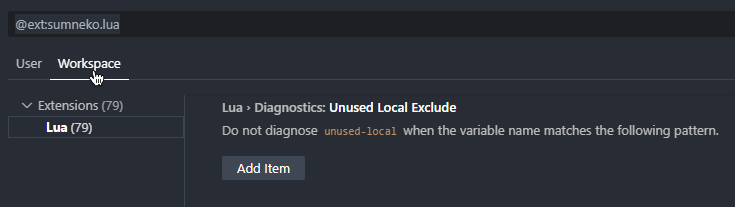
You should see the Settings window open in the main portion of VSCode. Now look at the top and select the "Workspace" tab.
Nonstandard Symbols
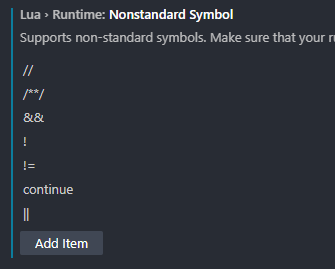
To configure the extension to be compatible with Garry's Mod's Lua tweaks, we need to add a few "nonstandard symbols," which are special keywords and syntax options that Garry's Mod's Lua supports but aren't natively supported by Lua. To do so, scroll down until you locate the section that says "Lua > Runtime: Nonstandard Symbol."

Click "Add Item" and select from the drop down list, then click "OK" to confirm it.

Do this process for the following symbols: //, /**/, !, !=, &&, ||, and continue.
When you're done, this section should now look like this:
Preload File Size
Next, we need to increase the "Preload File Size" in preparation for some of Photon 2's annotation files. Scroll until you find the option labeled "Lua > Workspace: Preload File Size", and set the value to something greater than 1000 (I use 8192, which is 8MB).

Add Photon 2 to the Workspace Library
Lastly, we need to add the Photon 2 directory into the project's workspace library so Photon 2's code can be read by the extension and provide useful hints. Find the section labeled "Lua > Workspace: Library," and click the "Add Item" button.
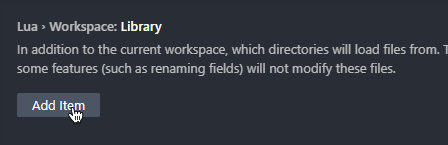
Now find the full filepath for Photon 2 in your Garry's Mod addons folder, and paste it here (...\steamapps\common\GarrysMod\garrysmod\addons\Photon-v2) and click "OK."

Troubleshooting
If auto-suggestions (Intellisense pop-ups) are not working, it's possible that the extension didn't initialize and cache your workspace correctly. This is common when first setting it up as there are several thousand new annotations it needs to read through, and it can sometimes break while doing this.
The simplest solution is to reload your VSCode window by using the keyboard shortcut Ctrl+Shift+P, then type "reload" and select the "reload window" option. Press enter and the window will reload.
5. Updates
As Photon 2 is still in heavy development (as of November 2023), updates to the repository are typically made multiple times per week. To take advantage of the newest features as soon as they're made available, you'll need to periodically check and pull updates from the repository using the GitHub client. (See previous link to GitHub's documentation on an in-depth explanation).

What next?
What's next? Check out the other guides on this wiki for specific guidance.