Bed Mesh - phnxdrgn536/FLSun-v400 GitHub Wiki
The Bed Mesh module may be used to compensate for bed surface irregularities to achieve a better first layer across the entire bed. It should be noted that software based correction will not achieve perfect results, it can only approximate the shape of the bed. Bed Mesh also cannot compensate for mechanical and electrical issues. If an axis is skewed or a probe is not accurate then the bed_mesh module will not receive accurate results from the probing process.
This example is for the V400 300mm bed with the stock 5 probe count
[bed_mesh]
    speed: 120
    horizontal_move_z: 5
    mesh_radius: 150
    mesh_origin: 0, 0
round_probe_count: 5-
mesh_radius: 150
Required
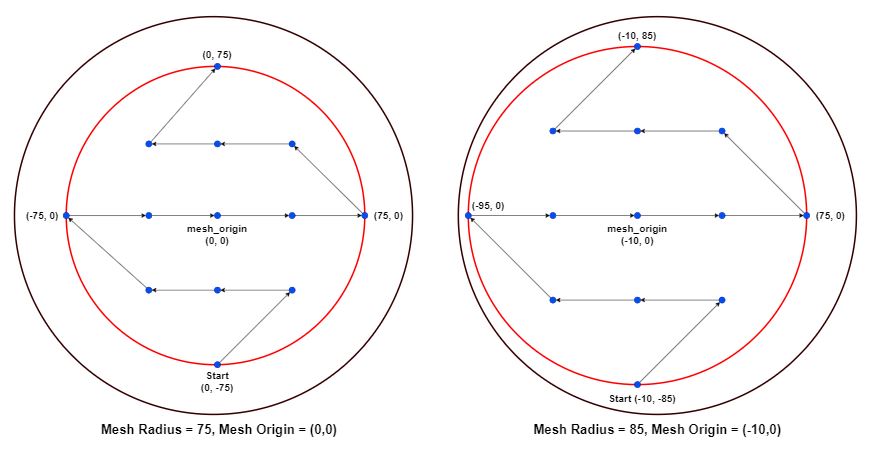
The radius of the probed mesh in mm, relative to the mesh_origin. Note that the probe's offsets limit the size of the mesh radius. In this example, a radius larger than 76 would move the tool beyond the range of the printer. -
mesh_origin: 0, 0
Default Value: 0, 0
The center point of the mesh. This coordinate is relative to the probe's location. While the default is 0, 0, it may be useful to adjust the origin in an effort to probe a larger portion of the bed. See the illustration below. -
round_probe_count: 5
Default Value: 5
This is an integer value that defines the maximum number of probed points along the X and Y axes. By "maximum", we mean the number of points probed along the mesh origin. This value must be an odd number, as it is required that the center of the mesh is probed.
The illustration below shows how the probed points are generated. As you can see, setting the mesh_origin to (-10, 0) allows us to specifiy a larger mesh radius of 85.
To change the default probe pattern from 5X5 to 9X9, 11X11, ...23X23 simply change the "Round_probe_count" to what you would like this value to be squared. If you were to change this value to 15, then you would set up a probe pattern of 15X15. NOTE: due to the origin of the build plate being the center of the bed this value has to be an odd number. 0,0 is a probe point and is added to the pattern. since these patterns are squared the number of probe points have to be even on either side of this center point on the X/Y axis.
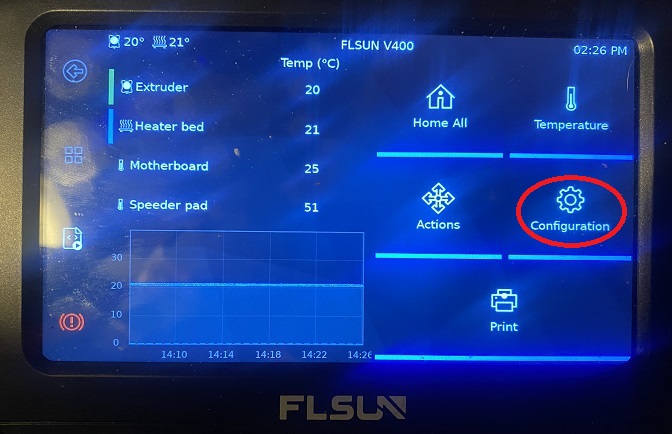
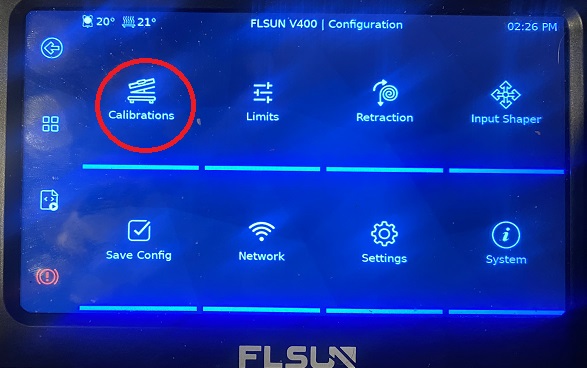
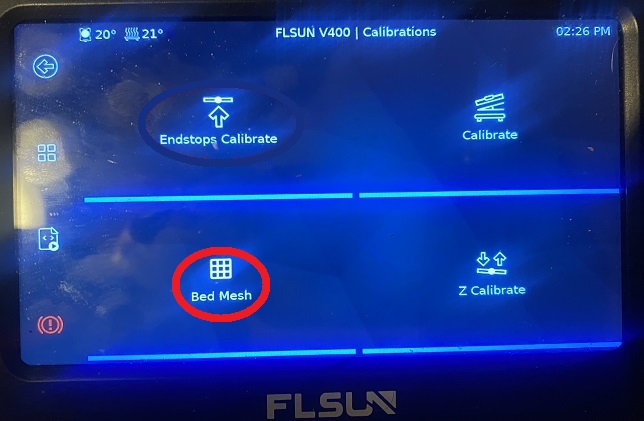
From the home screen press "Configuration->Calibrations->Bed Mesh"
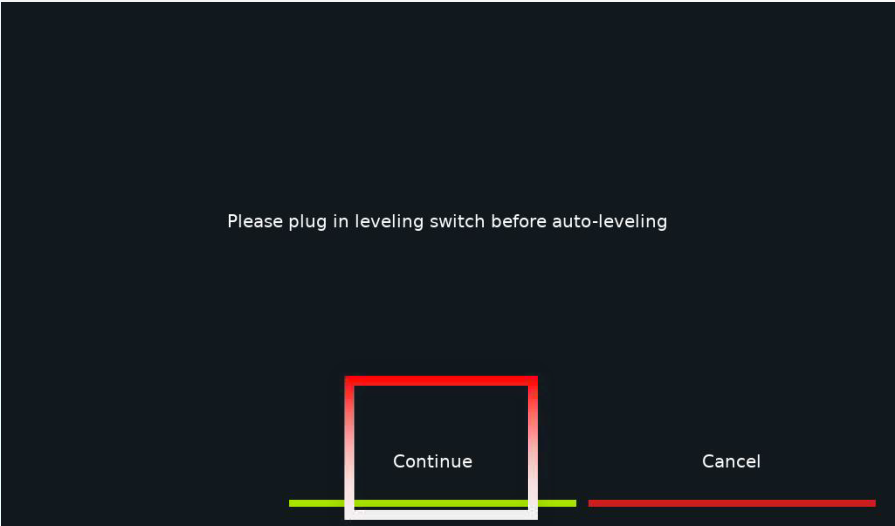
The printer will then ask you to verify the leveling switch is installed, Press continue
After the first leveling is completed, the printer will restart and display the homepage. Data is automatically saved
Continue to Z-offset calibration.
If you like my work, don't hesitate to support me by buying me a 🍺 or a ☕. Thank you 🙂