Bed Level - phnxdrgn536/FLSun-v400 GitHub Wiki
Bed leveling (sometimes also referred to as "bed tramming") is critical to getting high quality prints. If a bed is not properly "leveled" it can lead to poor bed adhesion, "warping", and subtle problems throughout the print. This document serves as a guide to performing bed leveling in Klipper.
It's important to understand the goal of bed leveling. If the printer is commanded to a position X0 Y0 Z10 during a print, then the goal is for the printer's nozzle to be exactly 10mm from the printer's bed. Further, should the printer then be commanded to a position of X50 Z10 the goal is for the nozzle to maintain an exact distance of 10mm from the bed during that entire horizontal move.
In order to get good quality prints the printer should be calibrated so that Z distances are accurate to within about 25 microns (.025mm). This is a small distance - significantly smaller than the width of a typical human hair. This scale can not be measured "by eye". Subtle effects (such as heat expansion) impact measurements at this scale. The secret to getting high accuracy is to use a repeatable process and to use a leveling method that leverages the high accuracy of the printer's own motion system.
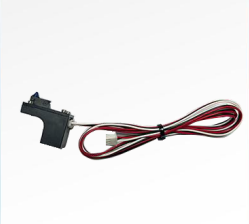
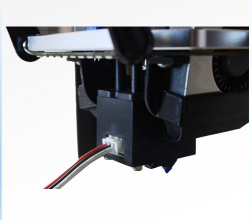
To perform the Bed leveling test on the V400 install the bed leveling probe on the hotend and connect the cable in the proper port at the top of the printer.

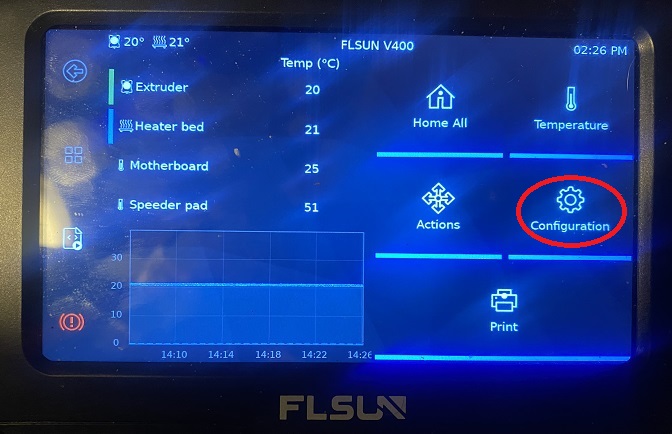
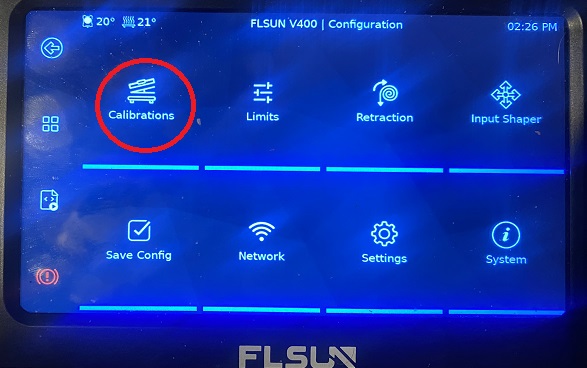
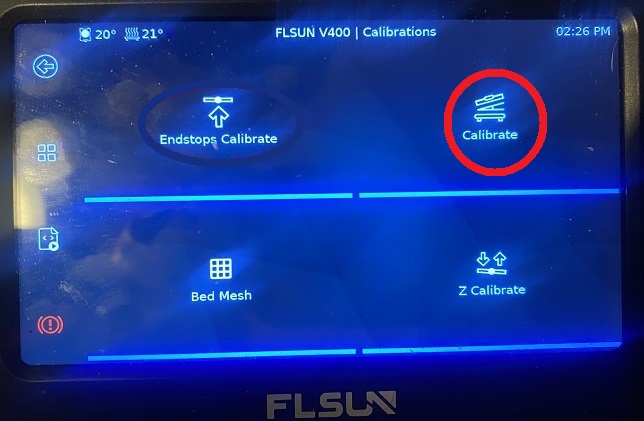
At this point you will want to press Configuration->Calibrations->Calibrate on your speeder pad to initiate bed level calibration.
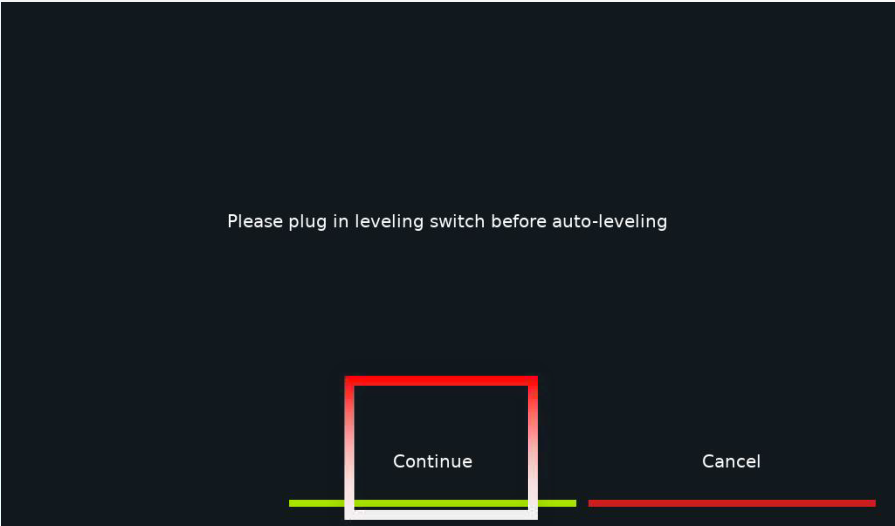
The printer will then ask you to verify the leveling switch is installed, Press continue
After the first leveling is completed, the printer will restart and display the homepage. Data is automatically saved
Continue to Bed Mesh calibration.
If you like my work, don't hesitate to support me by buying me a 🍺 or a ☕. Thank you 🙂