Scripting Tutorial Halftone Filter - obsproject/obs-studio GitHub Wiki
This tutorial describes the implementation of a "halftone" filter as a Lua script for OBS. Such a filter appears in the list of filters and can be added as part of a filter chain to any video source. As effect, the filter mimics the halftone technique, used for printing with a reduced set of ink colors arranged in patterns. It is based on dithering with a carefully designed texture.
The tutorial is divided into two parts. In this first part, we create a minimal script that implements a simple rendering effect. Such a script with its effect file can be easily re-used as starting point for new projects.
Similarly to the Source Shake tutorial, create a script file named filter-halftone.lua with this content:
obs = obslua

-- Returns the description displayed in the Scripts window
function script_description()
  return [[<center><h2>Halftone Filter</h2></center>
  <p>This Lua script adds a video filter named <it>Halftone</it>. The filter can be added
  to a video source to reduce the number of colors of the input picture. It reproduces
  the style of a magnified printed picture.</p>]]
end
Add the new script in the Scripts window, the description should appear (with no properties).
Sources are supported in Lua through the source_info structure. It is defined as a usual Lua table containing a set of mandatory keys referencing values and functions that mimic a subset of the C obs_source_info structure.
The source_info structure is registered using obs_register_source. OBS will use the structure to create the internal data and settings when the filter is added to an existing video source. A filter has its own independent set of properties and data settings, i.e. an instance of such settings exists for each filter instance. OBS manages the filter creation, destruction and the persistent storage of its settings.
Let's create the source info structure for a video filter with a minimal set of values and functions. It is typically registered in script_load:
-- Called on script startup
function script_load(settings)
  obs.obs_register_source(source_info)
end

-- Definition of the global variable containing the source_info structure
source_info = {}
source_info.id = 'filter-halftone'              -- Unique string identifier of the source type
source_info.type = obs.OBS_SOURCE_TYPE_FILTER   -- INPUT or FILTER or TRANSITION
source_info.output_flags = obs.OBS_SOURCE_VIDEO -- Combination of VIDEO/AUDIO/ASYNC/etc

-- Returns the name displayed in the list of filters
source_info.get_name = function()
  return "Halftone"
end
Add the code, refresh the script, then choose a source (here a colorful picture of the VR game Anceder) and display the Filter dialog window for the source (e.g. Filters in the context menu of the source). Click on + and the name Halftone should appear in the list of filters:
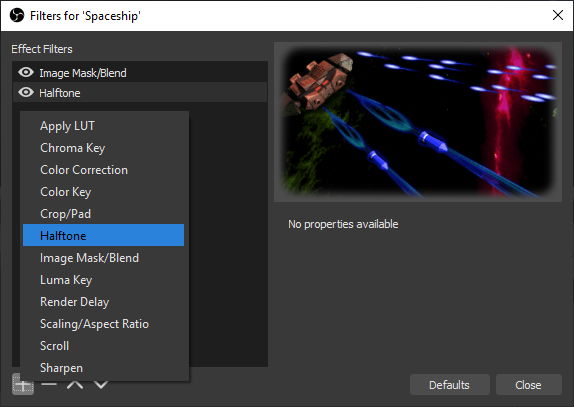
Add the new Halftone filter. For now the filter has no effect because the source_info.create function is not defined.
Lua would not be fast enough for video processing so the filter is based on GPU computation. A GPU can be programmed through "shaders" compiled by the graphics device driver from GLSL for OpenGL or HLSL in the MS Windows world. OBS relies on HLSL and expects shader code in the so-called effect files.
An effect can be compiled from a file with gs_effect_create_from_file or from a string with gs_effect_create, and is destroyed with gs_effect_destroy). Like other graphic functions in OBS, manipulating effects needs to occur in the graphics context. This is ensured by calling obs_enter_graphics and then obs_leave_graphics when everything is done.
The compilation is typically implemented in the source_info.create function and resources are released in the source_info.destroy function. source_info.create returns a Lua table containing custom data used for the filter instance. Most functions of the source_info structure will provide this Lua table passed as an argument, so this is where you want to store any custom data needed by the filter. Please note that if source_info.create returns nil, then the filter initialization is considered failed (and logged accordingly).
Add this code to the Lua script:
-- Creates the implementation data for the source
source_info.create = function(settings, source)

  -- Initializes the custom data table
  local data = {}
  data.source = source -- Keeps a reference to this filter as a source object
  data.width = 1       -- Dummy value during initialization phase
  data.height = 1      -- Dummy value during initialization phase

  -- Compiles the effect
  obs.obs_enter_graphics()
  local effect_file_path = script_path() .. 'filter-halftone.effect.hlsl'
  data.effect = obs.gs_effect_create_from_file(effect_file_path, nil)
  obs.obs_leave_graphics()

  -- Calls the destroy function if the effect was not compiled properly
  if data.effect == nil then
    obs.blog(obs.LOG_ERROR, "Effect compilation failed for " .. effect_file_path)
    source_info.destroy(data)
    return nil
  end

  return data
end

-- Destroys and release resources linked to the custom data
source_info.destroy = function(data)
  if data.effect ~= nil then
    obs.obs_enter_graphics()
    obs.gs_effect_destroy(data.effect)
    data.effect = nil
    obs.obs_leave_graphics()
  end
end
The effect file filter-halftone.effect.hlsl is mentioned in the code, it will defined in the next section. Please note that the source argument of the function source_info.create is a reference to the current instance of the filter as a source object (almost everything is a source in OBS). This reference, as well as the variables width and height, initialized with dummy values, are used in the rendering function.
Namely, the function source_info.video_render is called each frame to render the output of the filter in the graphics context (no need to call obs_enter_graphics). To render an effect, first obs_source_process_filter_begin is called, then the effect parameters can be set, and then obs_source_process_filter_end is called to draw.
Determining the width and height to pass to obs_source_process_filter_end is somehow tricky in OBS, because the filter is itself in a chain of filters, where the resolution could theoretically change at any stage. The usual method is to retrieve the "parent source" of the filter with obs_filter_get_parent, i.e. "the source being filtered", and then to use the so far undocumented functions obs_source_get_base_width and obs_source_get_base_height. Note that some filters reference the next source in the chain using obs_filter_get_target, not the source being filtered (it may make a difference depending on the use case).
In addition, two additional functions source_info.get_width and source_info.get_height must be defined to provide the values to OBS whenever necessary. The functions will re-use the values determined in source_info.video_render.
The effect rendering code looks like:
-- Returns the width of the source
source_info.get_width = function(data)
  return data.width
end

-- Returns the height of the source
source_info.get_height = function(data)
  return data.height
end

-- Called when rendering the source with the graphics subsystem
source_info.video_render = function(data)
  local parent = obs.obs_filter_get_parent(data.source)
  data.width = obs.obs_source_get_base_width(parent)
  data.height = obs.obs_source_get_base_height(parent)

  obs.obs_source_process_filter_begin(data.source, obs.GS_RGBA, obs.OBS_NO_DIRECT_RENDERING)

  -- Effect parameters initialization goes here

  obs.obs_source_process_filter_end(data.source, data.effect, data.width, data.height)
end
Add the code blocks to the Lua script, but no need to reload for now, the effect file is still missing.
The Lua code is in place, now create a new file called filter-halftone.effect.hlsl in the same directory as the Lua script.
.hlsl is chosen such that a code editor or an IDE recognizes directly that it is HLSL code. As the parser of OBS may miss unbalanced brackets or parenthesis (and say nothing about it in the logs), it is very important to have syntax checking in the editor.
An effect file follows a strict syntax and structure. It is a mix of static data definitions and code. These constraints are necessary to allow the compilation for the GPU and the massively parallel execution. The various parts are described below.
Our effect file starts with macro definitions that will allow writing HLSL-compliant code instead of the effect dialect understood by OBS, in order to support a full syntax check in the IDE. Indeed, the keywords sampler_state and texture2d are specific to effects in OBS. Using such macros is of course not mandatory (and not so common looking at other OBS effect files):
// OBS-specific syntax adaptation to HLSL standard to avoid errors reported by the code editor
#define SamplerState sampler_state
#define Texture2D texture2d
Then the two mandatory uniform parameters required by OBS are defined. The values of these parameters will be set transparently by OBS according to the input picture of the source being filtered set in image, and the "View-Projection Matrix" ViewProj used to compute the screen coordinates where the filtered picture will be drawn:
// Uniform variables set by OBS (required)
uniform float4x4 ViewProj; // View-projection matrix used in the vertex shader
uniform Texture2D image;   // Texture containing the source picture
The next definition is a "sampler state". It defines how to sample colors from pixels in a texture, i.e. how to interpolate colors between two pixels (Linear) or just to take the next neighbor (Point), and how to behave in the the pixel coordinates are outside of the texture, i.e. take the pixels from the nearest edge (Clamp), wrap around (Wrap) or mirror the texture over the edges (Mirror). The supported values for sampler states are documented in the OBS API reference.
We define a simple linear clamp sampler state that will be used in the pixel shader:
// Interpolation method and wrap mode for sampling a texture
SamplerState linear_clamp
{
    Filter    = Linear;     // Anisotropy / Point / Linear
    AddressU  = Clamp;      // Wrap / Clamp / Mirror / Border / MirrorOnce
    AddressV  = Clamp;      // Wrap / Clamp / Mirror / Border / MirrorOnce
    BorderColor = 00000000; // Used only with Border edges (optional)
};
After that, two very specific data structures are defined to specify which parameters are given to the vertex shader, and passed from the vertex shader to the pixel shader. In this tutorial these structures are artificially separated for better understanding and more generality. In most effects, both structures are defined in only one structure.
The structures require for each parameter a semantics identifier giving the intended use of the parameter. Supported semantics are documented in the OBS API reference. Semantics are necessary for the graphics pipeline of the GPU:
// Data type of the input of the vertex shader
struct vertex_data
{
    float4 pos : POSITION;  // Homogeneous space coordinates XYZW
    float2 uv  : TEXCOORD0; // UV coordinates in the source picture
};

// Data type of the output returned by the vertex shader, and used as input
// for the pixel shader after interpolation for each pixel
struct pixel_data
{
    float4 pos : POSITION;  // Homogeneous screen coordinates XYZW
    float2 uv  : TEXCOORD0; // UV coordinates in the source picture
};
Before going further, some words about the classical 3D rendering pipeline. Roughly speaking, it comprises these main steps:
- The application, here OBS, set-ups all data structures (textures, data parameters, arrays, etc) necessary for the computation and then feeds the 3D coordinates of triangles into the vertex shader together with various vertex attributes such as UV coordinate of the vertex mapped to a texture or a color assigned to this vertex, all part of the
vertex_datastructure. - Each time a
vertex_datastructure is available in the GPU, the vertex shader is called and returns apixel_datastructure corresponding to the pixel under the vertex as seen on the screen. During this call, the vertex shader transforms the 3D world coordinates of the vertex into screen coordinates, and transforms the other vertex attributes if necessary. - Then many complex steps are performed by the GPU to determine how far the surface of each triangle is visible on the screen, up to each visible pixel.
- Each time the GPU determines that a pixel of a triangle is visible, it calls the pixel shader with a
pixel_datastructure as argument that corresponds to the position of the pixel. In order to provide position-specific values for each pixel of the triangle, the GPU interpolates values from the values of the 3 structures returned for the 3 vertices of the triangle by the vertex shader.
To render sources, OBS follows the same model and renders simply quads (2 triangles) on the screen, where each vertex has the UV mapping of the source picture as attribute. The vertex shader is only used to compute the screen coordinates of the 4 vertices of the quad, according to the transform of the source, and to pass the UV coordinates to the pixel shader. The classical method for the transformation of world coordinates into screen coordinates is a multiplication through the "View-Projection" 4x4 matrix in homogeneous coordinates (don't be afraid, it is not necessary to understand homogeneous coordinates for the tutorial):
// Vertex shader used to compute position of rendered pixels and pass UV
pixel_data vertex_shader_halftone(vertex_data vertex)
{
    pixel_data pixel;
    pixel.pos = mul(float4(vertex.pos.xyz, 1.0), ViewProj);
    pixel.uv  = vertex.uv;
    return pixel;
}
The vertex shader will remain like this in most cases with OBS. Altering the 3D transformation would change the proper location of displayed sources on the screen. Note that interesting results could be achieved, e.g. actually the Source Shake animation could be certainly implemented as a smart modification of the View-Projection matrix.
Please note the well-adapted HLSL syntax vertex.pos.xyz here. pos is a vertex member with vector type float4. Adding the suffix .xyz is sufficient to convert it to a temporary float3 vector with the values of the components x, y and z of pos. Then float4(vertex.pos.xyz, 1.0) is again a float4 vector with the 3 first components of vertex.pos.xyz and 1.0 as fourth component. The HLSL syntax, which is by the way very similar to GLSL used in OpenGL, has this special feature that makes it very compact for matrix and vector operations.
Now the real heart of the video filter effect is in the Pixel Shader. The main principle of a pixel shader is very simple: this is a function that computes a color at a given pixel position. The pixel shader function is called for every single pixel within the draw area.
As a simple gray shading effect, we want to compute the "luminance" of the source pixel (i.e. its brightness or luminous intensity), and use it for each RGB component of the output color:
// Pixel shader used to compute an RGBA color at a given pixel position
float4 pixel_shader_halftone(pixel_data pixel) : TARGET
{
    float4 source_sample = image.Sample(linear_clamp, pixel.uv);
    float luminance = dot(source_sample.rgb, float3(0.299, 0.587, 0.114));
    return float4(luminance.xxx, source_sample.a);
}
Please again admire the incredibly compact syntax:
- On the first line, the
source_samplevariable receives the RGBA color of the pixel atpixel.uvin the source picture in UV coordinates, following a sampling method given bylinear_clamp. Attention: here.uvis just afloat2member of the structurepixel, not a suffix to access particular vector components. - On the second line, the relative luminance is computed as a dot product of the
float3vector of the RGB components ofsample_colorand the constantfloat3vector (0.299, 0.587, 0.114). The expression is equivalent tosource_sample.r*0.299 + source_sample.g*0.587 + source_sample.b*0.114. Sufficesr,g,b,acan be used likex,y,z,wto access particular vector components. It is necessary to writesource_sample.rgbhere because it is afloat4vector and we want to exclude theacomponent from the dot product. - On the third line, a
float4vector is built with three time theluminancevalue and then the original alpha value of the source color as fourth component. The color is returned as afloat4containing the values of the RGBA components between 0.0 and 1.0.
The position of the pixel is provided through the pixel_data structure:
-
pixel.posis afloat4vector resulting from the computation in the vertex shader and further interpolation. In the pixel shaderpixel.pos.xymay contain the absolute position on screen of the pixel being rendered (i.e. values change if the user moves the source with the mouse). Now if the source is itself scaled with a setting of Scale filtering different than Disable, or if some other filter needs to render in a texture as an intermediate step, thenpixel.pos.xymay contain some other pixel coordinates corresponding to the internal texture used to render the output of our filter before further processing. In addition, aspixel.posis in homogeneous coordinates, normally it is necessary to dividexandyby thewcomponents (which should be always equal to 1 here as there is no 3D). Long story short, it is not recommended to usepixel.posdirectly. -
pixel.uvgives the interpolated UV coordinates of the pixel in the source picture as afloat2vector, i.e. it does not depend on the position or scaling of the source. As UV coordinates,pixel.uv.xandpixel.uv.yhave values in range 0.0 to 1.0, with the upper left corner of the source picture is at position (0.0,0.0) and the bottom right corner at (1.0,1.0). This is what we want to use to reference the source pixels. In addition, the UV coordinates can be used directly to retrieve the pixel color from theimagetexture.
The final part of the effect file is the definition of the "techniques". Here again the structure will be similar in most effects, typically with one pass and one technique:
technique Draw
{
    pass
    {
        vertex_shader = vertex_shader_halftone(vertex);
        pixel_shader  = pixel_shader_halftone(pixel);
    }
}
Add all the code blocks in the HLSL file, then restart OBS, normally the source should be displayed in black and white:
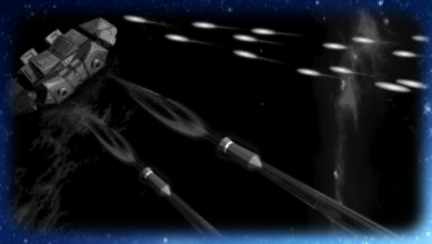
Well, this is not really a halftone picture here, but it clearly shows the expected shades of gray according to the luminance. The example picture is very dark and needs some luminosity correction.
Colors are typically encoded with 8 bits for each RGB component, i.e. in range 0 to 255, corresponding to the range 0.0 to 1.0 in HLSL. But because the human eye has a non-linear perception of the light intensity emitted by the monitor, usually the values encoded in RGB components do not grow linearly with the intensity, they follow a power law with an exponent called "gamma". This non-linearity of the RGB components can be a problem in a video filter if some computation is performed assuming components are encoded in a linear way.
Actually, in the frame of an OBS filter, this is not always an issue. Some sources will provide linearized pixel data to the shaders, some others will provide gama-encoded data. As of version 26.1, several attempts were made to have consistently linearized colors available in shaders. As long as it is not fully implemented, to give the maximum flexibility, we will to let the user select if the source is gamma-encoded or not. As the filter of this tutorial is more artistic than exact, a user would just try different settings to get the best result.
The power law for encoding and decoding uses typically an exponent 2.2 or 1/2.2. The two operations of gamma correction are called first gamma compression, i.e. encoding of an RGB component proportional to the light intensity into a value to be displayed to a human eye, with an exponent lower than 1, and gamma expansion with an exponent greater than 1.
Let's call gamma the exponent used for color decoding (greater than 1) with a value of 2.2. We can use simplified formulas for gamma encoding:
encoded_value = linear_value 1/gamma
And for gamma decoding:
linear_value = encoded_value gamma
Please note that such formulas keep values nicely between 0.0 and 1.0.
Now to come back to the halftone filter, we noted that the example picture is a bit too dark, and we know that changing the "gamma" of a picture change its overall luminosity. So we can introduce a gamma computation for 2 purposes: use of linear values for more exact calculations and a "gamma shift" of the source picture (not called "gamma correction" to avoid misunderstandings).
Namely, a gamma decoding including a subtractive shift would look like this, performed before any computation on the RGB color components (with a minus such that positive values increase the luminosity):
linear_value = encoded_value gamma-shift
Let's do it in the code, starting with the definition of the gamma and gamma_shift uniform variables and default values with other uniform variables at the top of the HLSL effect file:
// General properties
uniform float gamma = 1.0;
uniform float gamma_shift = 0.6;
Experiment and adapt the default values of gamma and gamma_shift to your source. They will be defined through OBS properties later on.
We introduce the gamma encoding and decoding functions, and re-write the pixel shader to use it. We use an additional clamp function to be sure to keep values between 0.0 and 1.0 before the exponentiation. In fact this may not be necessary but it avoids a warning that may be produced by the compiler. Add the code below the vertex shader:
float3 decode_gamma(float3 color, float exponent, float shift)
{
    return pow(clamp(color, 0.0, 1.0), exponent - shift);
}

float3 encode_gamma(float3 color, float exponent)
{
    return pow(clamp(color, 0.0, 1.0), 1.0/exponent);
}

// Pixel shader used to compute an RGBA color at a given pixel position
float4 pixel_shader_halftone(pixel_data pixel) : TARGET
{
    float4 source_sample = image.Sample(linear_clamp, pixel.uv);
    float3 linear_color = decode_gamma(source_sample.rgb, gamma, gamma_shift);

    float luminance = dot(linear_color, float3(0.299, 0.587, 0.114));
    float3 result = luminance.xxx;

    return float4(encode_gamma(result, gamma), source_sample.a);
}
Add all the code blocks in the HLSL file, then restart OBS (only reloading the script would not help, because the effect remains cached and would not be re-compiled). Depending on the values you select for gamma and gamma_shift, the filtered picture should have a different overall luminosity:
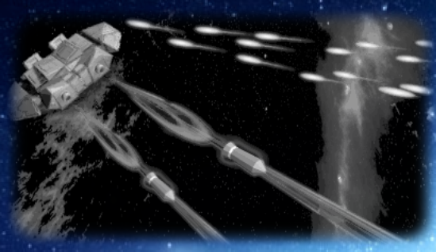
The picture is a bit better now.
Whatever the final form, the halftone effect is based on a pattern applied pixel-by-pixel to the source picture. While it is easy to transform the color of a single pixel, if the position of the pixel is necessary to recognize in which part of a pattern the pixel is located, then the UV coordinates alone are not sufficient in the general case, it is necessary to know the size of the source picture. More about the calculations in the next section.
In this section we will first see how to make the values of width and height available in the shader from the Lua code. Strangely, OBS does not foresee these parameters in effect files by default. We define the uniform variables with other uniform variables at the top of the HLSL effect file:
// Size of the source picture
uniform int width;
uniform int height;
Only uniform variables can be changed from the Lua code. Once an effect is compiled, the function gs_effect_get_param_by_name provides the necessary gs_eparam structure where the value can be set.
The effect parameters can be retrieved at the end of the source_info.create in the Lua file (above return data):
  -- Retrieves the shader uniform variables
  data.params = {}
  data.params.width = obs.gs_effect_get_param_by_name(data.effect, "width")
  data.params.height = obs.gs_effect_get_param_by_name(data.effect, "height")
Finally the values are set with gs_effect_set_int between obs_source_process_filter_begin and obs_source_process_filter_end in in source_info.video_render:
  -- Effect parameters initialization goes here
  obs.gs_effect_set_int(data.params.width, data.width)
  obs.gs_effect_set_int(data.params.height, data.height)
Add the code, restart OBS, for now no difference is expected, the interesting things start in the next section.
Now that the size of the picture is available, we can start to use pixel coordinates for formulas. Namely, we want to add a little perturbation on the computed luminance according to the formula cos(x)*cos(y). The form of this classic formula looks like:
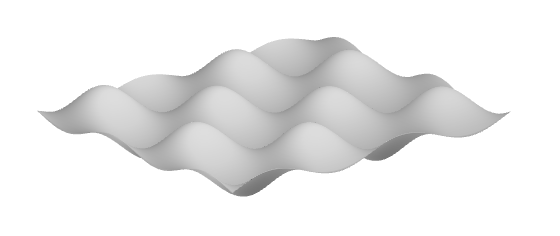
The formula will be such that:
- It adds to the luminance a small negative or positive value with a given amplitude
- The scale of the form can be changed, with a scale of 1.0 corresponding to a 8 pixels long oscillation
If we name the parameters of the formula simply scale and amplitude, assuming x and y are in pixels, the angle for the oscillations on x is given by 2*π*x/scale/8 (the bigger the scale, the longer the oscillations). The cosine function returns values between -1.0 and 1.0, so the amplitude can be just multiplied to the product of cosine.
The final parameterized formula will be (with simplification):
perturbation = amplitude*cos(π*x/scale/4)*cos(π*y/scale/4)
For the coordinates x and y in pixels, as we have the width and height plus the UV coordinates, the formula are simply x = U * width and y = V * height if we call the UV coordinates U and V here. In the code, we will use a more compact form with a component-by-component multiplication of pixel.uv with float2(width,height).
Re-write the center part of the pixel shader (between the decoding and encoding lines) in the HLSL effect file:
    float luminance = dot(linear_color, float3(0.299, 0.587, 0.114));
    float2 position = pixel.uv * float2(width, height);
    float perturbation = amplitude * cos(PI*position.x/scale/4.0) * cos(PI*position.y/scale/4.0);
    float3 result = (luminance + perturbation).xxx;
At the top of the file, do not forget to define a new constant for PI and the new uniform variables scale and amplitude with default values:
// Constants
#define PI 3.141592653589793238

// General properties
uniform float amplitude = 0.2;
uniform float scale = 1.0;
Add the code, restart OBS, now the effect should look like this:
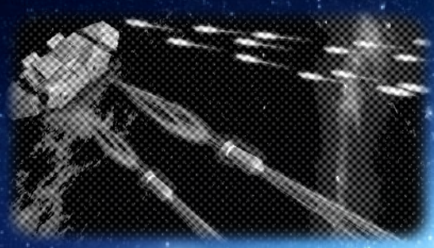
It slowly starts to look like a halftone.
Until now we use a continuous luminance. The next step is to mimic a reduced number of inks on a printed paper.
For a given value of luminance from 0.0 to 1.0, we can multiply the value by a constant factor and then round the product to obtain a certain number of integer values. For example, with a factor of 3, we obtain the values 0, 1, 2 and 3. The we re-divide by 3 to obtain 4 luminance values with values 0.0, 0.33, 0.66 and 1.0. It can be generalized to n colors by multiplying/dividing by n-1.
The computation is really simple to implement. We start by adding a global uniform number of color levels with other uniform variables at the top of the HLSL effect file:
uniform int number_of_color_levels = 4.0;And we add a single line in the pixel shader, just before the gamma encoding:
result = round((number_of_color_levels-1)*result)/(number_of_color_levels-1);Add the code, restart OBS, now the effect should look like this:
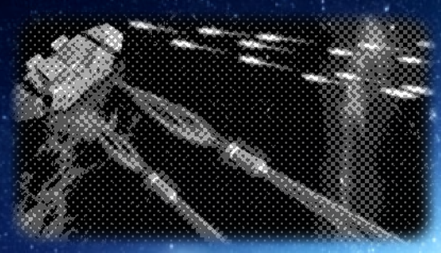
Here we are! It is nice to see what a simple cosine-based perturbation plus rounding can do. The active part of the effect is just a couple of lines long.
And now it is also very interesting to check how the effect behaves with different kinds of scale filtering (context menu of the source in OBS, then Scale Filtering).
First example, the scale filtering Point does not perform any interpolation after zoom and shows square-formed pixels:
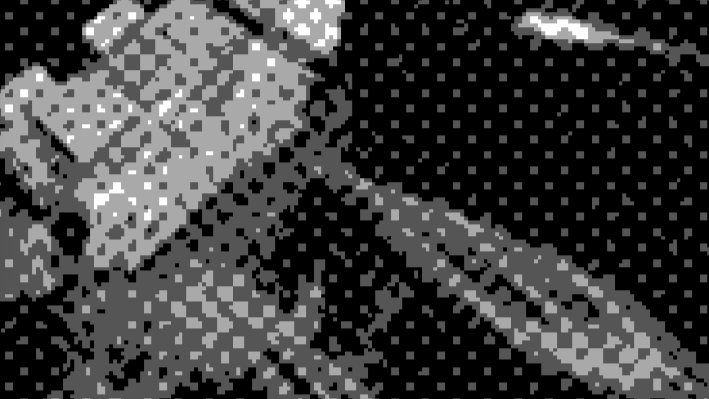
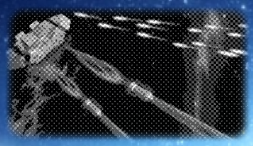
Typically, as we use a periodic pattern in the effect, "aliasing" artifacts may appear if we reduce the size of the picture:
With a scale filtering set to Bicubic, the interpolation after scaling shows anti-aliasing:
With reduced size, the aliasing is not completely gone but at least reduced:
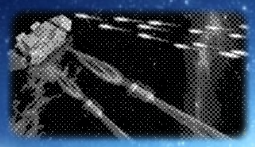
Now a very interesting effect appears when the scale filtering is set to Disable on a strongly zoomed picture (attention it may not work if other filters are in the chain of the source). The pixel shader renders directly to the screen (the output is not rendered into an intermediate texture for later scaling), so it is called for every single pixel in the screen space, at a sub-pixel level for the source picture. As we use continuous mathematical functions, and sample the source picture using a Linear interpolation with linear_clamp, the curves drawn by the pixel shader hide completely the pixel grid of the source picture. It looks like a vector drawing:
With reduced size it still behaves well:
The cosine-based halftone effect is completely implemented now. It has many parameters set with default values but the user cannot set these parameters so far.
The effect is already satisfactory, we now want to improve the user experience by creating properties for the uniform variables that we already have in the effect file:gamma, gamma_shift, amplitude, scale and number_of_color_levels.
By convention, we will name all instances of the variables or properties with the sames names as in the effect file, i.e. for the effect parameters, the data settings and the variables of the data structure.
Similarly to what is described in the Source Shake tutorial, we first have to define default values in source_info.get_defaults. Default values are chosen such that applying them to a new source would give a reasonable result:
-- Sets the default settings for this source
source_info.get_defaults = function(settings)
  obs.obs_data_set_default_double(settings, "gamma", 1.0)
  obs.obs_data_set_default_double(settings, "gamma_shift", 0.0)
  obs.obs_data_set_default_double(settings, "scale", 1.0)
  obs.obs_data_set_default_double(settings, "amplitude", 0.2)
  obs.obs_data_set_default_int(settings, "number_of_color_levels", 4)
end
Then we define the properties as sliders in source_info.get_properties, which builds and returns a properties structure:
-- Gets the property information of this source
source_info.get_properties = function(data)
  local props = obs.obs_properties_create()
  obs.obs_properties_add_float_slider(props, "gamma", "Gamma encoding exponent", 1.0, 2.2, 0.2)
  obs.obs_properties_add_float_slider(props, "gamma_shift", "Gamma shift", -2.0, 2.0, 0.01)
  obs.obs_properties_add_float_slider(props, "scale", "Pattern scale", 0.01, 10.0, 0.01)
  obs.obs_properties_add_float_slider(props, "amplitude", "Perturbation amplitude", 0.0, 2.0, 0.01)
  obs.obs_properties_add_int_slider(props, "number_of_color_levels", "Number of color levels", 2, 10, 1)

  return props
end
Once a property is changed, the source_info.update function is called. This is where we will transfer the values from data settings to the data structure used to hold values until they are set in the shader:
-- Updates the internal data for this source upon settings change
source_info.update = function(data, settings)
  data.gamma = obs.obs_data_get_double(settings, "gamma")
  data.gamma_shift = obs.obs_data_get_double(settings, "gamma_shift")
  data.scale = obs.obs_data_get_double(settings, "scale")
  data.amplitude = obs.obs_data_get_double(settings, "amplitude")
  data.number_of_color_levels = obs.obs_data_get_int(settings, "number_of_color_levels")
end
Next, like for width and height, we need to store the effect parameters and we call once source_info.update to initialize the members of the data structure (do not forget it, otherwise OBS will try to use non-initialized data in source_info.video_render and log errors every frame). This block comes at the end of the source_info.create function just above return data:
  data.params.gamma = obs.gs_effect_get_param_by_name(data.effect, "gamma")
  data.params.gamma_shift = obs.gs_effect_get_param_by_name(data.effect, "gamma_shift")
  data.params.amplitude = obs.gs_effect_get_param_by_name(data.effect, "amplitude")
  data.params.scale = obs.gs_effect_get_param_by_name(data.effect, "scale")
  data.params.number_of_color_levels = obs.gs_effect_get_param_by_name(data.effect, "number_of_color_levels")


  -- Calls update to initialize the rest of the properties-managed settings
  source_info.update(data, settings)
And finally we transfer the values from the data structure into the effect parameters in source_info.video_render:
  obs.gs_effect_set_float(data.params.gamma, data.gamma)
  obs.gs_effect_set_float(data.params.gamma_shift, data.gamma_shift)
  obs.gs_effect_set_float(data.params.amplitude, data.amplitude)
  obs.gs_effect_set_float(data.params.scale, data.scale)
  obs.gs_effect_set_int(data.params.number_of_color_levels, data.number_of_color_levels)
Well, that's a lot. Each variable appears 7 times in different forms! Every line above is somehow needed such that OBS manages the persistency of settings, default values, display of properties, etc. Let's say it is worth the pain but it calls for a proper object-oriented design to avoid writing so many times the same lines of code.
Add the pieces of code, restart OBS, open the Filters of the source, it should look like this (here in 2 colors):
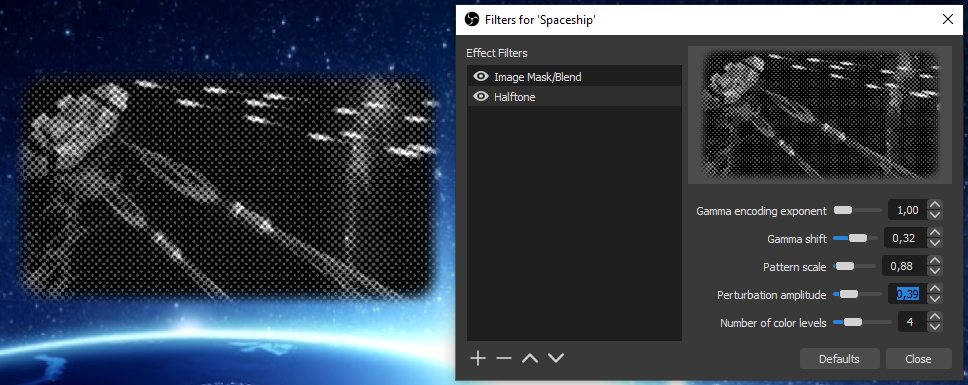
Playing with the parameters of a video filter and seeing the result immediately is quite satisfying. Note the aliasing effects on the preview in the Filters window (unclear if it is possible to change the filtering there).
The old-fashioned newspaper effect is very convincing with 2 colors:
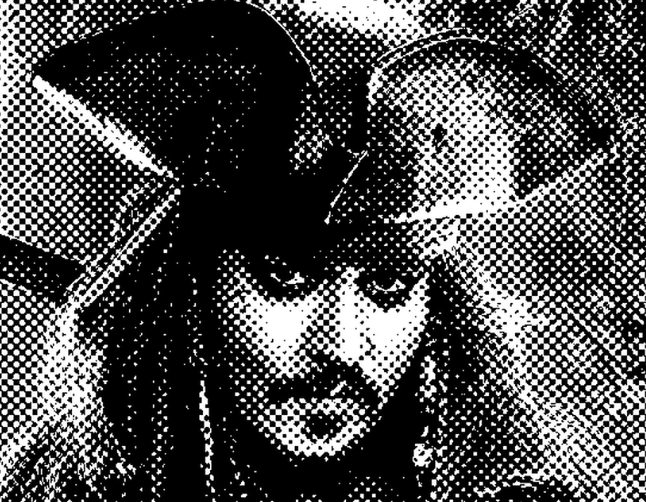
Note that some edges are preserved on the picture so it is probably not the same result as an optical process would produce.
Pictures in just 3 colors can be fascinating:
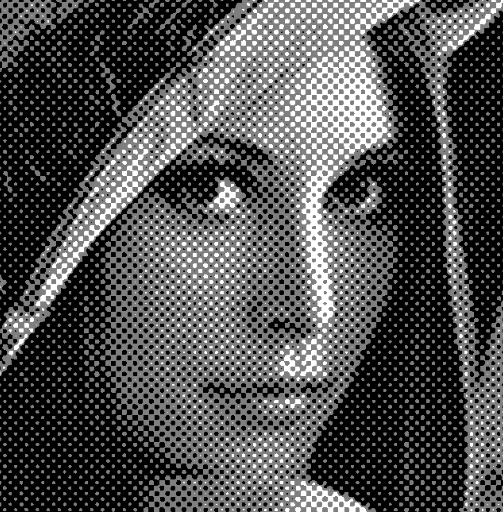
The first part of the tutorial is completed and the script plus its effect file are definitely a good starting point for further development. The complete source code of this first part is available.
In this second part we will see how to use additional textures for the pattern and the color palette.
If you followed the tutorial up to this point, then you are certainly fed up with the black and white pictures!
We change only one line in the pixel shader:
float3 result = linear_color + perturbation;And this is the result after re-starting OBS:
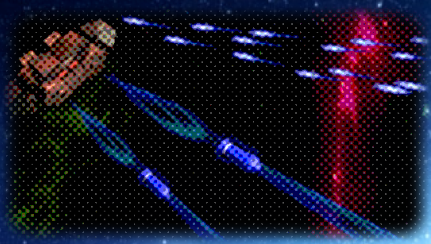
It works! And it is another example of the great versatility of the HLSL language. Here we add the float perturbation scalar to the float3 linear_color (instead of the float luminance). HLSL makes the necessary casting transparently (i.e. converts perturbation to a float3).
So we add a small perturbation to the Red, Green and Blue channels. Then the color quantization is done on each channel by the round operation, which results in a palette of 64 colors.
The scalar cosine formula gives great results and has an undeniable style, but it shows as well the limit of the method. Rather than a mix of dots with different colors, as a magnified printed photo would look like, we observe a grid of uniform color tones:
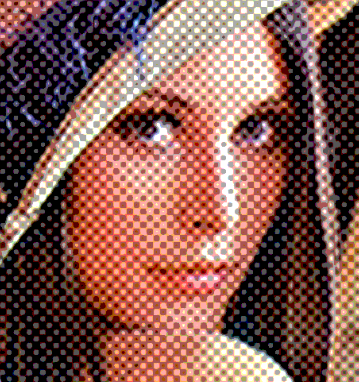
When the number of color levels is reduced to 2, i.e. with 8 colors (black, white, red, green, blue, cyan, magenta, yellow), the scale factor of the perturbation can be reduced as well to obtain a picture reproducing the original colors (here with a scale filtering set to bicubic to show the single pixels):
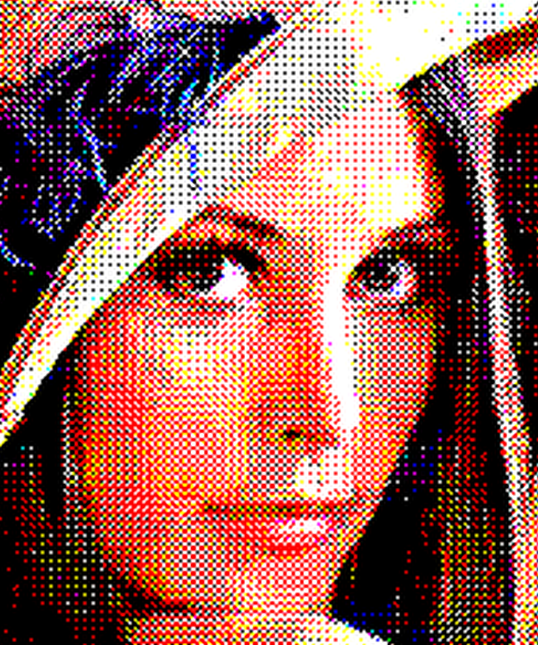
Not bad with 8 colors and the primitive approach! But the typical "printed paper effect" cannot be reached with the current cosine-based scalar perturbation, it needs to have different values on each RGB channel. To make the perturbation fully flexible we will replace the computed formula with a pre-computed bitmap texture.
The general method to obtain our effect can be divided in simple steps:
- The color of the source pixel is retrieved from the
imagetexture and gamma-decoded - A variable perturbation is determined according to the position of the source pixel
- The perturbation is added to the RGB channels of the decoded source color
- A color close to the perturbed color is selected among a limited set through the rounding operation
- The close color is gamma-encoded and returned as output
First, to be very general, we will add a variable offset set to 0 by default at step 3:
perturbed_color = linear_color + offset + amplitude*perturbation
In addition, we allow the amplitude to be negative. So first, in the Lua file, we change the definition of the amplitude property (-2.0 as lower bound):
obs.obs_properties_add_float_slider(props, "amplitude", "Perturbation amplitude", -2.0, 2.0, 0.01)And in the effect file we need an additional uniform value at the top of file:
uniform float offset = 0.0;Second, and this is the main change, the steps 2 and 4 are put into separate functions for better modularity. We will even define the "perturbation color" (determined at step 2) and the closest color (determined as step 4) with an additional alpha, i.e. both are defined as float4. The variable alpha channel will be treated later on, for now the exact same functionality will be implemented with alpha set to 1.0.
Replace the pixel shader with the 2 new functions and the new code for the pixel shader in the effect file:
float4 get_perturbation(float2 position)
{
    float4 result;
    result = float4((cos(PI*position.x/scale/4.0) * cos(PI*position.y/scale/4.0)).xxx, 1.0);
    return result;
}

float4 get_closest_color(float3 input_color)
{
    float4 result;
    result = float4(round((number_of_color_levels-1)*input_color)/(number_of_color_levels-1), 1.0);
    return result;
}

float4 pixel_shader_halftone(pixel_data pixel) : TARGET
{
    float4 source_sample = image.Sample(linear_clamp, pixel.uv);
    float3 linear_color = decode_gamma(source_sample.rgb, gamma, gamma_shift);

    float2 position = pixel.uv * float2(width, height);
    float4 perturbation = get_perturbation(position);

    float3 perturbed_color = linear_color + offset + amplitude*perturbation.rgb;

    float4 closest_color = get_closest_color(clamp(perturbed_color, 0.0, 1.0));

    return float4(encode_gamma(closest_color.rgb, gamma), source_sample.a);
}
Add the code, restart OBS, no change is expected. Even if the amplitude is set to a negative value, the output is similar due to the symmetric cosine formula.
Two textures will be added:
- A seamless pattern texture to replace the cosine formula by an arbitrary bitmap-based perturbation
- A palette texture to retrieve colors from a limited set and hence replace the rounding operation
The basis for managing a texture is a gs_image_file object. It is selected as a file by the user.
We need some additional variables to manage the texture:
- Obviously we need the
texture2dobjects (re-defined asTexture2Dtype by a macro to be more HLSL compliant) - We define the sizes of the textures (not available through the
Texture2Ddefinition) - And we define an alpha encoding/decoding exponent just in case
To start the definition, add the following uniform variables at the top of the effect file:
// Pattern texture
uniform Texture2D pattern_texture;
uniform float2 pattern_size = {-1.0, -1.0};
uniform float pattern_gamma = 1.0;

// Palette texture
uniform Texture2D palette_texture;
uniform float2 palette_size = {-1.0, -1.0};
uniform float palette_gamma = 1.0;
Coming to the Lua file, we will use the opportunity to add the new offset used in the perturbation calculation (see previous section). Add the retrieval of effect parameters to the source_info.create function:
  data.params.offset = obs.gs_effect_get_param_by_name(data.effect, "offset")

  data.params.pattern_texture = obs.gs_effect_get_param_by_name(data.effect, "pattern_texture")
  data.params.pattern_size = obs.gs_effect_get_param_by_name(data.effect, "pattern_size")
  data.params.pattern_gamma = obs.gs_effect_get_param_by_name(data.effect, "pattern_gamma")

  data.params.palette_texture = obs.gs_effect_get_param_by_name(data.effect, "palette_texture")
  data.params.palette_size = obs.gs_effect_get_param_by_name(data.effect, "palette_size")
  data.params.palette_gamma = obs.gs_effect_get_param_by_name(data.effect, "palette_gamma")
The next addition is a helper function to set the size and texture effect parameters according to a simple logic, i.e. if the texture object is nil, then its size is set to (-1,-1) such that the shader is able to recognize it (and note the use of the vec2 OBS object):
function set_texture_effect_parameters(image, param_texture, param_size)
  local size = obs.vec2()
  if image then
    obs.gs_effect_set_texture(param_texture, image.texture)
    obs.vec2_set(size, image.cx, image.cy)
  else
    obs.vec2_set(size, -1, -1)
  end
  obs.gs_effect_set_vec2(param_size, size)
end
The helper function is used in the source_info.video_render function, assuming the related image file objects representing the pattern and palette textures are stored in the data variable passed by OBS:
  obs.gs_effect_set_float(data.params.offset, data.offset)

  -- Pattern texture
  set_texture_effect_parameters(data.pattern, data.params.pattern_texture, data.params.pattern_size)
  obs.gs_effect_set_float(data.params.pattern_gamma, data.pattern_gamma)

  -- Palette texture
  set_texture_effect_parameters(data.palette, data.params.palette_texture, data.params.palette_size)
  obs.gs_effect_set_float(data.params.palette_gamma, data.palette_gamma)
We continue to implement the textures with default values. Note that the properties set by the user, and kept in the user settings, are paths to the texture files (empty if no texture is selected). Add the following lines in the source_info.get_defaults function:
  obs.obs_data_set_default_double(settings, "offset", 0.0)

  obs.obs_data_set_default_string(settings, "pattern_path", "")
  obs.obs_data_set_default_double(settings, "pattern_gamma", 1.0)
  obs.obs_data_set_default_string(settings, "palette_path", "")
  obs.obs_data_set_default_double(settings, "palette_gamma", 1.0)
For the properties, the function obs.obs_properties_add_path is used to let the user select a path. Because we want to be able to fallback to a formula (without texture), we foresee a button for each texture to reset the path to an empty string (with an inline function that returns true to force the refresh of the properties widget and uses a kept reference in data.settings, see below). Add the following lines in source_info.get_properties:
  obs.obs_properties_add_float_slider(props, "offset", "Perturbation offset", -2.0, 2.0, 0.01)

  obs.obs_properties_add_path(props, "pattern_path", "Pattern path", obs.OBS_PATH_FILE,
                              "Picture (*.png *.bmp *.jpg *.gif)", nil)
  obs.obs_properties_add_float_slider(props, "pattern_gamma", "Pattern gamma exponent", 1.0, 2.2, 0.2)
  obs.obs_properties_add_button(props, "pattern_reset", "Reset pattern", function()
    obs.obs_data_set_string(data.settings, "pattern_path", ""); data.pattern = nil; return true; end)

  obs.obs_properties_add_path(props, "palette_path", "Palette path", obs.OBS_PATH_FILE,
                              "Picture (*.png *.bmp *.jpg *.gif)", nil)
  obs.obs_properties_add_float_slider(props, "palette_gamma", "Palette gamma exponent", 1.0, 2.2, 0.2)
  obs.obs_properties_add_button(props, "palette_reset", "Reset palette", function()
     obs.obs_data_set_string(data.settings, "palette_path", ""); data.palette = nil; return true; end)
Another helper function is added to manage the reading of the image file, the initialization of the texture inside, an the freeing of allocated memory when necessary. Note that this is only possible in the graphics thread (this is the reason for the call to obs_enter_graphics), and that the function gs_image_file_init_texture is separated from reading the image:
-- Returns new texture and free current texture if loaded
function load_texture(path, current_texture)

  obs.obs_enter_graphics()

  -- Free any existing image
  if current_texture then
    obs.gs_image_file_free(current_texture)
  end

  -- Loads and inits image for texture
  local new_texture = nil
  if string.len(path) > 0 then
    new_texture = obs.gs_image_file()
    obs.gs_image_file_init(new_texture, path)
    if new_texture.loaded then
      obs.gs_image_file_init_texture(new_texture)
    else
      obs.blog(obs.LOG_ERROR, "Cannot load image " .. path)
      obs.gs_image_file_free(current_texture)
      new_texture = nil
    end
  end

  obs.obs_leave_graphics()
  return new_texture
end
Finally, reading the image files is triggered in the update function, i.e. when a data settings was changed by the user or at OBS startup. Special variables are defined to keep the path of an image file previously loaded, such that it can be freed when another file needs to be loaded. Note that it is necessary to keep a reference in data.settings for the inline callback functions of the buttons:
  -- Keeps a reference on the settings
  data.settings = settings

  data.offset = obs.obs_data_get_double(settings, "offset")

  local pattern_path = obs.obs_data_get_string(settings, "pattern_path")
  if data.loaded_pattern_path ~= pattern_path then
    data.pattern = load_texture(pattern_path, data.pattern)
    data.loaded_pattern_path = pattern_path
  end
  data.pattern_gamma = obs.obs_data_get_double(settings, "pattern_gamma")

  local palette_path = obs.obs_data_get_string(settings, "palette_path")
  if data.loaded_palette_path ~= palette_path then
    data.palette = load_texture(palette_path, data.palette)
    data.loaded_palette_path = palette_path
  end
  data.palette_gamma = obs.obs_data_get_double(settings, "palette_gamma")
After adding the code, restart OBS and the properties should appear in the Filters dialog window:
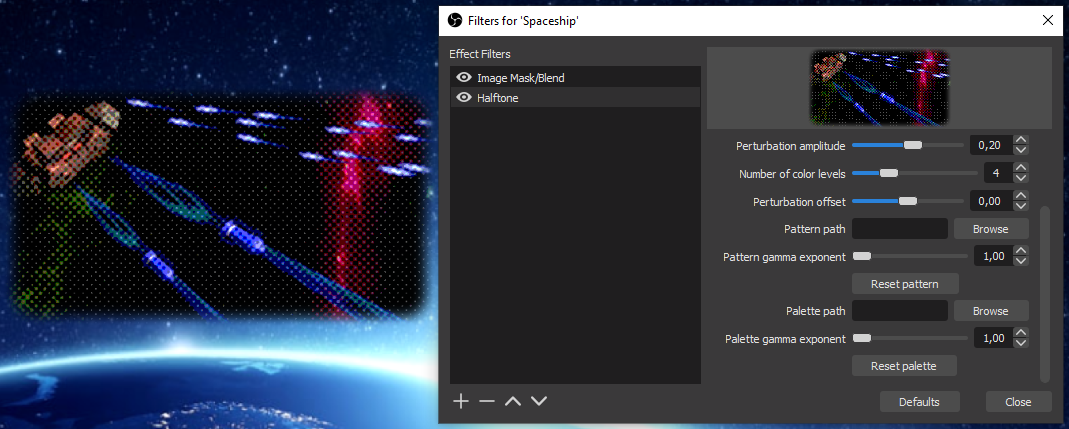
The pattern and palette textures are not yet functional.
The naive algorithm we use is actually a form of ordered dithering, that typically relies on a "Bayer matrix" tiled over the picture, where each number from the matrix is added to the color of the related pixel, and the closest color is determined. In average, the mix of neighbor color dots reproduces the original color. Note that we keep this simple algorithm, while other algorithms for dithering with an arbitrary palette exist.
In its mathematical form, a Bayer matrix contain levels between 0 and 1 distributed over the matrix area. Bayer matrices can be represented as well as bitmap images with gray scales, like in this repository of Bayer PNG textures.
The picture of the basic 2x2 Bayer matrix is a square of 2 pixels by 2 pixels, what make a really tiny image:
Bayer matrix texture with 4 levels: ➡️  ⬅️
⬅️
After a zoom:

Please note the 4 gray levels 0, 1/4, 2/4, 3/4 increasing along a loop like the "alpha" greek letter (top-right then bottom-left then top-left then bottom-right). This construction ensures that the pattern can be tiled infinitely in each direction without visible border artifact.
Bayer matrices of higher orders can be constructed recursively by replacing each pixel by the whole matrix and adding the levels. As an example, for a 4x4 matrix starting from the 2x2 matrix, the top-right pixel (level 0 pure black) is replaced directly with the 2x2 matrix, then the bottom right pixel (level 1/4) becomes the 2x2 matrix with 1/4 added to the levels of the 2x2 matrix, etc. At the end, the 4x4 Bayer matrix looks like (note the top-right 2x2 block, which is the same as the 2x2 Bayer matrix):
Bayer matrix texture with 16 levels: ➡️  ⬅️
⬅️
After a zoom:

An interesting variation with Bayer matrices is to use a non-rectangular shape itself arranged to make a seamless pattern. For example with a cross of 5 pixels (hence 5 levels), arranged with no holes, resulting in a minimal 5x5 matrix:
Bayer matrix texture with 5 levels: ➡️  ⬅️
⬅️
After a zoom:

Now we have some patterns to play with, time to modify the effect file.
Usually, in order to find coordinates in a tiled pattern, given the coordinates in the full area, the solution would be to use a "modulo" operation (remainder of the division by the size of the pattern). Here we will just let the GPU do it for us by using a "wrap" texture address mode. A new sampler_state (redefined as SamplerState by macro to be more HLSL compliant) is defined for that in the effect file:
SamplerState linear_wrap
{
    Filter    = Linear;
    AddressU  = Wrap;
    AddressV  = Wrap;
};
With this definition, we re-define the function get_perturbation:
float4 get_perturbation(float2 position)
{
    if (pattern_size.x>0)
    {
        float2 pattern_uv = position / pattern_size;
        float4 pattern_sample = pattern_texture.Sample(linear_wrap, pattern_uv / scale);
        float3 linear_color = decode_gamma(pattern_sample.rgb, pattern_gamma, 0.0);
        return float4(2.0*(linear_color-0.5), pattern_sample.a);
    }
    else
        return float4((cos(PI*position.x/scale/4.0) * cos(PI*position.y/scale/4.0)).xxx, 1.0);
}
Please note that:
- If the X size of the pattern is negative, i.e. if no pattern file was selected by the user or the file could not be loaded, then the function falls back to the cosine formula.
- It is necessary to compute UV coordinates in
pattern_uvto locate the pixel in the pattern texture, given byposition / pattern_size, but becauseposition(pixel coordinates in the source picture) has values bigger thanpattern_size, the resulting UV coordinates has values between 0.0 and much more than 1.0, and that is where the "Wrap" mode is important. - The function is expected to return RGB values from -1.0 to 1.0, that is why there is a normalization as
2.0*(linear_color-0.5) - Using a "Linear" sampling (as in
linear_wrap) is an arbitrary choice here, and means that if the pattern is scaled, colors from the pattern are interpolated (maybe not the expectation with a Bayer matrix). A "Point" filter could be used too, depending on the kind of scaling that is desired, in conjunction with the Scale Filtering setting.
Add the code, restart OBS, then download and select the 4x4 Bayer matrix above (the tiny one), set the scale to 1.0, the Scale Filtering to Bicubic and you should obtain something like this with 2 color levels:
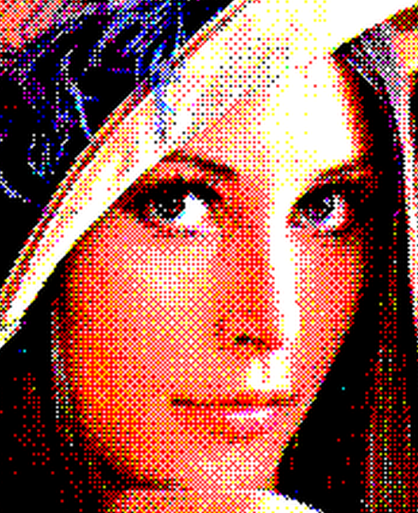
Such an image may bring back memories of the 8-bits or 16-bits computer era, depending how old you are, this is almost pixel-art!
The texture based on the cross-formed pattern with 5 levels gives a quite different style to the dithering:
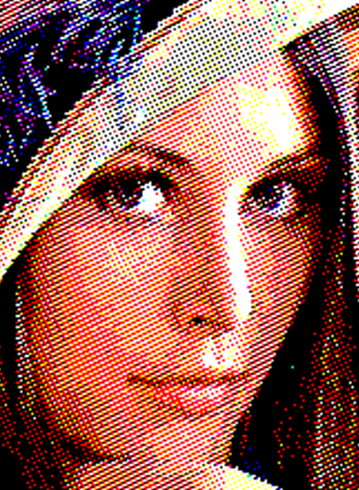
The effect is now strongly driven by the pattern used as input. A "seamless" pattern is necessary and it is not trivial to create one. There are special tools around to do that, or there is a quite simple method that works with any paint tool (e.g. paint.net).
Actually, the issue here is that any global transformation applied to a complete picture (e.g. gaussian blur) would assume that the outside of the picture has a constant color (e.g. white), and would produce border artifacts that are only visible when the picture is tiled.
The simple method to avoid this is to "pre-tile" the picture on a 9x9 grid, then apply the global transformation, then select and crop the central part of the picture. This way the border artifacts are limited to the surrounding pictures and the central picture can be tiled seamlessly:

Using a blur filter just creates the different levels expected in a dithering pattern. This is the resulting star pattern:

The filtered picture shows stars with different sizes, that correspond the the different levels created by the blur operation (a better effect would be reached with more blurring in the pattern, do your own experimentation):
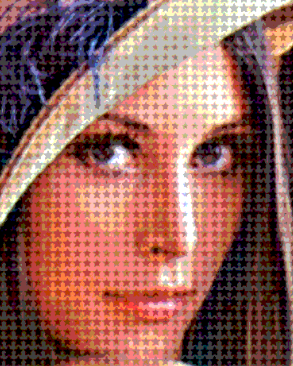
The same kind of technique was used to blur a texture from the hexagonal tiling page on Wikipedia:

On this pattern the RGB channels are separated. The blurring was done in one operation that kept the RGB separation. The result brings us back to producing a halftone picture, this time with colors. Look at the many little discs of different sizes, resulting from blurring the hexagons in the texture:

Finally, another method to produce a nice pattern is just to compute it and grab it as a screenshot. As an example, this shader on GLSL sandbox was used to produce this pattern, which kind of reproduces the shape of printed paper, i.e. with an orthogonal raster for each RGB, and an orientation of 0° for Red, 30° for Green, 60° for Blue (the pattern repeats after 30 oscillations, this is why the picture is so big):
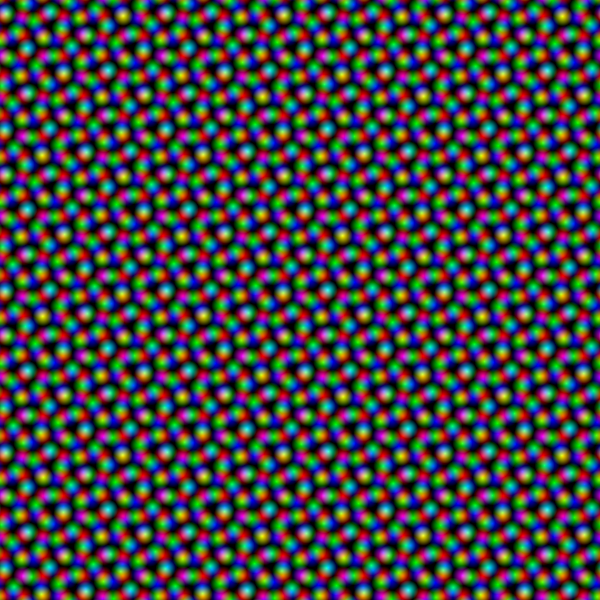
The resulting picture is very similar to the one produced with the blurred hexagons:

Actually printed paper uses a CMYK color model (Cyan-Magenta-Yellow-Black) with a subtractive blend mode, and our simple approach is classically additive with the RGB components. The real computation with CMYK would require a modification of the perturbation formula. Nevertheless this simple computation produces vary convincing results to reproduce the style of printed paper. This is especially true for comics or pop art (after tweaking the amplitude and offset):
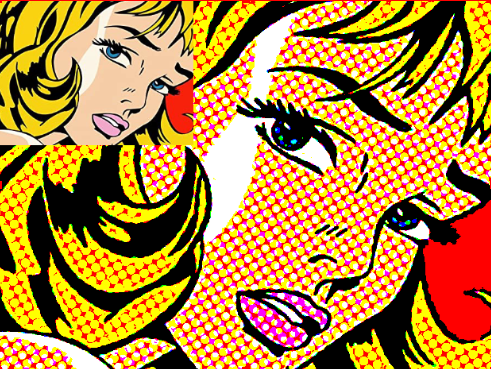
Even if our filter does not produce the typical CMYK print raster, it works very well in 8 colors because mixing the primary colors Red, Green and Blue with an additive blend gives directly the primary colors of a subtractive blend Cyan (Green+Blue), Magenta (Red+Blue) and Yellow (Red+Green). At the end, the resulting set of colors is the same with additive RGB or subtractive CMYK, and this is why the general impression produced by the output of the filter reminds printed paper.
Until now the color quantization is based on finding the closest discrete level on each RGB component. The operation is simple and quick.
The goal now is to read the different colors from a texture and find the closest one. The operation will imply, for each single rendered pixel, a comparison with a potentially large number of other colors. Of course the operation will not be quick and the palette cannot be too big.
The web site Lospec is a good source for palettes. It proposes curated palettes with usage examples in different formats. For our filter the best is to use the one-pixel per color form, all pixels in a single row.
As an example, with this format, the original palette of the Gameboy would look like:
Palette of the Gameboy: ➡️  ⬅️ Zoomed:
coming to the code, first, to be sure that the colors do not get interpolated, a new sampler state using the "Point" filter is necessary in the effect file:
SamplerState point_clamp
{
    Filter    = Point;
    AddressU  = Clamp;
    AddressV  = Clamp;
};
Then, the get_closest_color is modified to include a color search. Comparing two colors is based on a simple distance function. This is the same as the usual distance between 3D points, applied to the RGB components. There are many sophisticated color comparison methods, the usual distance will be good enough for our purpose here.
The new function replaces get_closest_color in the effect file:
float4 get_closest_color(float3 input_color)
{
    float4 result;
    if (palette_size.x>0)
    {
        float min_distance = 1e10;
        float2 pixel_size = 1.0 / min(256, palette_size);
        for (float u=pixel_size.x/2.0; u<1.0; u+=pixel_size.x)
            for (float v=pixel_size.y/2.0; v<1.0; v+=pixel_size.y)
            {
                float4 palette_sample = palette_texture.Sample(point_clamp, float2(u, v));
                float3 linear_color = decode_gamma(palette_sample.rgb, palette_gamma, 0.0);

                float current_distance = distance(input_color, linear_color);
                if (current_distance < min_distance)
                {
                    result = float4(linear_color, palette_sample.a);
                    min_distance = current_distance;
                }
            }
    }
    else
        result = float4(round((number_of_color_levels-1)*input_color)/(number_of_color_levels-1), 1.0);

    return result;
}
Please note that:
- Again, if the palette size is negative then it means that the texture is not defined or not loaded. In this case the function falls back to the rounding operation according to
number_of_color_levels. - Positions of pixels in the texture are iterated as UV coordinates, exactly on the center of each pixel (e.g. starting at
u=pixel_size.x/2.0) in order to avoid sampling at the edge between two pixels, resulting in flickering due to random imprecision. - There is a kind of protection in case the user selects a very big picture, i.e. the number of read pixels is maximum 256x256 (i.e. the
pixel_sizeUV increment is given by1.0 / min(256, palette_size)). This could be used to check the colors extracted from an arbitrary picture used as palette, but much too slow for video processing if the picture is too big. - The color search is a classical research of the minimum value.
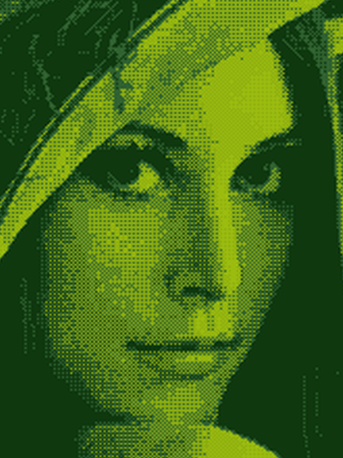
Add the code, restart OBS, use the Gameboy palette with a Bayer matrix for dithering and you should see something like this:
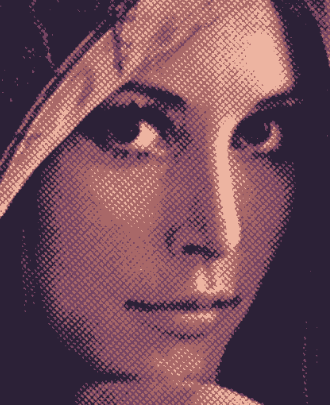
Another interesting effect with a reduced palette is to use a hatching dithering pattern and adjust levels to make the result looks like a hand drawn picture (yes, that's possible too with the simplest dithering algorithm!):
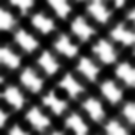
With this quick and dirty pattern (not completely seamless but it is not visible on the picture):
The functions get_closest_color and get_perturbation both return a float4 with an alpha value from the related texture. There several ways we can mix the colors now, and let OBS mix colors with the other stuff on the screen. To keep it simple we will just:
- Re-use the alpha of the input source as output (it is already the case in the current code)
- Blend the result of the dithering with the input source according to the product of the alpha values returned by both functions, i.e. wherever there is some transparency in the palette or the pattern the unmodified source picture will appear
The code is straightforward in the effect file, replace the last return line of the pixel shader with (note the use of the lerp function to interpolate between two RGB vectors):
    float mix_alpha = perturbation.a * closest_color.a;
    float3 mixed_color = lerp(source_sample.rgb, closest_color.rgb, mix_alpha);

    return float4(encode_gamma(mixed_color, gamma), source_sample.a);
The mix can be used to give a soft hatching effect with a transparent hatch pattern:
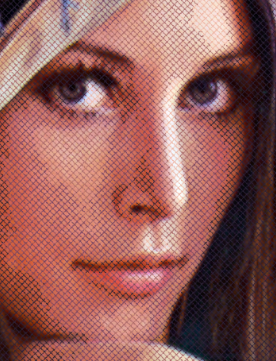
Done with this pattern (here again not perfectly seamless):
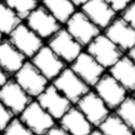
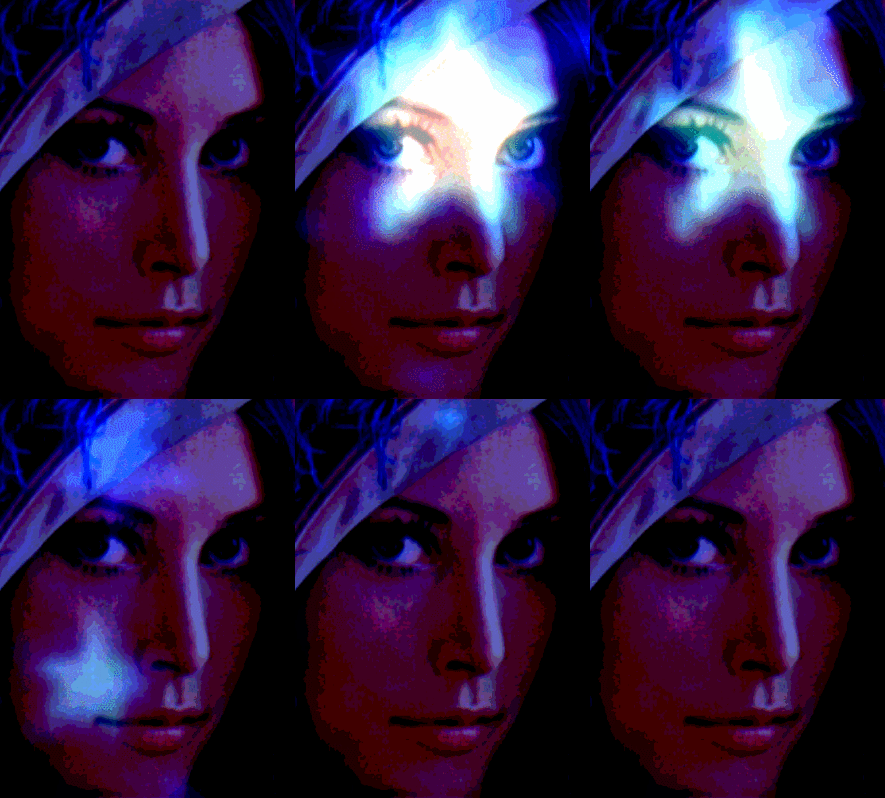
Another use of the effect would be masking a specific set of colors in the palette.
OBS foresees the functions gs_image_file_tick and gs_image_file_update_texture for animated GIF files! This is relatively easy to put in place and does not interfere with the rest.
It is necessary to known how many nanoseconds passed since the last tick in gs_image_file_tick. This information is not available in video_render but it is in video_tick. So, assuming both functions are called each frame, we implement the source_info.video_tick function just to store the information in data, in the Lua file:
source_info.video_tick = function(data, seconds)
  data.nanoseconds = seconds*1e9
end
Then we re-write the set_texture_effect_parameters function with the "tick" function:
function set_texture_effect_parameters(image, param_texture, param_size, nanoseconds)
  local size = obs.vec2()
  if image then
    obs.gs_image_file_tick(image, nanoseconds)
    obs.gs_image_file_update_texture(image)
    obs.gs_effect_set_texture(param_texture, image.texture)
    obs.vec2_set(size, image.cx, image.cy)
  else
    obs.vec2_set(size, -1, -1)
  end
  obs.gs_effect_set_vec2(param_size, size)
end
And add the parameter data.nanoseconds to the calls to set_texture_effect_parameters in source_info.video_render:
  -- Pattern texture
  set_texture_effect_parameters(data.pattern, data.params.pattern_texture,
                                data.params.pattern_size, data.nanoseconds)
  obs.gs_effect_set_float(data.params.pattern_gamma, data.pattern_gamma)

  -- Palette texture
  set_texture_effect_parameters(data.palette, data.params.palette_texture,
                                data.params.palette_size, data.nanoseconds)
  obs.gs_effect_set_float(data.params.palette_gamma, data.palette_gamma)
Add the code, restart OBS or reload the script, then use some animated gif of your choice. Here with blinking stars to give a night club touch:
The palette could be animated too.
There is enough functionality in the filter! Now before finishing, let's have a look at the properties and try to make them more understandable for the user.
First, we see clearly 3 groups of parameters: input source correction, dithering pattern and color/palette settings. We will group them together with the obs_properties_add_group function.
Second, some parameters are sometimes superfluous. This is the case for number_of_color_levels if the palette texture is loaded. For such parameters, we will define a "modified callback" to change the visibility when a texture path is changed or a reset button is clicked.
The visibility callback will be set directly using obs_property_set_modified_callback. The callback has three arguments when called by OBS:
-- Properties "modified callback" to set visible flags of the displayed properties
function set_properties_visibility(props, property, settings)

  local pattern = string.len(obslua.obs_data_get_string(settings, "pattern_path")) > 0
  local palette = string.len(obslua.obs_data_get_string(settings, "palette_path")) > 0

  obs.obs_property_set_visible(obs.obs_properties_get(props, "pattern_reset"), pattern)
  obs.obs_property_set_visible(obs.obs_properties_get(props, "pattern_gamma"), pattern)

  obs.obs_property_set_visible(obs.obs_properties_get(props, "number_of_color_levels"), not palette)
  obs.obs_property_set_visible(obs.obs_properties_get(props, "palette_reset"), palette)
  obs.obs_property_set_visible(obs.obs_properties_get(props, "palette_gamma"), palette)

  return true
end
Then we re-defined the source_info.get_properties function as such, with some renaming:
-- Gets the property information of this source
source_info.get_properties = function(data)
  print("In source_info.get_properties")

  local props = obs.obs_properties_create()

  local gprops = obs.obs_properties_create()
  obs.obs_properties_add_group(props, "input", "Input Source", obs.OBS_GROUP_NORMAL, gprops)
  obs.obs_properties_add_float_slider(gprops, "gamma", "Gamma encoding exponent", 1.0, 2.2, 0.2)
  obs.obs_properties_add_float_slider(gprops, "gamma_shift", "Gamma shift", -2.0, 2.0, 0.01)

  gprops = obs.obs_properties_create()
  obs.obs_properties_add_group(props, "pattern", "Dithering Pattern", obs.OBS_GROUP_NORMAL, gprops)
  obs.obs_properties_add_float_slider(gprops, "scale", "Pattern scale", 0.01, 10.0, 0.01)
  obs.obs_properties_add_float_slider(gprops, "amplitude", "Dithering amplitude", -2.0, 2.0, 0.01)
  obs.obs_properties_add_float_slider(gprops, "offset", "Dithering luminosity shift", -2.0, 2.0, 0.01)

  local p = obs.obs_properties_add_path(gprops, "pattern_path", "Pattern texture", obs.OBS_PATH_FILE,
                              "Picture (*.png *.bmp *.jpg *.gif)", nil)
  obs.obs_property_set_modified_callback(p, set_properties_visibility)
  obs.obs_properties_add_float_slider(gprops, "pattern_gamma", "Pattern gamma exponent", 1.0, 2.2, 0.2)
  obs.obs_properties_add_button(gprops, "pattern_reset", "Reset pattern texture", function(properties, property)
    obs.obs_data_set_string(data.settings, "pattern_path", ""); data.pattern = nil;
    set_properties_visibility(properties, property, data.settings); return true; end)

  gprops = obs.obs_properties_create()
  obs.obs_properties_add_group(props, "palette", "Color palette", obs.OBS_GROUP_NORMAL, gprops)
  obs.obs_properties_add_int_slider(gprops, "number_of_color_levels", "Number of color levels", 2, 10, 1)
  p = obs.obs_properties_add_path(gprops, "palette_path", "Palette texture", obs.OBS_PATH_FILE,
                              "Picture (*.png *.bmp *.jpg *.gif)", nil)
  obs.obs_property_set_modified_callback(p, set_properties_visibility)
  obs.obs_properties_add_float_slider(gprops, "palette_gamma", "Palette gamma exponent", 1.0, 2.2, 0.2)
  obs.obs_properties_add_button(gprops, "palette_reset", "Reset palette texture", function(properties, property)
    obs.obs_data_set_string(data.settings, "palette_path", ""); data.palette = nil;
    set_properties_visibility(properties, property, data.settings); return true; end)

  return props
end
The change with the groups is always the same: first a new obs_properties object is created, and added to the main obs_properties object, then the new properties object is filled with property objects.
Add the code, reload the script, the properties should now be displayed in named groups and some parameters be displayed only when necessary:
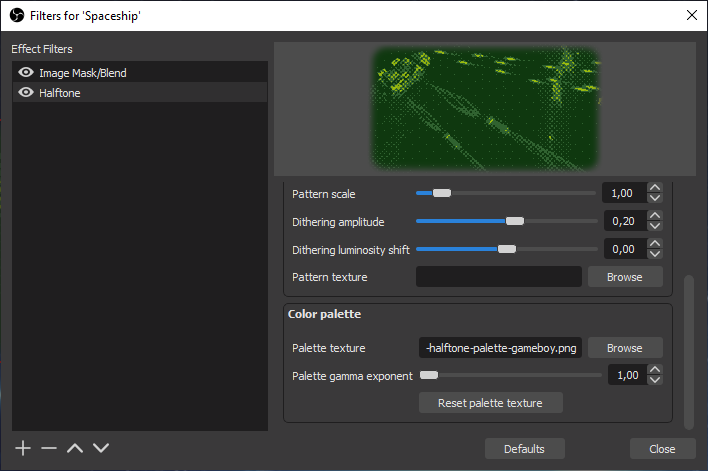
Final operation on this script, we want to provide a single Lua file to ease deployment. OBS features the gs_effect_create function to compile an effect as a string and not as a file.
First we need to copy the complete content of the effect file into one big string:
EFFECT = [[

// !! Copy the code of the effect file here !!

]]
Then change the compilation in source_info.create to (note that the second parameter is supposed to be some file name and cannot be nil, the value may be used for error messages):
data.effect = obs.gs_effect_create(EFFECT, "halftone_effect_code", nil)And modify the error message line to remove the mention of the effect file path:
obs.blog(obs.LOG_ERROR, "Effect compilation failed")No visible effect normally with this change. Just a matter of putting everything in one file.
Woow that was a long tutorial!! The code of the second part is as well available.
Many aspects were covered, from writing shaders and Lua scripts to video processing basics. The most incredible thing is the simplicity of the basis algorithm and the effects it produces.
There is still room for further experiments: real CMYK transformation, better color comparison, transparency effects, seamless patterns design, etc. This is left as exercise for the reader!
That's all folks!