Navigating EDF files in Sleep Portal Viewer - nsrr/edf-viewer GitHub Wiki
Signal Control Panel

- You can navigate to any point in the recording by:
- Clicking at the desired point on the Hypnogram.
- Using the arrow keys to scroll to the next or previous epoch.
- Clicking the arrow buttons(B) between the Hypnogram and Channel Data panes.
- Typing the number of the epoch you wish to view in the field between the arrow buttons.
- Clicking on an event in the Events window to jump to its corresponding epoch.
- Using the scroll bar at the bottom of the Channel Data pane.
- The display(A) on the left side of the signal control buttons shows current signal information when clicked on the Channel Data pane
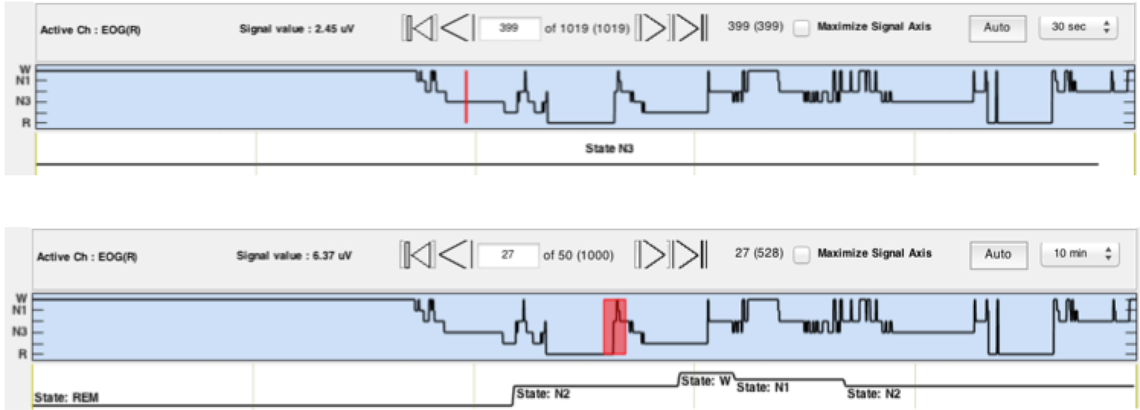
- The hypnogram will be turn on or off when loading the annotation file. If the annotation file contains sleep staging information, then the hynogram will be shown. The red marker indicates the position and length of the event selected from the right hand side event list box under specific epoch length. Sleep stages are categoried as five levels: Wake State, Sleep Stage 1, Sleep Stage 2, Sleep Stage 3, Sleep Stage 4 and REM State. Also, on the top of the Channel Data pane, there is an area showing the sleep stage information in the current selected window(indicated by the width of the red marker).
Staging Display with 30 seconds & 10 minutes
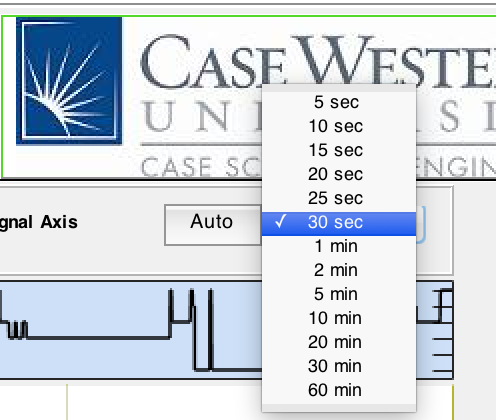
- The dropdown menu(E) in the upper right can be used to change the timescale displayed. The epoch length chooser is used to select epoch length to show on the signal display window. The default epoch length is 30 seconds. Users are allowed to choose from 5 seconds up to one hour.
Epoch length chooser
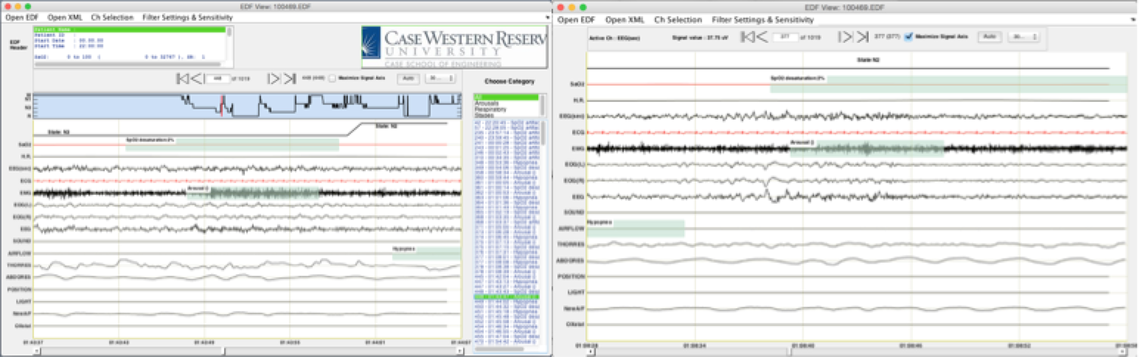
- Use the Maximize Signal Axis radio button(C) to toggle the display of the Events pane and increase the viewable size of the Channel Data pane.
Normal View & Maximized Signal View
- Place your cursor over any channel and use the
↑,↓arrow keys to increase/decrease scale. - Use
Ctrl+arrow keysto scale all channels simultaneously. - The Auto button(D) attempts to scale all displayed channels to fit in the Channel Data pane.