Working with Identity Attributes template - nsrr/edf-editor-translator GitHub Wiki
EDFHeader: Identity Attributes
View Identity Attributes
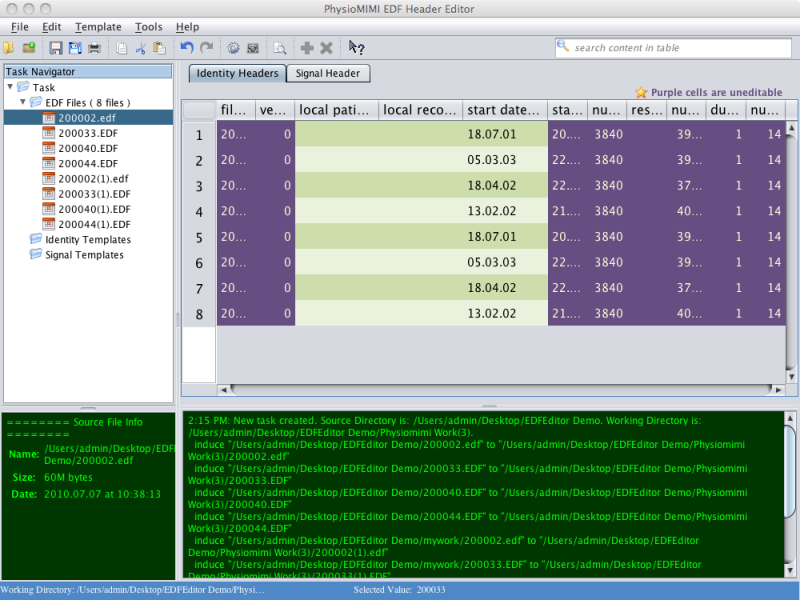
- The Identity Attributes for all opened EDF files can be viewed by clicking the Identity attributes tab in the Data Workspace.
- Identity attributes are displayed as a grid with the files as rows and the attributes as columns. The width of columns can be adjusted by clicking and dragging the column heading boundaries.
EDF Identity Attributes
Edit Identity Attributes
- Manual Edit
- Values can be edited by double-clicking in the desired cell and typing or pasting a new value.
- Note that certain fields can be viewed but are not available for editing. These fields are displayed in black. Manual editing of certain fields could cause data integrity conflicts that could render the EDF file useless.
- Apply File Attribute Template
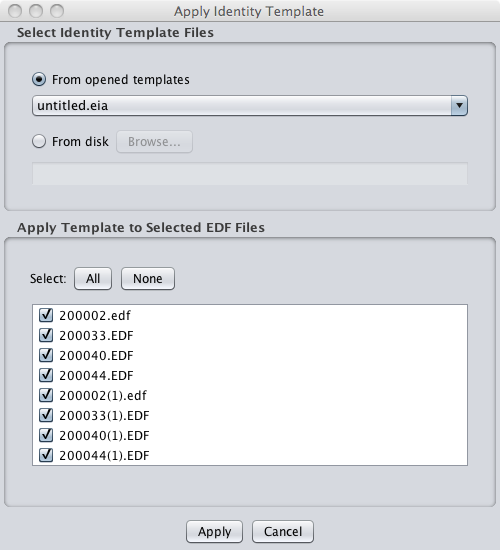
- Values can also be modified for all files simultaneously by applying an Identity Template. These template files contain values or keyword instructions that are applied to each file. A template can be applied by selecting the
Template > Apply Identity Templatemenu item or by clicking the apply template taskbar icon. - A currently open template file can be selected from the list, or the user can browse for an existing template file. The files to which the template will be applied can be configured by selecting and deselecting individual files.
- Because the application of a template edits every selected file, it is important that these templates be properly configured (see Configuring Identity Attribute Templates section).
Applying Identity Attributes
- Undo Changes:
- Before changes are saved to the files they can be undone by selecting the
Edit > Undomenu item or clicking the undo taskbar icon. This will restore the value before the last edit. - To undo all changes since the last save, select
Edit > Discard Changes. All identity attributes will be restored to the values at the time of the last save.
- Save Changes:
- All changes can be saved by selecting the
File > Savemenu item or clicking the save taskbar icon. This will write any changes made to the Identity Attributes or the Signal Attributes to the output EDF files. - Note that if you are not overwriting existing files, the first time changes are saved the output files must be created. If the files are large and/or a large number of files was selected this process can take several minutes.
- During this process the entire EDF file (the header as well as the signal data) is being written to disk in the selected output directory.
- The task progress bar will indicate that the program is executing the save process.
- Subsequent changes, since they only involve modifying the header of each file and not the signal data, are very quick.
Export File Attributes
- From the Edit File Attributes window, the current values in each header can be exported to a CSV file. This provides for creating a lookup file between the original files and the new files.
- To export file attribute data, select the
File > Exportmenu item. The identity attributes for all open EDF files will be saved into the output directory asFile_Attributes_[date]_[time].csv.
EDFHeader: Configuring Identity Attribute Templates
Identity Attribute Templates
-
The purpose of Identity Attribute Template files is to make the same changes to multiple files simultaneously. This can be the insertion of the same value for each file, the removal of values for each file, or other actions specified by special keywords. Only certain elements in the file attributes section of the header can be modified by use of a template. In the current version this includes the Local Patient ID, Local Recording ID, and Start Date of Recording.
-
The Identity Template editing interface appears as a new tab in the Data Workspace when a new template file is being created or an existing file is being edited.
-
For each field in the template, the user can either specify a value or can select from one of several key words. If the first option is selected and text is supplied, that same text will be written to that field in each file when the template is applied. The use of keywords gives the user more flexibility in specifying a template

| {blank} | Indicates that the specified field is to be set to blank. This may be particularly helpful for clearing out patient identifiers in the Local Patient ID and Local Recording ID fields. This keyword should not be applied to the Start Date field. |
| {skip} | Indicates that the specified field is to be left as it currently is in the file. |
| {rand} | Inserts a random number into the field. This keyword is useful for the creation of new identification numbers separate from any patient identifying information. |
| {filename} | Inserts the current file name (without the .edf extension) into the field. |
| {pid} | Inserts the original Local Patient ID into the field. |
| {rid} | Inserts the original Local Recording ID into the field. |
| {yy} | Inserts the year portion of the current Recording Start Date |
| {mm} | Inserts the month portion of the current Recording Start Date |
| {dd} | Inserts the day portion of the current Recording Start Date |
-
These keywords can be used in combination with one another by including the keywords in the text box for each field. For example, if it was necessary to have the template specify that for each file the new Local Recording ID should be the current file name plus "_" followed by the month and year of the study, that could be accomplished by including the following in the Local Recording ID field
{filename}_{mm}-{yy} -
Note: The Start Date field is a special case where not all values may be used. The start date must retain a xx.xx.xx structure where x are integers.
-
File Attribute Template files are ASCII-based files structured after the pattern of the EDF Header itself, and saved with the extension ".eia" (EDF Identity Attributes).
Existing Template
An existing template file can be selected for editing by selecting the Template > Open Identity Template menu item and browsing for the appropriate file on the disk.
Create New Template
A new template can be created by scratch by selecting the Template > New Identity Template menu item.
Import Template from EDF
A new template can also be created by importing the values from the header of an existing EDF file. This can be used as a starting point and then the attributes of the template modified as necessary before saving.
Save Template
File Attribute Template files can be saved by selecting the File > Save menu item or clicking the save taskbar icon. Files can be saved with a new file name by selecting the File > Save as ... menu item.