(11) Creating an NPC - nroflmao/NesMakerHelp GitHub Wiki
1: To create an NPC, follow the same process as creating a Monster. To utilize different colors, you can save the NPC into the next Monster tileset (Monster_0_01.bmp) which will allow you to use a completely different Monster Palette with this NPC than the monster. You need to change the "Tiles-x" dropdown to see the different tilesets based on the Monster_0_xx.bmp templates.
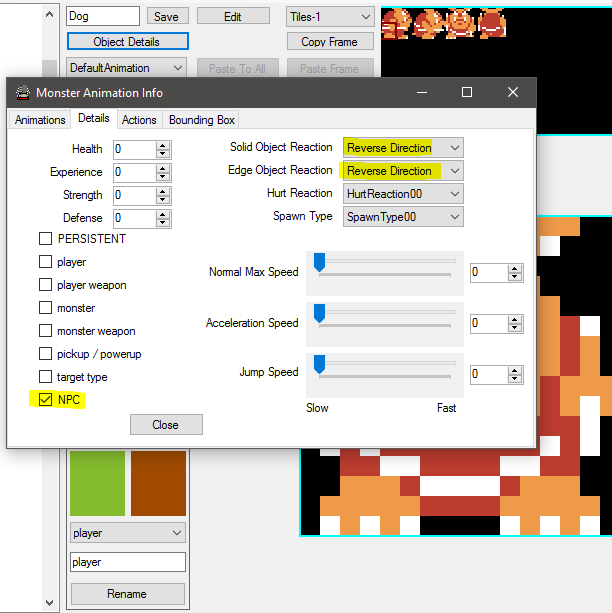
2: To make the character an NPC instead of a monster, click on "Object Details" and then the Details tab. Click the "NPC" checkbox to make NPC.
3: Set the bounding box for the NPC:
4: Close the Object Details Box and Click "Save" to save the NPC Monster changes.
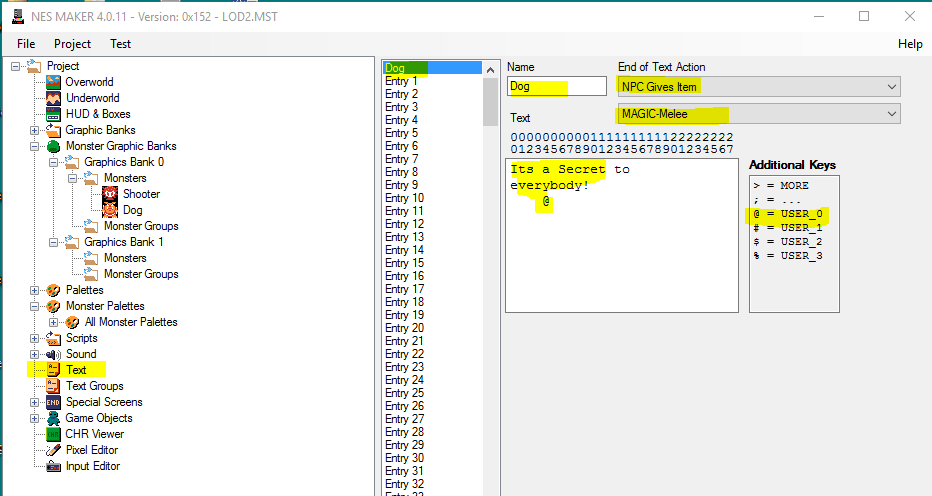
5: Click on the Text title on the left pane and add NPC text as shown below:
6: Click on "Text Groups" to confirm the Text is shown as below:
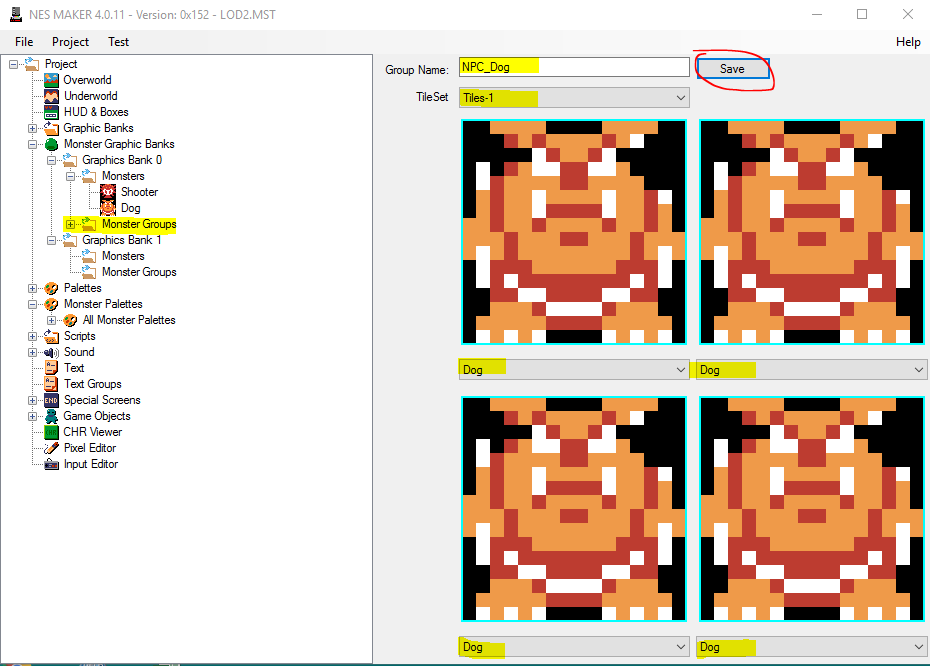
7: Click on "Monster Groups" and select the NPC TileSet and the NPC character for each Monster Group Slot as shown. Name the Monster Group and Click "Save".
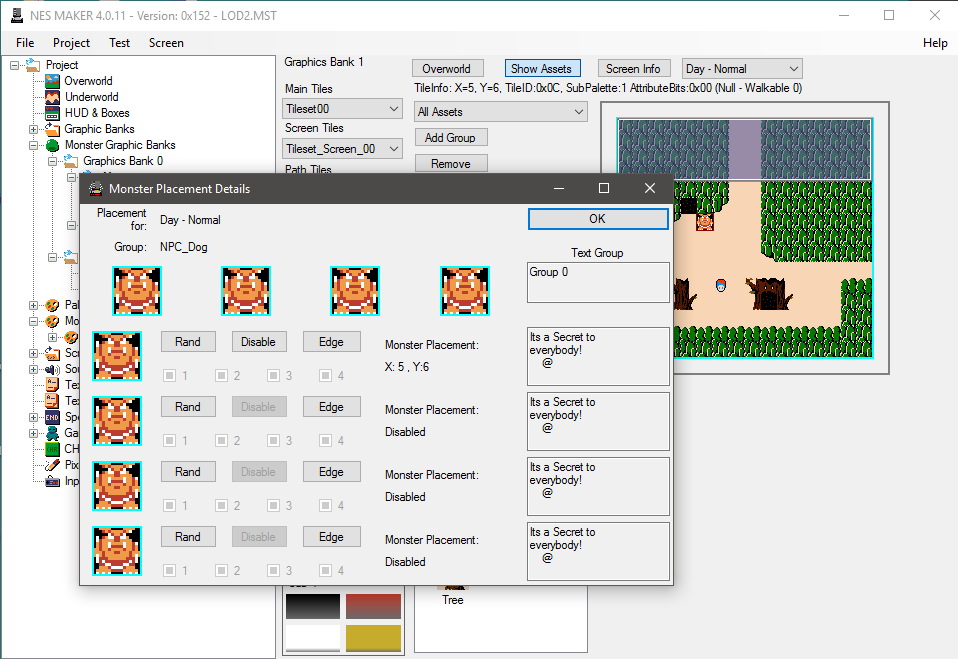
8: Click on Overworld and double click to navigate to the overworld starting screen. Click "Screen Info" and click the "Day Monsters" tab. Set the tileset, Monster Group, and Monster Palette to use as shown:
9: Right click on the overworld starting screen and select "Place Monster 1...MONSTER Name" as shown below:
10: Confirm NPC by right clicking it on the Overworld map and selecting "Edit Monster Placement Details". The Details dialog should pop up which shows the NPC and text.