(06) Designing HUD - nroflmao/NesMakerHelp GitHub Wiki
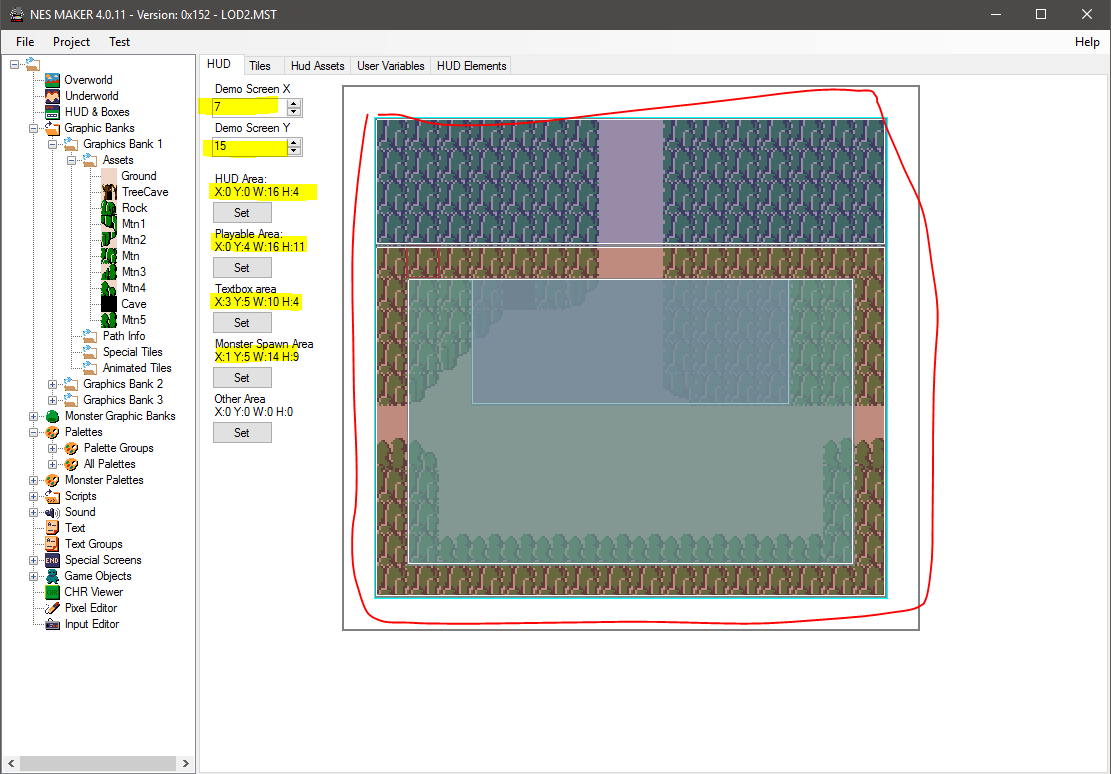
1: Click on "HUD & Boxes" on the left hand pane.
1.A: Put in the coordinates of your first screen in the "Demo Screen X/Y" inputs.
1.B: Drag rectangles for the sizes of your HUD, Playable Area, Textbox area, and Monster Spawn Area.
Note: Refer to Issue #1 for caution regarding setting up your textbox area to avoid strange coloring effects.
2: Return to Overworld to see HUD Overlay:

3: Load HUD graphics into the Pixel Editor and color using one of the Background Sub-Palettes.
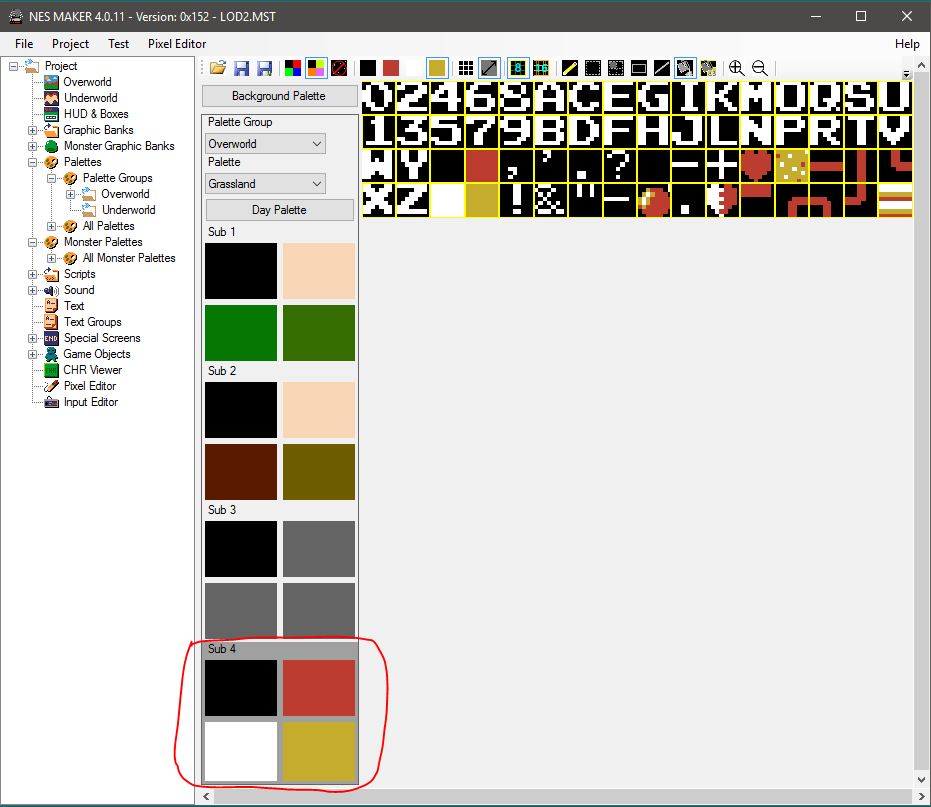
3.A: Save graphics and overwrite the "HudTiles.bmp" tile in the GraphicAssets.
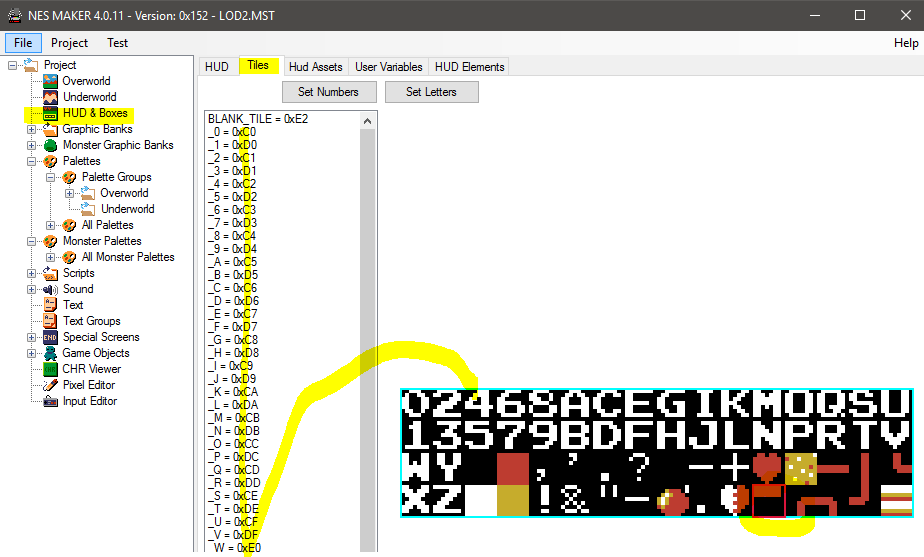
4: Click on the "HUD & Boxes" in the left pane and then the "Tiles" tab. Assign the HUD characters to the appropriate sprite in the tile.
NOTE: "F5" seems to be hardcoded to expect a "Blank" character for the Text Box. Ensure that the "F5" position in the tileset is Blank (it is incorrect in the image below)
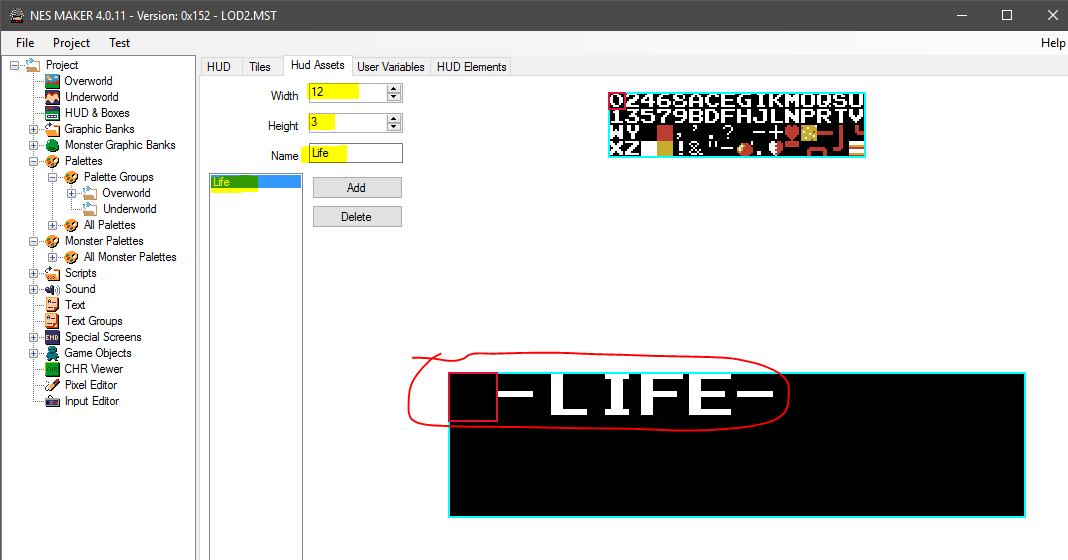
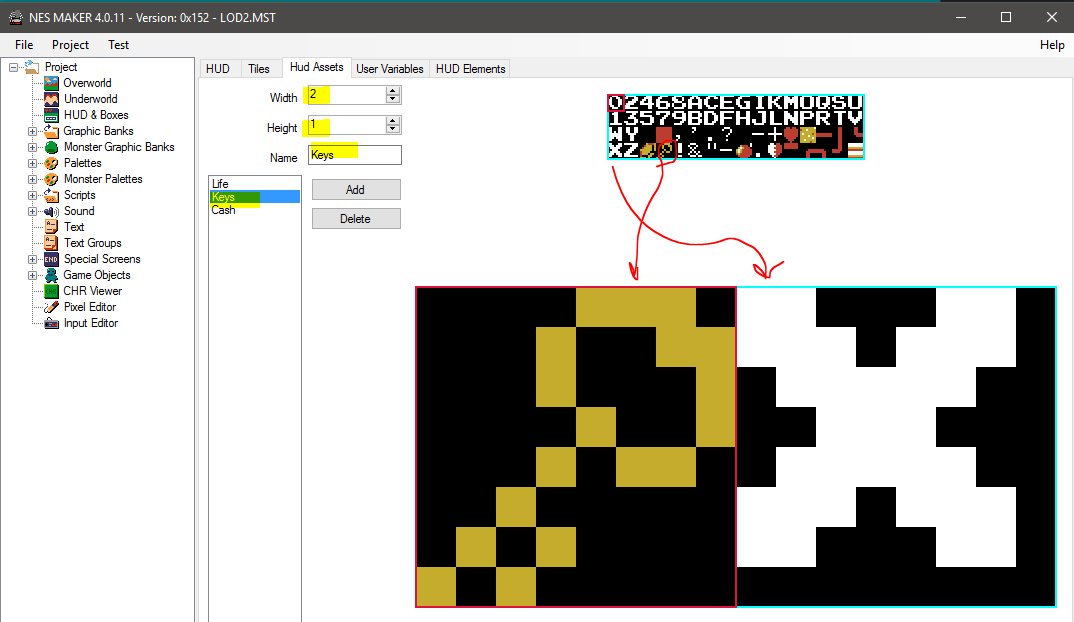
5: Add a static text HUD Asset for player health ("Life"). Click on the "Hud Assets" tab and add a new asset. Set the Width and Height and use the tiles to create the asset as shown below.
6: Click on the "HUD Elements" Tab and select Element 1. Select "Hud Asset" as type and "Life" for Hud Asset. Use the X and Y boxes to position the asset in the HUD.
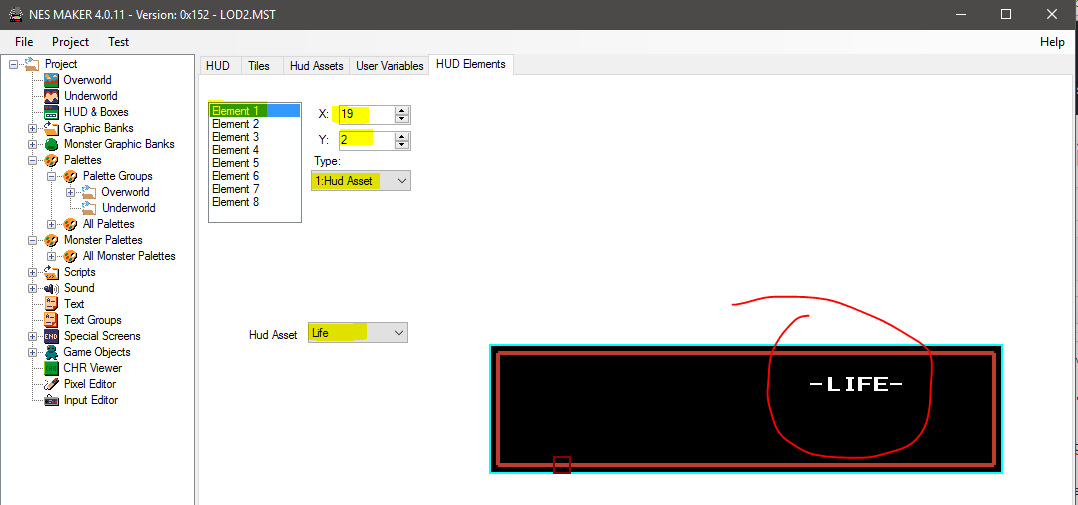
6.A: Export and Test to confirm the static HUD Asset is placed.
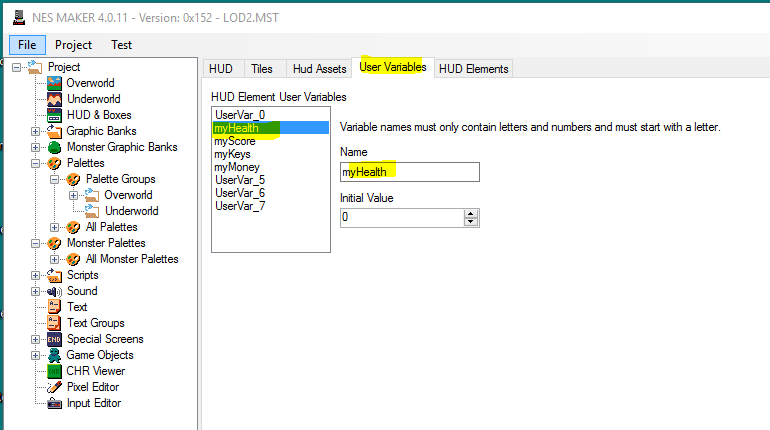
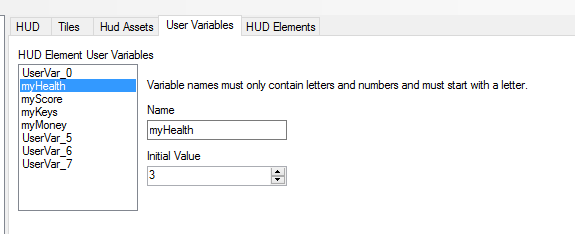
7: Add a variable HUD Asset for player health. Click on the "User Variables" tab and note that "myHealth" is already set up (per the Adventure Module).
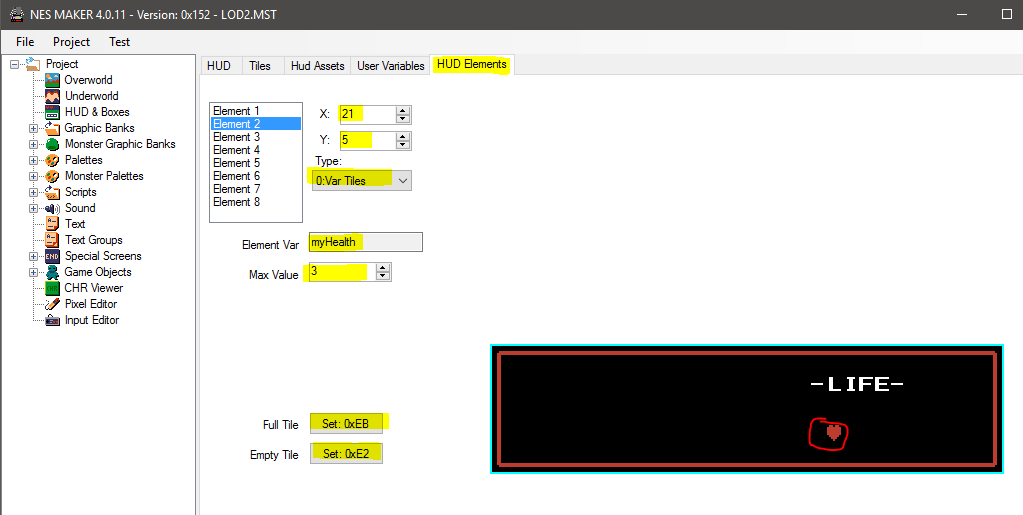
7.A: Click on the "HUD Elements" tab and select Element 2. Choose "Var Tiles" type and this element should be pre-set to myHealth. Set the Max Value and use the "Full Tile" and "Empty Tile" buttons to choose the tiles for full and empty health. Use the X and Y to place the tile on the HUD diagram.
8: Go back to the Hud Assets Tab and Create static Hud Assets for "Keys" and "Cash".
NOTE: The following steps can be buggy, and if something is not responding/moving/etc then save and reload the project and it should update / work.
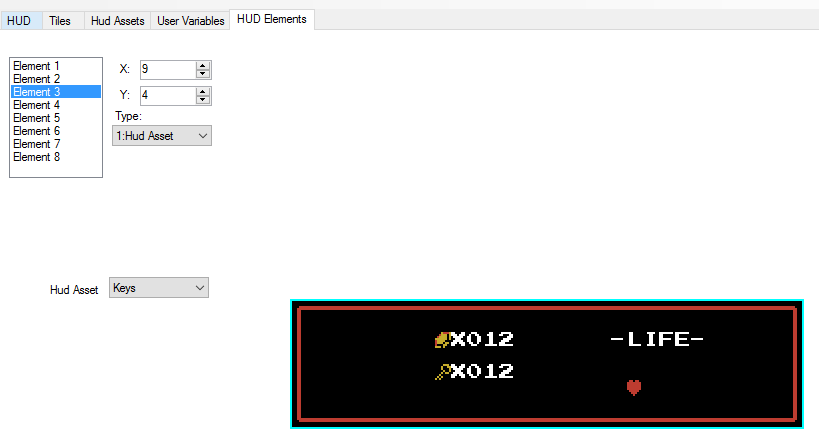
8.A: Click on the HUD Elements tab and make Element 3 a Hud Asset for Keys and place on HUD:
8.B: Set Element 4 to the Number type, it should be hard-coded to myKeys and set place on the HUD:

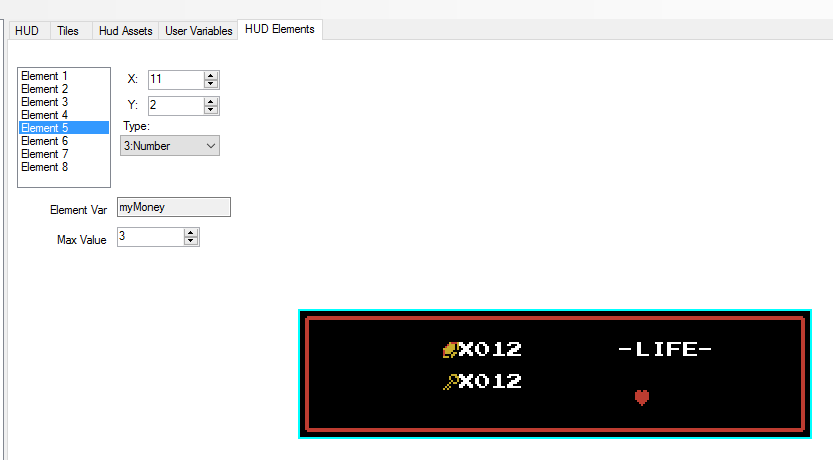
8.C: Set Element 5 to the Number type, it is hardcoded to myMoney and place on the HUD:
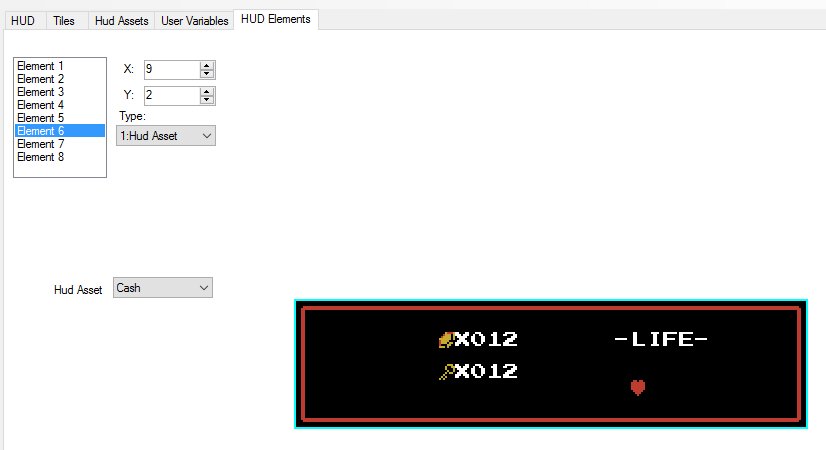
8.D: Set Element 6 to the HUD Asset for Cash and place on the HUD:
9: Click to the User Variables tab and set the initial value for myHealth.
10: Export and Test to check that everything looks good:
(I'm not sure yet why keys and cash show "111")

11: Adding the weapon / icon brackets
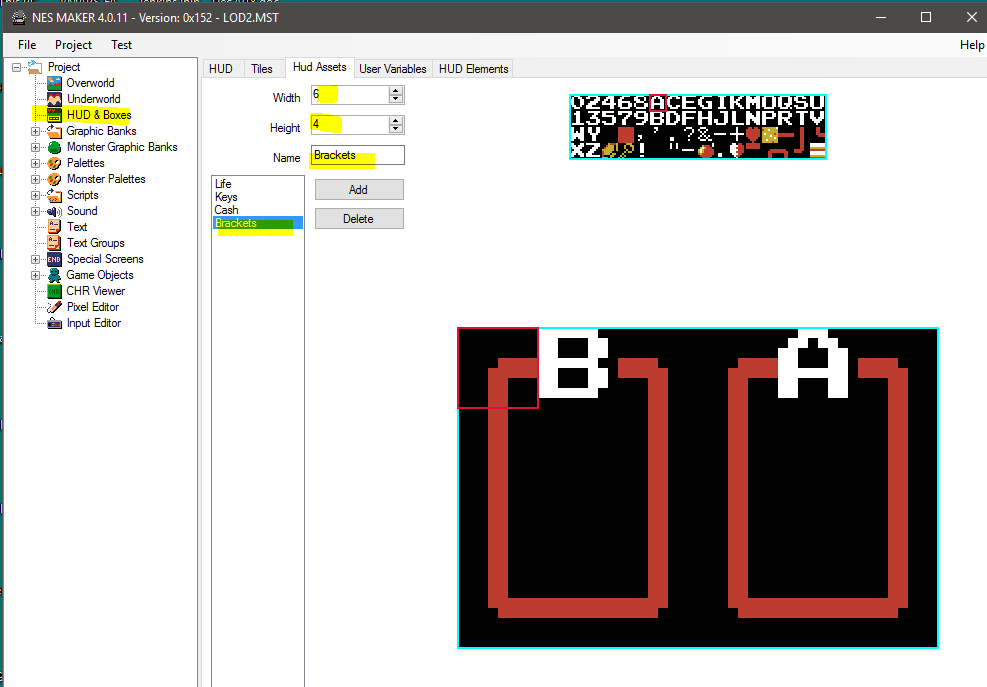
12: Add the Asset into the HUD Elements tab
_Note: This part is still really buggy. Click over to Overworld and back to confirm changes are taking. Save. Then reload the project if placement of the HUD Asset doesn't seem to be working.

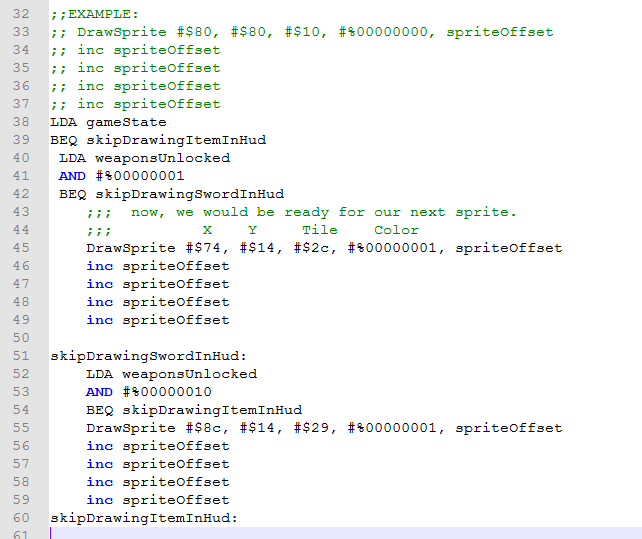
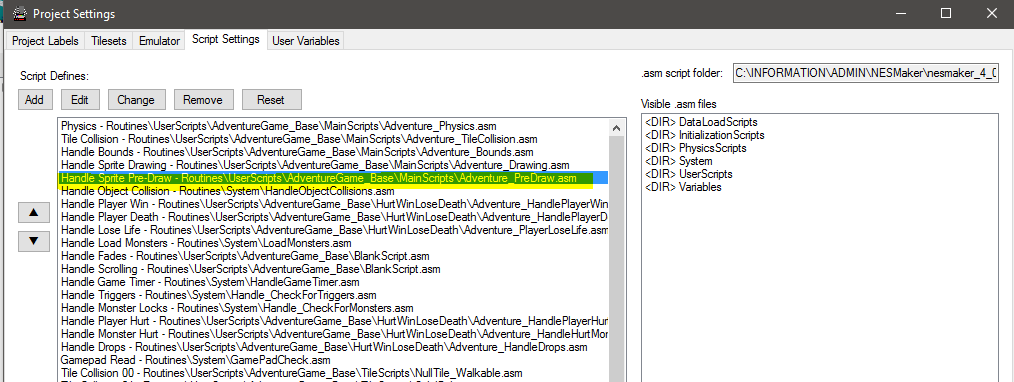
13: Advanced HUD editing can be done by going into the Project Script Settings Pre-Draw ASM
13.A: Add the following code to add sprites to the HUD. The first two hex numbers circled in red are the X, Y location of the Sprite on the hud. The third number is the tileset coordinate of the sprite (can be found by using PPU viewer in FCEUX). The fourth number is the palette to use.

13.B: In the example script above, the tile is being drawn in the HUD at the indicated location.
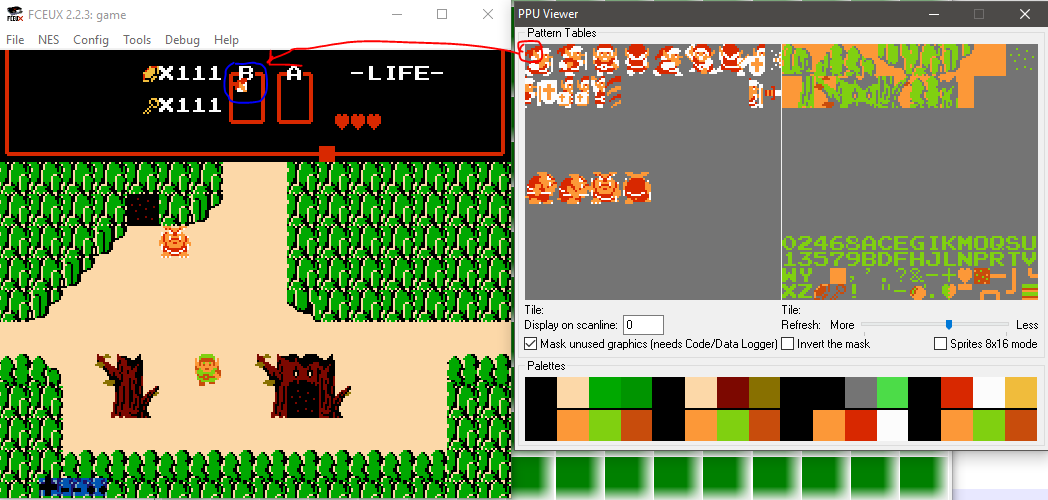
13.C: Below is an example from the NESMaker 4.0.6 tutorial showing how the weapon sprite is drawn in the HUD after receiving it in game.