Setting up your resigning environment - nowsecure/node-applesign GitHub Wiki
The following instructions were developed using Xcode 11.2.1, iOS 13.2.2, and node-applesign 3.4.2, although they will likely work for other versions as well.
Installing node-applesign
These instructions assume that you have cloned the node-applesign repo and are invoking applesign from the bin directory. You can also install applesign globally on your host as a command-line tool via npm:
$ npm install -g applesign
When installed in this manner, simply replace bin/applesign.js in the instructions with applesign.
Creating an Apple ID
If you have an Apple device you already have an Apple ID, but creating one separate from your personal account is recommended for re-signing and development.
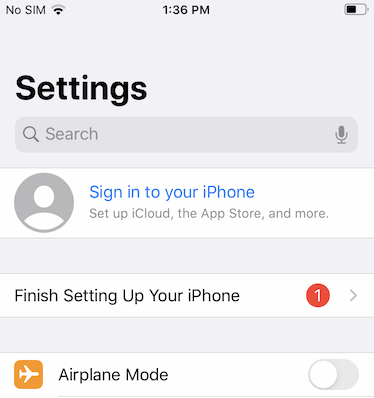
You can create a new Apple ID from an iOS device in the Settings app. While signed out, click the “Sign in to your iPhone” link and follow the instructions.
You can also create an Apple ID when setting up your Xcode project, as outlined in the next section.
Setting up Xcode to run our project
- Install and launch Xcode on macOS.
- Create an empty iOS project (File -> New -> Project and choose “Single View App”).
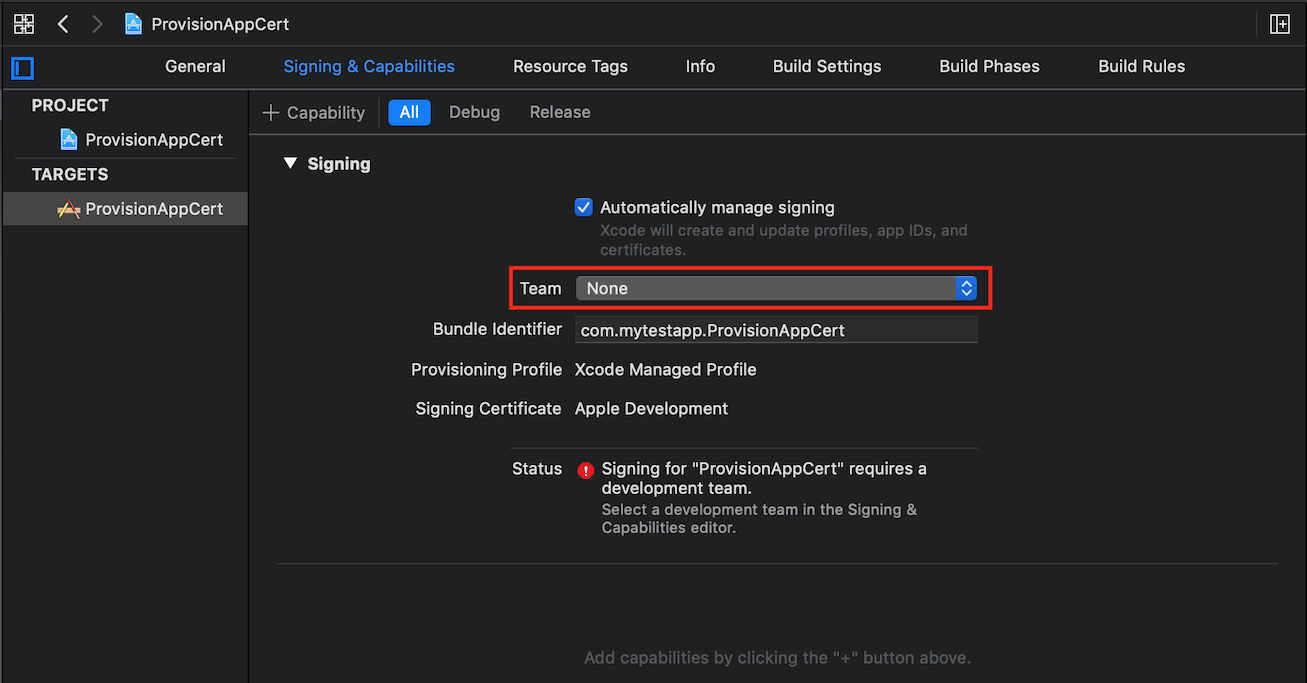
- Under Targets, select the app and click the “Signing & Capabilities” tab. In the “Team” dropdown, select your existing development account or “Add an Account...” to add an existing account or create a new account.
- Plug in your favourite non-jailbroken device. If you haven’t previously connected it, Xcode will notify you that it is preparing the device for development. Follow any on-screen prompts.
- Make sure your device is selected, then build and run the application by pressing the “Play” button. Follow any on-screen prompts.

- If you haven’t used this account to deploy apps to the device previously, you will see an error message that prompts you to trust your Developer App certificate on your device.
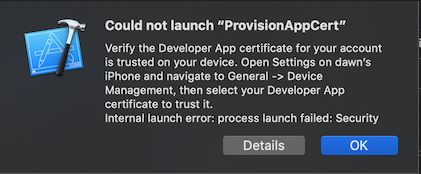
Follow the instructions in the error message to do so. For instance, in iOS 13.2.2, navigate to General -> Profiles & Device Management, then select your certificate and follow the on-screen instructions to trust it. - Build and run the app again. It should successfully launch.
You have created a simple iOS app, signed it, and trusted the Developer App certificate on the device. You now have everything necessary to re-sign an application for a jailed device.
Re-signing
Let's see how to use applesign to re-sign a random .ipa to run on your jailed device.
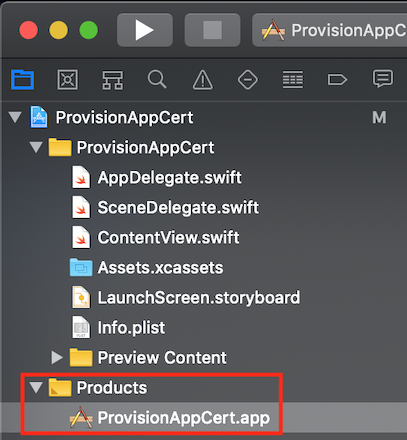
- Open the Xcode iOS project you created in the previous section and click on the Products folder in the left column to display the bundle directory (.app).
- Drag the bundle to a Terminal window to grab the path and then
cdto that directory; alternatively Ctrl-click and select “Show in Finder” then Ctrl-click and select “Show Package Contents” to navigate into the bundle directory. - Copy the
embedded.mobileprovisionfile to your home directory. We are now ready to re-sign! - Re-sign your .ipa file! When using a free Apple ID (versus a paid developer account) we recommend signing as follows:
$ bin/applesign.js --mobileprovision ~/embedded.mobileprovision \
                   --bundleid [bundle identifier from embedded.mobileprovision] \
                   --clone-entitlements \
                   --all \
                   path/to/your.ipa
or with less typing:
$ bin/applesign.js -m ~/embedded.mobileprovision -b [bundle identifier] -c -a path/to/your.ipa
These options will:
- Set the bundle identifier of the signed ipa to match the provision profile
- Use the entitlements from the provision profile to sign
- Sign all eligible files, even if they are not referenced by the application
If you are using a paid developer account, setting the bundle identifier should not be necessary.
After running applesign, you will have a path/to/your-resigned.ipa file which can be installed with ios-deploy or ideviceinstaller like this:
$ ideviceinstaller -i your-resigned.ipa
You can also install the file with Xcode by navigating to Window->Devices and Simulators and dragging the .ipa file onto the “Installed Apps” pane for the target device.
Modifying the Bundle Identifier
If you want to install the same app twice just use --bundleid to adjust it to a different one.
$ bin/applesign.js --mobileprovision ~/embedded.mobileprovision \
                   --bundleid new.bundle.identifier \
                   path/to/your.ipa
Bear in mind that you don't need a developer account to do this.
Portability
Applesign provides multiple options to make apps run on different devices, older operating systems or without enforcing https!
  -O, --osversion 9.0           Force specific OSVersion in Info.plist
  -f, --force-family            Force UIDeviceFamily in Info.plist to be iPhone
In order to sideload apps with watchOS extensions, a separate provisioning profile associated with the watch is required for re-signing. Use the following flag to work around this issue:
-w, --without-watchapp Remove watchOS extension before re-signing
To facilitate advanced MITM techniques (such as SSL Stripping/HTTPS downgrade to capture all communications in plaintext) we can use this flag to allow unencrypted HTTP:
  -H, --allow-http              Add NSAppTransportSecurity.NSAllowsArbitraryLoads
                                in Info.plist
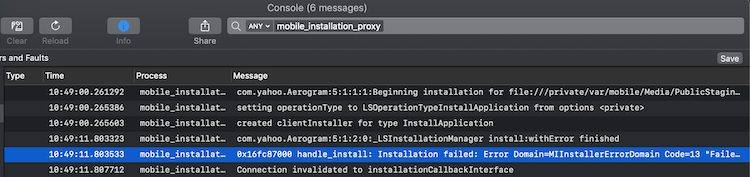
Troubleshooting
If the application fails to install to your device after re-signing, the errors logged on the device frequently indicate why. To view system logs with the Console app on macOS, navigate to Applications->Utilities->Console in Finder. You can also launch the Console app in Xcode from Window->Devices and Simulators; select your device in the left-hand pane and click the “Console” button. In the Console app, make sure your device is selected in the left-hand pane and then search for “mobile_installation_proxy” to filter the messages down to install-related events.