Installing Psoc 5LP Test projects - noeldiviney/P5LP_Comp_repo GitHub Wiki
$: mkdir -p ~/projects/P5LP/ComponentsTest
$: cd projects/P5LP/ComponentsTest
$: repo init -u https://github.com/noeldiviney/P5LP_CompTest_repo
$: repo sync
-
once this has completed you should have P5LP Component Test Projects in place

-
Launch PSoC Creator
-
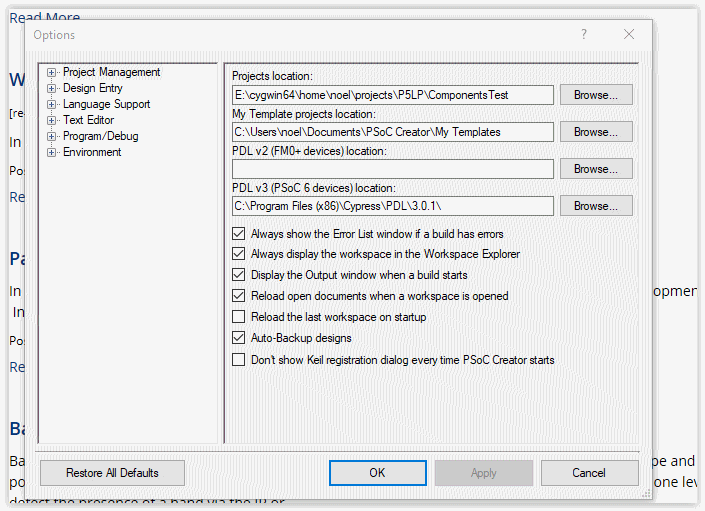
select "Tools→Options"
-
Setup the "Options" dialog as per the following image
-
Ensure that "Projects Location" shows ~\projects\P5LP\ComponentsTest"
-
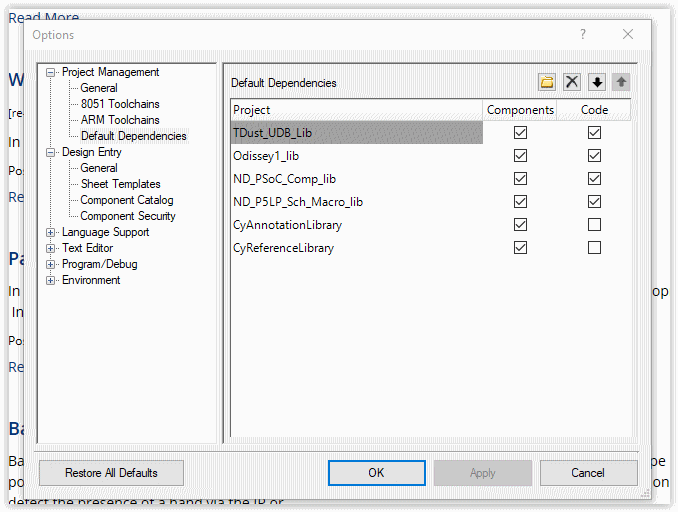
Now select "Project Management→Default Dependencies"
-
Navigate to "~\projects\P5LP\ComponentsDev"
-
Use the "New Entry" button to find and "open" each Libratiy’s .cyprj file
-
When finished press "Ok" to close the dialog
-
Use "File→New→Project" to launch the "Create Project" dialog
-
Select "Target device"
-
Select "PSoC 5LP" and "CY8C5888LTQ-LP097" and "next" btn
-
Select "Empty Schematic" and "next" btn
-
Select "Finish" btn to launch the new project
-
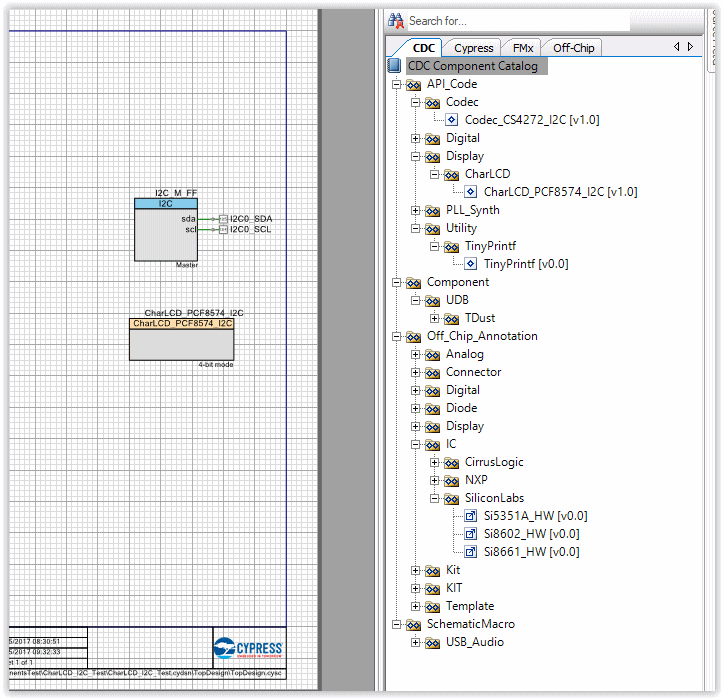
In "Project Explorer" Window double click on the "TopDesign.cysch"
-
In the "Component Catalog" window on the right select "CDC" tab
-
I will use "P5LP_CharLCD_I2C" as an example
-
To prepare for Git it is neccessdary to check out a branch
$: git checkout master or whatever branch one wishes to use
-
Use "File→Open→Project Workspace" to launch the "Open" dialog
-
Navigate to and then "open" "P5LP_CharLCD_I2C.cywrk"
-
perform any development and Testing