How to create an own adapter? - necroware/gameport-adapter GitHub Wiki
It is relatively easy for most hobby/amateur-tinkers to solder the parts by hand, as there are only a few simple components.
1. Ordering prototype PCB and assembling yourself
As this is open-source hardware you should be aware that it is currently relatively easy and inexpensive to submit the KiCad PCB layout files directly to PCB prototype board manufacturers such as "JLCPCB", "PCBWay" or "Oshpark". They will then produce and ship a few PCB boards to you without you having to use KiCad or understand PCB layout:
- https://www.pcbway.com
- https://jlcpcb.com
- Follow this guide to convert KiCAD files to Gerber format for jlcpcb.com: https://jlcpcb.com/help/article/How-to-generate-Gerber-and-Drill-files-in-KiCad-6
- https://oshpark.com
- See example shared project (rev 0.2.1 of the board) -> https://oshpark.com/shared_projects/rzwJjMoP
For your information, Chinese PCB manufacturers will usually produce around 20 simple PCBs like this for less than $10 and ship them to you for around $20. Depending on your country's import tax, you could have them at home within a month for around $30–40.
We recommend buying the ones from the project BOM (Bill of Materials) list.
2. Bill of materials (BOM)
The hardware is super simple. See also https://github.com/necroware/gameport-adapter/blob/main/README.md#bill-of-materials-bom which might get updated more frequently.
Note on the Arduino Pro Micro model:
- It is not recommended to buy the Mini-USB variant of Arduino Pro Micro as its header is wider than USB-C and Micro-USB variants
- It is also not recommended to buy the Micro-USB variant of Arduino Pro Micro as it is too easy to break the USB-connector.
- Get the USB-C version of the Arduino Pro Micro instead.
To build an adapter you'll need the PCB from this project and following parts:
| Part | Qty | LCSC # | Digikey # | Mouser Electronics # | Comment |
|---|---|---|---|---|---|
| CONN1 | 1 | C77835 | 609-5371-ND | 523-L77SDA15SA4CH4F | DB15 female connector |
| R1..R4 | 4 | C172965 | 13-MFR-25FTE52-100KCT-ND | 603-MFR-25FTE52-100K | 100 kOhm resistors |
| SW1 | 1 | C15781 | 2449-KG04ET-ND | 642-DS04T | DIP-4 switch |
| U1 | 1 | C72120 | ED3051-5-ND | 649-DILB24P-223TLF | DIP24 Socket (optional) |
| U1 | 1 | N/A | 1568-1060-ND | 474-DEV-12640 | Arduino Pro Micro (ATmega32U4 16MHz, 5V), including two 12 pin header connectors, MicroUSB or USB-C version (see "Known issues") |
Tip! Some other user recommended buying an enclosure case: Hammond Manufacturing 1551RTBU, Digi-Key Part # HM1142-ND.
You can otherwise 3D-print your own case, see example -> https://www.thingiverse.com/thing:5457006
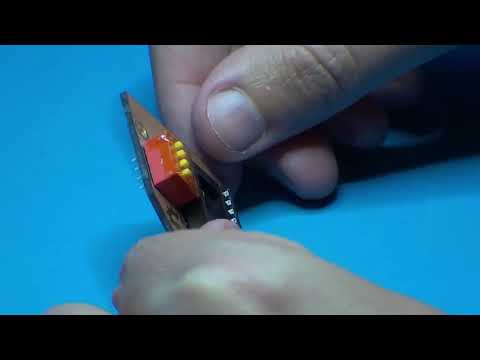
3. Assemble the components
"A video is worth a thousand words"
Complete assembly video: https://www.youtube.com/watch?v=HUmbvfqP784
4. Flash the firmware to the Adruino Pro Micro
In order to make the Arduino work, you need to flash the firmware to it.
- Download the source code files from -> https://github.com/necroware/gameport-adapter/tree/main/firmware/gameport-adapter
- Download the Arduino IDE from -> https://www.arduino.cc/en/software
- Connect the Adapter with your USB cable
- Open "gameport-adapter.ino" included in the source files (see directory "/firmware")
- In "Tools" -> Port -> select the virtual COM port that says (Arduino Micro)
- In "Sketch" -> select "Upload" which will compile the firmware and upload it to the Arduino
- You are done
To ensure you always have the latest software version on your Arduino, repeat these steps whenever a new firmware was released.
Originally posted by @Hedda in https://github.com/necroware/gameport-adapter/issues/12#issuecomment-1408782899