QuickStart - nairraf/x4SaveManager GitHub Wiki
Back to Documentation Contents
Overview
This quickstart will guide you through the process of downloading, installing, and a quick guide through what is needed for the first application start-up and first backup run so that x4SaveManager can manage all your X4 backups going forward.
Installation
- download the latest release from Releases
- Unzip into a folder anywhere on your computer
- Open the folder where you extracted the contents of the zip file and double click on x4SaveManager.exe to run the application.
- You can also pin to the taskbar or start menu (right click on x4SaveManager.exe and choose the appropriate pin option) to make it easy to launch x4SaveManager in the future.
Main Window
x4SaveManager will start up with default settings, attempting to auto-configure itself with a default backup location, and attempts to locate the X4 Foundations save file directory.
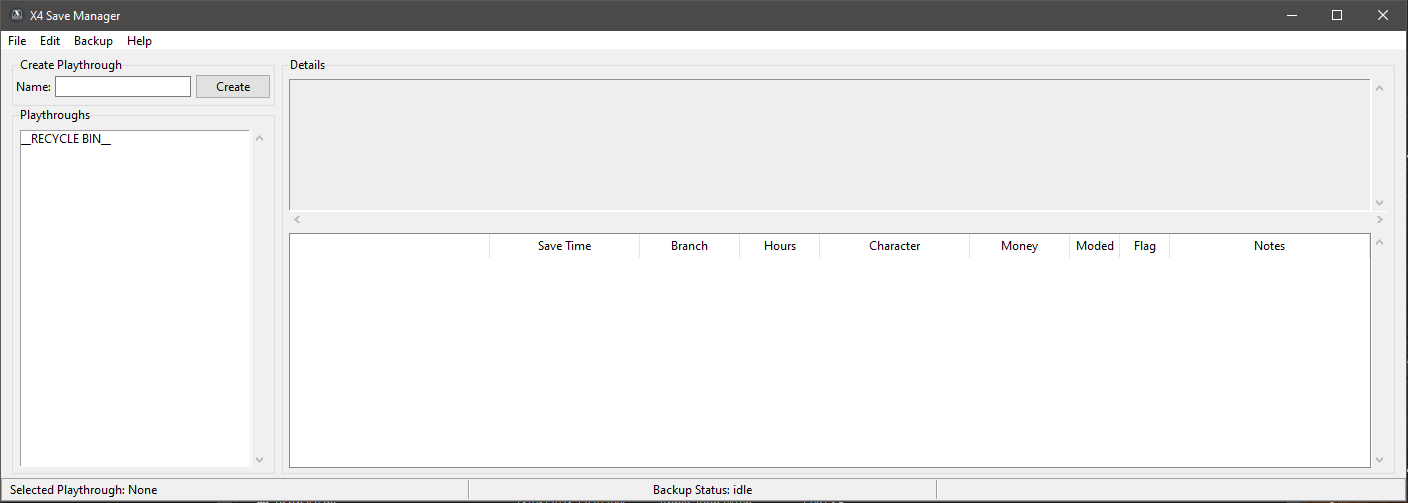
Notice that there is a special playthrough that already exists called "RECYCLE BIN". You can read more about this in the Backup Management section
Settings
Double check the settings by clicking on Edit -> Settings
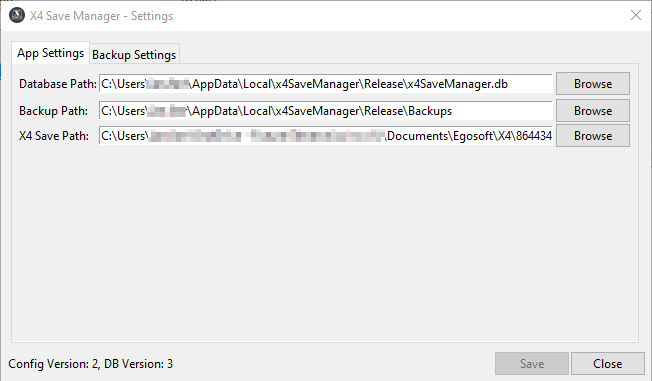
- At a minimum you should confirm that the X4 Save Path is correct. If it isn't, click on the "Browse" button to browse to the folder containing the X4 Foundations save files.
You can also review the backup settings. For now the most important setting is the "Backup Frequency (sec)" setting which controls how often (in seconds) x4SaveManager will check for any X4 save files which have not been backed up yet:
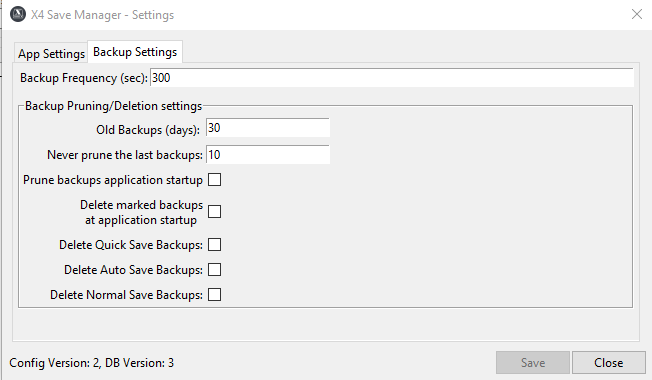
You can ignore all "Backup Pruning/Deletion" settings for now. You can read more about this in Backup Management*
Playthroughs
Create a playthrough by clicking on File -> Create Playthrough, or by typing a name in the "Create Playthrough" section of the main page and clicking on the "Create" button. This will open the "Create Playthough" window to allow you to confirm the name, and add any comments/notes to associate to that playthrough:
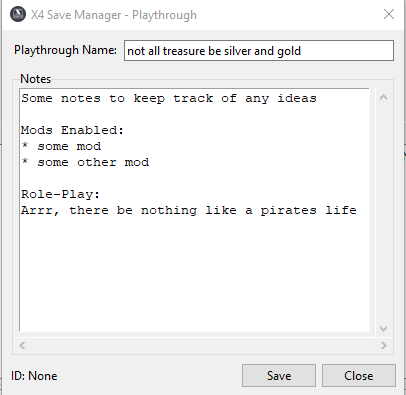
Click on Save to save the playthrough, and close to close the window once you have done setting the name and notes for that playthrough
Once you save the playthrough, Note that you will now see the playthrough in the list, but also notice that the status bar does not have a playthrough selected yet:

Simply clicking on the playthrough will select that playthrough. Notice that it is underlined and highlighted, and the status bar is updated to confirm the currently selected playthrough. When you start the backup process, all backups will be associated with the currently selected playthrough:
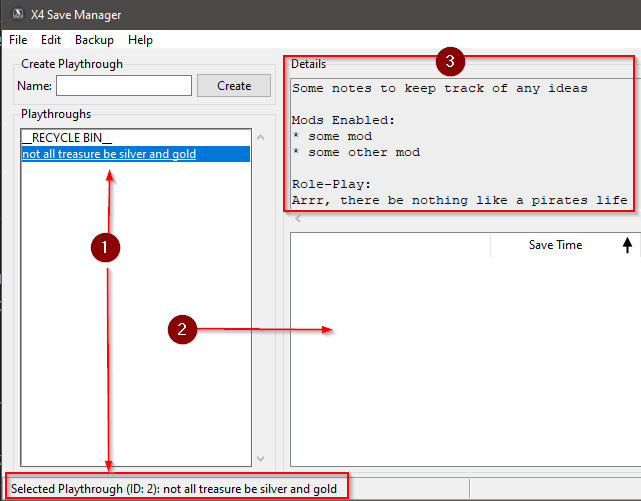
- the currently selected playthrough
- all backups will be listed here
- the notes for the currently selected playthrough will be displayed here
You must create at least one playthrough, and have a playthrough selected before you can backup any x4 saves.
Backups
Starting the Backup Process
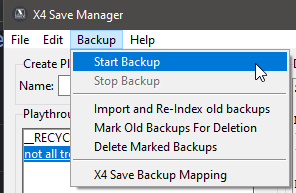
From the Backup Menu, select "Start Backup"
Once you start the backup process, the main application screen will change to the backup view:
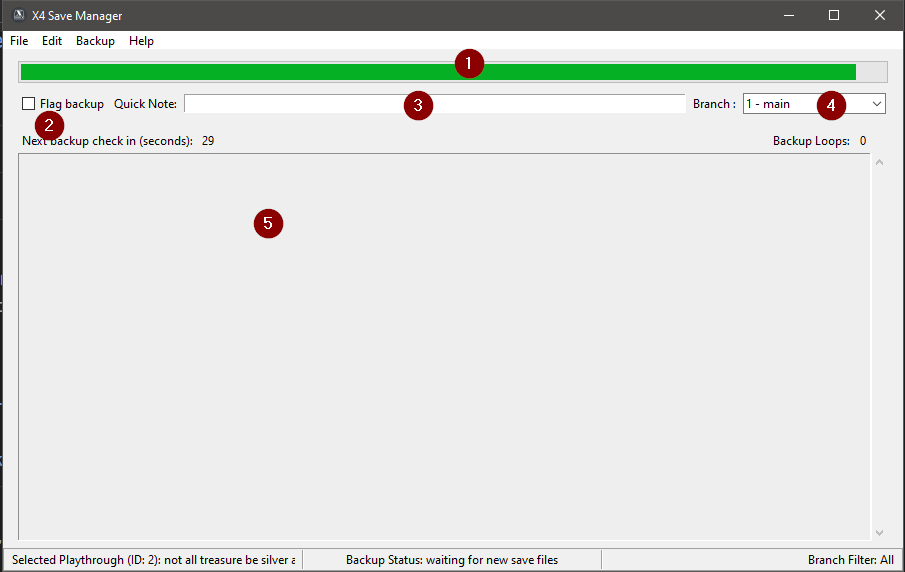
-
Countdown bar.
- when the countdown hits 0 the next backup cycle will start
-
Set the flag for the next backup
- think of the flag as an importance marker. Backups that are flagged will never be deleted by x4SaveManager
-
A note for the next backup.
- This can be anything you want to remind yourself of what was happening at the time the save was taken
-
the branch to associate with this backup.
- A playthrough can have an unlimited amount of branches. You can simply type the name of a new branch if you need to create a new one, or select an existing branch. All playthroughs have 1 branch by default called "1 - main"
-
details about the backups that are in progress, or backups that have happened during the current backup session are displayed here.
When x4SaveManager has found a new save file to backup, the progress will be displayed in the backup window:
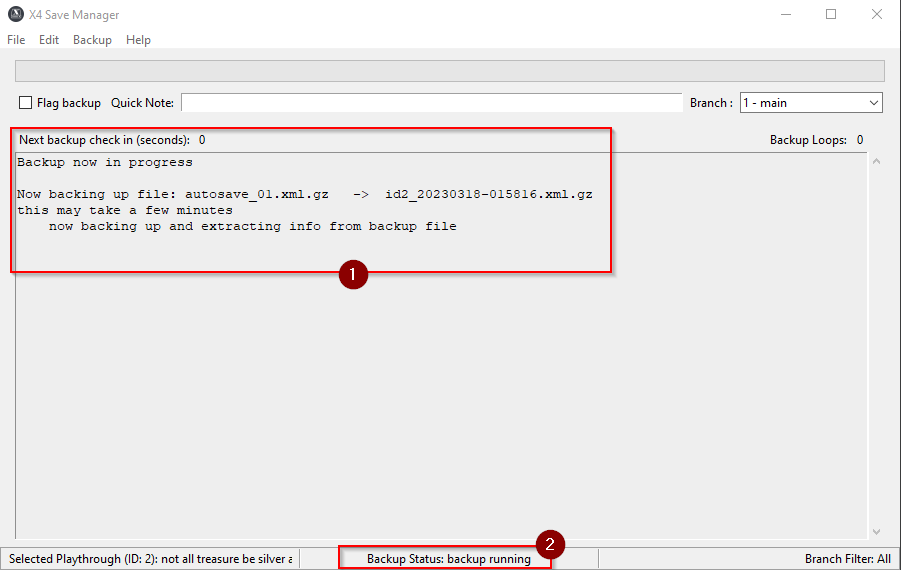
- details about the X4 save that is being backed up
- the status bar is updated to reflect that a backup is now in progress
First Backup Run
The first time x4SaveManager runs, it will create a backup for all the save files that are in the X4 Foundations saves folder and display the results while the countdown waits for the next backup loop:
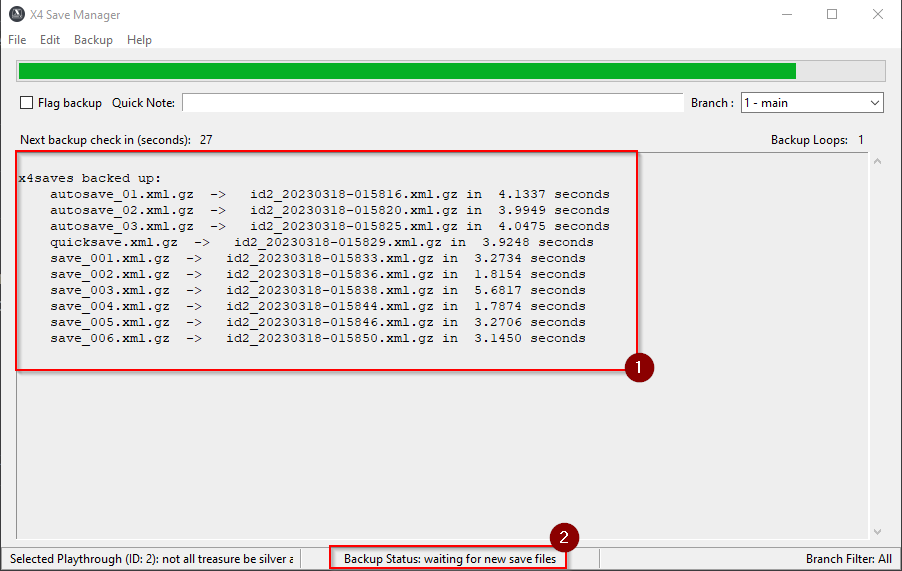
- details of all backups that have been taken so far during this backup session
- status bar updated to reflect that x4SaveManager is waiting for the next backup loop to check for new save files.
Note: All Backups will be associated with the currenlty selected playthrough. You can move backups between playthroughs, and edit the backup details once the backup process is stopped
Stopping the backup process
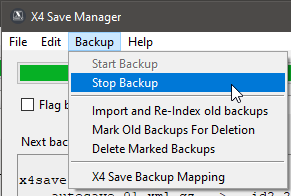
when you want to stop the backup process, simply select "Stop Backup" from the Backup menu:
After you stop the backup process, the main window will update and display the backups taken for the currently selected playthrough
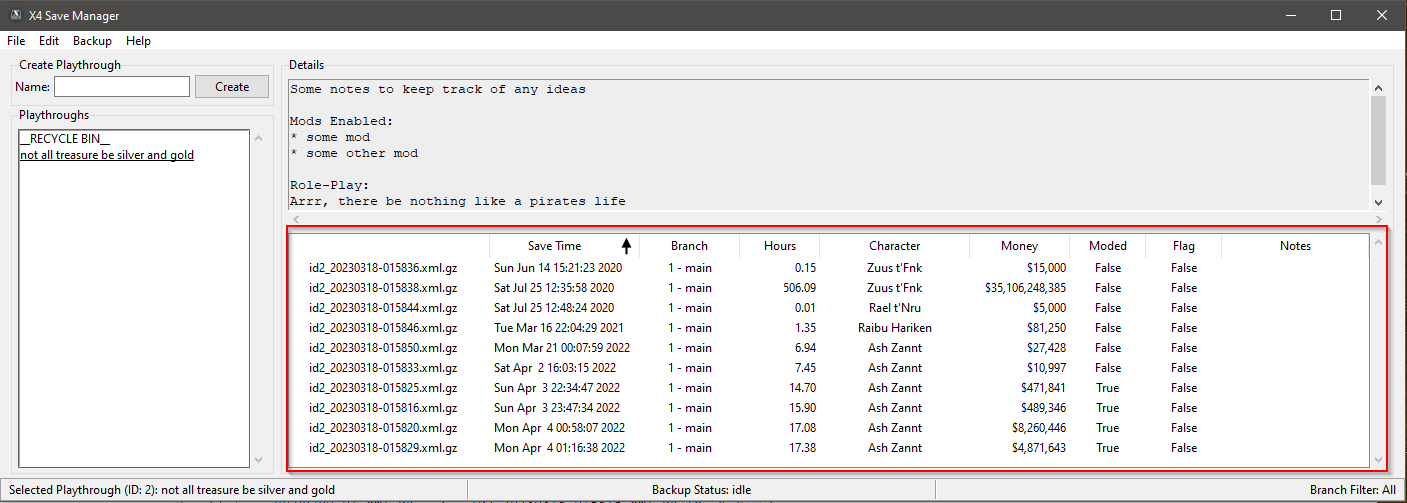
Note: that at present you can sort by SaveTime or Hours columns
Interacting with Backups
- Left Click a backup to select it. You can use the Ctrl and Shift keys to select multiple backups at a time
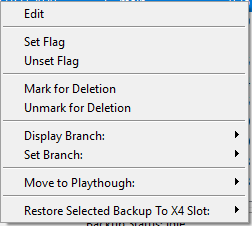
- Right click to see the backup action menu:
-
edit: opens the edit backup window. You must only have a single backup selected for this action to work.
-
Set Flag: Sets the flag on all selected backups Unset Flag: Removes the flag on all selected backups
-
Mark for Deletion: marks all selected backups for deletion. backups that are marked for deletion are only visible in the RECYCLE BIN.
-
Unmark for Deletion: removes the deletion mark on selected backups. When you remove the deleted mark, the backups will be visible in the appropriate playthrough.
-
Display Branch: display a specific branch, or all branches for the currently selected playthrough
-
Set Branch: Sets the branch on all currently selected backups
-
Restore Selected Backup to X4 Slot: Only works with a single selected backup. Restores the currently selected backup to the specified X4 save slot.
After the first run, you will have all backups associated with a single playthrough. From here you can create more playthroughs, and then simply move the appropriate backups to a different playthrough using the right-click action menu. Use Ctrl or Shift to select multiple playthroughs, and then right click -> Move to Playthrough to move all currently selected backups to the new playthrough.
Now you can easily see all the backups per playthrough as you select the different playthroughs.
Editing a backup
Double clicking on a specific backup, or right clicking the selected backup and choosing edit will open up the edit backup window. You can use this window to edit the details for a specific backup:
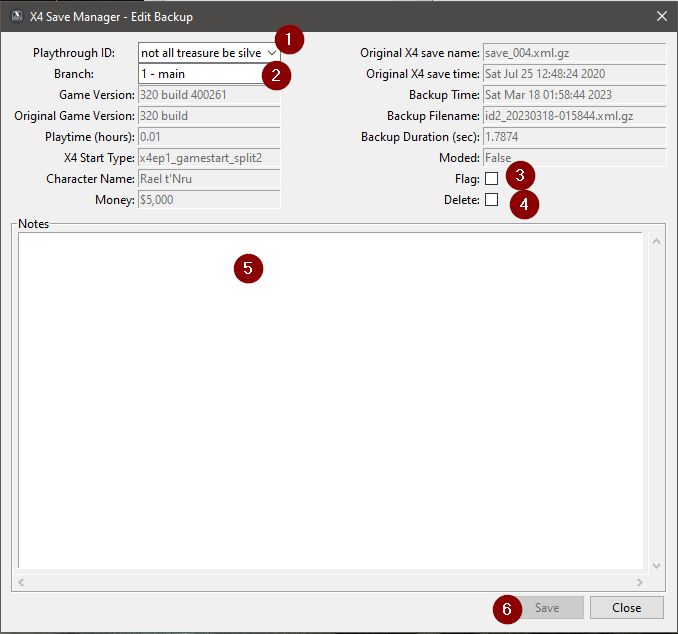
- view/change the playthrough that this backup is associated with
- view/change the branch this backup should be associated with
- branches are a way to organize your backups for that playthrough. You can use branches to easily associate backups with in-game decisions.
- to create a new branch, just type in a new branch name, which can be anything you want.
- set/unset the flag for this backup
- think of the flag as an importance flag. Backups with their flag set will never be deleted.
- Mark/Unmark this backup for deletion
- this does not immediately delete the backup. It simply marks the backup for deletion. It will only be viewable from the RECYCLE BIN
- edit the notes for this backup
- save your modifications.
use the close button, or the "X" in the top right to close the backup window.
Restoring a backup
To restore a backup, right click on a selected backup and choose the option "Restore Selected Backup to X4 Slot"
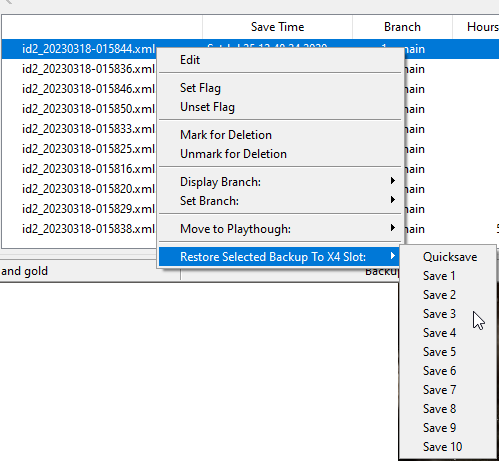
All the save slots correspond to the in-game slots as follows:
- Quicksave
- Quicksave in the X4 Load Game screen
- Save 1 through 10
- Slots 1 through 10 in the X4 Load Game screen
Once you select an appropriate slot to restore to, you will be presented with a confirmation dialog:
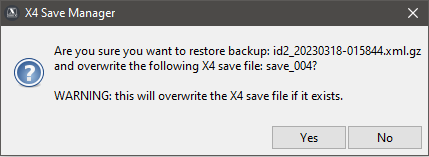
Selecting Yes will proceed with the restore, and it will overwrite that X4 save slot with the selected backup.
X4 Save Slot to Backup Mapping
Once you start taking backups, you may want to see which X4 save slots are associated with which backups. You may start asking this question when it comes time to restoring backups over X4 Save Slots.
Because the restore process is a desctructive process, meaning that it will overwrite an X4 Save Slot, you may want to double check to make sure that the save slot in question does have a corresponding backup.
You can also use the the save slot to backup mapping window to remind yourself of which slot you want to play when you are in the X4 load game window.
All the save slots correspond to the in-game slots as follows:
- autosave 1 to 3
- autosave_001.xml.gz, autosave_002.xml.gz, autosave_003.xml.gz
- Quicksave
- quicksave.xml.gz
- slots 1 through 10
- save_001.xml.gz through save_010.xml.gz
To see a mapping between X4 Save Slots and their corresponing backups, select "X4 Save Backup Mapping" from the Backup Menu:
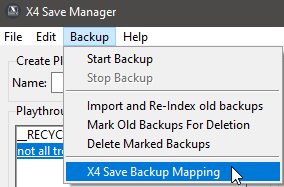
This will open the Save to Backup mapping window:
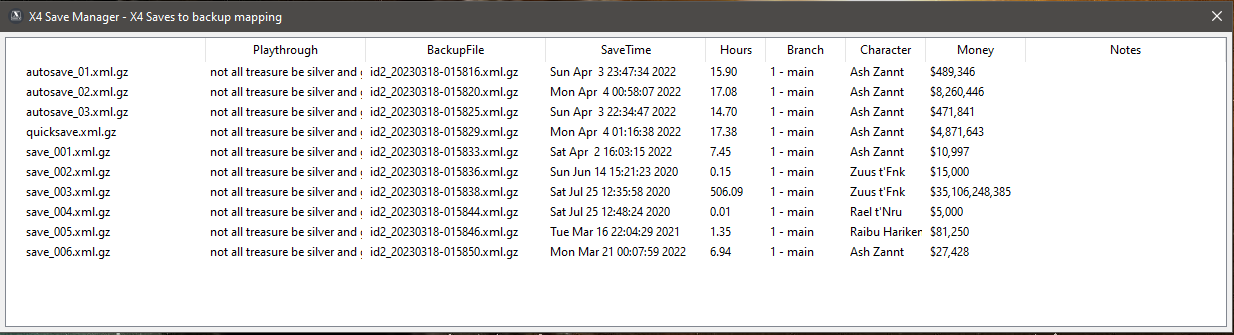
- it may take a few seconds to perform the save to backup mapping.
- this is useful to see if there are any X4 saves that haven't been backed up yet and also show you which backup is currenlty in which X4 save slot, so you can decide which slots to safely overwrite when restoring backups to X4 save slots.
That covers the basic features of x4SaveManager. If you need any more details on a specific feature, see the appropriate section in the main documentation