Development - mongoose-os-apps/shelly-homekit GitHub Wiki
Code contributions are welcome! See open issues and feel free to pick one up.
- Ubuntu, other Linux machine, or macOS (TODO: test and describe a Windows setup).
- GNU make.
- cURL, gzip utilities
- For local builds - Docker engine (Community Edition).
-
mosCLI tool - get it here.
Install Generic MacOS/Linux mos CLI tool
curl -fsSL https://mongoose-os.com/downloads/mos/install.sh | /bin/bash
mos
In the top level directory, run make with the desired target - one of Shelly1, Shelly1PM, Shelly2, Shelly25 or ShellyPlugS.
$ make Shelly1
mos build --platform=esp8266 --build-var=MODEL=Shelly1 \
  --build-dir=./build_Shelly1 --binary-libs-dir=./binlibs  --local
Fetching libmongoose-esp8266-nossl.a (latest) from https://github.com/mongoose-os-libs/mongoose/releases/download/latest/libmongoose-esp8266-nossl.a...
Fetching libota-common-esp8266.a (latest) from https://github.com/mongoose-os-libs/ota-common/releases/download/latest/libota-common-esp8266.a...
Fetching libota-http-client-esp8266.a (latest) from https://github.com/mongoose-os-libs/ota-http-client/releases/download/latest/libota-http-client-esp8266.a...
Fetching libota-http-server-esp8266.a (latest) from https://github.com/mongoose-os-libs/ota-http-server/releases/download/latest/libota-http-server-esp8266.a...
Firmware saved to /home/username/shelly-homekit/build_Shelly1/fw.zip

cp ./build_Shelly1/fw.zip shelly-homekit-Shelly1.zip
$ make Shelly25 MOS=/home/rojer/cesanta/mos/mos
gzip -9 -c fs_src/index.html > fs/index.html.gz
gzip -9 -c fs_src/style.css > fs/style.css.gz
/home/rojer/cesanta/mos/mos build --platform=esp8266 --build-var=MODEL=Shelly25  --build-dir=./build_Shelly25 --binary-libs-dir=./binlibs
Connecting to https://mongoose.cloud, user test
Uploading sources (31156 bytes)
Firmware saved to /home/rojer/allterco/q/build_Shelly25/fw.zip
cp ./build_Shelly25/fw.zip shelly-homekit-Shelly25.zip
You don't strictly need Docker to build, it's possible to use remote build server, but local builds are usually faster.
$ make Shelly25 LOCAL=1
gzip -9 -c fs_src/index.html > fs/index.html.gz
gzip -9 -c fs_src/style.css > fs/style.css.gz
mos build --platform=esp8266 --build-var=MODEL=Shelly25  --local --build-dir=./build_Shelly25 --binary-libs-dir=./binlibs
Fetching libmbedtls-esp8266-noatca.a (latest) from https://github.com/mongoose-os-libs/mbedtls/releases/download/latest/libmbedtls-esp8266-noatca.a...
Fetching libmongoose-esp8266-nossl.a (latest) from https://github.com/mongoose-os-libs/mongoose/releases/download/latest/libmongoose-esp8266-nossl.a...
Fetching libota-common-esp8266.a (latest) from https://github.com/mongoose-os-libs/ota-common/releases/download/latest/libota-common-esp8266.a...
Fetching libota-http-client-esp8266.a (latest) from https://github.com/mongoose-os-libs/ota-http-client/releases/download/latest/libota-http-client-esp8266.a...
Fetching libota-http-server-esp8266.a (latest) from https://github.com/mongoose-os-libs/ota-http-server/releases/download/latest/libota-http-server-esp8266.a...
Fetching librpc-service-ota-esp8266.a (latest) from https://github.com/mongoose-os-libs/rpc-service-ota/releases/download/latest/librpc-service-ota-esp8266.a...
Firmware saved to /home/rojer/allterco/q/build_Shelly25/fw.zip
cp ./build_Shelly25/fw.zip shelly-homekit-Shelly25.zip
Note: First build may take a while - it will have to fetch the build image (~1 GB) and library dependencies. Subsequent builds will be fast.
Device logs useful information to console. Console is available via serial port - if possible, use that:
$ mos console
Using port /dev/ttyUSB0
[Jul 14 22:40:19.912] shelly_main.cpp:273     Uptime: 1828.57, RAM: 33824, 22232 free
[Jul 14 22:40:20.912] shelly_main.cpp:273     Uptime: 1829.57, RAM: 33824, 22232 free
[Jul 14 22:40:22.912] shelly_main.cpp:273     Uptime: 1831.57, RAM: 33824, 22232 free
...
Alternatively, you can use UDP logging as follows. Here 192.168.11.x.y is IP address of the device and 192.168.a.b is ip address of your development machine.
$ mos --port ws://192.168.x.y/rpc config-set debug.udp_log_addr=192.168.a.b:8910
Now run mos console and you should see the logs:
$ mos console --port udp://:8910/
Listening on UDP port 8910...
[Jul 14 22:44:36.037] shellyswitch25-B955B6 2135 2084.575 2|shelly_main.cpp:273     Uptime: 2084.57, RAM: 33824, 22228 free
[Jul 14 22:44:36.959] shellyswitch25-B955B6 2136 2085.575 2|shelly_main.cpp:273     Uptime: 2085.57, RAM: 33824, 22228 free
[Jul 14 22:44:37.982] shellyswitch25-B955B6 2137 2086.575 2|shelly_main.cpp:273     Uptime: 2086.57, RAM: 33824, 22228 free
...
For obvious reasons logs are only available once device connects to WiFi, so this doesn't give you early init logs.
TODO: integrate file-logger library.
While it is possible to use flashing over serial port as described here, it's less than convenient in practice.
Delayed commit OTA allows for fail-safe development with deployment over OTA. Here's how it works.
$ make Shelly25 LOCAL=1 && curl -F commit_timeout=120 -F file=@build_Shelly25/fw.zip http://shellyswitch25-B955B6.local/update
gzip -9 -c fs_src/index.html > fs/index.html.gz
gzip -9 -c fs_src/style.css > fs/style.css.gz
mos build --platform=esp8266 --build-var=MODEL=Shelly25  --local --build-dir=./build_Shelly25 --binary-libs-dir=./binlibs
Firmware saved to /home/rojer/allterco/shelly-homekit/build_Shelly25/fw.zip
cp ./build_Shelly25/fw.zip shelly-homekit-Shelly25.zip
1 Update applied, rebooting
commit_timeout=120 setting means that after deployment firmware remains in uncommitted state and will wait up to 120 seconds for explicit commit.
If commit does not happen, or device reboots for any reason (e.g. crash), firmware automatically reverts to previous version:
So, if you are happy with the new firmware, you must comit it within 2 minutes after flashing:
$ curl http://shellyswitch25-B955B6.local/update/commit
Ok
or
 $ mos --port ws://shellyswitch25-B955B6.local/rpc call OTA.Commit
null
This allows for safe development without a serial connection.
Making UI changes can be done without rebuilding and reflashing entire firmware.
After making a change to files in fs_src, open the index.html file in a web browser, when you see the following dialog:
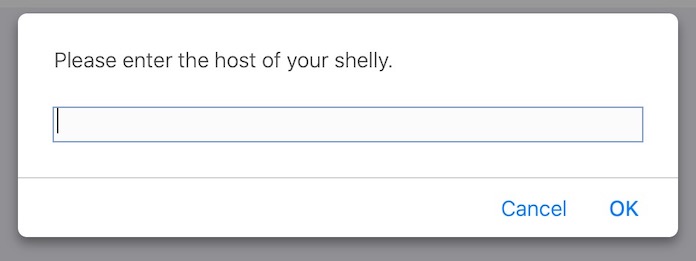
Enter the hostname or ip address of the shelly device you want to test the new UI on, you should now see your changes. You can also reload the page in your browser to see new changes.
When chasing a memory leak or corruption issue, using "grown up" tools such as Address Sanitizer is invaluable. Mongoose OS has a minimal "ubuntu" platform that makes it possible - it doesn't support peripherals but is ideal if you can separate the code you're debugging into something that doesn't require hardware access. For Shelly-HomeKit we have a "ShellyU" target that is exactly that - it's a "switch" with no physical connections but with a functioning web interface and HAP support fully working. Running and using it will catch memory corruption and pointer misuse, such as double-free or use-after-free. Here's how to build and use it:
On a Ubuntu Linux machine with Clang (sudo apt-get install clang) and Docker CE installed, run
make ShellyU
Backtraces will be more useful if set symbolizer path in your environment: export ASAN_SYMBOLIZER_PATH=$(realpath /usr/bin/llvm-symbolizer-*). This only needs to be done once per session.
In the main source directory, then run the resulting binary:
build_ShellyU/objs/shelly-homekit.elf --insecure --chroot build_ShellyU/fs
Go to http://localhost:8080/ to access the web interface, pair, etc. If your firmware does something nasty with a pointer, it will crash and you'll get a full trace. Leak check is only performed on graceful exit, so to check if it leaks memory press ctrl-c in the terminal and if it does, you'll get a report.
Mongoose OS RPC and there is REST API for that (along with UART, WebSocket, MQTT and others), this requires firmware version 2.7.0 or above.
for HTTP, here's an example:
$ curl http://shelly1-test.local/rpc/Shelly.SetState -d '{"id": 1, "type": 0, "state": {"state": true}}'
null
id is id of the switch (1 or 2 for devices with 2 switches). null means success, in case of error you'll get an error code and message:
$ curl http://shelly1-test.local/rpc/Shelly.SetSwitch -d '{"id": 123, "type": 0, "state": {"state": true}}'
{"code":400,"message":"component not found"}
You will need to find the switch type you are try to control, those can be found here.
If you are using a password to secure the web access, you have to add the following arguments to your curl API call:
--user "admin:<password>" --digest
The Username is always "admin".
You can call these in a weburl as follows:
For GET requests, construct args from query string, for example, this will turn on the switch relay.
http://shelly1-test.local/rpc/Shelly.SetState?id=1&type=0&state={"state":true}
example for Garage Door Opener:
http://shelly1-test.local/rpc/Shelly.SetState?id=1&type=5&state={"toggle":true}
for a detached input.
- Single press:
event=1, Double press:event=2, Long press:event=3 http://shelly1-test.local/rpc/Shelly.InjectInputEvent?id=1&event=2
and for roller door opening
http://shelly25-test.local/rpc/Shelly.SetState?type=4&id=1&state=%7b%22tgt_pos%22%3a50%7d
When using this API in conjuction with the stock shelly firmware to send URL commands, you need to use the IP of the device:
http://192.168.3.49/rpc/Shelly.SetState?id=1&type=0&state=%7b%22state%22%3atrue%7dhttp://192.168.3.49/rpc/Shelly.InjectInputEvent?id=1&event=2
The device status can be read this way.
http://shelly1-test.local/rpc/Shelly.GetInfohttp://shelly1-test.local/rpc/Shelly.GetInfoExt