Installation and setup - mollie/orocommerce GitHub Wiki
1. Mollie Account
First, you need your own Mollie Account. If you don't have an account already, please go to Mollie signup page and create a new account.
2. Install Module
Installation using composer
OROCommerce uses the Composer to manage the module package and the library. Composer is a dependency manager for PHP. Composer declares the libraries your project depends on and it will manage (install/update) them for you.
composer –v
If your server doesn’t have the composer install, you can easily install it by the following this instruction.
Step 1: Run your SSH Console to connect to your OROCommerce store.
Step 2: Locate the root of your OROCommerce store.
Step 3: Install the extension’s Composer package using the Composer require command:
composer require mollie/orocommerce:<extension-version> --prefer-dist --update-no-dev
Step 4: Next, remove the old cache by executing command:
rm -rf var/cache/prod
Step 5: When you are finished with adding new packages, use the oro:platform: update command to make the application aware of the newly installed extension:
php bin/console oro:platform:update --env=prod --force
Step 6: Finally, make sure to properly clean the OroCommerce cache:
php bin/console cache:clear --env=prod
Manual installation
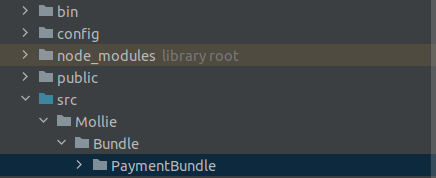
Step 1: Please go to your root OroCommerce project directory and navigate to the src folder.
Step 2: There you should create structure Mollie > Bundle > PaymentBundle and paste content of Mollie plugin directory.
Step 3: Then, run commands:
rm -rf var/cache/prod
php bin/console oro:platform:update --env=prod --force
php bin/console cache:clear --env=prod
php bin/console oro:migration:load --bundles="MolliePaymentBundle" --env=prod --force
php bin/console oro:entity-extend:update-config --env=prod
php bin/console oro:entity-extend:update-schema --env=prod
php bin/console oro:entity-extend:cache:warmup --env=prod
php bin/console oro:assets:install --symlink --env=prod
3. Authorization with Mollie
Step 1: Please click on the System tab on the OROCommerce dashboard.
Step 2: In the menu list, click on the Manage Integrations tab.
Step 3: To create new Mollie integration, click on the Create Integration button.
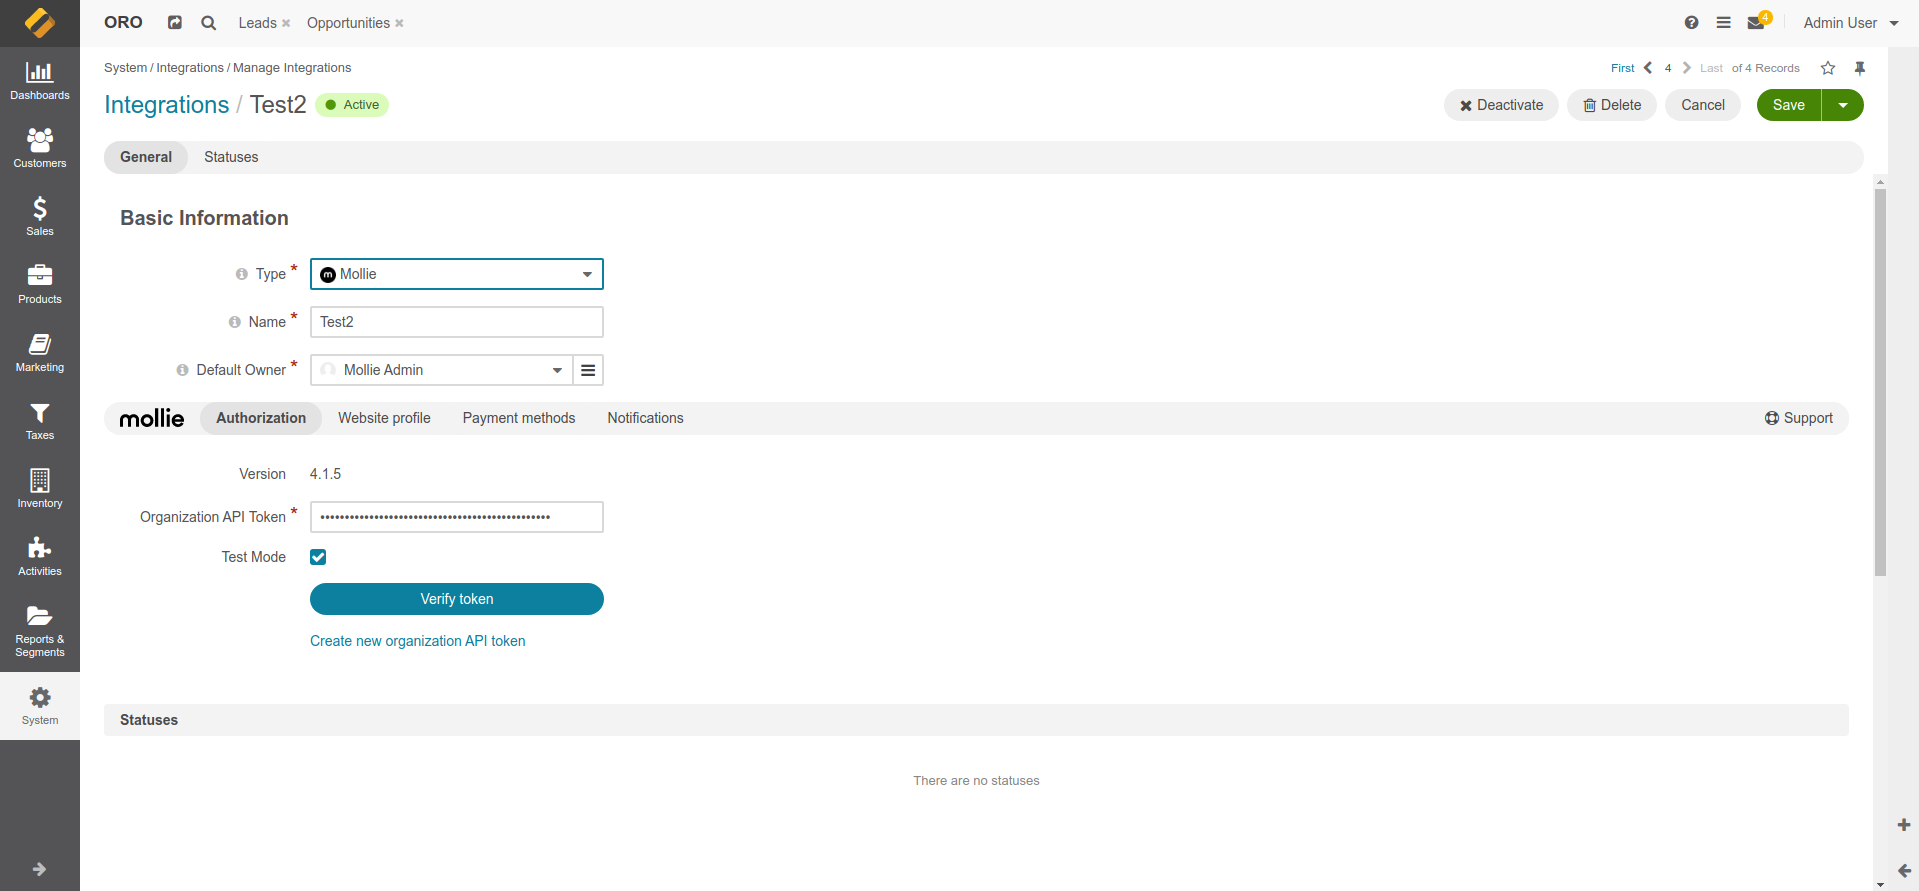
Step 4: From the list of installed integrations, please choose the Mollie integration type and fill in all necessary data. The access token can be generated on the Mollie dashboard under the Developers » Organization Access Tokens tab and you must allow the following permissions:
- Customers Read
- Customers Write
- Invoices Read
- Onboarding Read
- Onboarding Write
- Orders Read
- Orders Write
- Organizations Read
- Organizations Write
- Payments Read
- Payments Write
- Profiles Read
- Profiles Write
- Refunds Read
- Refunds Write
- Settlements Read
- Shipments Read
- Shipments Write
- Subscriptions Read
- Subscriptions Write
By clicking on the Verify token button, access token and permissions will be validated.
Step 5: If a token is correct, a proper message will be shown. Please click on the Save and New button.
Step 6: Created integration will be listed along with the other created integrations.
Step 7: To manage the integration, please click on the specific Mollie integration in the data grid. Integration dashboard will be displayed.
4. Finalizing Steps
Under the Authorization tab, the organization API token and mode can be changed.
Under the Website profile tab, the Mollie website profile can be selected.
