GettingStarted - mist-devel/mist-board GitHub Wiki
This page covers the initial setup of a MiST FPGA board.
To set up your board, you will need:
- The MiST board itself.
- A USB keyboard.
- A micro USB phone charger, or a micro USB cable connected to a USB hub or computer.
- A FAT-formatted SD or SDHC card, at least 1GB.
- A VGA screen and cable.
For potential compatibility issues, see the peripherals wiki page.
To set up your MiST FPGA board for the first time, we will use here an Atari ST setup. Afterwards, you can continue updating your board to the latest firmware and core or start using other cores.
You need to place three files in the root directory of your FAT-formatted SD card:
-
core.rbf, the Atari ST FPGA core. Choose the appropriate one based on when you got your MiST: for boards purchased before May 2015 or for boards purchased May 2015 or later. If either of these links are broken, just use the latest core_.rbf, available here.
A note about the Atari ST core versions: The MiST board uses permanently-installed firmware in on-board flash as well as the FPGA core file on the SD card. If the versions of the firmware and the core differ too much, then the core may not boot. There have been two firmware versions installed on MiST boards before shipment, which is why there are two options for the core. Boards with the newer firmware from April 2015 started shipping in May 2015.
-
tos.img, the ATARI ST operating system. You can use the latest EmuTOS or a real TOS image. TOS 1.00, 1.02, 1.04, and 2.06 will all work in any language. Please note that copyright still applies to real TOS images. -
disk_a.st, a default floppy disk image for drive A:. Without a floppy disk enabled, booting may be very slow. TOS will automatically recognize this file and boot times will be much faster.
Make sure to name the files exactly as listed above: core.rbf, tos.img, disk_a.st.
Once your SD card is ready, connect the components in the following order:
- Insert the SD card into the MiST.
- Connect the VGA screen and USB keyboard.
- Connect the micro USB power source.
- Switch the board on.
It should boot into the Atari ST desktop.
If you used the wrong core, the video output may be broken or the core may not boot at all, but it will not damage your board at all. To fix it, replace the wrong core on the SD card with the correct version.
For other issues, check out the troubleshooting page.
Once you've verified that your board is working and the Atari ST boots, you can update your board to the latest firmware and core. All boards are physically the same, so you can update regardless of the initial core you used.
You can find some information about the updates and changes in the firmware and core changelog thread.
You can check your current firmware version by opening the on-screen display (OSD) with F12 and selecting Firmware & Core.
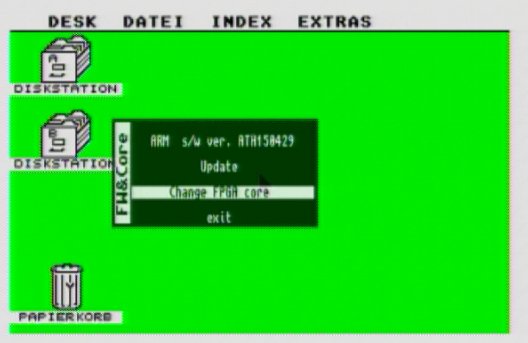
This displays the installed firmware version after ARM s/w ver., as above.
To upgrade your firmware:
- Download the latest firmware, which will have the highest revision number.
- Rename the
.upgfile tofirmware.upgand upload it to your SD card. - Boot into your Atari ST setup and go to the
Firmware & Coresubmenu. - Select
Updateand follow the instructions.
You can find more detail in How to Install the Firmware.
To upgrade your Atari ST core:
- Download the latest core, which will have the highest revision number.
- Rename the file to
core.rbfand upload it to your SD card, replacing the existingcore.rbf.
Once the board works there are many things to explore:
- Press
F12or the menu key on the connected keyboard to explore the on-screen display. - Connect a USB mouse or speakers.
- Explore other MiST cores.
- Learn how to put multiple FPGA cores on a SD card and how to start them via Startup menu.
- Visit the MiST section in the Atari Forum.
- Visit the MiST thread in the Minimig Forum.
If you prefer video tutorials, you can check out:

