06 MIPS IDE Projects - mips-open-ide/Releases GitHub Wiki
This chapter contains a description of projects in MIPS Open IDE. A project is a logical construct that facilitates building a collection of C and/or assembly files into an executable image.
Creating Projects
Creating Source Files
Creating new source files for a library project is straightforward; simply follow the file creation instructions found in Chapter 7. The examples that follow in this chapter are focused on importing existing files, which is typically the more common operation.
Importing Source Files
Building the Executable
Creating an MIPS Embedded Linux Project
Creating an MIPS Embedded Linux project is very similar to creating a standalone project – the biggest difference is the project type selection in the creation process. MIPS Embedded Linux projects come with source files from the respective RTOS to enable successful generation of an executable utilizing the API from said RTOS.
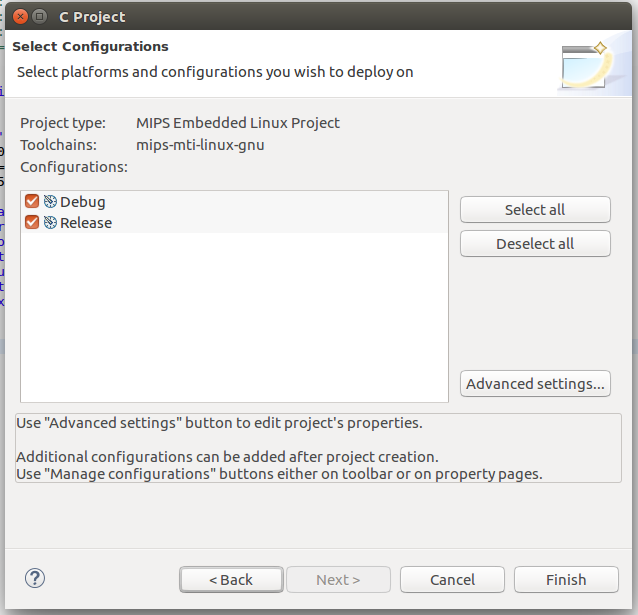
Below is the new project wizard dialog, which has selections for both types of projects. You can see that MIPS Embedded Linux, and Standalone Embedded are two project types supported by MIPS Open IDE in Figure 40.
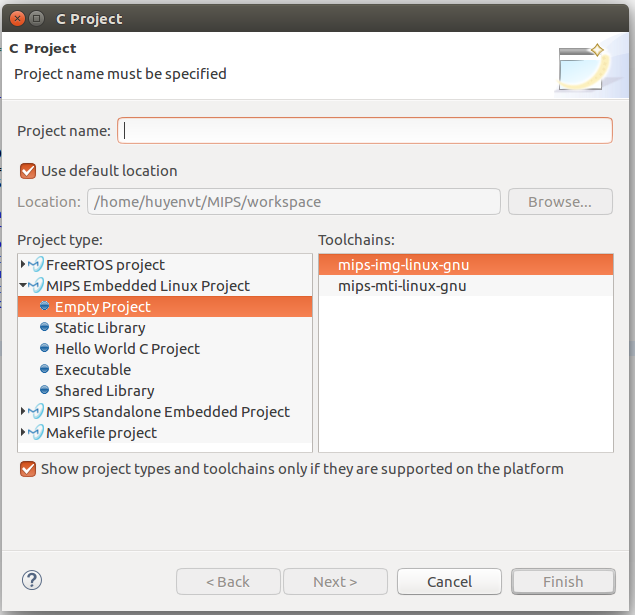
Figure 40 - MIPS Project Types Supported by MIPS Open IDE
Note the Debug and Release options in the dialog. These options allow MIPS Open IDE to manage two different configurations of the same project. The Debug configuration typically contains settings appropriate for developing and debugging the code in the project, while the Release configuration typically has settings appropriate for finished production code—the main difference being the lack of debug symbols and perhaps higher optimization settings in the Release configuration. The examples in this guide use the Debug configuration.
Creating Source Files
Creating new source files for an executable project is straightforward; simply follow the file creation instructions found in Chapter 7. The examples that follow in this chapter are focused on importing existing files, which is typically the more common operation.
Importing Source Files
Importing files into newly created project is straightforward; simply drag and drop the desired files into the project. Files may also be imported to the project through menu selections. To explicitly import one or more files, “right-click” on the project as shown below and select the Import menu selection as shown in Figure 41.
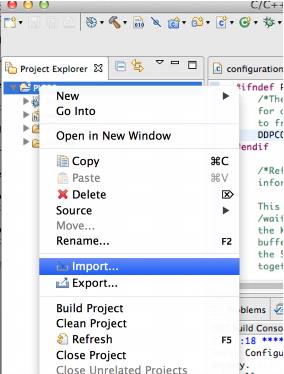
Figure 41 - Import Menu Selection
Once Import is selected, MIPS Open IDE displays the Import dialog, showing many options for the source of the files to import. Generally, the “File System” option is the most used source for importing. Select this option to import one or more files from the file system into your project.
The File System Import dialog is now displayed. Next, expand the “General” folder, select “File System,” and select the “Next” button. Simply use the Browse button to navigate to the specific folder containing the source files to import, select the files to import within that directory, and select “Finish.” You will now observe the selected files being imported into the selected project.
At this point, all the necessary files for building an MIPS Embedded Linux executable for MIPS MCUs are contained in the project.
Note that additional files might be required for executable projects and are specified in the linker settings dialogs. Such files include linker control files and the desired library files to be linked with the executable project.
Building the Executable
To build the executable, first ensure that the Console tab is selected. This makes it possible to view the progress of the executable build since the actual MIPS C compiler invocation for each source file and the linker invocation is displayed in the Console view. Next, simply select the Build button to build the executable.
Note that the default project settings are for a specific combination of MIPS MCU device architecture, device, and hardware debug tools. To select a different combination, please refer to the subsequent section in this chapter called Modifying Projects.
Once selected, observe compilation and linkage commands in the Console.
At this point, the MIPS Embedded Linux executable is ready for program, execution, and debug. Chapter 7 of this guide contains details of the program and debug processes.
Closing Projects
If a specific project is not currently needed, it is easily closed by right-clicking on the desired project to close and then clicking on the “Close Project” selection, as shown below in Figure 42:
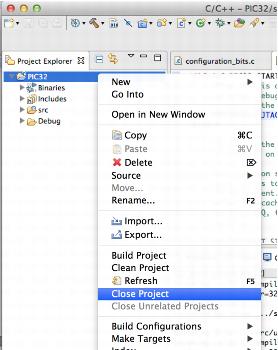
Figure 42 - Closing Project Menu Selection
Below is the C/C++ perspective with the project in a closed state.

Figure 43 - C/C++ Perspective in Closed State
Modifying Projects
There are many build options available for MIPS Open IDE for MIPS MCUs developers. The options are available through the Properties dialog. To bring up the Properties dialog, right click on the project name and then select “Properties,” as shown below in Figure 44.

Figure 44 - Project Properties Selection
Selecting “Properties” results in MIPS Open IDE bringing up the Properties dialog. This dialog has many configuration options, however, the most typically used options are found within the “C/C++ Build -Settings” selection, shown here in Figure 45.

Figure 45 - C/C++ Build / Settings Selection
Device and Tool Settings
N/A.
MIPS C Compiler Settings
The high-level overview of the current C Compiler settings is shown below in Figure 47.
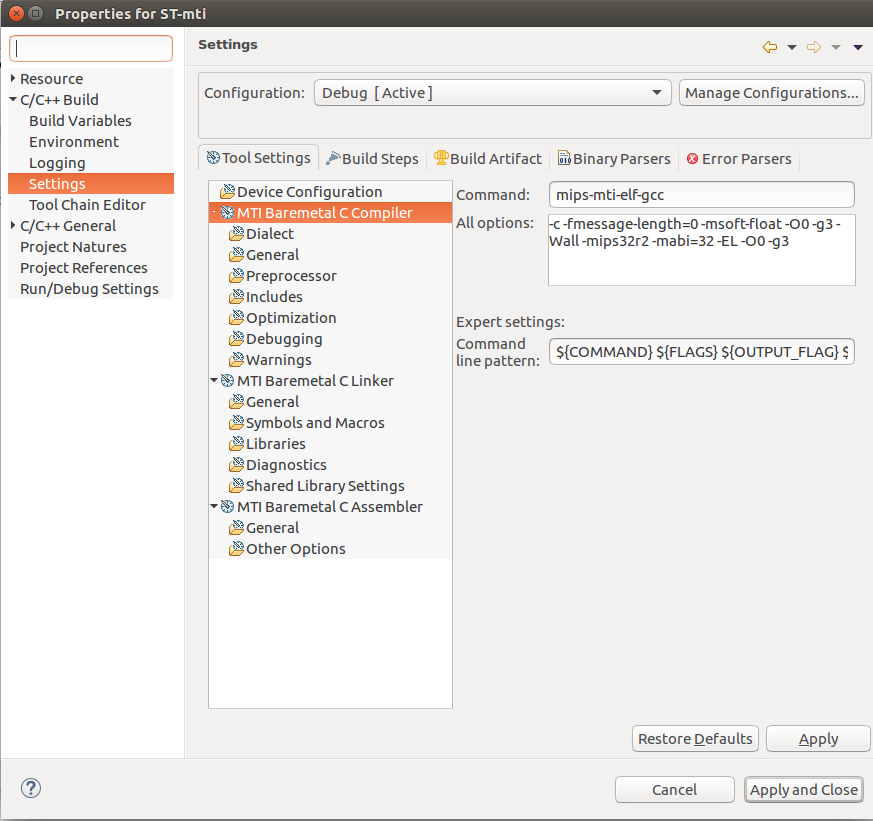
Figure 47 - C Compiler High Level Overview
The “Command” and “All options” entries show exactly how the compiler is going to be invoked for this project. All files with a “.c” extension will be built, by default, with these options.
General Settings
The General settings dialog contains options enabling you to control various aspect of code and debug symbol generation by the compiler. You can also define additional pre-processor symbols, as well as include directory search path. An overview of the general setting dialog is shown below in Figure 48.
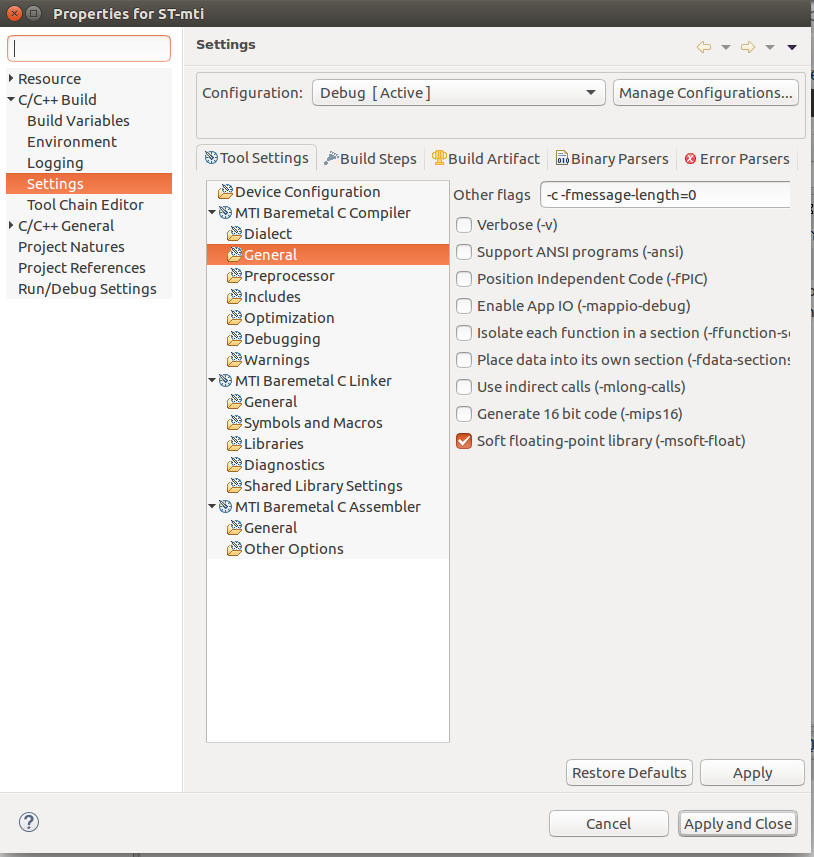
Figure 48 - C Compiler General Settings
Errors and Warning Settings
This dialog allows you to control various error and warning reporting aspect of the compiler, as shown below in Figure 49.

Figure 49 - C Compiler Errors and Warnings Settings
Optimization Settings
The optimization settings dialog allows you to change the optimization level of code generated by the compiler. Note that you will need to upgrade to a paid version of the compiler in order to access the full optimization settings of the compiler.
MIPS Linker Settings
The high-level overview of the current C Linker settings is shown below in Figure 50.
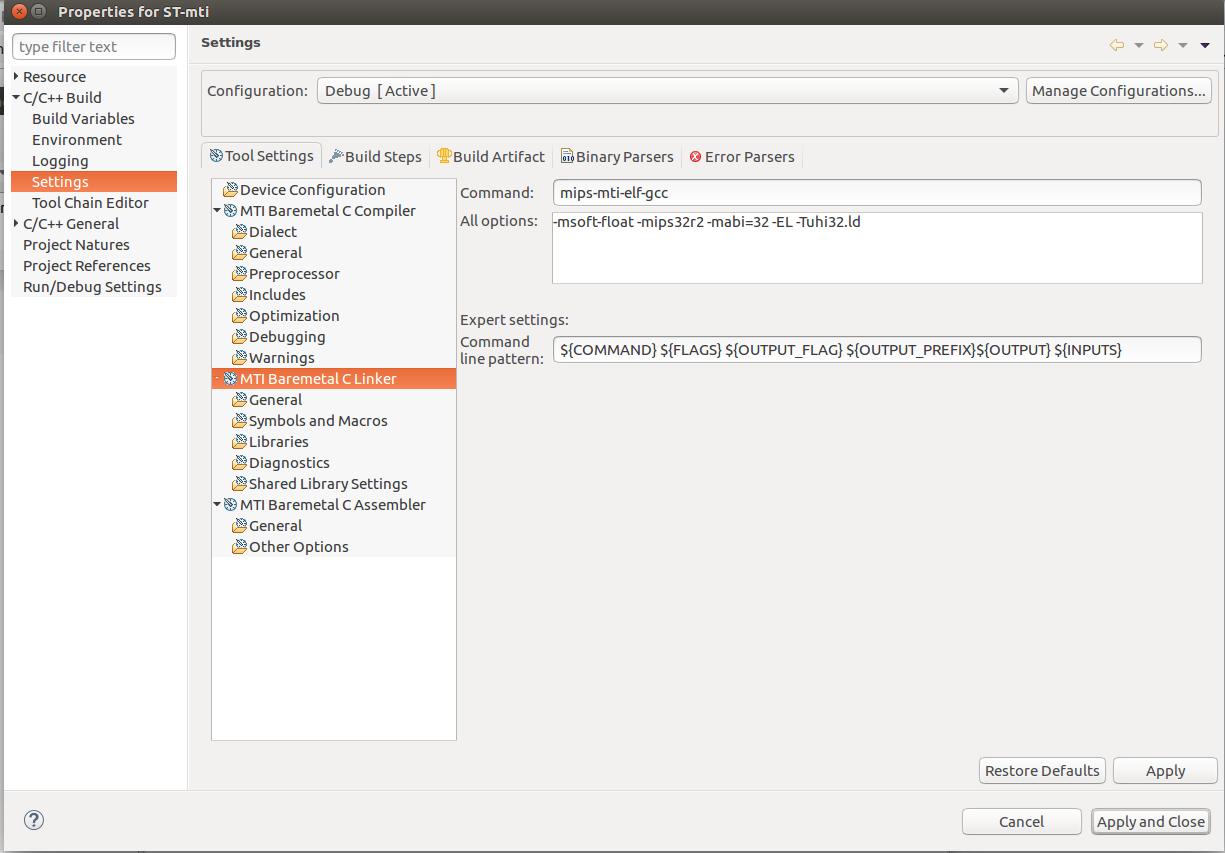
Figure 50 - Linker High Level Overview
The “Command” and “All options” entries show exactly how the linker is going to be invoked for this project. All executables, by default, will be linked with these options.
General Options
The General Options allows you to control the heap and stack size, as well as to write in additional options not covered by the dialog. A view of the General Option dialog is shown below in Figure 51.

Figure 51 - Linker General Options
Symbols and Macros
This option group lets you introduce additional linker symbols, as well as pre-processor macro definition used during the linking process, as shown in Figure 52.
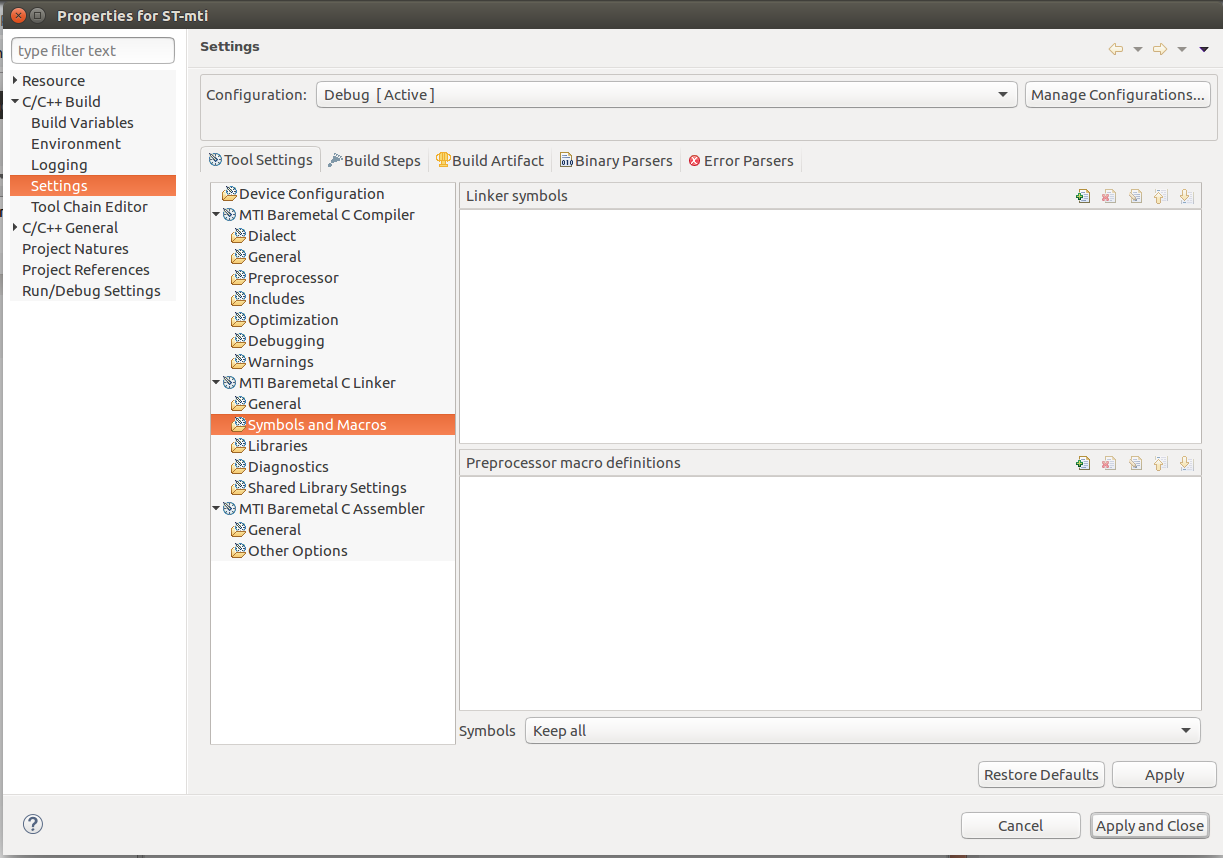
Figure 52 - Symbols and Macros Settings
Libraries Options
These options, shown in Figure 53, let you specify one or more standard libraries to link with the project executable. In the event that one or more libraries are not part of the MIPS toolchain (i.e. they reside in a different directory), you can also specify one or more search paths for the libraries. Other options include the ability to exclude standard libraries, start-up code, or floating point library.
Note that the selections in the Libraries dialog specify the “c” and “gcc” libraries. It is the GNU linker than then prepends the “lib” modifier to the library names specified and thus expects to find “libc.a” and “libgcc.a” library files in one of the specified library paths.
MIPS Open IDE also makes it possible to specify the path and actual name of library files. The “Additional Inputs (*.o/*.lib)” dialog is used to do this. Please note that references to actual path on your host computer will make your project/workspace not portable to other host systems.
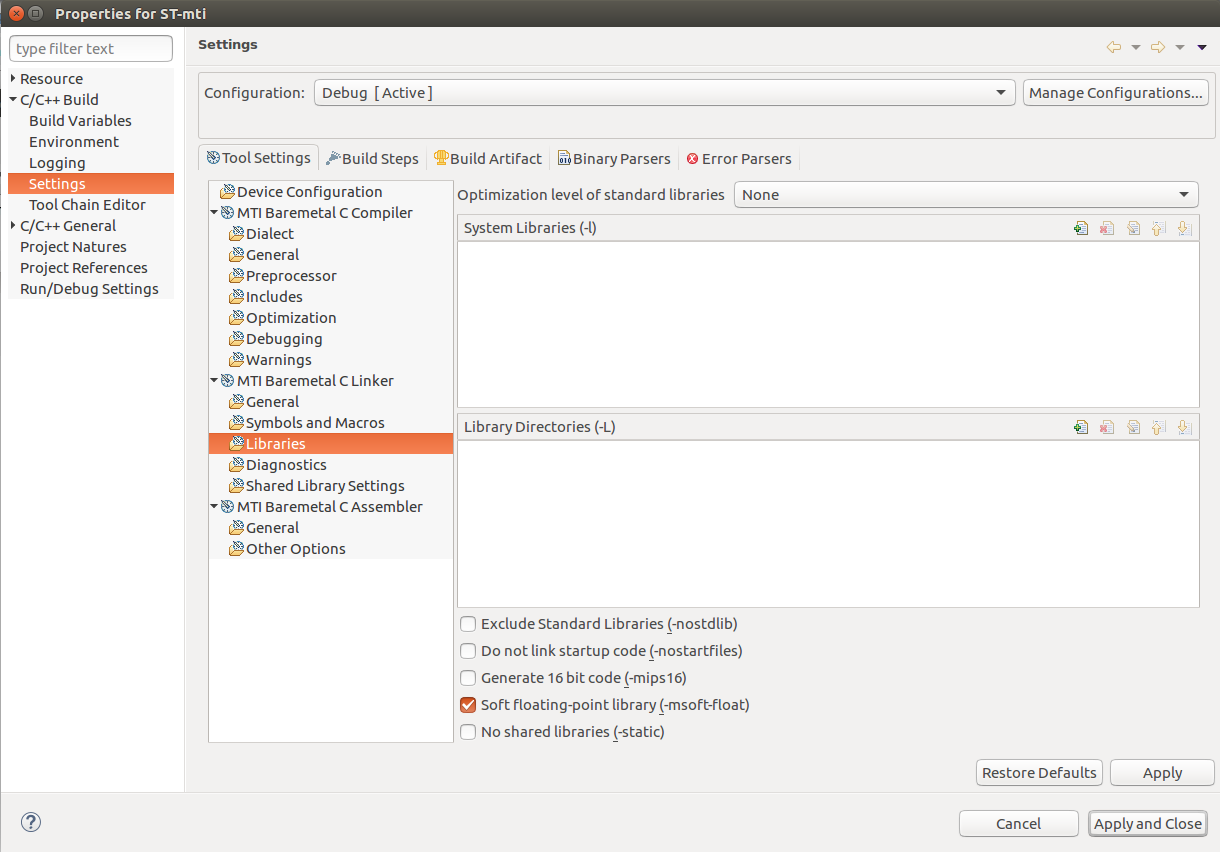
Figure 53 - Library Options
Diagnostic Options
These options, shown in Figure 54, let you generate extra reports about the executable, including memory usages, files crossed referenced, and one or more trace symbol(s).

Figure 54 - Diagnostic Options
MIPS Assembler Settings
These settings let you control various aspects of the assembler. A general view is shown below in Figure 55.
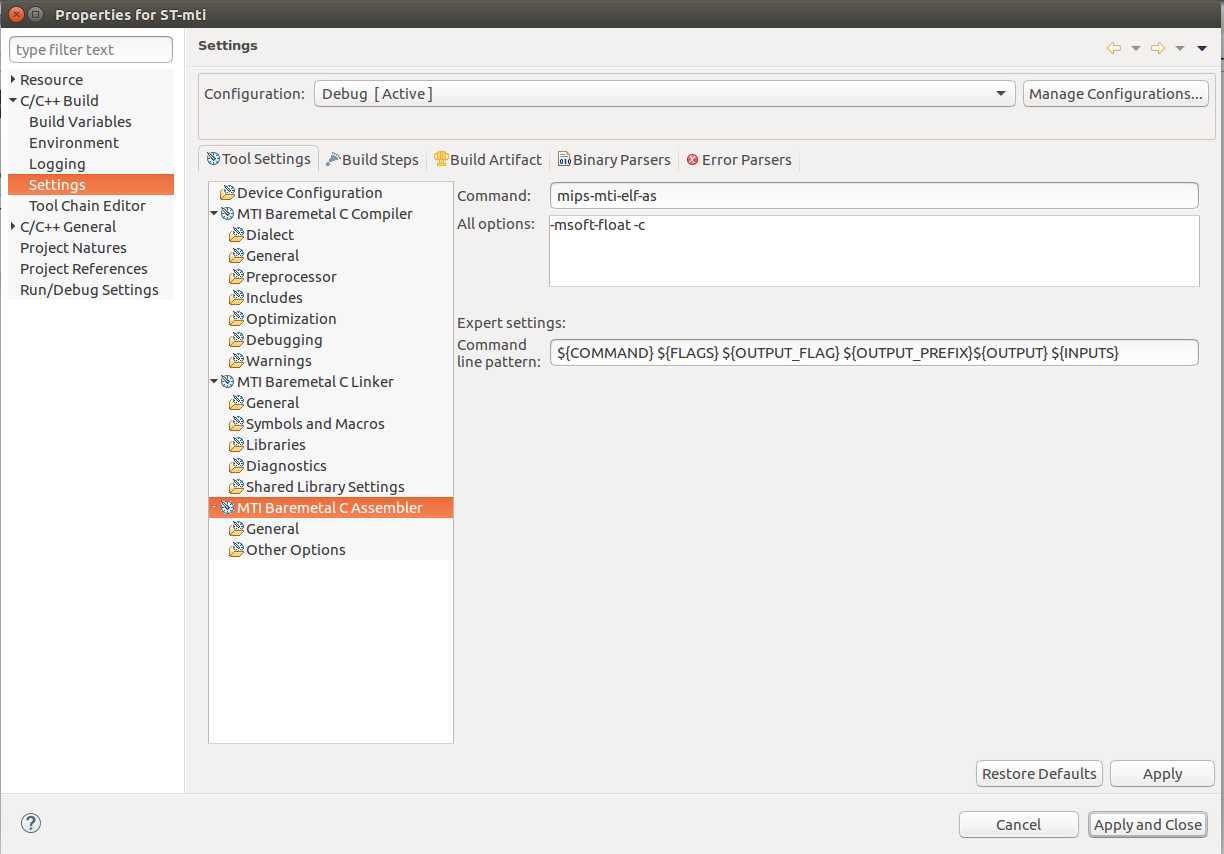
Figure 55 - Assembler General View
As with compiler and linker settings, the “Command” and “All Options” show exactly how the assembler is to be invoked for files ending with “.s” extension in the selected project.
General Settings
The General settings let you define preprocessor macros, as well as assembler symbols and search paths, as shown below in Figure 56.

Figure 56 - Assembler General Settings
Other Options
The Other options let you tune various parameters of the assembler, as shown in Figure 57.
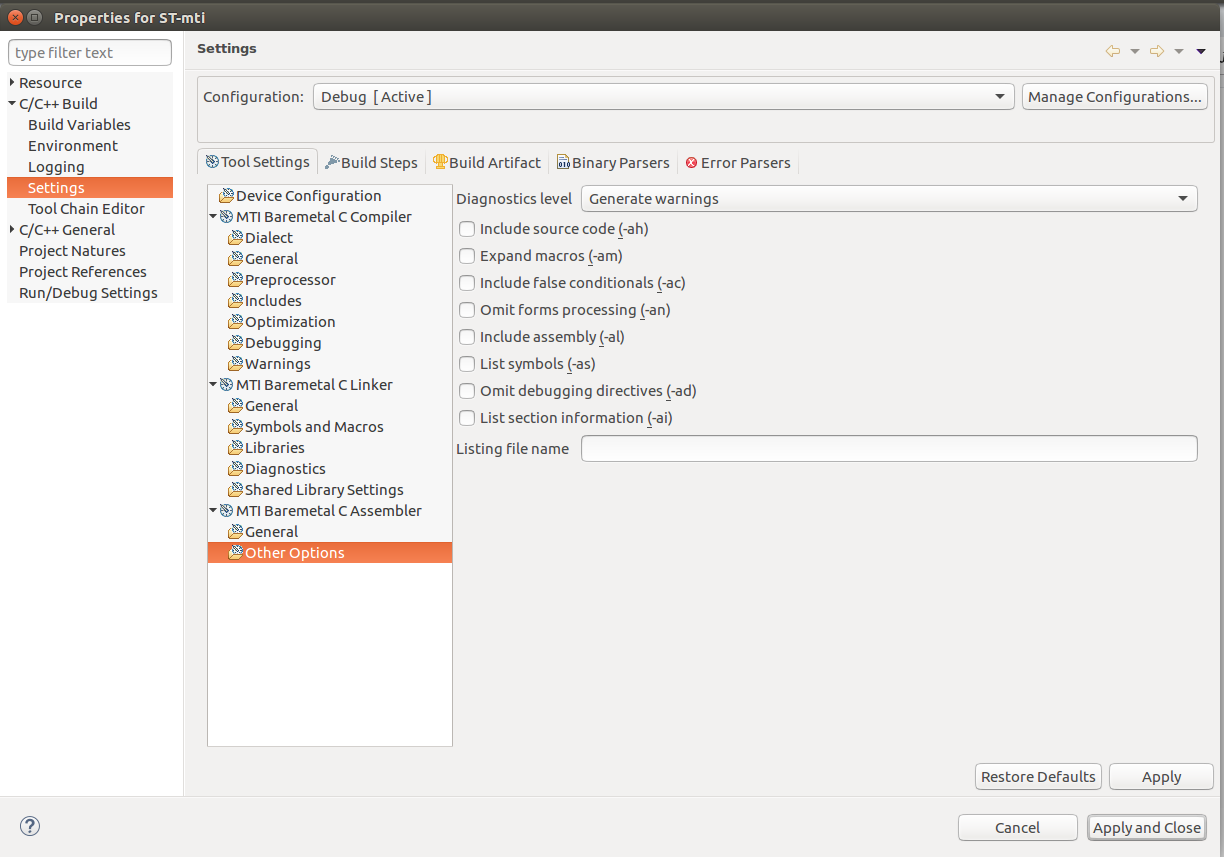
Figure 57 - Assembler Other Options
Deleting Projects
Deleting a project is done by right clicking on the project and selecting “Delete”
Once “Delete” is selected, MIPS Open IDE presents a dialog that specifies whether or not everything in the project directory is to be deleted. If the contents are not deleted, they may be used in a subsequent creation of another project.