Azure Functions Resource Create in Azure - microsoft-campus-community/workshop-shopping-list-bot GitHub Wiki
Prerequisite: You should have a basic understanding of Azure Functions and already implemented the AddItemFunction. If not, take a look at how to implement an Azure Function.
Create an Azure Function App resource in Azure
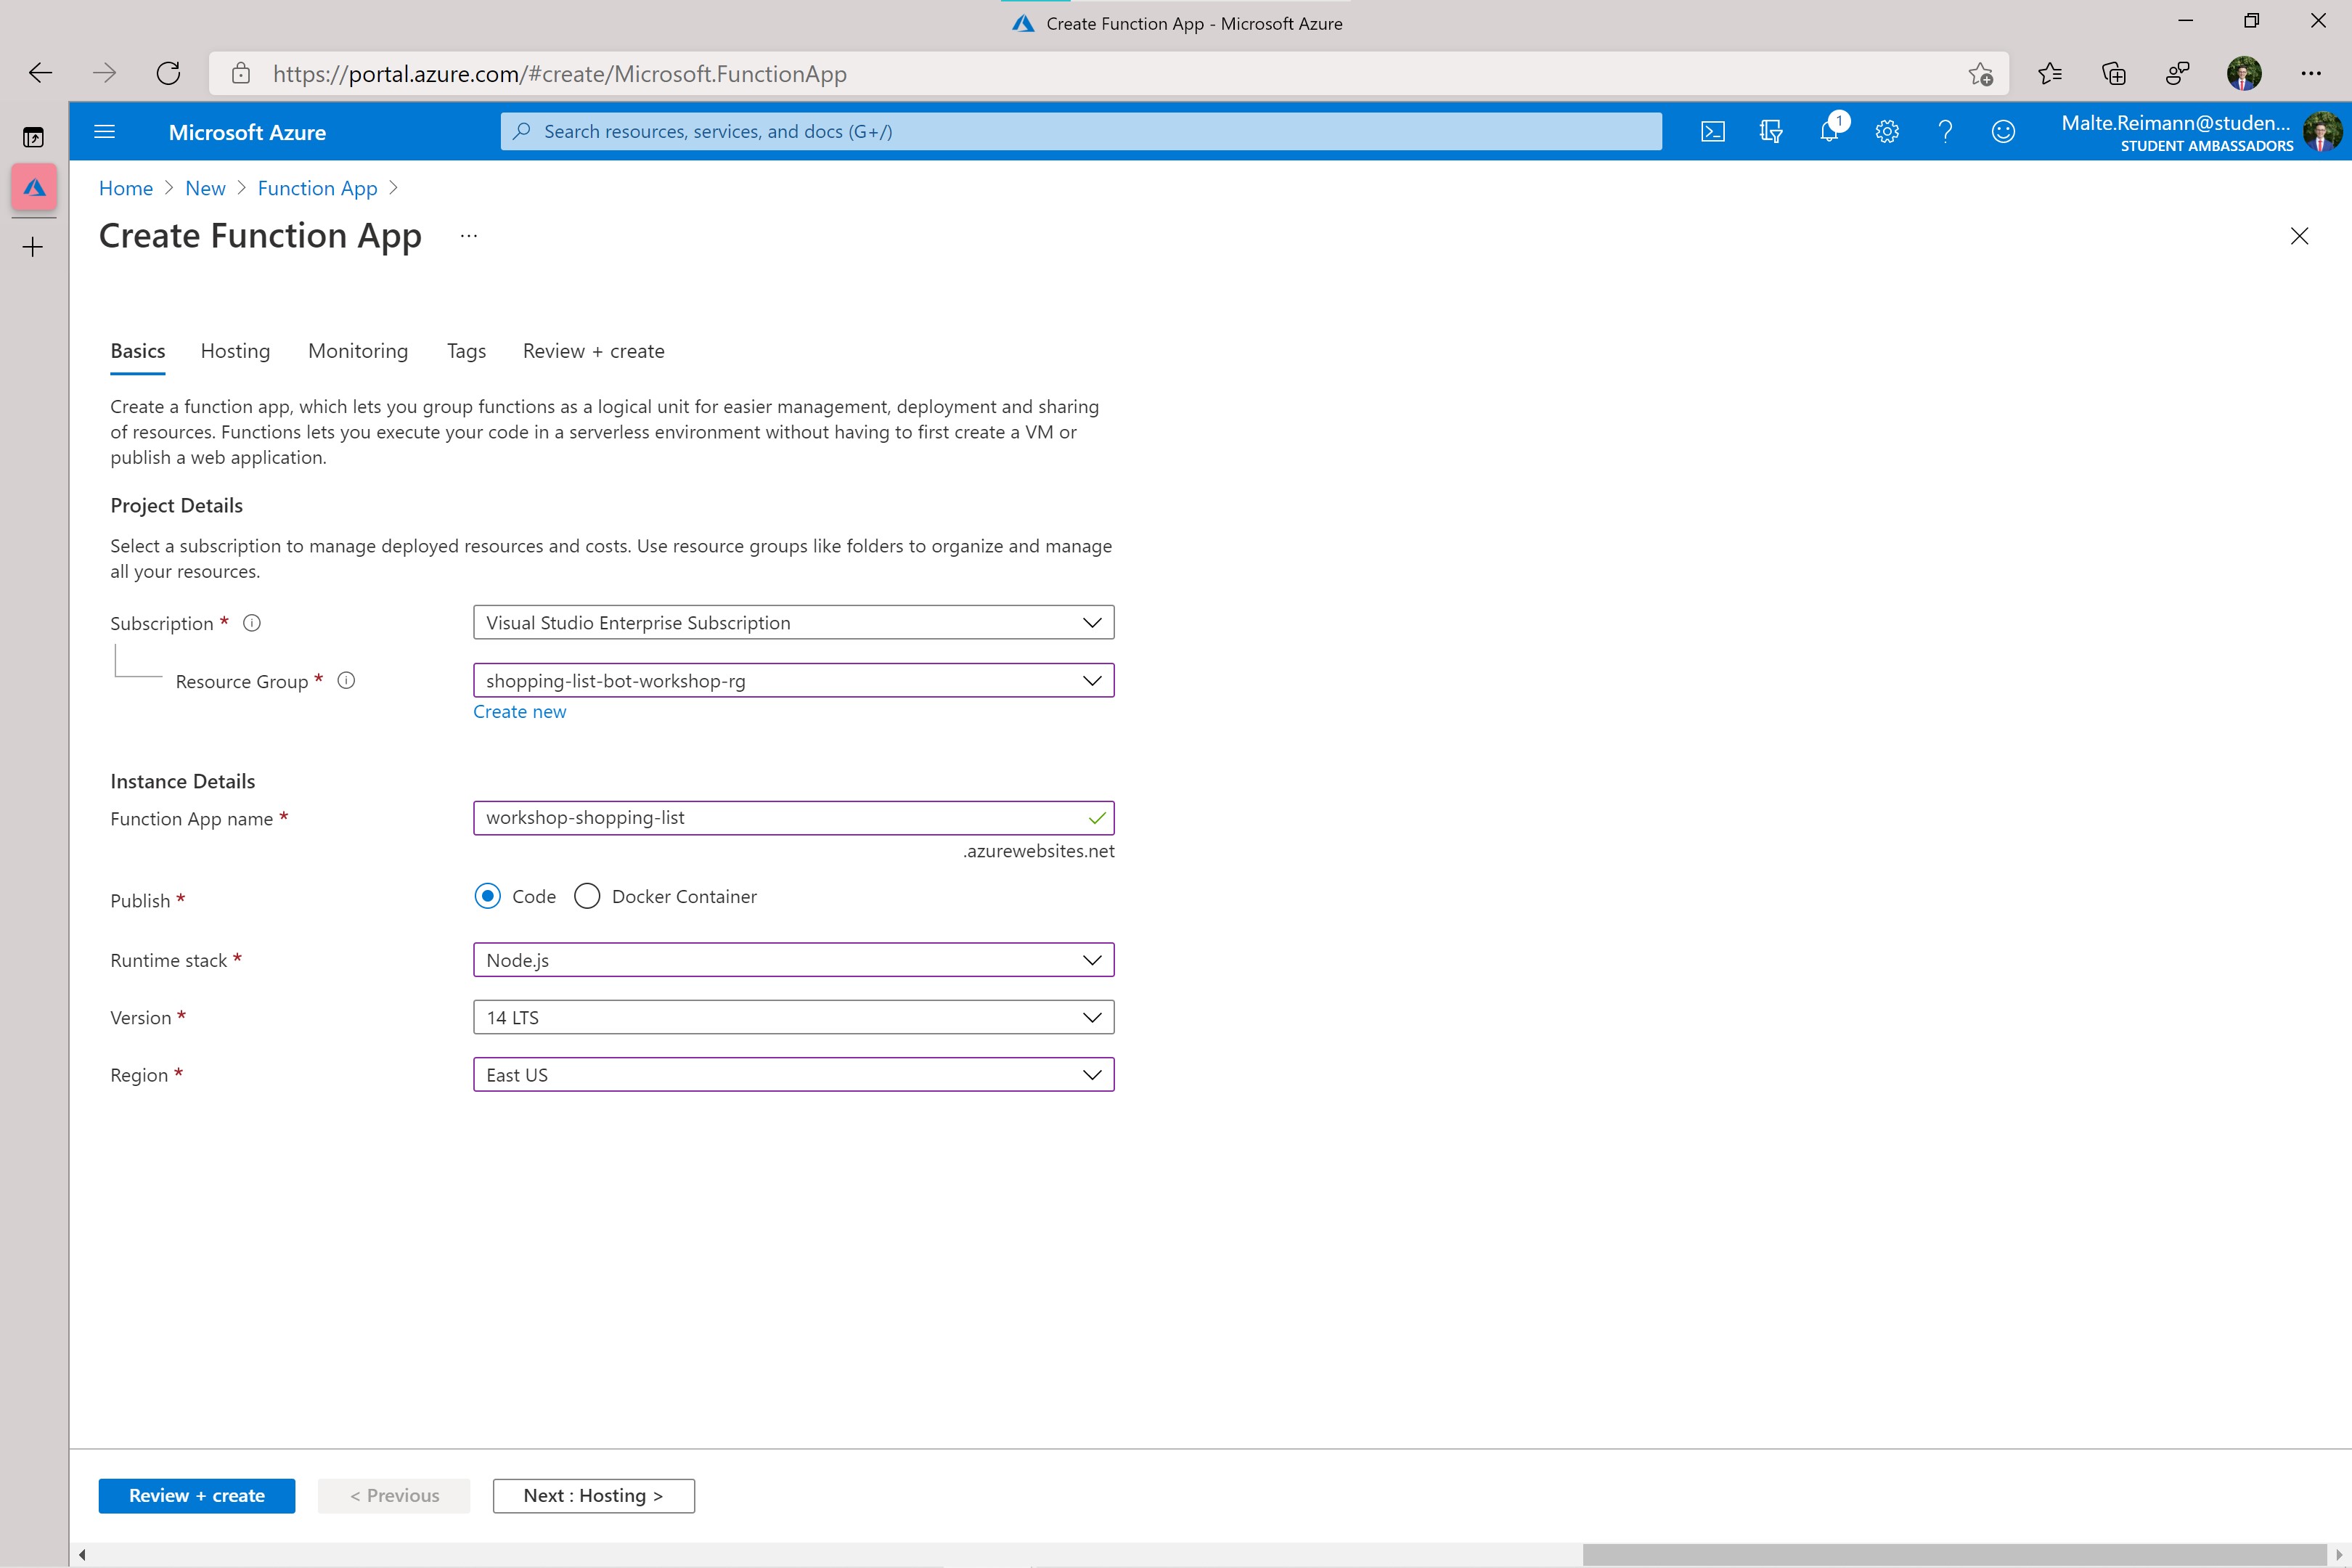
To publish an Azure Function, you will need a Function App resource in Azure.
- Open the Azure portal in your browser.
- Navigate to the create page for
Function App. Here is a direct link to Create Function App. - Specify the Function App Resource.

- Select your Azure Subscription.
- Select the resource group you created previously with the name 'shopping-list-bot-workshop-rg'. If you do not have a resource group yet, create a new one. In Azure resource, groups are containers to group related resources. So, it is best to create one resource group for all resources used in this workshop. Then you can later manage or delete all resources at once.
- Give your Function App a name, for example,
workshop-shopping-list. You might have to use a different name because this name needs to be globally unique. You could, for example, append your name. - Leave
Codeselected for the 'Publish' option. - In the 'Runtime Stack' dropdown, select
Node.js. - Leave the 'Version' as the most recent.
- Select a Region that suits your needs.
- Click 'Review + create'.
- Once Azure is done validating the information you provided, click 'Create'.
- Wait until you get a notification in the Azure Portal saying that your resource is deployed. You can then continue with the next steps.