Azure Functions Continuous Delivery - microsoft-campus-community/workshop-shopping-list-bot GitHub Wiki
Prerequisite: This page assumes that you have an Azure Function configured in the cloud. Also, you will need a fork of this repository.
General Information
You will learn how to get the Function project you have locally up and running in the cloud on this page. There are separate ways how to deploy an Azure Function. This workshop includes a GitHub Actions continuous deployment pipeline.
Continuous deployment pipelines can be difficult to understand or get right initially because they are not as transparent to run or debug as code. Often multiple servers and organizations are involved, so it can be hard to line up all of them. However, once a continuous deployment pipeline is working, it is enriching. You will be able to deploy every time you push a change without having to move your mouse an inch. It is also easier to reproduce for other team members or, in this case, workshop participants. Also, let's be real; continuous deployment is a big deal in real-world software development. So why should a workshop not teach you the complete picture?
GitHub has a marketplace for Actions you can run inside your own pipeline. This means that building a pipeline consists of finding fitting existing Actions in combination with writing some command-line scripts. Let's dive into it.
The Action
You can find the .github/workflows folder where all GitHub actions continuous delivery pipelines for this workshop are defined in the root of the repository.
The GitHub Action for deploying the Azure Function to the cloud is defined in the main_shopping-list-functions.yml file.
Let's go over how this Action is defined.
The on part of the YAML file tells GitHub when to run this action.
on:
  push:
    branches:
      - main
    paths:
      - 'functions/**'
You can see that it will only run when you push changes on your main branch from your local git repository to your forked repository of this repository on GitHub. Because this is a mono-repository, meaning that there are different projects (i.e., one for the bot and one for the Azure Functions) in this repository, the paths option in the push trigger is defined. As a result, only changes in the functions folder where the Azure Function project is located will trigger this action. If the local Function project does not change, then there is no need to redeploy it.
Environment variables allow defining configuration values in a single place that GitHub can access across the pipeline.
Under env, the environment variable AZURE_FUNCTIONAPP_PACKAGE_PATH should be the path to the Azure Function in the GitHub repository. NODE_VERSION defines which version of NodeJS the GitHub Action should use.
Under jobs in the main_shopping-list-functions.yml file, this pipeline only defines one job that builds and deploys the Function Project. The job consists of four steps.
- It gets the most recent code from your GitHub repository to the machine the Action is running on.
- The NodeJS version defined as an environment variable is installed.
- NPM installs all dependencies for the Function project, builds the Function project, and runs any tests. Like you would do on your local machine.
- This is where the code, build in the previous step, is uploaded to your Azure Function in the cloud.
Run Azure Functions Action Step
This step is where the magic happens. The Azure/functions-action is from the GitHub Actions marketplace. You tell it where to find the build artifact of the Function Project and uploads it to Azure.
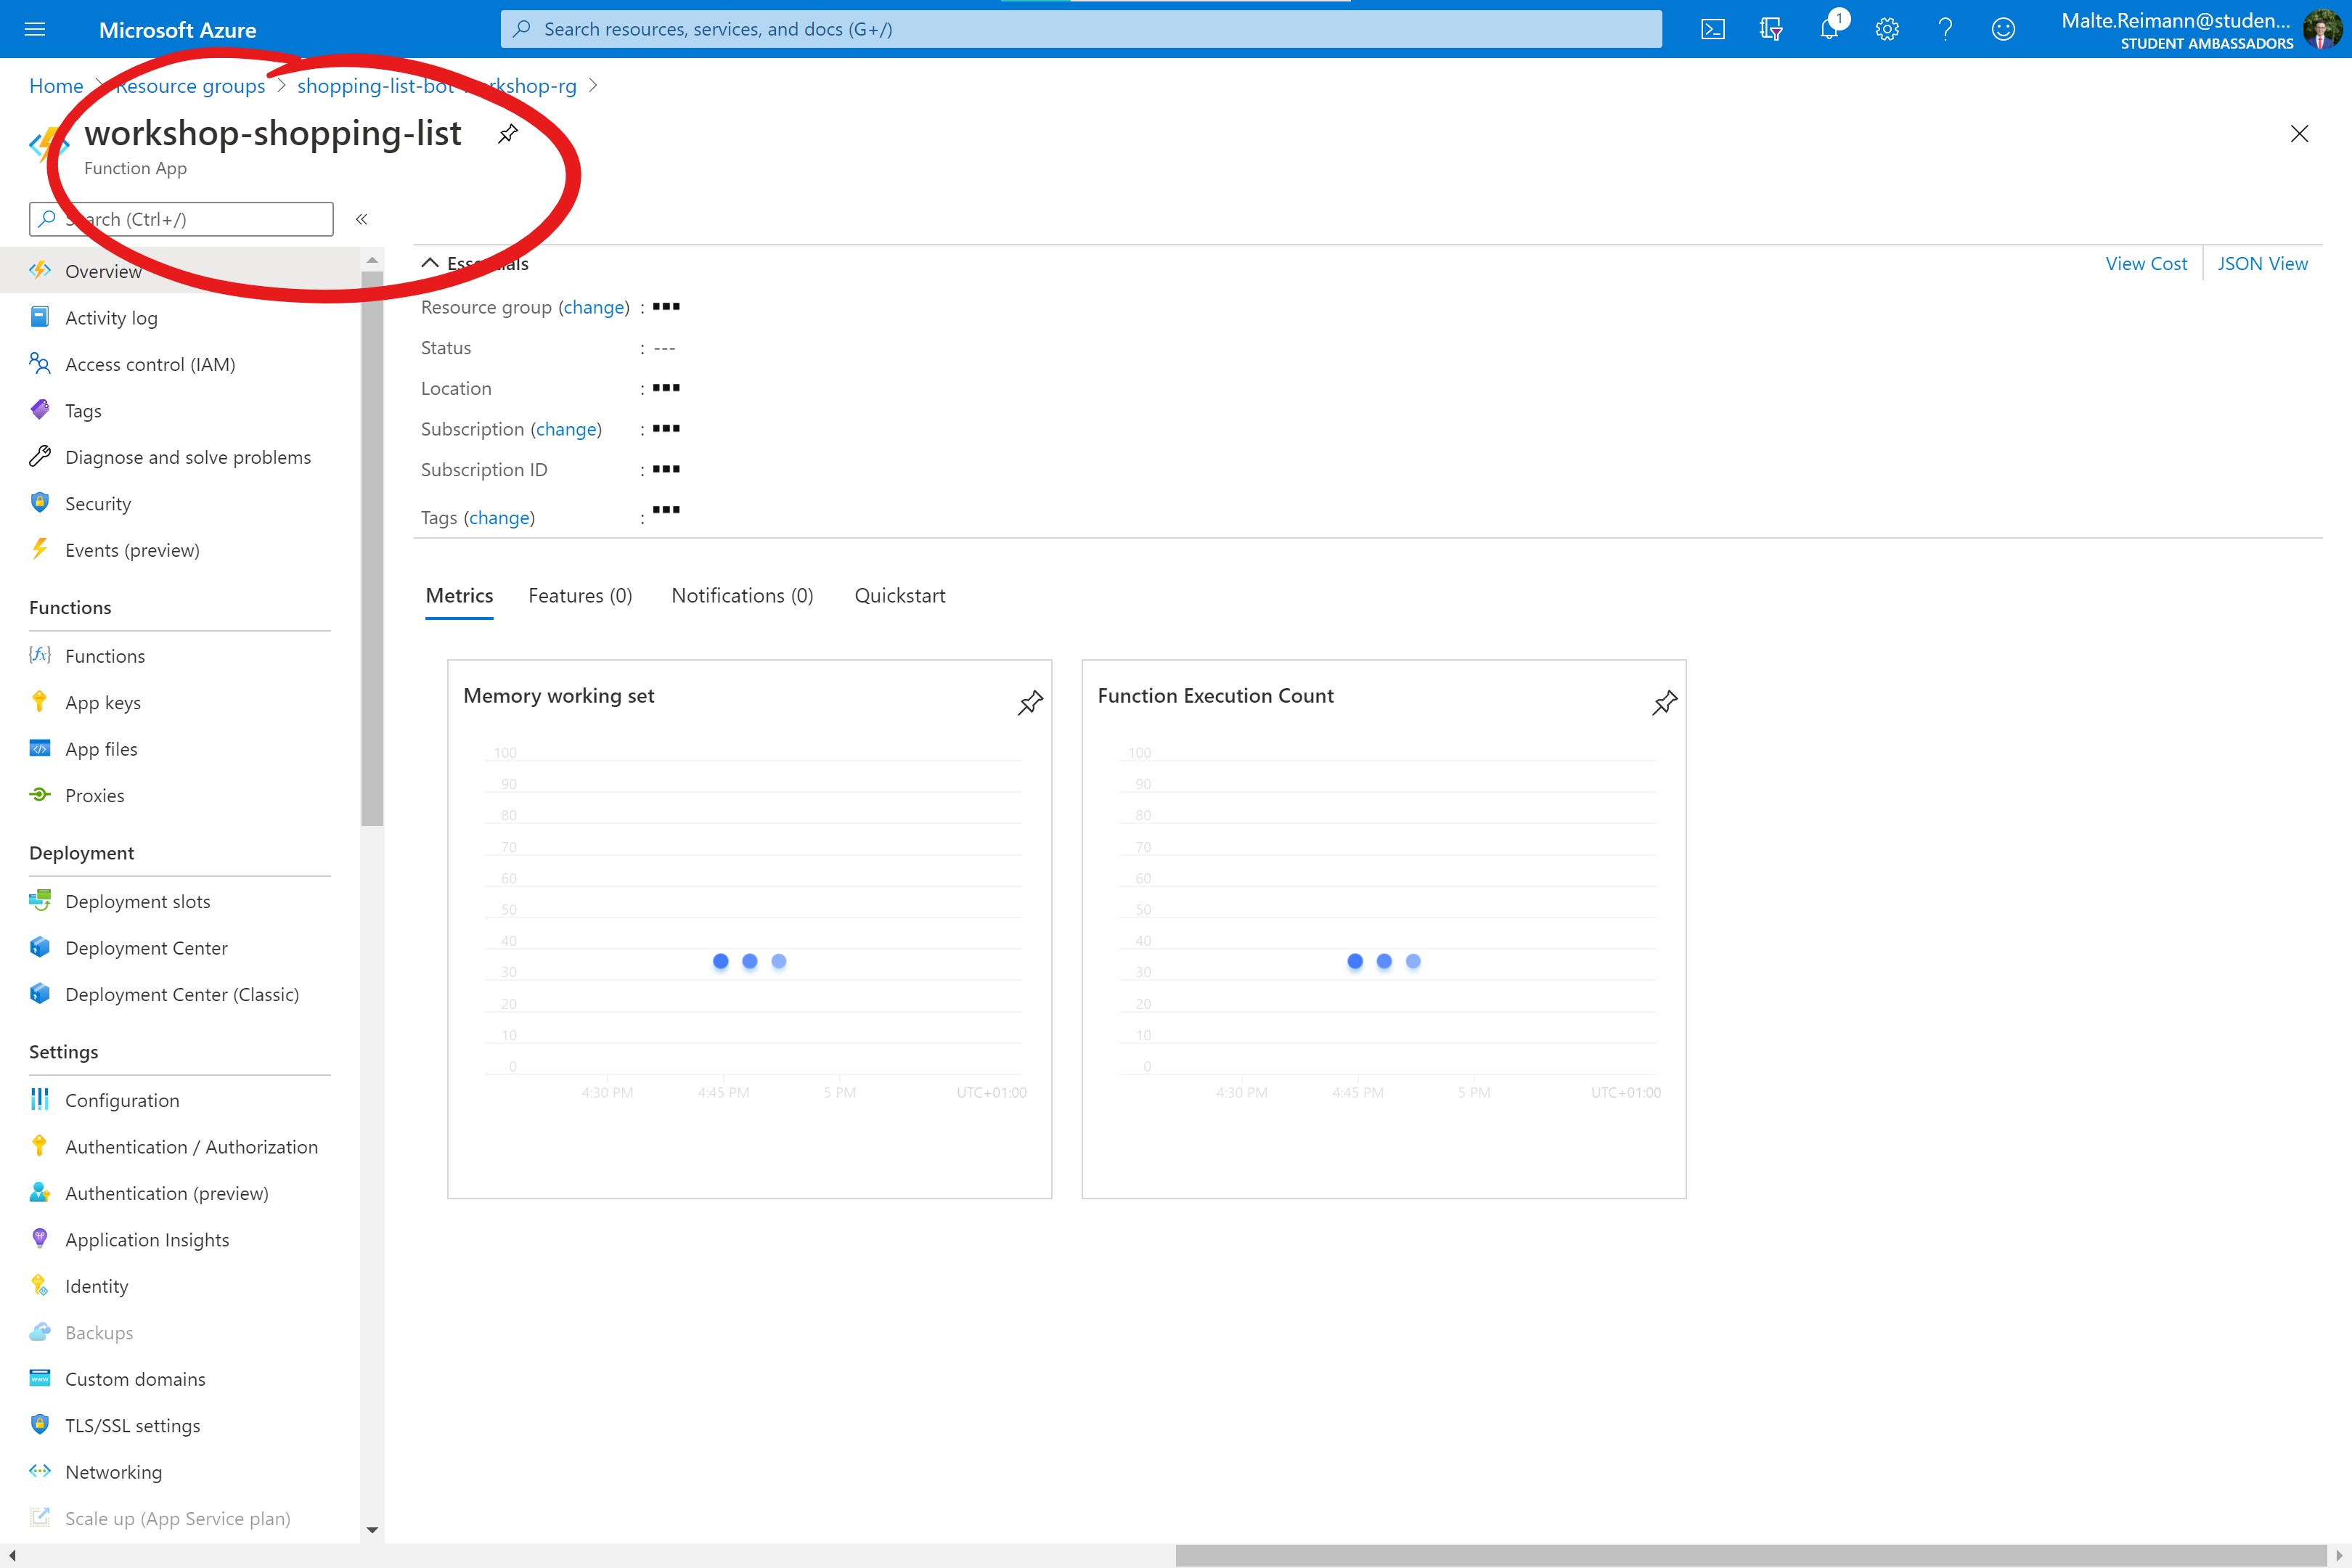
Under with parameters for the Azure/functions-action are defined. You only need to change app-name: 'shopping-list-functions' by replacing it with the name of your Azure Function Resource you defined when creating it in Azure.
In the screenshot below, the app-name would be workshop-shopping-list.
How does the GitHub Action know where to find your Azure Function in the cloud and how is it allowed to access it?
You will need to configure a GitHub secret that tells the Action how to upload to Azure through a publish profile. Inside the Action this secret is accessed through secrets.AzureAppService_PublishProfile_656b940b97ad482e89947253b659ce0b.
Set GitHub Secrets for Azure
GitHub needs to communicate with your Azure when running the pipeline. You need to configure this connection inside GitHub using a publish profile you get from Azure.
- Go to the Azure portal and navigate to your
Function Appin the resource group you created for this workshop.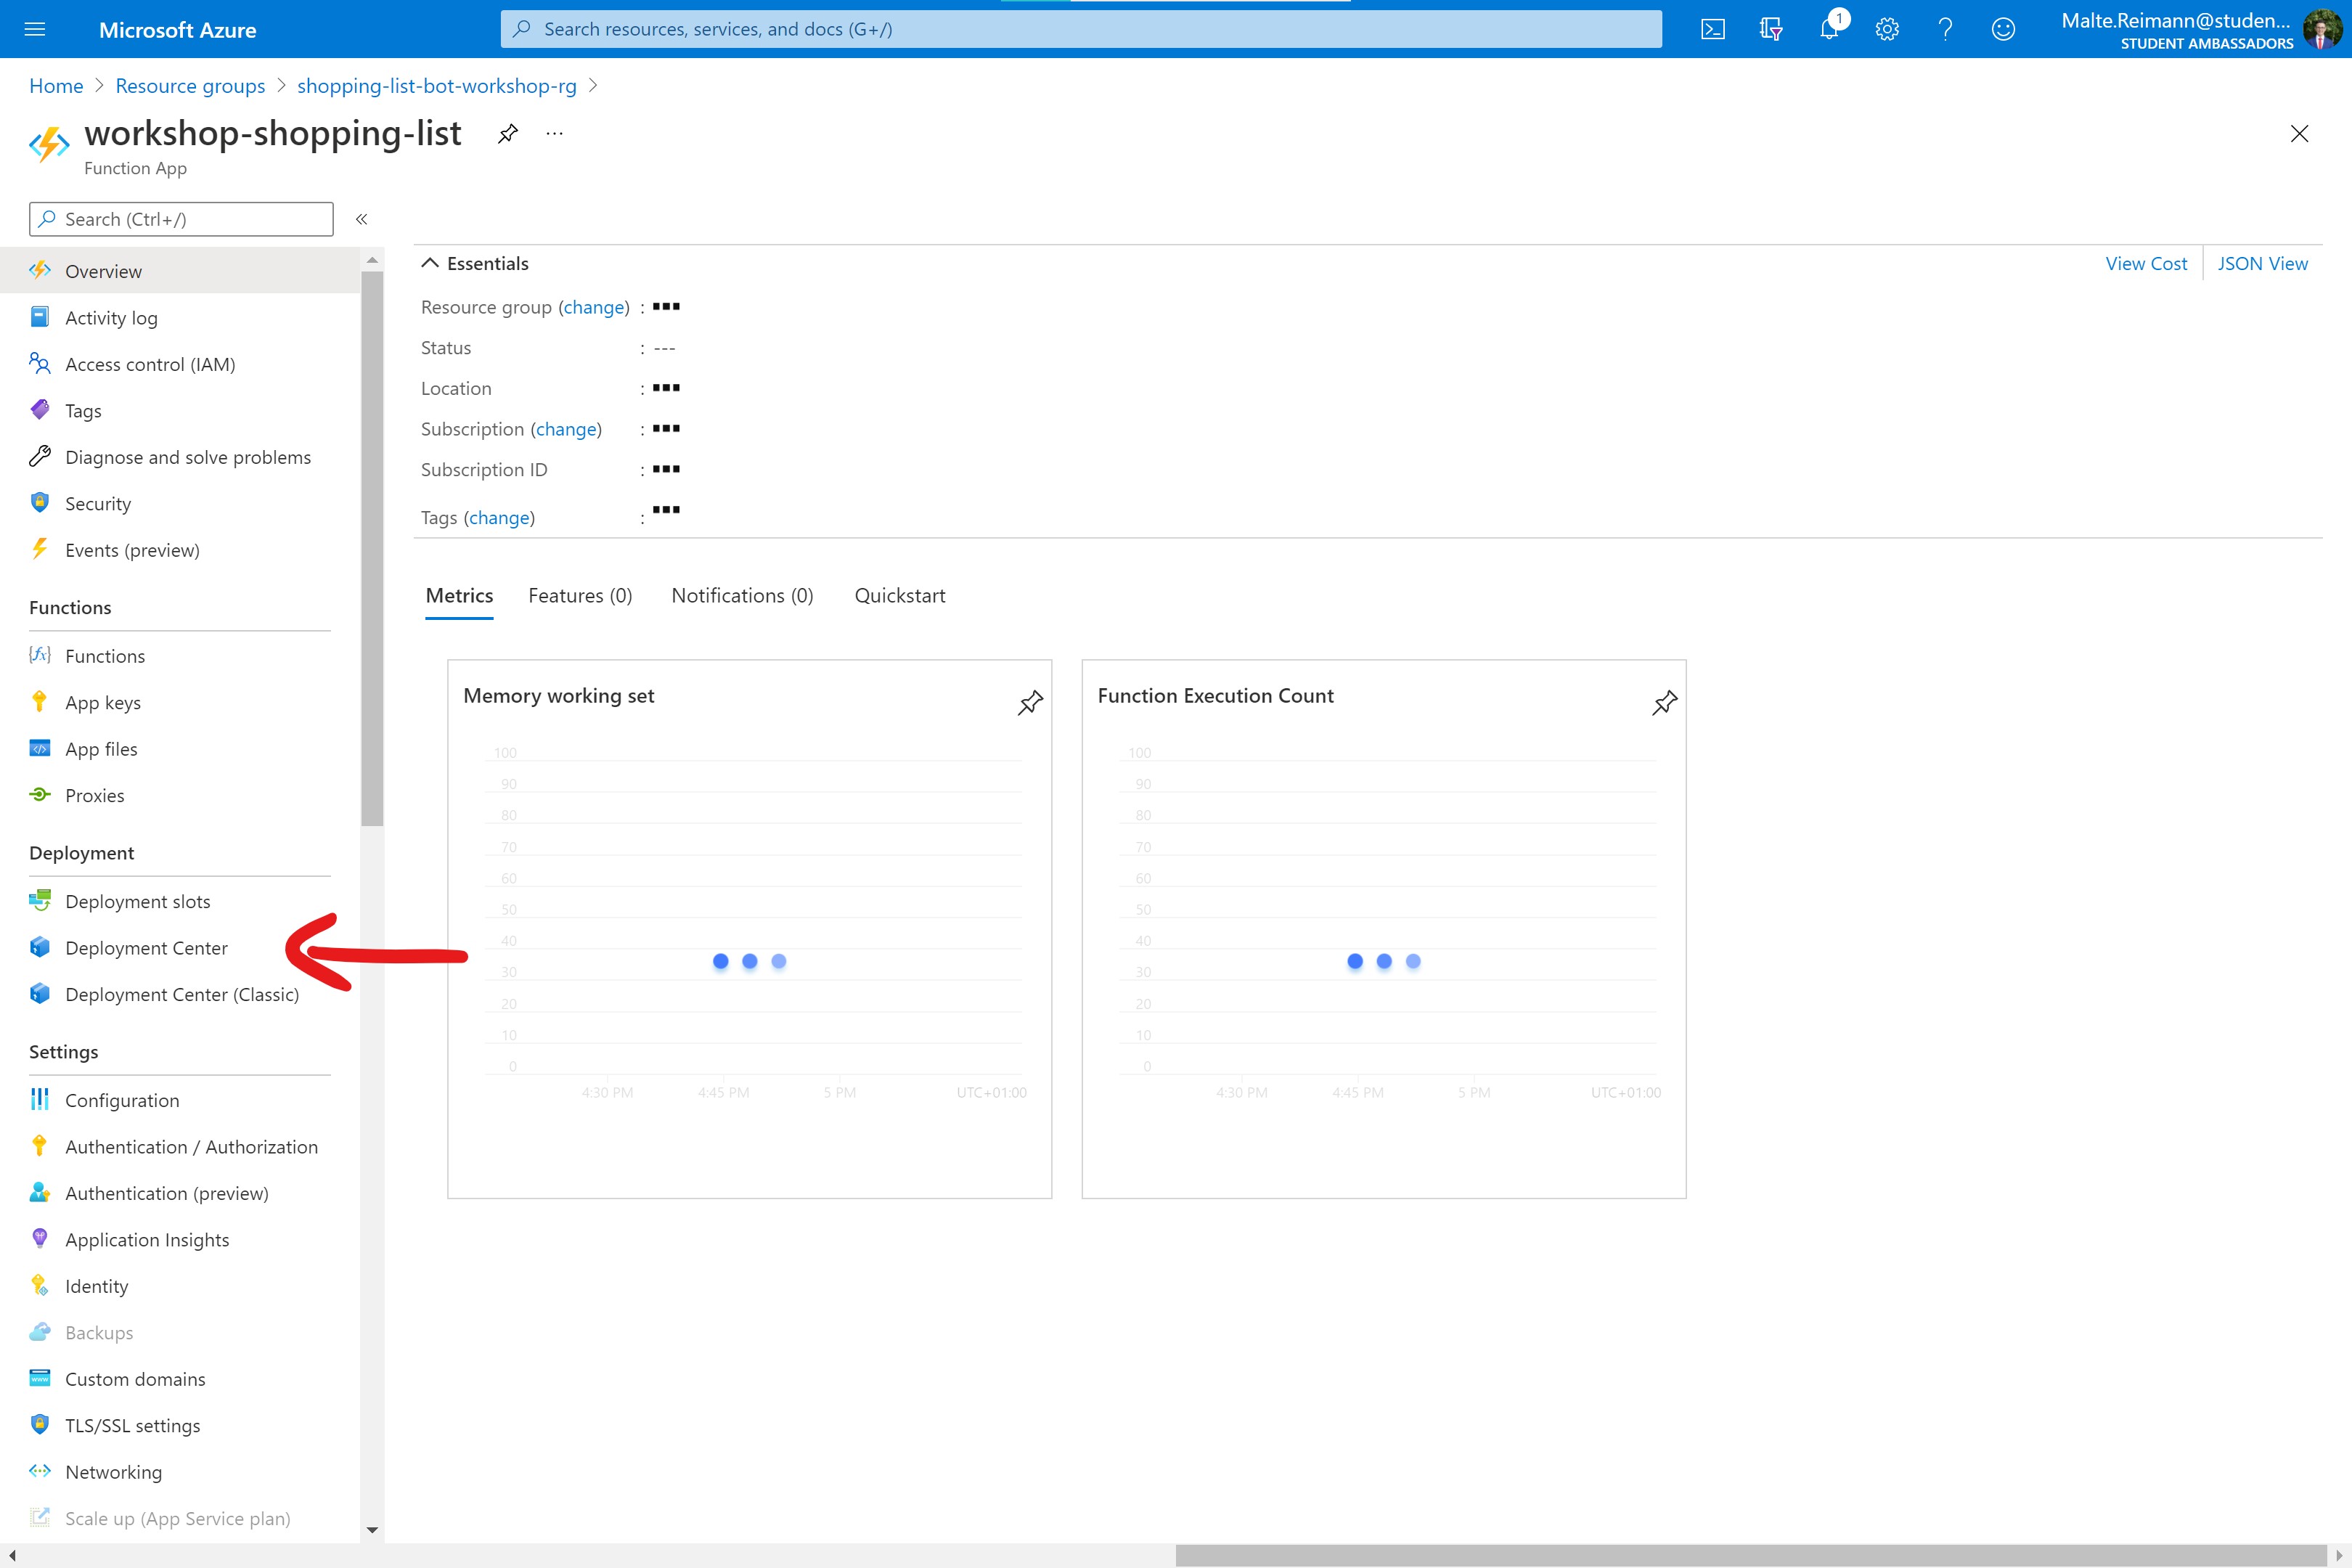
- With the Function App resource open, you should click on the
Deployment CenterunderDeploymentin the left navigation list. - In the deployment center, click on the
Manage publish profilebutton in the top row.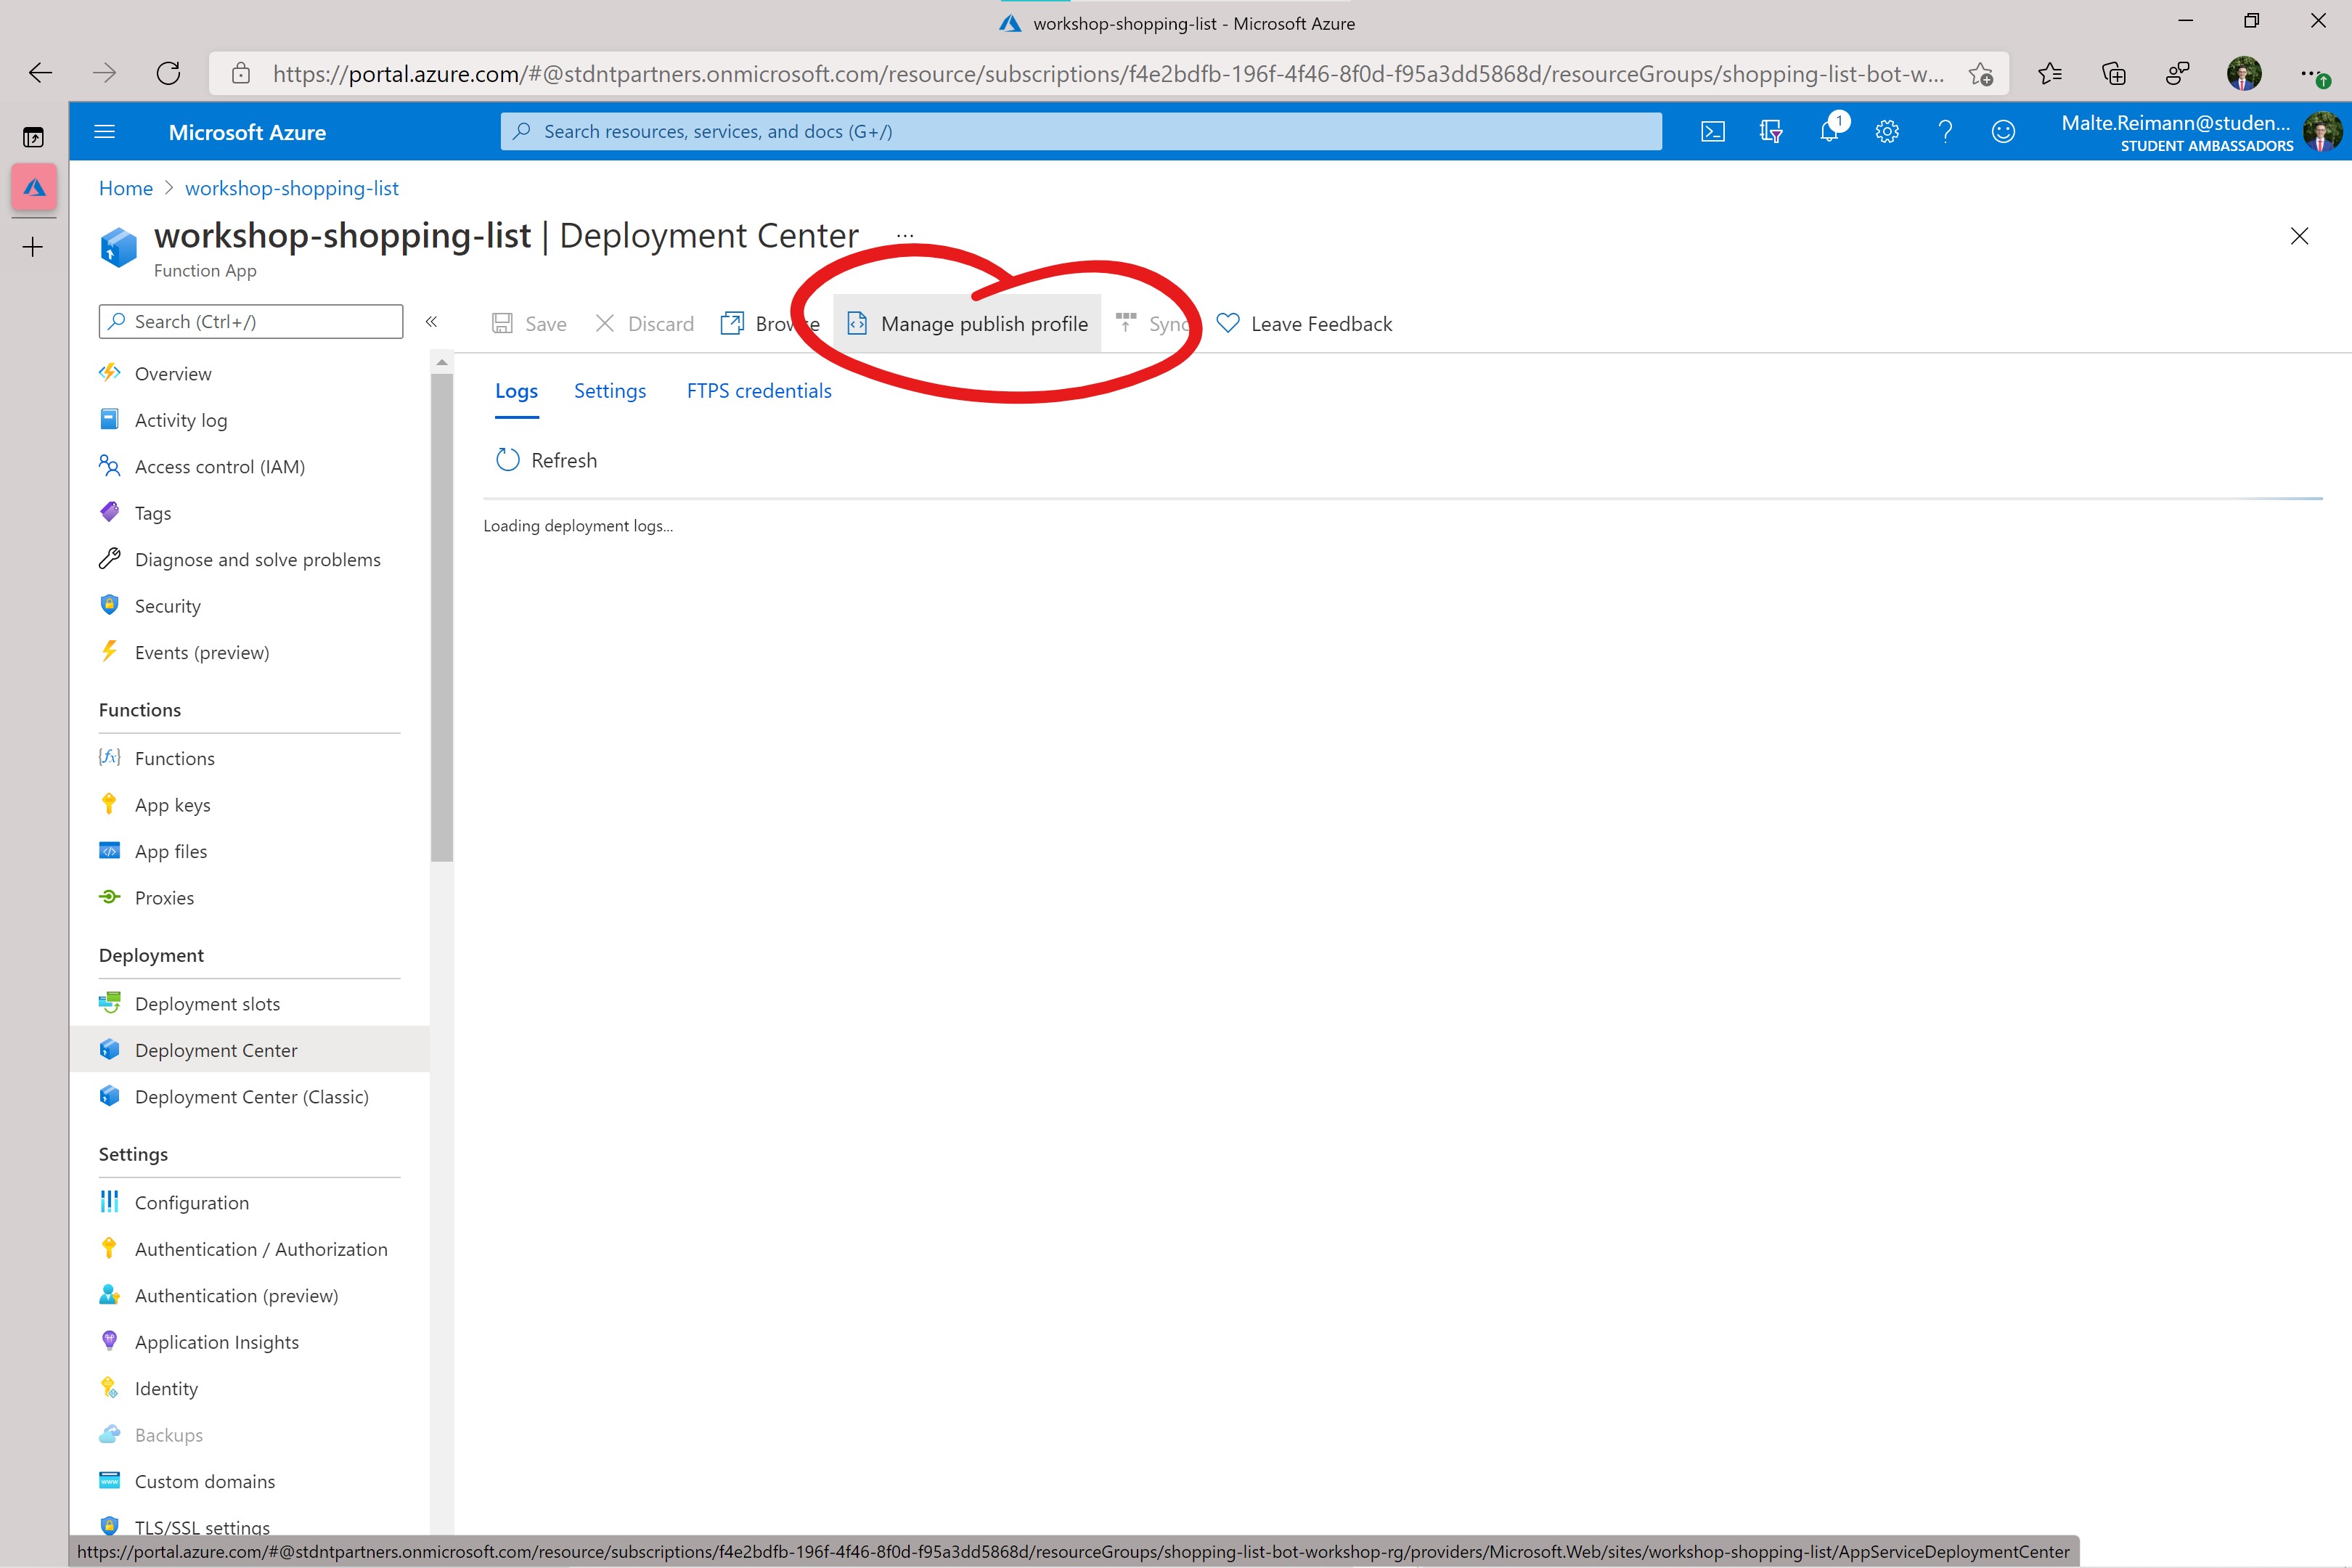
- In the 'Manage Publish Profile' panel, click on the
Download publish profilebutton. This will download aprofile.ymlfile.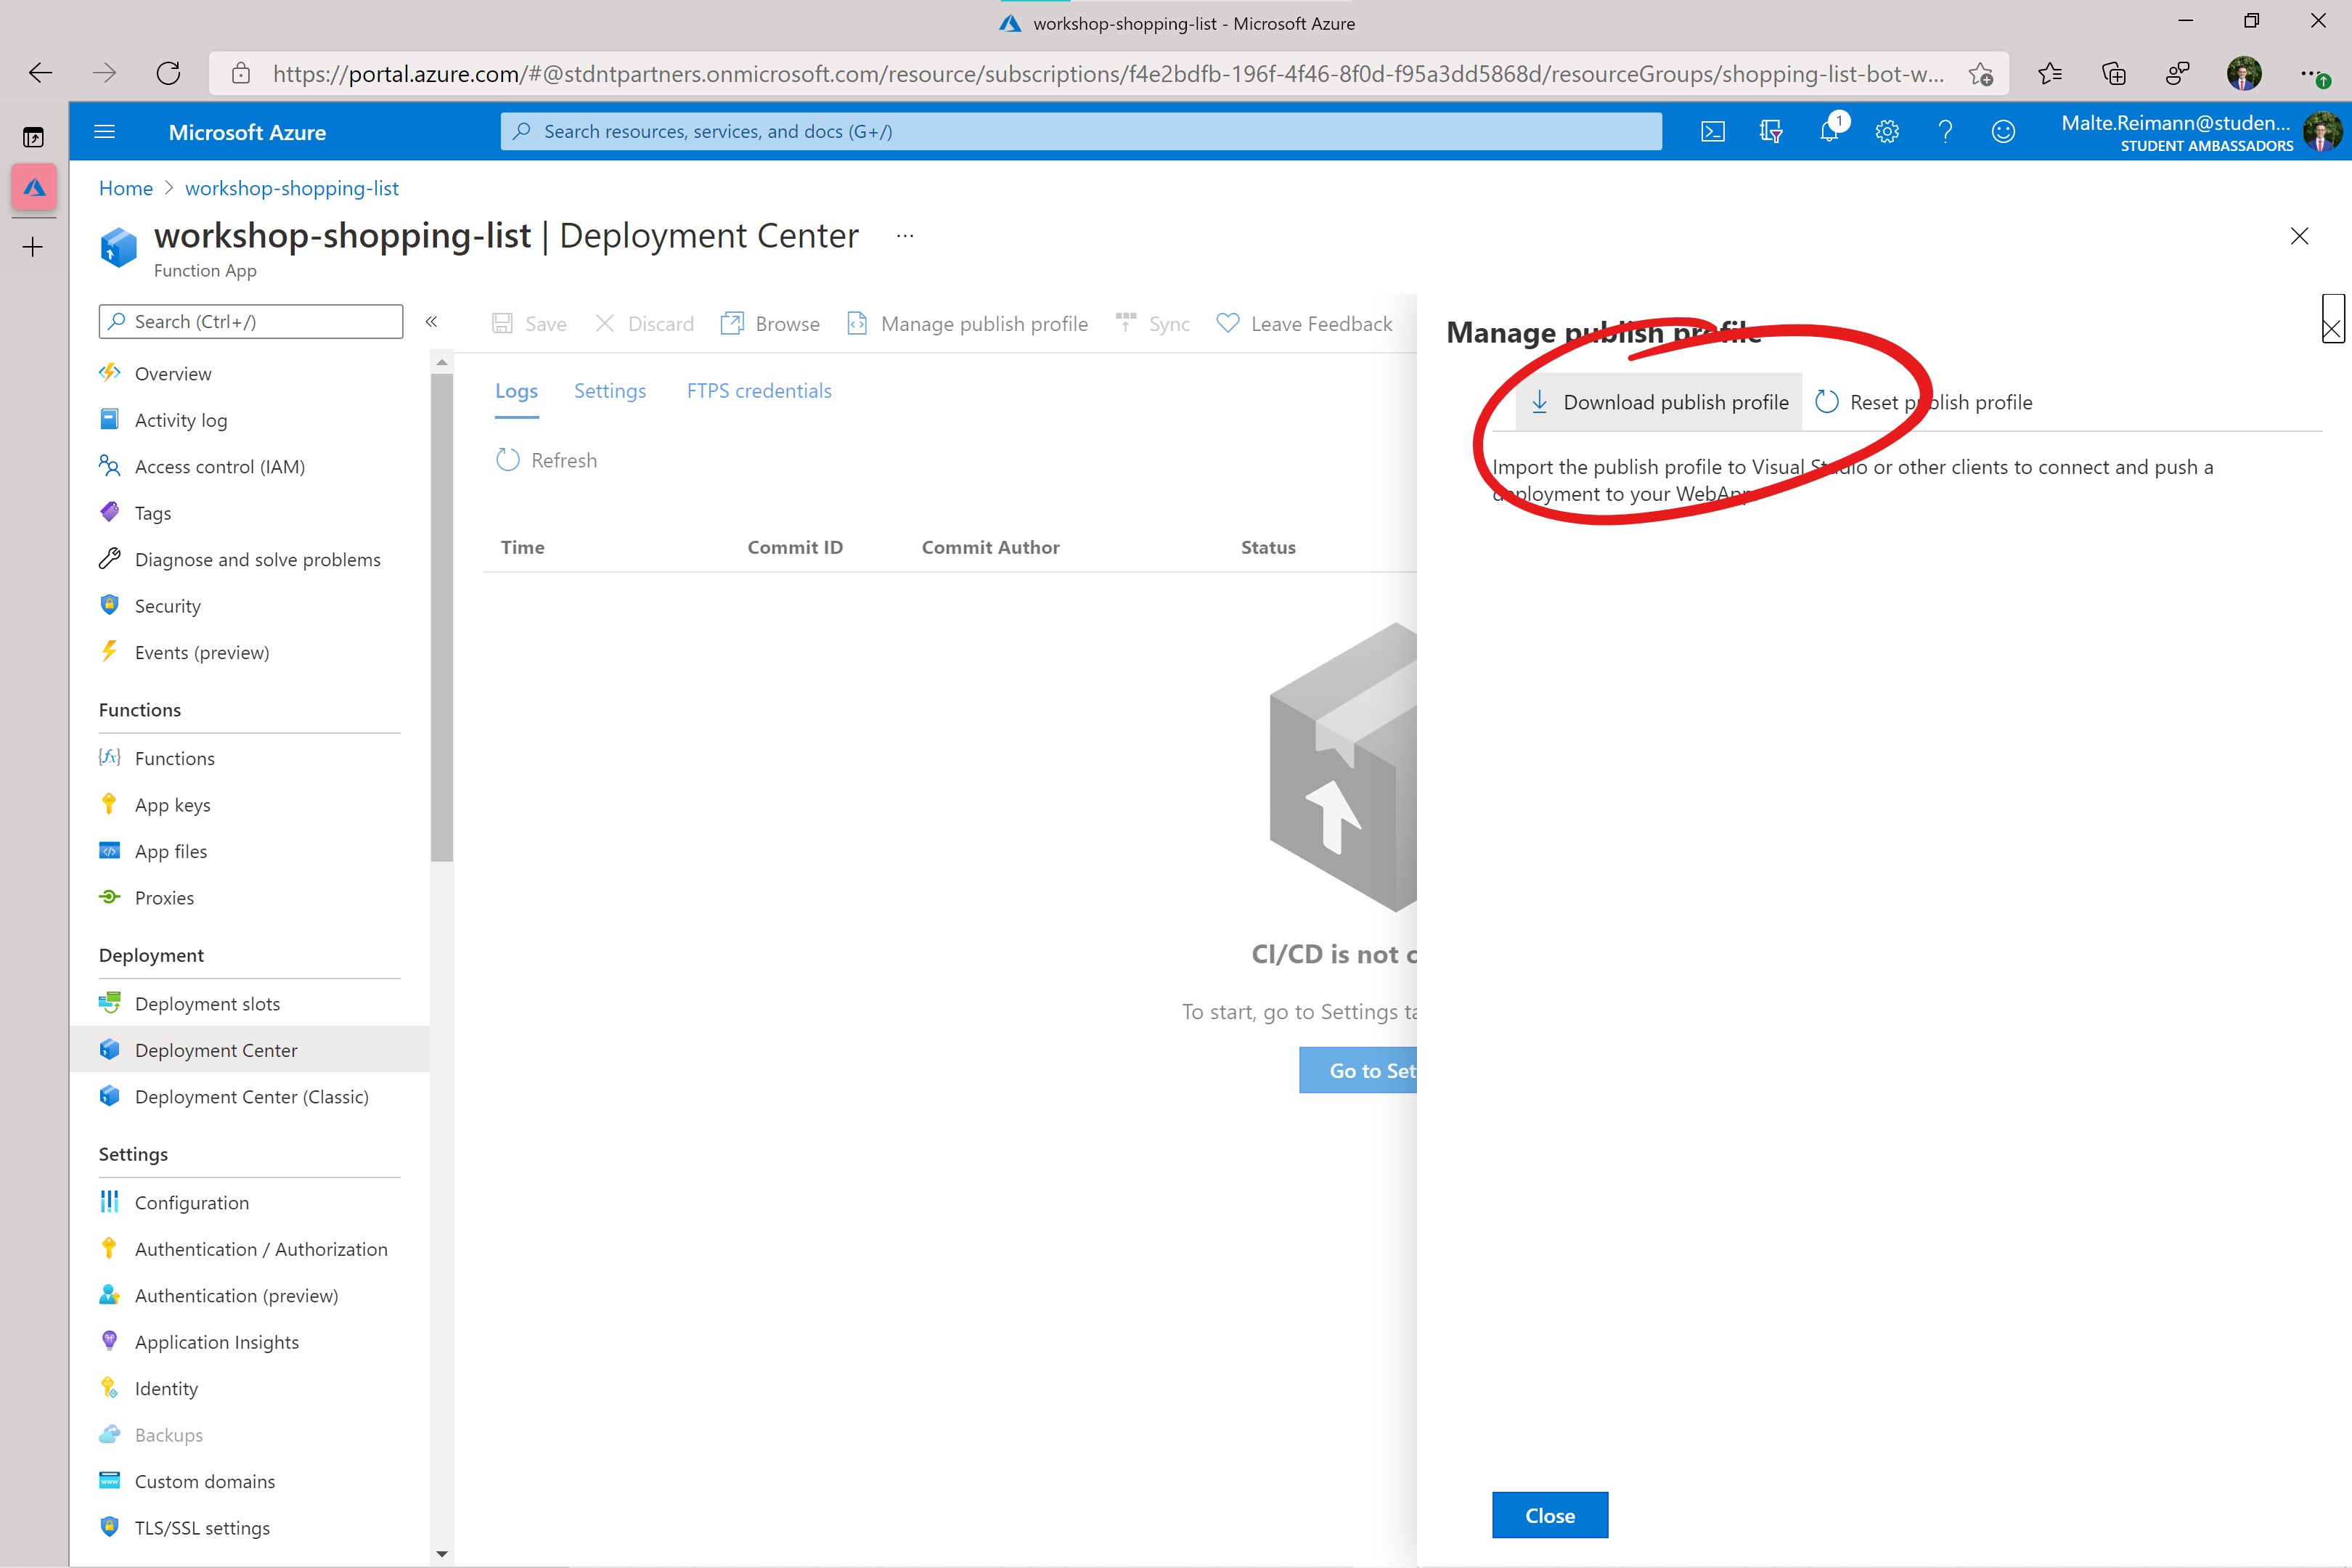
- When the
profile.ymlfile is downloaded, you need to open it in an editor and copy its entire content. - In your browser, navigate to your fork of this repository on GitHub.
- Click on the
Settingstab. - In the list of settings, click on
Secrets. - On the secrets page, click on the
New repository secretbutton.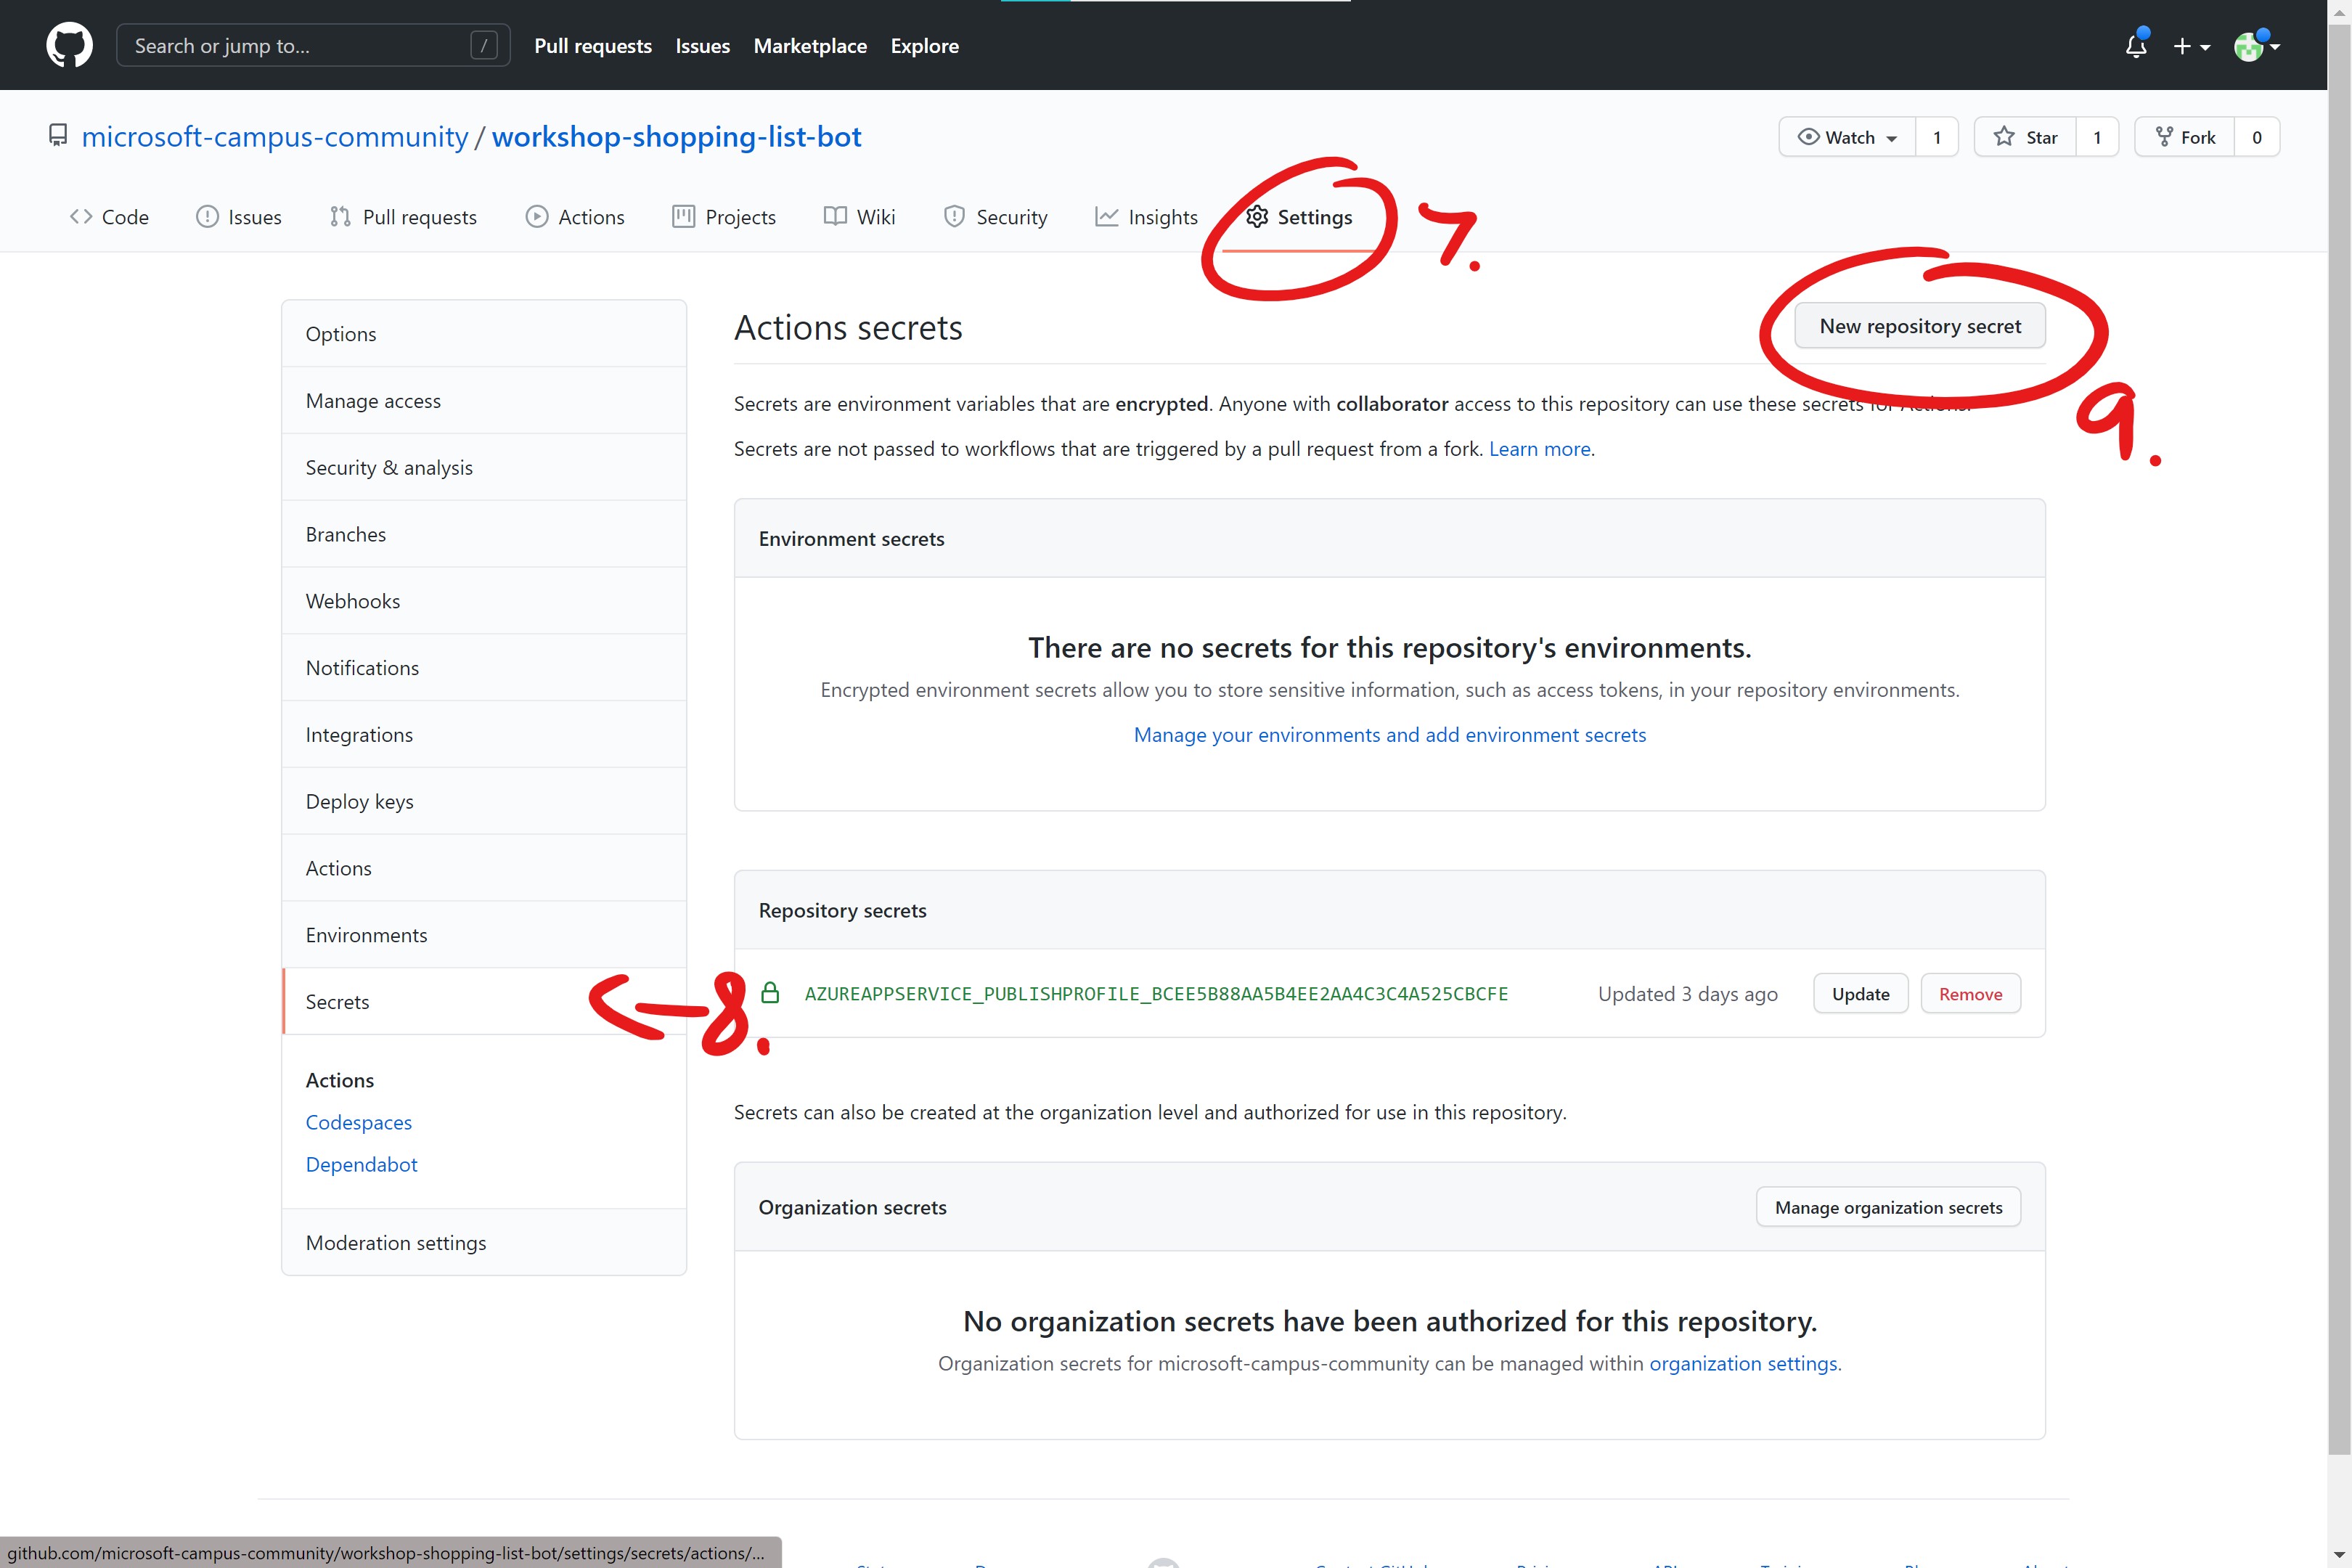
- In the
Valuetextbox, paste the entire content of thepublish.ymlfile you downloaded from Azure. - In the
Namefield for the secret pasteAzureAppService_PublishProfile_656b940b97ad482e89947253b659ce0bwhich is how the GitHub Action references the secret. - Click
Add secret.
The next time you push changes to your bot project on the main branch of your forked repository to GitHub, it will trigger the GitHub Action and deploy the changes to your bot running in the cloud.
You can try it out now by doing any change in the functions folder of your forked repository.