Learning How To Draw a Gauge - meldavy/ipf-documentation GitHub Wiki
This is basically a Hello World Part 2. My first few addons were completely ui-less, and required no interactions with UI elements. I wanted to make an addon where I could learn some of the UI framework that TOS offers. And to do that, I decided I want to create a gauge that is displayed on the screen, movable by dragging around the screen, and displays realtime buff/debuff information.
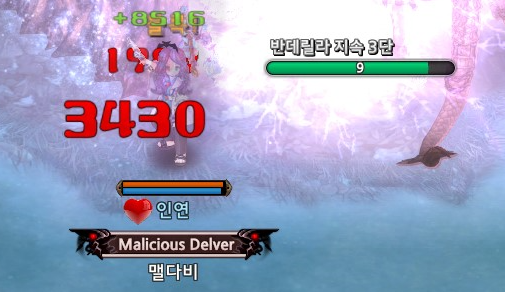
While playing Fencer - Mata comp, I always had a hard time staring at the boss debuff screen to maintain Banderilla stacks, so I decided that this was the best opportunity. In this wiki, I document everything I went through to create the Banderilla addon!
There are various gauges in the game, and many many thidr party addons that use gauges. Because I wanted a gauge for my addon, I needed to start exploring what are the options I can do. I know that there were already third-party addons with custom gauge elements that I could peek into the source code for inspiration, but I wanted to start from complete scratch and only rely only on first-party code. That's just how I like to learn!
There were 2 things I wanted to search for, that felt like a good fit for the addon I had in mind:
- Necromancer corpse gauge
- Yellow gauge that shows when getting squire buff or gem roasting

A lot of people might know from my youtube channel, but I am a Sorc/Necro main, and I see the Necronomicon gauge every day, which is why it was the first option that came to my mind.
I wanted to draw a small gauge, so I was also interested in the yellow gauge from squire buff.
To start, I did a quick search on the ipf dump to find relevant code. I basically did a search for the word gauge across the ipf dump and tried to see what I could find.
Digging through to get the gem roasting yellow gauge took a little bit of time, but I eventually found it some code around gem roasting that I could start as a lead.
I did not see anthing related to a gauge in the code, but I saw that it triggers some function on the seller, linked above. After seeing that line of code, I searched for AUTO_SELL_GEM_ROASTING. That lead me to the item_buff_server.lua file which contained a very interesting line of code...
Based on the findings above, drawing a yellow gauge seemed to be the easiest as there was no actual involvement with UI elements.
-- snippet from item_buff_server.lua

    if sellerhandle ~= targethandle then
        AttachGaugeToTarget(seller, target, 30, 0, "gauge");
    else
        AttachGaugeToTarget(seller, target, 30, 1, "gauge");
    end

--
However, based on the global table dump, there was no AttachGaugeToTarget, meaning that it was probably a call to code that we did not have access to from an addon.
Thus we unfortunately cannot use this method.
The next idea was to use the Necro Gauge. I liked its size, and it can be moved around the screen.
I wanted to create a gauge based on a debuff, specifically, the debuff from Matador's Banderilla skill: 4607 · ITEM_BUFF_VIBORA_RAPIER_MATADOR_DEBUFF
I want to check its count,
First, since it includes UI elements, let's analyze its xml.
<uiframe name="necronomicon_hud" x="470" y="30" width="233" height="60" hud="true">
<draw drawtitlebar="false"/>
<skin frameskin=" "/>
<frame layout_gravity="left top" scale_align="center top" keyboardselectframe="false"/>
<input maxwidth="1280" moveable="true" hittestframe="true" moveintitlebar="false"/>
<opencheck scp="NECRONOMICON_HUD_CHECK_OPEN" strarg="necronomicon" numarg="1"/>
<layer layerlevel="60"/>
<option visible="true" hideable="false" closebutton="false" alwaysVisible="true" autoopen="false"/>
<sound opensound="window_open" closesound="window_close"/>
<script LBtnUpScp="NECRONOMICON_HUD_LBTN_UP"/>
<controls>
<picture name="necroPic" rect="0 0 24 27" margin="15 16 0 0" layout_gravity="left top" image="necronomicon_amount_image" stretch="true" hittest="false"/>
<picture name="skillgaugeleft" rect="0 0 4 21" margin="38 21 0 0" layout_gravity="left top" image="skillgaugeleft" stretch="true" hittest="false"/>
<picture name="skillgaugeright" rect="0 0 4 21" margin="0 21 0 0" layout_gravity="right top" image="skillgaugeright" stretch="true" hittest="false"/>
<gauge name="necroGauge" rect="0 0 187 50" margin="42 6 0 0" layout_gravity="left top" skin="necronomicon_amount" drawlastpoint="true" ratewidth="true" text1="{s13}%v{/}" textalign1="center center" textfont1="quickiconfont" textoffset1="0 0" hittest="false"/>
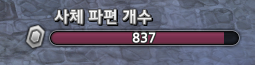
<richtext name="infoText" rect="0 0 200 20" margin="44 0 0 0" layout_gravity="left top" caption="{@st42}사체 파편 개수{/}" hittest="false"/>
</controls>
</uiframe>I basically copied and basted this XML, made a very slight few modifications, and added a timer control to it, resulting in:
<uiframe name="banderilla" x="470" y="30" width="233" height="60" hud="true">
    <draw drawtitlebar="false"/>
    <skin frameskin=" "/>
    <frame layout_gravity="left top" scale_align="center top" keyboardselectframe="false"/>
    <input maxwidth="1280" moveable="true" hittestframe="true" moveintitlebar="false"/>
    <layer layerlevel="60"/>
    <option visible="true" hideable="false" closebutton="false" alwaysVisible="false"/>
    <sound opensound="window_open" closesound="window_close"/>
    <script LBtnUpScp="BANDERILLA_LBTN_UP"/>
    <controls>
        <picture name="skillgaugeleft" rect="0 0 4 21" margin="38 21 0 0" layout_gravity="left top" image="skillgaugeleft" stretch="true" hittest="false"/>
        <picture name="skillgaugeright" rect="0 0 4 21" margin="0 21 0 0" layout_gravity="right top" image="skillgaugeright" stretch="true" hittest="false"/>
        <gauge name="banderillaGauge" rect="0 0 187 50" margin="42 6 0 0" layout_gravity="left top" skin="necronomicon_amount" drawlastpoint="true" ratewidth="true" text1="{s13}%v{/}" textalign1="center center" textfont1="quickiconfont" textoffset1="0 0" hittest="false"/>
        <richtext name="infoText" rect="0 0 200 20" margin="44 0 0 0" layout_gravity="left top" caption="{@st42}반데릴라 지속{/}" hittest="false"/>
        <timer name="debufftimer"  rect="0 0 10 10"/>
    </controls>
</uiframe>
The timer control is there so that I
- Start a timer when my character's banderilla buff is removed
- On every timer tick, check if there are any targets nearby with banderilla debuff
- If so, update the gauge. If not, stop the timer and make the gauge invisible.
The only other interesting control in the xml is the gauge control, because that's the heart of what we are trying to achieve. Everything else is really just cherries on top.
Secondly is the code to go with it. If you have gone through the hello world tutorial, you may have a good idea of how to get buff properties. I implemented something similar, so that my gauge would track my target's banderilla debuff.
Banderilla.BUFF_ID = 4606

function BANDERILLA_ON_INIT(addon, frame)
    Banderilla.addon = addon;
    Banderilla.frame = frame;
    addon:RegisterMsg('BUFF_REMOVE', 'BANDERILLA_ON_BUFF_REMOVE');
end

function BANDERILLA_ON_BUFF_REMOVE(frame, msg, argStr, argNum)
    if (argNum == Banderilla.BUFF_ID) then
        Banderilla:ProcessBanderillaDebuff(frame)
    end
end

function Banderilla.ProcessBanderillaDebuff(self, frame)
    local target = session.GetTargetHandle();
    local buff = Banderilla:GetBanderillaDebuff(target);
    if (buff == nil) then
        buff = Banderilla:FindNearbyDebuffTarget()
    end
    if (buff ~= nil and buff:GetHandle() == session.GetMyHandle()) then
        local gauge = GET_CHILD_RECURSIVELY(frame, 'banderillaGauge');

        -- start timer
        local __timer = frame:GetChild("debufftimer");
        local timer = tolua.cast(__timer, "ui::CAddOnTimer");
        timer:Stop();
        timer:SetUpdateScript("BANDERILLA_ON_TIMER_UPDATE");
        timer:Start(0.1);
        frame:ShowWindow(1);
    end
end

function BANDERILLA_ON_TIMER_UPDATE(frame)
    local buff = Banderilla:FindNearbyDebuffTarget()
    if (buff ~= nil and buff:GetHandle() == session.GetMyHandle()) then
        local time = buff.time
        local gauge = GET_CHILD_RECURSIVELY(frame, 'banderillaGauge');
        -- update gauge
        gauge:SetPoint((time / 1000), 10);
    else
        -- stop timer
        local __timer = frame:GetChild("debufftimer");
        local timer = tolua.cast (__timer, "ui::CAddOnTimer");
        timer:Stop()
        frame:ShowWindow(0);
    end
end

function Banderilla.FindNearbyDebuffTarget(self)
    local list, count = SelectObject(GetMyPCObject(), 500, 'ALL')
    for i = 1, count do
        local handle = GetHandle(list[i])
        local buff = info.GetBuff(handle, Banderilla.DEBUFF_ID)
        if (buff ~= nil) then
            return buff
        end
    end
    return nil
end
If you have gone through the Hello World wiki, then a lot of the code you see will be very familiar, and stuff we already went over.
The only special method that I've used in the above code that wasn't part of the HelloWorld wiki (asides from the new gauge related code) is info.GetBuff(handle, Banderilla.DEBUFF_ID). Usage of it was found in buff.lua in IMC code. It returns a buff object which you can use to get the owner of the buff. Basically I wanted to make sure that when there were multiple fencers in the party, the addon only tracks my character's Banderilla.
        -- start timer
        local __timer = frame:GetChild("debufftimer");
        local timer = tolua.cast(__timer, "ui::CAddOnTimer");
        timer:Stop();
        timer:SetUpdateScript("BANDERILLA_ON_TIMER_UPDATE");
        timer:Start(0.1);
        frame:ShowWindow(1);

        -- stop timer
        local __timer = frame:GetChild("debufftimer");
        local timer = tolua.cast (__timer, "ui::CAddOnTimer");
        timer:Stop()
        frame:ShowWindow(0);
I learned to use the timer from JTos Addon Wiki. It was actually incredibly straightforward. Get the timer lua object from the xml through frame:GetChild(controlName) or GET_CHILD_RECURSIVELY(frame, controlName), and call the Start(interval) method and the Stop() method to start and stop. And on every tick of the set interval, the function you passed on SetUpdateScript() will be invoked.
And with this, I had a working gauge addon. Except I had one small problem. The gauge color was purple and I didn't like it.
<gauge name="banderillaGauge" rect="0 0 187 50" margin="42 6 0 0" layout_gravity="left top" skin="necronomicon_amount" drawlastpoint="true" ratewidth="true" text1="{s13}%v{/}" textalign1="center center" textfont1="quickiconfont" textoffset1="0 0" hittest="false"/>Based on the attributes of our gauge control, we see that the skin is necronomicon_amount. Doing a search in the ipf dump lead me to this:
		<skin name="poisonpot_amount" texture="\skin\HUD.tga">
			<img name="bgleft" imgrect="558 73 1 21"/>
			<img name="bgmiddle" imgrect="559 73 185 21"/>
			<img name="bgright" imgrect="744 73 1 21"/>
			<img name="barleft" imgrect="558 98 1 21"/>
			<img name="barmiddle" imgrect="559 98 185 21"/>
			<img name="barright" imgrect="744 98 1 21"/>
		</skin>
		<skin name="necronomicon_amount" texture="\skin\HUD.tga">
			<img name="bgleft" imgrect="558 73 1 21"/>
			<img name="bgmiddle" imgrect="559 73 185 21"/>
			<img name="bgright" imgrect="744 73 1 21"/>
			<img name="barleft" imgrect="558 120 1 21"/>
			<img name="barmiddle" imgrect="559 120 185 21"/>
			<img name="barright" imgrect="v"/>
		</skin>
Well looks like somebody at IMC obviously made a copy paste error on that last line, lol.
The XML had all of the leads I needed. It was pointing to a file called HUD.tga and there was also a list of coordinates.
So I grabbed the HUD.tga file and opened it up in photoshop, and saw this:
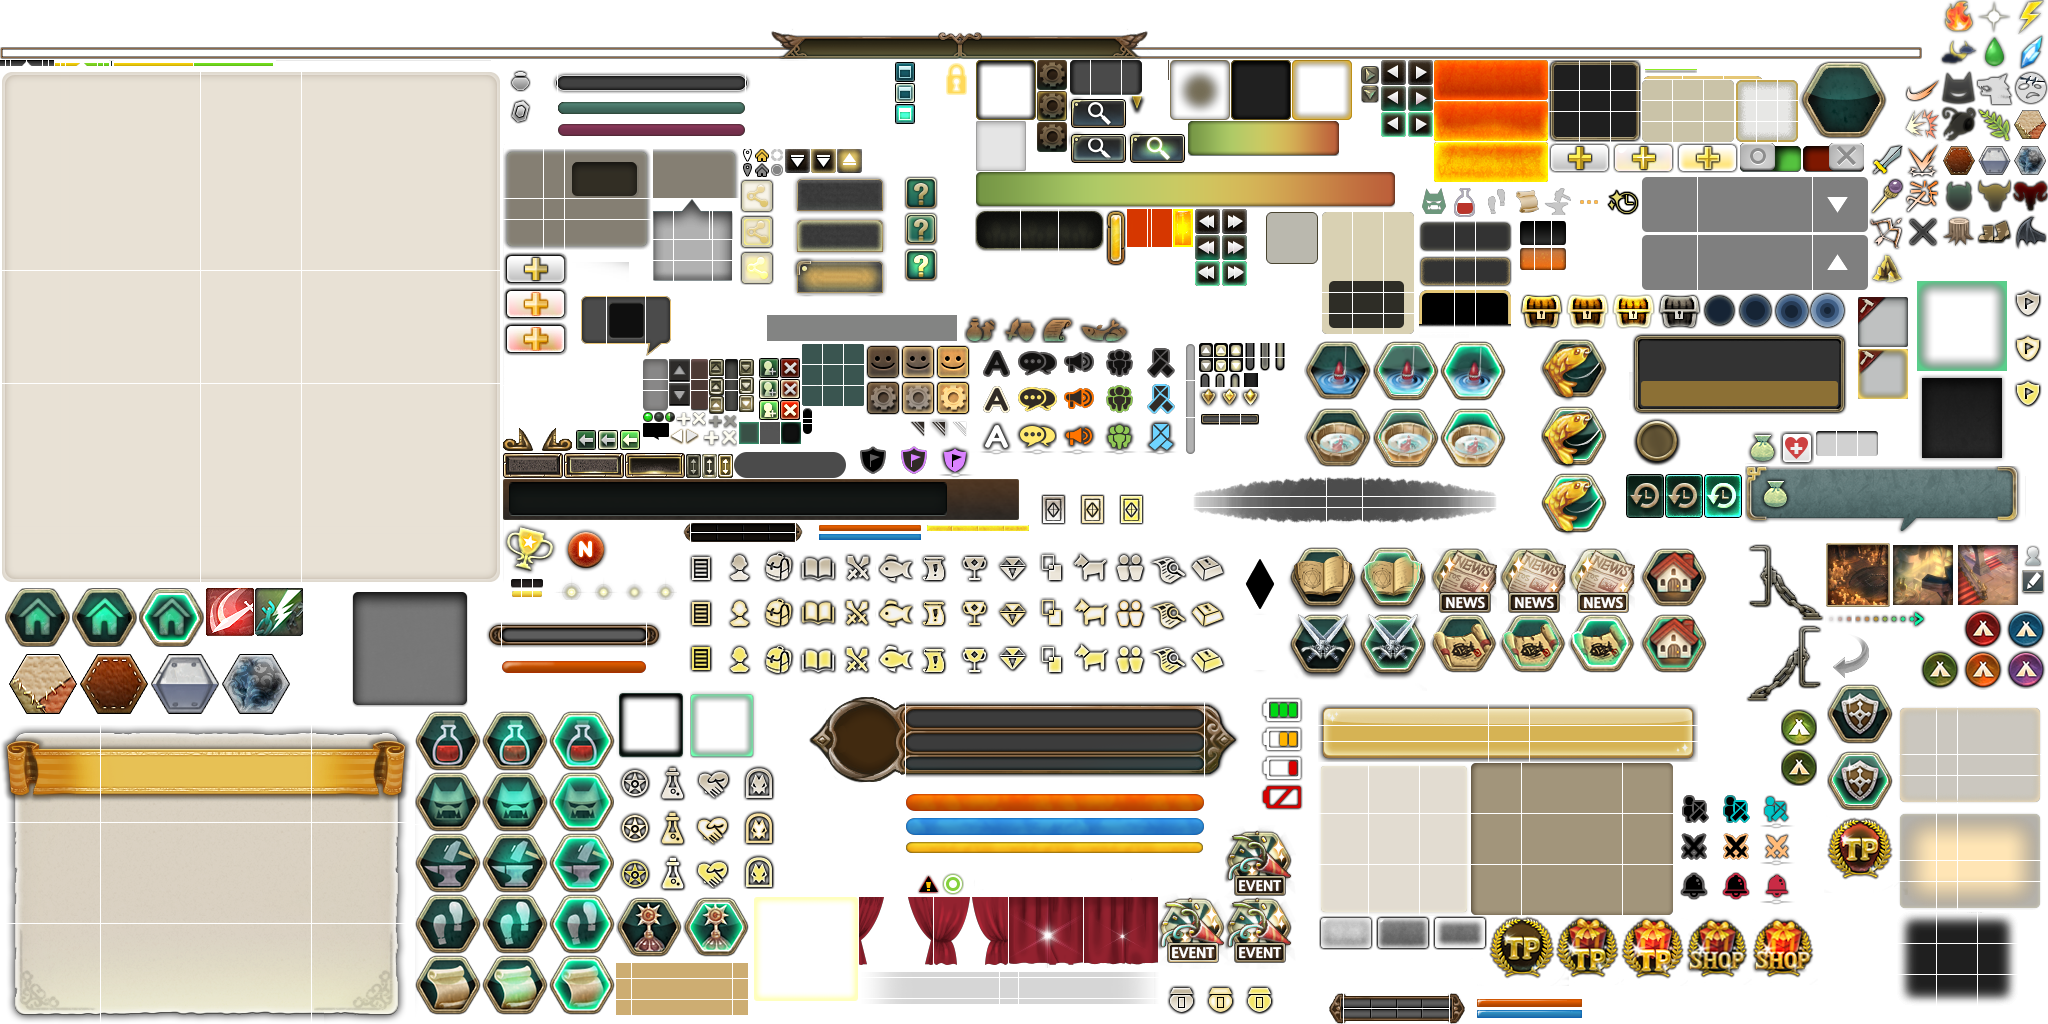
If you have a keen eye, you might actually see the necronomicon gauge in the top middle-left.
So I compared the pixel coordinates of the <skin> elements against what I was seeing in photoshop, and then I photoshopped my own .tga file.
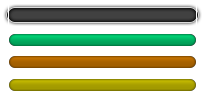
I basically just copy/pasted what was in the original HUD.tga, recolored it with photoshop magic, and saved it.
Then based on what was in the <skin> xml, I made my own xml file:
<?xml version="1.0" encoding="UTF-8"?>
<!-- edited with XMLSPY v2004 rel. 2 U (http://www.xmlspy.com) by imc (imc) -->
<!-- edited with XMLSpy v2008 sp1 (http://www.altova.com) by MintPC (Mi) -->
<skinset name="Base">
    <skinlist category="Skin">
        <skin name="banderilla_gauge_green" texture="\skin\banderilla.tga">
            <img name="bgleft" imgrect="9 5 1 21"/>
            <img name="bgmiddle" imgrect="10 5 185 21"/>
            <img name="bgright" imgrect="195 5 1 21"/>
            <img name="barleft" imgrect="9 30 1 21"/>
            <img name="barmiddle" imgrect="10 30 185 21"/>
            <img name="barright" imgrect="9 30 1 21"/>
        </skin>
        <skin name="banderilla_gauge_orange" texture="\skin\banderilla.tga">
            <img name="bgleft" imgrect="9 5 1 21"/>
            <img name="bgmiddle" imgrect="10 5 185 21"/>
            <img name="bgright" imgrect="195 5 1 21"/>
            <img name="barleft" imgrect="9 52 1 21"/>
            <img name="barmiddle" imgrect="10 52 185 21"/>
            <img name="barright" imgrect="9 52 1 21"/>
        </skin>
        <skin name="banderilla_gauge_yellow" texture="\skin\banderilla.tga">
            <img name="bgleft" imgrect="9 5 1 21"/>
            <img name="bgmiddle" imgrect="10 5 185 21"/>
            <img name="bgright" imgrect="195 5 1 21"/>
            <img name="barleft" imgrect="9 75 1 21"/>
            <img name="barmiddle" imgrect="10 75 185 21"/>
            <img name="barright" imgrect="9 75 1 21"/>
        </skin>
    </skinlist>
</skinset>
Now I replaced the original <gauge> control's skin value (note the banderilla_gauge_yellow value)
<gauge name="banderillaGauge" rect="0 0 187 50" margin="42 6 0 0" layout_gravity="left top" skin="banderilla_gauge_yellow" drawlastpoint="true" ratewidth="true" text1="{s13}%v{/}" textalign1="center center" textfont1="quickiconfont" textoffset1="0 0" hittest="false"/>And then finally, searched for SetSkin in the code dump which led me to the following code:
https://github.com/meldavy/tos-ipf/blob/main/extract/addon.ipf/challenge_mode/challenge_mode.lua#L42
With the above, I realized I can change the skin of programmatically. Thus, I modified the function which starts the timer by also setting the skin based on the current Banderilla stack. (For those who don't play fencer, up to 3 stacks of Banderilla can be applied, with each stack increasing the dot DPS)
function Banderilla.ProcessBanderillaDebuff(self, frame)
    local target = session.GetTargetHandle();
    -- 현 타겟의 반데릴라 디버프 확인
    local buff = Banderilla:GetBanderillaDebuff(target);
    -- 현 타겟이 반데릴라 디버프가 없을때 주변 몬스터들에게 반데릴라 디버프 확인
    if (buff == nil) then
        buff = Banderilla:FindNearbyDebuffTarget()
    end
    -- 반데릴라 디버프가 있는 타겟을 찾았고 내 케릭터의 반데릴라 효과일경우 (파티원 반데릴라 효과 걸러내기)
    if (buff ~= nil and buff:GetHandle() == session.GetMyHandle()) then
        local gauge = GET_CHILD_RECURSIVELY(frame, 'banderillaGauge');
        local caption = GET_CHILD_RECURSIVELY(frame, 'infoText');
        -- 현 반데릴라 중첩에 비례해 게이지 색상과 텍스트 변경
        if (buff.over == 3) then
            gauge:SetSkinName("banderilla_gauge_green");
        elseif (buff.over == 2) then
            gauge:SetSkinName("banderilla_gauge_orange");
        else
            gauge:SetSkinName("banderilla_gauge_yellow");
        end
        caption:SetText(string.format("{@st42}반데릴라 지속 %d단{/}", buff.over))
        -- 타이머 시작
        local __timer = frame:GetChild("debufftimer");
        local timer = tolua.cast(__timer, "ui::CAddOnTimer");
        timer:Stop();
        timer:SetUpdateScript("BANDERILLA_ON_TIMER_UPDATE");
        timer:Start(0.1);
        frame:ShowWindow(1);
    end
end
buff.over returns the current stack count of the buff. I basically learned this just by plain trial and error after studying the buff table:
[BUFF_C]:  table {
    [__name]: string = BUFF_C
    [.get]:  table {
        [over]: function()
        [buffID]: function()
        [arg4]: function()
        [arg1]: function()
        [arg3]: function()
        [arg2]: function()
        [time]: function()
        [index]: function()
        [arg5]: function()
    } // [.get]
    [GetName]: function()
    [GetHandle]: function()
    [.set]:  table {
        [over]: function()
        [buffID]: function()
        [arg4]: function()
        [arg1]: function()
        [arg3]: function()
        [arg2]: function()
        [time]: function()
        [index]: function()
        [arg5]: function()
    } // [.set]
    [tolua_ubox]:  table {
    } // [tolua_ubox]
} // [BUFF_C]
Lastly, I needed to package this together, and this is where I cheated a bit. I opened up a third-party addon that uses custom tga files through IPFSuite and followed its structure:
 └addon_d.ipf
      └ [addonname]
           ├ [addonname].lua
           └ [addonname].xml
 └ui.ipf
      └ [baseskinset]
           └ [addonname].xml // file that contains <skin> elements
      └ [skin]
           └ [addonname].tga // texture file