FirstTimeUse - lucadellasantina/ObjectFinder GitHub Wiki
Start Object Finder from your MATLAB's app toolbar, the main window of this app will have a series of tabs and buttons as in this screenshot:

New Project
To begin your analysis, choose "create new project", a secondary window will guide you through the process:
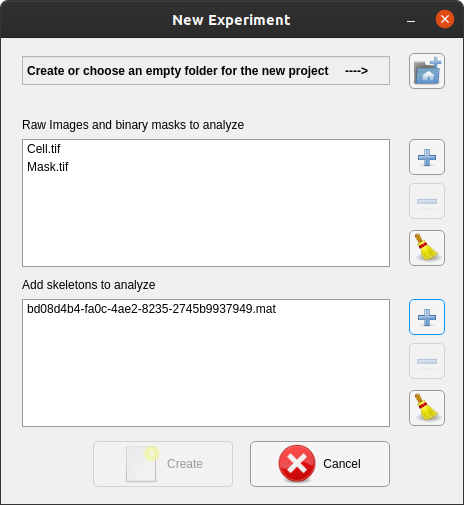
- Create a new folder for the project on your local computer and select it using the first button. The selected folder location will be displayed in the text area next to the button.
- Add all the image stacks belonging to this project that you want to analyze. Important: only 8-bit TIF files are allowed as images in which a single channel is represented per image fole. You can create them from multi-channel images using ImageJ by loading the multi-channel image and selecting image->Color->Split channels and saving each individual image as a separate TIF file.
- Add all the digital skeleton belonging to this project. Only ObjectFinder skeletons created with the Imaris export plugin (.mat files) and skeletons created with ImageJ's Simple Neurite Tracer plugin (.traces files) are supported.
- Click "Create" to let Object Finder generate the project's hierarchy on disk.
Search objects
- Use the second combo-box (next to the picture frame icon) to choose which image to search objects in. You can optionally restrict the search to a specific binary mask choosing the mask image file from the third combo-box (next to the two black masks icon).
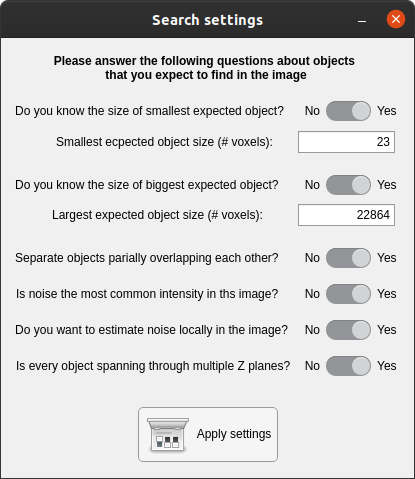
- Click "Choose Settings" and respond to the questions about the objects you expect to find in the new window.
- Click "Search Objects to start the detection process. Depending on the size of your image stack and the speed of your computer, this process can take from seconds to many minutes.
Review and Validate objects
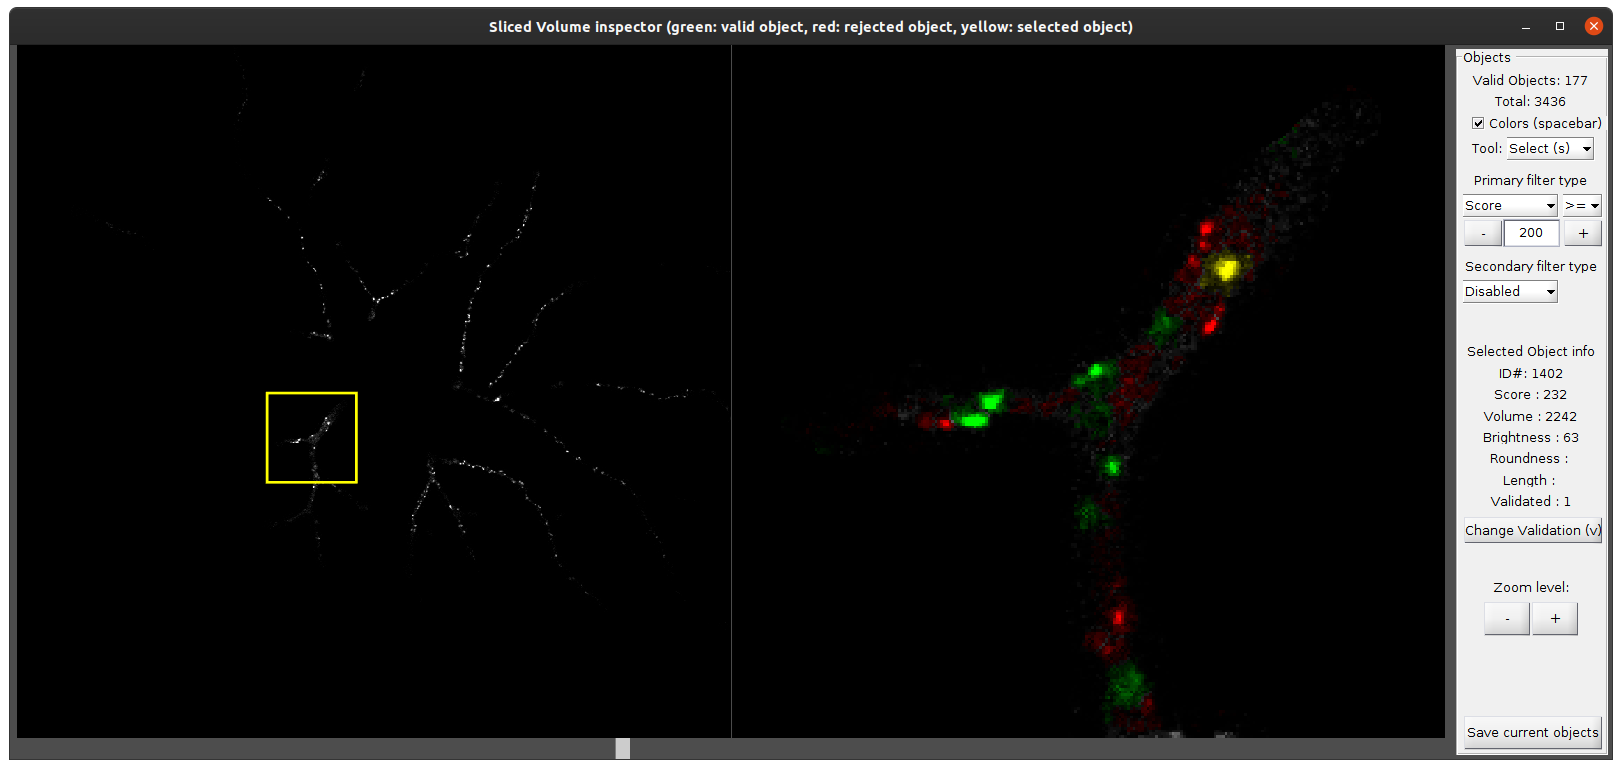
- After the detection is done, click "Validate Objects" to visually review the results.
- A new windows will display the image stack slice by slice. You can scroll to different slices using your mouse wheel or the white scroll bar at the bottom of this window. You can zoom in/out using the buttons "+/-" in the sidebar and you can move your field of view by clicking on a new position in the left panel.
- Inside the right panel you will see in green the detected objects, in red the rejected objects (e.g. outside of your size filter criteria) and in white the raw signal where no objects were found.
- You can select an individual object from the right panel by left-clicking on it. The sidebar will display statistics of the selecte object (e.g. size, brighness,...) you can change the validation status of the object by clicking "Change validation" or using the "v" shortcut on your keyboard.
- You can validate all objects meeting specific criteria alltogether by using the two filters comboboxes in the toolbar. For example you can filter all objects with detection score higher than 10 by choosing "Score" as the first filter and then choosing the condition ">=" and setting the value 10. Objects will be recolored in the right panel according to the new validation (green) / rejection (red) status.
- When satisfied of the final valid objects, click "Save" to close the inspector