IPC PV100A - longge-lee/doc_test GitHub Wiki
PV100A - Yocto 2.5 Kernel 4.14.98
Flash image
- ASUS PV100A - Yocto 2.5 BSP flash image SOP
1. Getting an image
-
Get Yocto-2.5 pre-release image from ASUS contact window
-
Build an image from source code:
Please refer to "PV100A Yocto-2.5 BSP build SOP" for instructions
- Note:
-
If you build from build.sh, then you can find bootloader, raw image, and flash boot in
Image-imx8mq-pv100a2g_DEBUGfolder. -
If you build from manual command, you can find image and tool in below folder:
-
Bootloader:
build_imx8mq-pv100a2g_DEBUG/tmp/deploy/images/imx8mq-pv100a2g/imx-boot-imx8mq-pv100a2g-2G.bin-flash_evk -
Raw Image:
build_imx8mq-pv100a2g/tmp/deploy/images/imx8mq-pv100a2g/fsl-image-qt5-validation-imx-imx8mq-pv100a2g.sdcard.bz2 -
flash tool:
sources/meta-asus-local/tools/flash_tool/*
Please copy all of them to another folder and rename
-
-
2. Flash image to eMMC
-
Case 1. Device without an OS image (Open Box)
Although PV100A is shipped without any OS by default, it enters into fastboot mode when it’s booted up.
Flash image:
-
Power the device with an adaptor.
-
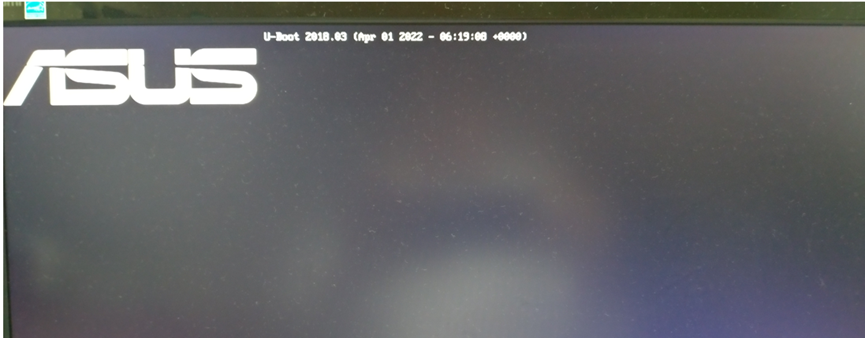
The device will stay in fastboot mode as shown below.

-
Connect the device and host computer (PC or NB) with USB Type-C® cable.
-
Enter image folder and double click flashall.cmd (Windows) / flashall.sh (Linux) to start image flashing.

If you use Ubuntu and flashall.sh to download image, your Ubuntu server may encounter this problem:
error while loading shared libraries: libssl.so.10: cannot open shared object file: No such file or directory-
Solution:
-
Edit the source list
sudo nano /etc/apt/sources.listto add the following line:deb http://security.ubuntu.com/ubuntu xenial-security main -
Then
sudo apt updateandsudo apt install libssl1.0.0.
-
-
-
The device will reboot to Yocto OS automatically once the process is completed.

-
-
Case 2. Flash an image in fastboot mode
Use “reboot-bootloader” command to make device enter fastboot mode so then the OS image can be flashed directly.
Flash image:
-
Power the device with an adaptor, and wait for the device to boot into Debian OS.
-
Open a terminal windows and enter
reboot-bootloadercommand
-
The device will stay in fastboot mode
-
Connect the device and host computer (PC or NB) with USB Type-C® cable.
-
Enter image folder and double click flashall.cmd (Windows) / flashall.sh (Linux) to start image flashing.

If you use Ubuntu and flashall.sh to download image, your Ubuntu server may encounter this problem:
error while loading shared libraries: libssl.so.10: cannot open shared object file: No such file or directory-
Solution:
-
Edit the source list
sudo nano /etc/apt/sources.listto add the following line:deb http://security.ubuntu.com/ubuntu xenial-security main -
Then
sudo apt updateandsudo apt install libssl1.0.0.
-
-
-
-
Case 3. Flash an image in serial download mode (For unbricking)
If device is in brick state or is with an empty eMMC, we can use “serial download mode” to flash an image.
Flash image
-
Toggle boot_mode switch to “Serial downloader” + “eMMC boot ”
DIP 1 2 3 4 ON/OFF OFF ON OFF ON 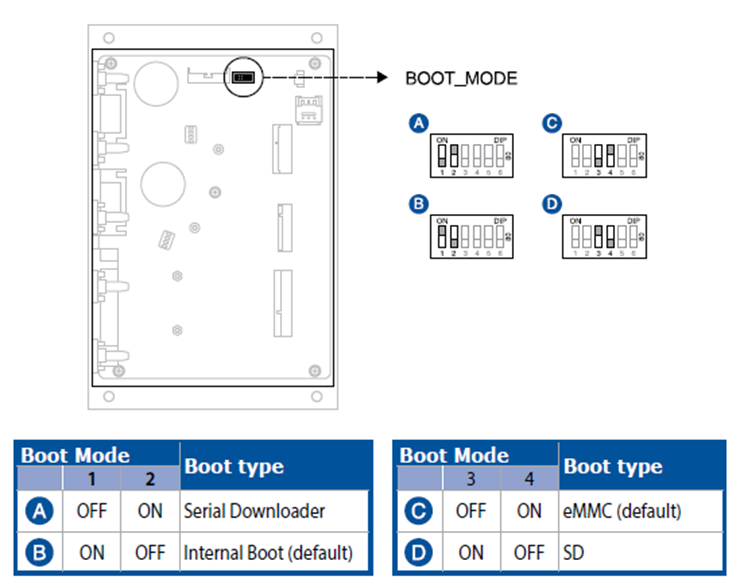
-
Power the device with an adapter.
-
Connect the device and host computer (PC or NB) with USB Type-C® cable
-
Enter image folder and double click flashall.cmd (Windows) / flashall.sh (Linux) to start image flashing.

If you use Ubuntu and flashall.sh to download image, your Ubuntu server may encounter this problem:
error while loading shared libraries: libssl.so.10: cannot open shared object file: No such file or directory-
Solution:
-
Edit the source list
sudo nano /etc/apt/sources.listto add the following line:deb http://security.ubuntu.com/ubuntu xenial-security main -
Then
sudo aptupdate andsudo apt install libssl1.0.0.
-
-
-
Remove the power adapter and toggle boot mode switch to “Internal boot” + “eMMC boot”
DIP 1 2 3 4 ON/OFF ON OFF OFF ON 
-
The device will reboot to Debian OS automatically once the process is completed.

-
Build image SOP
- ASUS PV100A - Yocto 2.5 BSP build SOP
-
Create an Ubuntu machine environment
Using one of the following versions is recommended: 16.04/18.04/20.04
-
Download Yocto source code from github (https://github.com/ASUS-IPC/manifest)
$ git config --global user.name "Your Name"
$ git config --global user.email "Your Email"
This step may not be needed if the bin folder already exists
$ mkdir ~/bin$ curl https://commondatastorage.googleapis.com/git-repo-downloads/repo > ~/bin/repo $ chmod a+x ~/bin/repo $ export PATH=~/bin:$PATH $ mkdir ~/asus-yocto-sumo $ cd ~/asus-yocto-sumo$ repo init -u https://github.com/ASUS-IPC/manifest.git -m $manifest_nameEx. for asus-pv100a-4.14.98-1.0.3.xml
$ repo init -u https://github.com/ASUS-IPC/manifest.git -m asus-pv100a-4.14.98-1.0.3.xml $ repo sync -j4 -
Setup Docker
-
Uninstall old versions
$ sudo apt-get remove docker docker-engine docker.io containerd runc -
Install Docker Engine - Community https://docs.docker.com/engine/installation/linux/docker-ce/ubuntu/
$ sudo apt-get update $ sudo apt-get install apt-transport-https ca-certificates curl gnupg-agent software-properties-common $ curl -fsSL https://download.docker.com/linux/ubuntu/gpg | sudo apt-key add - $ sudo apt-key fingerprint 0EBFCD88 $ sudo add-apt-repository "deb [arch=amd64] https://download.docker.com/linux/ubuntu $(lsb_release -cs) stable" $ sudo apt-get update $ sudo apt-get install docker-ce docker-ce-cli containerd.io $ sudo docker run hello-world -
Manage Docker as a non-root user https://docs.docker.com/install/linux/linux-postinstall/
If you don’t want to preface the docker command with sudo, create a Unix group called docker and add users to it.$ sudo groupadd docker $ sudo usermod -aG docker $USER $ sudo reboot $ docker run hello-world
-
-
Docker build:
-
Go to to the directory where the downloaded the code base is located in, and execute the script. This will take a while as it installs the necessary packages on the host and builds the Docker image.
$ cd ~/asus-yocto-sumo $ ./docker_builder/docker-builder-run.sh -
Once the step above is finished, you are in the shell of the newly started Docker container. You can issue the following command to build all the images for yocto. Below was sample command for ASUS PV100A, If you want to build image for other HW device, please change the MACHINE name (ex. imx8mq-pe100a for ASUS PE100A)
$ DISTRO=fsl-imx-xwayland MACHINE=imx8mq-pv100a2g EULA=1 source fsl-setup-release.sh -b build_imx8mq-pv100a2g
$ bitbake fsl-image-qt5-validation-imx
-
-
After build successfully, you can find all image at below path
Bootloader Image:
$ build_imx8mq-pv100a2g /tmp/deploy/images/imx8mq-pv100a2g/imx-boot-imx8mq-pv100a2g-2G.bin-flash_evkFull Raw Image:
$ build_imx8mq-pv100a2g/tmp/deploy/images/imx8mq-pv100a2g/fsl-image-qt5-validation-imx-imx8mq-pv100a2g.sdcard.bz2
LTE module function for PV100A
LTE module wakeup function
-
For PV100A
-
Wakeup by SMS and RING
-
To enable the wakeup function of your LTE module, click the weston-terminal icon in the upper left corner of your screen, and type the first command below when prompted:
- Enable wakeup function
mm_cli set-wakeup 1 - Disable wakeup function
mm_cli set-wakeup 0
- Enable wakeup function
G-sensor enable/disable
- G-Sensor disable
Open adb shell or Terminal $ /MCU_test_tool/gsensor_test disable PASS - G-Sensor enable
Open adb shell or Terminal $ /MCU_test_tool/gsensor_test enable PASS - G-Sensor read
Open adb shell or Terminal
$ /MCU_test_tool/gsensor_test read
(x1, y2, z3)
(x2, y2, z2)
...
Thermal sensor detect
- SOC Thermal Sensor
- Check CPU Zone:
Open adb shell or Terminal
CPU thermal:
# cat /sys/class/thermal/thermal_zone0/temp
38157 (about 38.157 'C)
- Check CPU Zone:
- MCU Thermal sensor
- Main Board near USB connector:
Open adb shell or Terminal $ /MCU_test_tool/sensor_read 1 --> tempture = 43.000 Degrees C, Completion code = 0x00 - Near LTE component:
Open adb shell or Terminal $ /MCU_test_tool/sensor_read 2 --> tempture = 42.000 Degrees C, Completion code = 0x00 - Near WiFi component:
Open adb shell or Terminal
$ /MCU_test_tool/sensor_read 3
--> tempture = 39.000 Degrees C, Completion code = 0x00
- Main Board near USB connector:
Console debug thru USB Type C
-
For PV100A
-
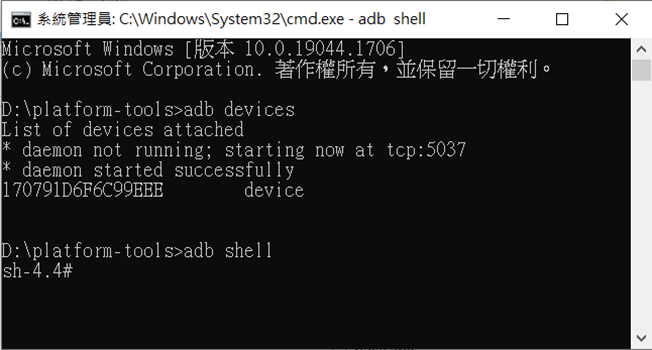
How to use Android Debug Bridge (adb)
-
Prepare an USB Type-C to Type-A cable.
-
Connect your device with USB: Connect cable Type-C side to PV100A and Type-A side to PC.
-
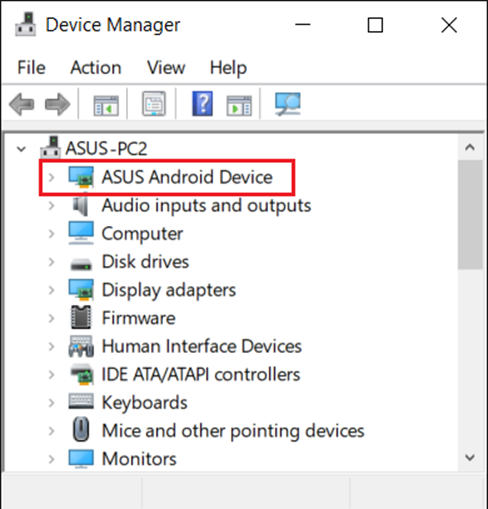
You can verify that your device is connected by check Device Manager.
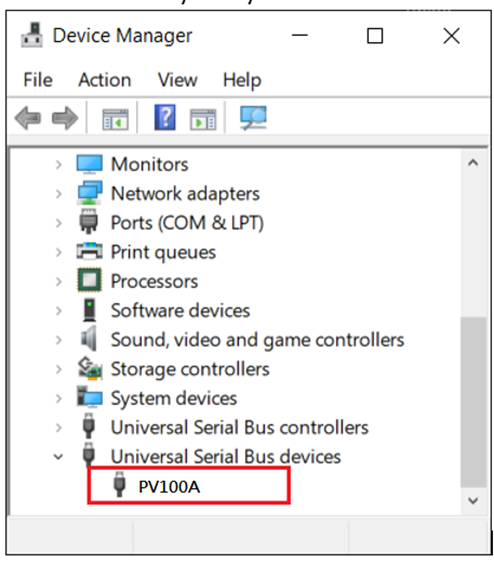
NOTE: If you have ever installed the ASUS_Android_USB_drivers_for_Windows, the device will appear as ASUS Android device.
-
Executing adb devices from the android_sdk/platform-tools/ directory. If connected, you'll see the device name listed as a device. The platform-tools can download from android website.
ASUS IoT API for PV100A