Database - liferesearchapp/life-research-members-portal GitHub Wiki
Schema
The database schema is slowly integrating the previous schema used by the LIFE Research Institute, with some modifications.
Here is the new schema for Members :

The schema for Partners

The schema for Products

The schema for Grants

The schema for Events

The schema for Supervisions

The database also contains a table named legacy which was used as a staging area for porting data from the other database to this one.
For creating these diagrams, DrawSQL is a good tool, although there is a limit to the number of tables you can draw in the free tier. Drawing the diagram is very helpful when designing relationships.
Note that Database Diagrams can be also generated using Microsoft SQL Server Management Studio by adding the desired relations:

Azure SQL Server
This application is using an SQL Server hosted by Azure. To manage the database, login to the Azure Portal and select SQL Databases, there you will see a list of databases you have access to. Clicking on a database will bring you to the management interface.
Take note of the server name, something like life-server.database.windows.net. This will be needed to connect a management tool to the server.
The database password is only visible when it is first created, however it can be reset at this interface. You can also get the connection string here, which is necessary for the app to connect.
If making a new database, ensure the Compute and Storage setting is set to DTU based purchasing model -> basic to minimize cost.
Connect with Power BI
- Open Power BI Desktop, click "Home -> Get Data -> More". Then, click "Azure -> Azure SQL Database -> Connect".
- Enter the Server and Database information. Click "OK".
- Server:
life-app-server.database.windows.net:1433 - Database (Vercel):
lri-database
- Enter the Username and Password.
- Username:
liferesearchapp@life-app-server - Password:
[for security concerns, please contact [email protected] or [email protected]]
- You will be able to see all the tables and the relationships.
Editing The Database (SSMS)
You can edit the database using any SQL management tool, SQL Server Management Studio (SSMS) is suggested.
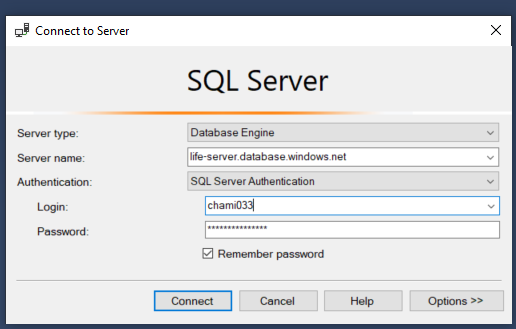
To connect to the SQL server using SSMS, simply enter the server name, username, and password.
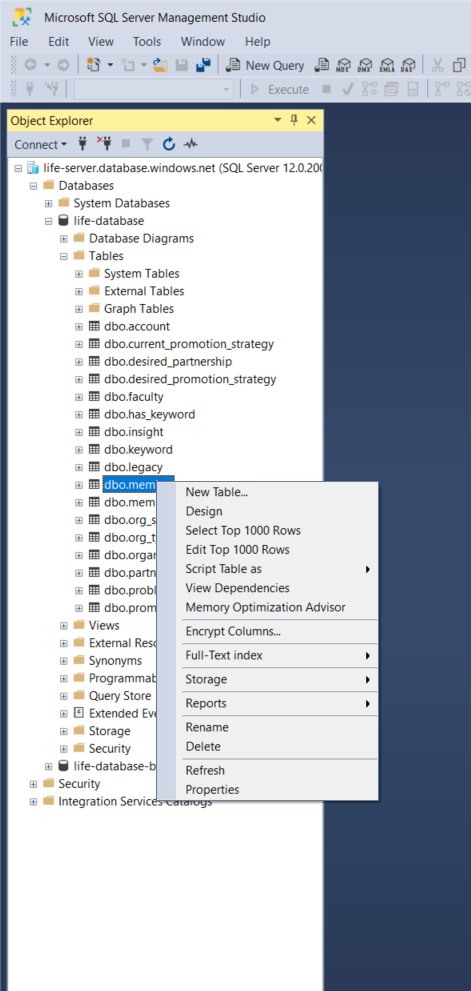
Once connected, expand the server -> Databases -> life-database -> Tables to see all tables in the database.
You can always execute SQL queries on the database using the New Query button.
Right clicking on a table will allow you to edit the design, select the top 1000 rows, or edit the top 200 rows. These numbers can be adjusted to allow you to edit larger tables.
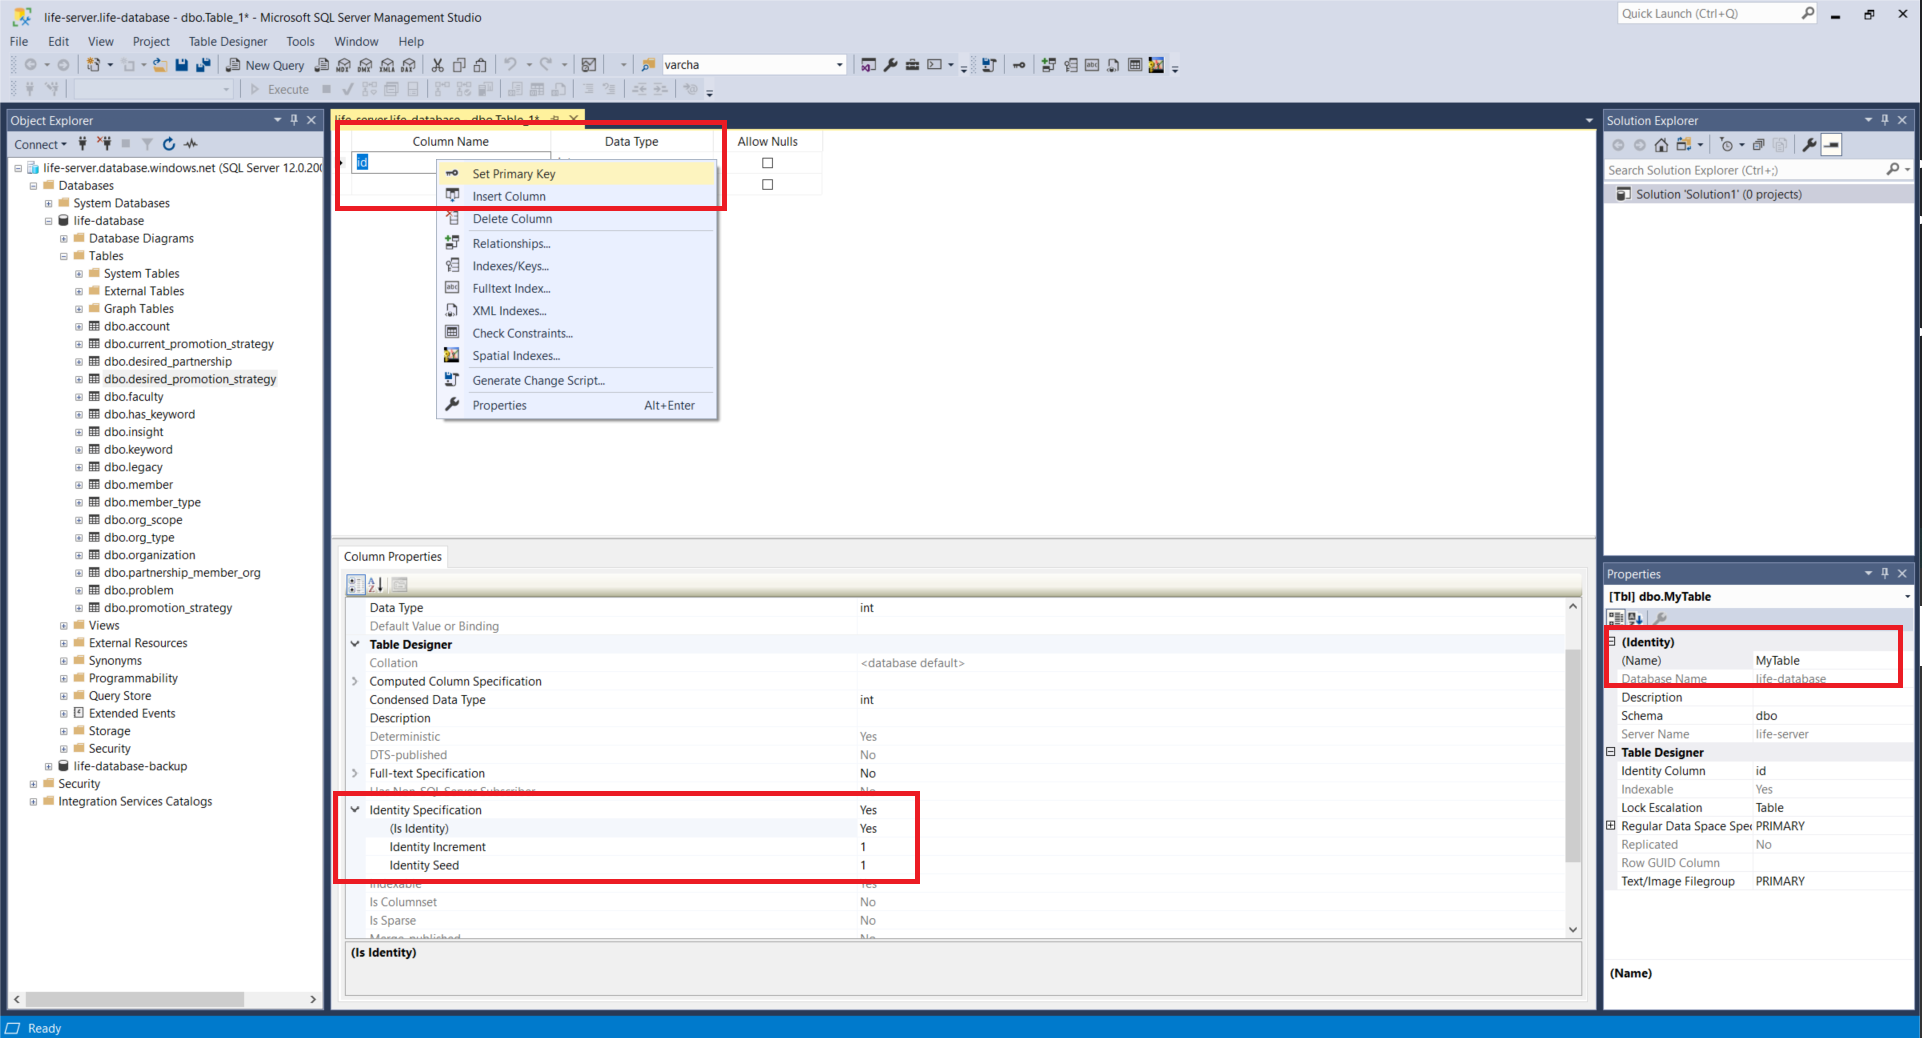
Selecting New Table will bring you to the design GUI.
The table's name can be changed on the far right.
You can add columns and their types in the main work area.
Primary Key
To make a column into an auto incrementing primary key, right click the column and select Set Primary Key.
Then locate Identity Specification -> (Is Identity) at the bottom of the screen and change to Yes.
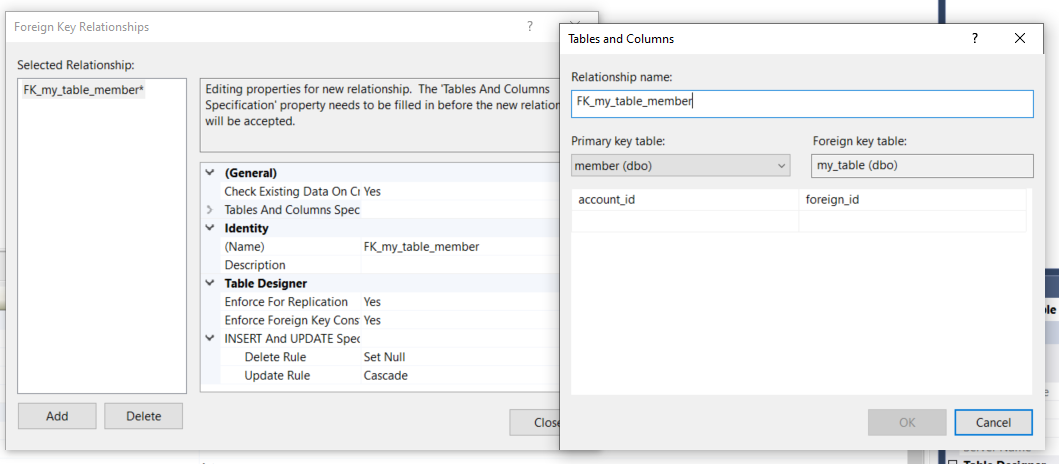
Foreign Key
To assign a column as a foreign key, right click the column and select Relationships.
In the popup, select Add.
Rename the constraint using the form FK_this_table_that_table to indicate the two connected tables.
Click the ellipsis next to Tables And Columns Specifications.
On the left, select the table you want this key to link to, then the specific column name.
On the right, leave the table as it is and just select the foreign key column.
Finally, set appropriate Delete and Update rules for when the foreign key is deleted from the other table. These values will be different depending on the specific relationship.
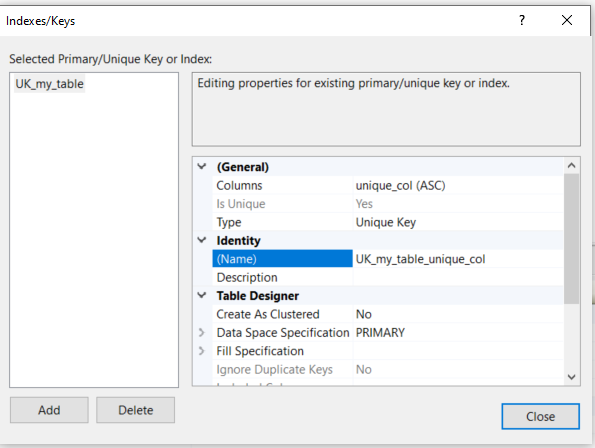
Unique Key
To ensure a column contains a unique value, you can add a Unique Constraint by right clicking a column and selecting Indexes / Keys.
In the popup, change the Type to Unique Key.
Change Columns to the unique column, or to a group of columns to create a unique tuple.
Change the name to UK_this_table_unique_col to indicate it is a unique constraint on unique_col.
Check Constraint
Sometimes we want to implement checks before allowing an operation to proceed.
For example, the keyword table has a check to ensure there are no more than 10 entries containing the same member_id, as a member can have a maximum of 10 keywords.
If we want to be able to perform a count in a check constraint, we'll need a Function.
We can just make a simple SQL query to produce a function that counts the number of instances in the keyword table given a member id.
We click New Query to open the editor, input the following, then press Execute:
CREATE FUNCTION has_keyword_count(@member_id int)
RETURNS int
AS
BEGIN
	DECLARE @count int;
	SELECT @count = COUNT(member_id) FROM dbo.has_keyword WHERE has_keyword.member_id = @member_id
	RETURN @count
END
The Function can now be found under Programmability -> Functions -> Scalar-valued Functions.
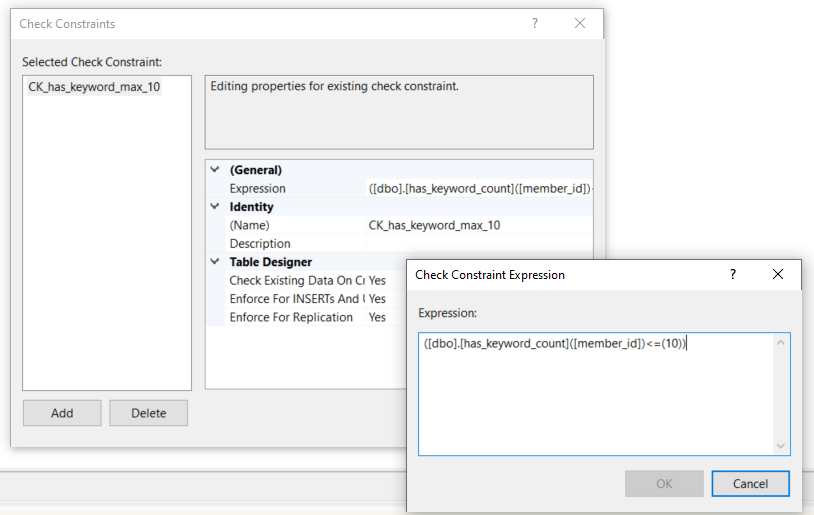
Now to add the check constraint to a table, right click the table in design mode and select Check Constraints, then select Add.
We input the following into Expression
has_keyword_count(member_id) <= 10
Then give it a meaningful name like CK_has_keyword_max_10
Now the table will ensure there are no more than 10 keywords per member.