SQL: Flyway DB Project Azure DevOps CICD Pipeline (YAML) - leganderson-dev/Flyway_PoC_Onboarding GitHub Wiki
Welcome to the Flyway_PoC_Onboarding wiki!
1. Prerequisites
Install a Git client (Git, GitHub Desktop, Sourcetree)
Determine what CICD system (Azure DevOps, Jenkins, GitLab...) your organization uses.
I'll be using AzureDevOps (ADO) in this Demo, but the processes and steps used here would work in any setup 😉.
If your organization dont have a CICD system, ADO offers a free tier
2. Preparing the PoC Environment
Step 2.1 Access the URL with latest Redgate products
Step 2.2
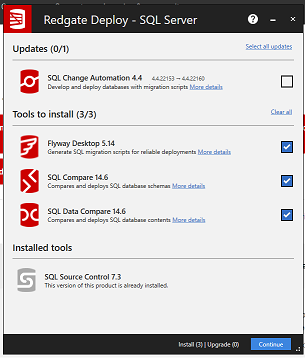
Download and Install 'Flyway Desktop', from the 'Version Control and Deployment Automation' option


Step 2.3 In SSMS, create the databases that will be used in the PoC, link to example
Step 2.4
- Create a new project in your CICD system - I've called mine Flyway_PoC (Later on this name will be referred as a pipeline variable, if you want to use a different name, take note of it)
- Clone (copy) your remote repository into your local development workspace (i.e. your laptop)
3. Create your Flyway database Project
Step 3.1 Open Flyway Desktop
Step 3.2 Create a New Project
Project location: file location that you cloned your repository to
Project name: any meaningful name, usually the name of your database
Database engine: we will use SQL Server
Step 3.3 Link Development database to the project
This is the database that we (as developers) will use to make and validate our changes, before those get committed to source control
We will use the Widget_Dev database
Step 3.4 Create your 'Schema Model'
When we create a new DB project, the first comparison will prompt you to save all existing database objects into your schema model, thus creating a file representation of your database
Select all objects and click 'save to project'
Future comparisons will only show the objects that are different from your model
Step 3.5 Set up the shadow database
Click on 'Generate Migrations' and then in 'Set up Shadow Database'
We will link the Widget_Shadow database
Step 3.6 Create the Baseline
Click on 'Create Baseline' and then on 'Connect to Database'
We will use Widget_Staging DB to create the baseline script
Save the baseline file
The baseline is a file that represents your production database. It contains the 'create statement' for all its objects
No changes are made to the database when creating the baseline, so when onboarding an actual project, it is OK to point it to production or a copy of it that is the same schema version.
Step 3.7 Commit and Push changes to Repository
To enable the auto generation of rollback scripts, click on the 'cog'/'settings' icon on the top right and check the 'generate undo scripts' option

Click on the 'Commit changes' button, or alternatively go to the 'Version Control' tab in order to do it.
Write a relevant comment and press 'Commit'
'Push' changed to the remote repository and explore/browse it
4. Validate your project
4.1. In SSMS, Make a change to the dev database
4.2. In Flyway, go the 'Schema Model' tab and 'refresh' your project
4.3. Save your changes to the schema model
4.4. 'Generate migrations' for the changes you have made
4.5. 'Commit' and 'Push' changes to the remote repo
4.6. Go to your repo and check both the 'schema model' and 'migrations' folders to make sure your changes are as expected
5. Create and Configure a CI pipeline (using YAML)
Step 5.1 Copy (commit/push) the following YAML file to your remote repo
Step 5.2 Create a new pipeline
Click on 'Pipelines' and 'New Pipeline'
Click on 'Azure Repos Git'
'Select your repo'
'Existing Azure Pipelines YAML file'
drop down and select your
azure-pipelines.yml
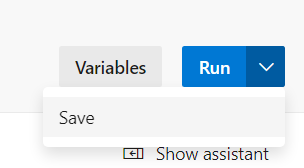
'Save
Step 5.3 Change the necessary variables within the YAML file
variables like pool (agent pool), paths, environment specific values...will need to be modified accordingly within the 'variables' section of each stage
The YAML file contains a Build, Staging and Production stages
Step 5.4 Cross your fingers, in the case of errors, please review the variables within YAML
Step 5.5 Run a pipeline job
6. Validate de process end-to-end
6.1. In SSMS, Make a change to the dev database
6.2. In Flyway, go the 'Schema Model' tab and 'refresh' your project
6.3. Save your changes to the schema model
6.4. 'Generate migrations' for the changes you have made
6.5. 'Commit' and 'Push' changes to the remote repo
6.6. Go to your repo and check both the 'schema model' and 'migrations' folders to make sure your changes are as expected
6.7 Changes to the main branch will automatically trigger the pipeline job to run
6.8 Validate that the changes you have made were successfully built and deployed to Staging
6.9 Review release artifacts (change report, code analysis, migration script)
6.10 'Approve' Prod release
6.11 Validate that changes got deployed to the production DB
