2.2. Getting started with butterfly in dynamo - ladybug-tools/butterfly GitHub Wiki
Butterfly is python library to create and execute OpenFOAM cases. This page discusses how you can use butterfly from the Butterfly plugin for Dynamo. We appreciate your comments. Let us know your thoughts on github.
 Follow Ladybug Tools on twitter or like the page on Facebook to get the latest updates.
In order to use butterfly you need to install
OpenFOAM for Windowsseparately before installing butterfly. If you already haven't installed OpenFOAM check the installation page for OpenFOAM and come back here once you have OpenFOAM installed.
You can install butterfly from Dynamo package manager. In Dynamo click on Packages tab and select Search for a Package....

Search for butterfly and install the latest version.

Once the installation is completed successfully you should see butterfly tab added to Dynamo.

Butterfly is using MeshToolkit package to mesh the geometries. At some point MeshToolkit will be installed with Dynamo's installation. Until then you need to install MeshToolkit separately following the similar steps as 2.1.

In order to use Butterfly you need to run Revit as an administrator otherwise you will get an error when you're trying to create a butterfly case. If you're not using an admin account close Dynamo and Revit and run it as administrator.
A number of sample files are available in the installation folder which demonstrate different approaches to use butterfly. Here we cover the two most typical workflows for preparing you model in Butterfly. The process of meshing and running the analysis is the same for both workflows.
First step is to prepare the OpenFOAM case folder. The process is explained for outdoor and indoor analysis separately.
The outdoor analysis workflow lets you create an OpenFOAM case from a wind tunnel. The size of the wind tunnel is calculated based on the heights of the test geometries and windTunnelParameters. You can use windTunnelParameters component to adjust the size if necessary. The boundary conditions for inlet, outlet, sides, top and ground surfaces are set by Butterfly. You can change wind speed and wind direction, add refinement regions and set up grading.

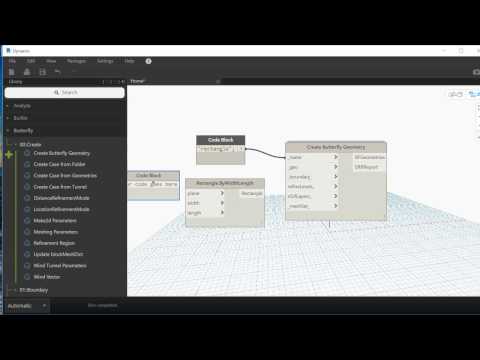
For indoor cases, you need to create the butterfly geometries for each group of geometries with similar boundary condition. You can use one of the default boundaries or create your own boundary. Once you have all butterfly geometries you can put them together as a Case.

There are two required steps for meshing in butterfly which follows OpenFOAM standard workflow. The first step is blockMesh which is followed by running snappyHexMesh. Before running the meshing components you need to have the OpenFOAM docker container running otherwise you will receive an error. You may need to run the Rhino and OpenFoam container as an administrator.
Use decomposeParDict component to run snappyHexMesh in parallel. Butterfly currently supports scotch and simple modes.
Check these discussions for troubleshooting in case you get an error message.

After running each step of meshing you can read the report from the readMe! output. You can also use loadMesh component to load the mesh into Dynamo. If you're dealing with a very large case then you are probably better off using ParaView. Loading a heavy mesh to Dynamo can take a lot of memory.

Use snappyHexMeshDict component to set-up the parameters for snappyHexMesh. The refinement values are already set in the previous step. Once you're happy with the mesh density and quality you can move forward to run the analysis. You can also use checkMesh component to check the mesh quality.
The next step before running the analysis is to use pick the right recipe for your analysis. Currently, Butterfly supports two recipes. Steady Incompressible recipe uses simpleFoam and Heat Transfer recipe uses buoyantBoussinesqSimpleFoam. You can customize turbulenceProperties, fvSchemes, fvSolution, residualControl and relaxationFactors for each recipe. You can also create your own recipe by writing a new class.

For running the analysis you need to create a solution. Solution component has several inputs that let you make the final changes to the case or change them while the analysis is running. Similar to snappyHexMesh you can run the solution in parallel.


SolutionParameters is a collection of parameters that can be modified while the analysis is running. In Dynamo you can make the changes before starting a run or after pausing the run. controlDict, probes are default parameters that can be modified using their separate components, however, you can use solutionParameter [with no s] component to update any parameter in Case folders.

You can run the solution by setting _write and run_ to True. Unlike Butterfly in Grasshopper Butterfly in Dynamo doesn't supports real-time results visualization. You can stop the analysis once in awhile by closing the batch window and checking the residual values.
Use Sample Case to get the result for a number of test points. If the results are vectors you can use Visualize Vectors node to visualize the vectors as geometries.


You can also use other tools outside of Dynamo to visualize the results. The image below shows an example of loading the results in ParaView.

We need your input on almost everything! How do you like the current workflow? How do you think the workflow can be improved? What are your thoughts on default boundary conditions? Do you have a set of boundary conditions that you think we should add to the library? What will be your wish for the next release?
Please open an issue for your comments, suggestions and bug reports so other users can also add their inputs. We will get back to you as soon as we can.
Butterfly also has a Python API which lets you to create your own components or modify the butterfly case with typing a couple of lines. Here is the API documentation. You can double click on any of the components to see an example! I will try to provide more examples in the near future.