Fix and Optimize CPU Power Management - l1n-dev/Dell-Inspiron-14-5490-OpenCore GitHub Wiki
This is a copy of Dortaia's Fixing power management guide but with specific values to enter. Go over there for advanced tuning.
I did not put this into the Post-Install guide because it's too large to fit.
Verify that X86PlatformPlugin is loaded
So before we can fine tune power management to our liking, we need to first make sure Apple's XCPM core is loaded. Note that this is supported only on Haswell and newer. But that shouldn't be an issue because this laptop is Comet Lake.
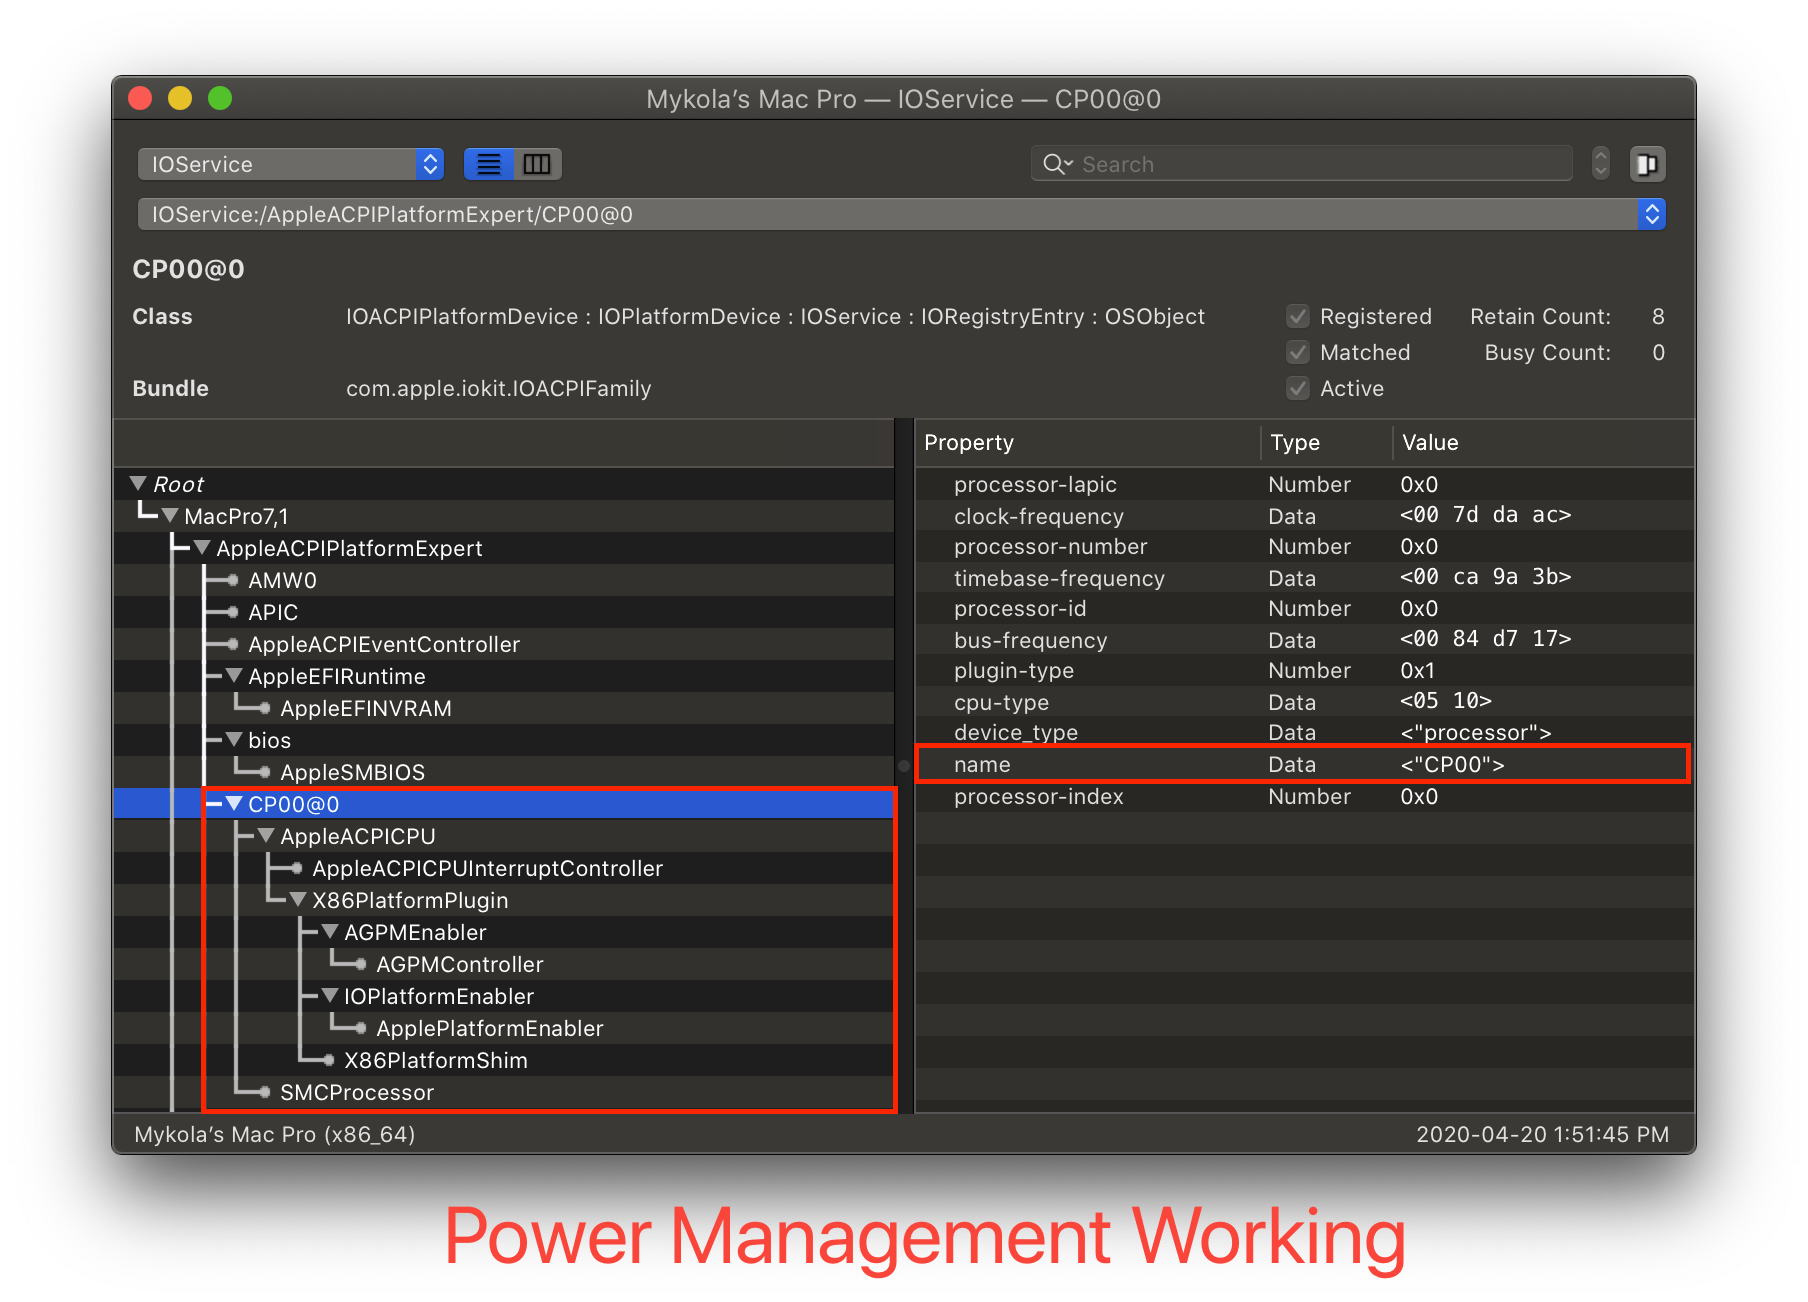
To start, grab IOReg and search for AppleACPICPU.
Warning! Clear the search box after searching to view the child items below.
X86PlatformPlugin Loaded:
X86PlatformPlugin NOT loaded:

As you can see from the top image, we have the X86PlatformPlugin attached meaning Apple's CPU Power Management Drivers are doing their thing. (Note the CPU's name does not matter, CPU names come in many variations such as CP00, CPU0, PR00, etc. What matters is that AppleACPICPU attaches to it). If you get something like to the bottom image, then there's likely an issue. Make sure to check the following:
SSDT-PLUG.aml is both present and enabled in your config.plist and EFI/OC/ACPI
SSDT-PLUG is set to the first thread of your CPU, you can check in IOReg by selecting the first CPU listed (CP00 for our example) and make sure you have this in the properties:
plugin-type | Number | 0x1
Using CPUFriend
First, we need a couple things:
- X86PlatformPlugin Loaded
- CPUFriend Kext.
Make sure you add the kext to your EFI\OC\Kexts and in your
config.plist! (In ProperTree, use ⌘+R to add kexts automatically.) (⌘ is the Windows Key).
LFM: Low Frequency Mode
Run the CPUFriendFriend.command file.

This screen is the LFM Frequency Mode setter. LFM is the lowest speed the CPU will run at. Here, you wanna type in 08 for 800MHz.
EPP: Energy Performance Preference

Next up is the Energy Performance Preference, EPP. This tells macOS how fast to turbo up the CPU to its full clock. 00 will tell macOS to let the CPU go as fast as it can as quickly as it can while FF will tell macOS to take things slowly and let the CPU ramp up over a much longer period of time. Depending on what you're doing and the cooling on your machine, you may want to set something in the middle. Below chart can help out a bit: (I set 7F for Balance Performance but most would want 80 or 90.)
0x00-0x3F Max Performance
0x40-0x7F Balance performance
0x80-0xBF Balance power
0xC0-0xFF Max Power Saving
Performance Bias
 This final entry is to help macOS out what kind of overall performance you'd like from your CPU. The general recommendation depends on your exact setup, and experimenting does help figure out what's best for you. (Personally I set
 05 here but you do you.)
Cleaning up


Once you're finished, you'll be provided with a CPUFriendDataProvider.kext and ssdt_data.aml. Which you choose is your preference but I recommend the kext variant to avoid any headaches with data injection into Windows and Linux.
Now that you're done, you can install the Kext into EFI\OC\Kexts.
ssdt_data.amlusers should add the SSDT toEFI\OC\ACPI.
After you add the kexts, open ProperTree and press ⌘+R to add all Kexts to config.plist.
If you do choose to use
ssdt_data.aml, note thatSSDT-PLUGis no longer needed. However the setup for this SSDT is broken on HEDT platforms like X99 and X299, so we highly recommendSSDT-PLUGwithCPUFriendDataProvider.kextinstead.