KODI - kpa32/retropie-wiki-cn GitHub Wiki

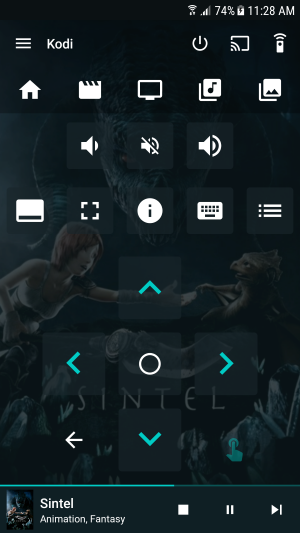
Kodi is a Home Media Server (basically your own personal netflix) formerly known as XBMC. Kodi is currently an optional build that can be installed from the optional menu of the setup script.
See here for more info: http://kodi.tv/
See here for more information on setting up Kodi
Visit the RetroPie-Setup Screen, select Optional Packages, and select Kodi. Installation can take 10 minutes. After installation, you will be able to go to the Ports section and view Kodi as an option.
RetroPie currently installs Kodi 16.1 Jarvis
By default, RetroPie doesn't install any PVRs. If you want to install them, run the following commands in a terminal:
Search available PVRs:
apt-cache search kodi-pvr
Install one PVR, in this case IPTV Simple Client:
sudo apt-get install kodi-pvr-iptvsimple
Install all PVRs:
sudo apt-get install kodi-pvr*
The latest Kodi module (Kodi 16/16.1) includes joypad support by default. Some joypads are detected and work out-of-the-box like PS3, Xbox360, Logitech, Ibuffalo, Retrolink Snes and more. If your joypad doesn't work OOTB or you prefer to add your custom keymap, create the file /home/pi/.kodi/userdata/keymaps/joystick.xml like the following
Example joystick.xml
<?xml version="1.0" encoding="UTF-8"?>
<keymap>
  <global>
    <joystick name="USB gamepad           ">
      <button id="3">Select</button>
      <button id="2">Back</button>
      <axis id="1" limit="+1">Right</axis>
      <axis id="1" limit="-1">Left</axis>
      <axis id="2" limit="-1">Up</axis>
      <axis id="2" limit="+1">Down</axis>
    </joystick>
  </global>
</keymap>
You can see what your joystick name is with cat /proc/bus/input/devices
For more information on how to create your custom keymaps for Kodi, check here
If you are experiencing problems with your Xbox controls, see the following examples and adapt for your version of controller
Recommended Smartphone App to control Kodi: Yatse
The first method here is a cleaner method that wont mess with the RetroPie setup script updates (note that in the future you will have to manually update the es_systems.cfg in .emulationstation as they arent overwritten on updates from RetroPie). Once you've installed kodi from the experimental menu of the setup script, Drop into a terminal with f4 or access the pi over SSH
create an es_systems.cfg file so that kodi will show up in emulationstation
sudo cp /etc/emulationstation/es_systems.cfg /home/pi/.emulationstation/es_systems.cfg
sudo nano /home/pi/.emulationstation/es_systems.cfg
add the following codeblock anywhere after <systemList>:
  <system>
    <fullname>Kodi</fullname>
    <name>kodi</name>
    <path>~/RetroPie/roms/kodi</path>
    <extension>.sh .SH</extension>
    <command>%ROM%</command>
    <platform>kodi</platform>
    <theme>kodi</theme>
  </system>
save you changes with ctrl+x , y , enter
Then make a kodi rom directory
mkdir /home/pi/RetroPie/roms/kodi
make a launch script:
sudo nano /home/pi/RetroPie/roms/kodi/kodi.sh
add the following line:
kodi-standalone
save you changes with ctrl+x , y , enter
make the launch script executable:
sudo chmod +x /home/pi/RetroPie/roms/kodi/kodi.sh
type emulationstation to go back into emulationstation and kodi should be there as its own system.
For more advanced users the following is another method that you can use to set kodi as its own system.
To add the code you have to first make a backup of the current kodi.sh module in /home/pi/RetroPie-Setup/scriptmodules/ports and then replace the contents with the following code block, you will then be able to install kodi from the experimental menu of the setup script like you normally would.
Note that you will need elevated priveleges to make any edits. You can edit the file directly with sudo over SSH or you can see HERE on how to log in as user ROOT in winscp. Note that by editing the aforementioned file you will need to git stash your changes or delete the file before you update the setup script again (after update the setup script the original kodi.sh will be restored)
If you want to setup Kodi as its own system instead of in ports replace the configure function with this:
function configure_kodi() {
    echo 'SUBSYSTEM=="input", GROUP="input", MODE="0660"' > /etc/udev/rules.d/99-input.rules

    mkRomDir "kodi"

    cat > "$romdir/kodi/Kodi.sh" << _EOF_
#!/bin/bash
/opt/retropie/supplementary/runcommand/runcommand.sh 0 "kodi-standalone" "kodi"
_EOF_

    chmod +x "$romdir/kodi/Kodi.sh"

    setESSystem 'Kodi' 'kodi' '~/RetroPie/roms/kodi' '.sh .SH' '%ROM%' 'pc' 'kodi'
}
# Kodi on Raspbian Wheezy
## Black Screen Freeze Fix

If you find yourself having troubles with your screen freezing when you exit kodi, you can replace the code in `/roms/ports/kodi.sh` with

#!/bin/bash

LOG_FILE=$HOME/.kodi/temp/kodi.log

rm $LOG_FILE 2> /dev/null

/usr/lib/kodi/kodi.bin --standalone &

while [[ ! -f $LOG_FILE ]] ; do
  sleep 1s
done

while read line ; do
  if [[ ${line} =~ "application stopped" ]] ; then
    echo "Killing kodi"
    break
  fi
done < <(tail --pid=$$ -f -n0 $LOG_FILE)

killall kodi.bin

fbset -depth 8 && fbset -depth 16

(note there may be some issues with the framebuffer but its the only functioning fix at the moment short of compiling Kodi 15)