Inkscape Decal Walkthrough - jpgerdeman/minifig-svg-decals GitHub Wiki
#Inkscape Decal Walkthrough
Okay let's walk through the process of creating a decal using Inkscape.
I'll assume you have installed a working copy of Inkscape. I'll also assume you have cloned the repository or downloaded and extracted the zip-file. Make sure you have installed the color palette correctly.
Open the file minifig_template.svg from the resources folder and save it as tutorial.svg.
You should now see the inkscape window with the open template in the middle area (the drawing area).
Below the drawing area you'll notice a bunch of colors, this is the color swatch. click on the small triangle all the way to the right and select LegoColors. The swatch at the bottom will now contain the Lego color palette. Hover over the colors to see their names. They should be something like Bright Yellow, Dark Grey and so forth.
Beneath that is the status bar from left to right it contains.
- fill, stroke and opacity settings of the currently selected element.
- visibility, lock and name of the current layer.
- information on how to use the currently selected tool, or what the next expected step from you is.
- the coordinates of the pointer.
- and the current zoom-factor.
Select the bezier tool  or click ctrl+F6. Now click somewhere. Nothing happens. Look at the status bar. The current layer is locked. A locked layer cannot be edited. Click the lock symbol to unlock the layer.
With the bezier tool selected click somewhere. The point where you clicked is marked and a line is drawn between that point and your pointer. Click again to create another point. The tweo points are connected and a line from the new point follows your mouse. This is repeated with every point you select. Hit enter to end editing of the path. A thick solid line now collects all those points you created.
In svg those points are called nodes. Two nodes form a bezier curve. Consecutive bezier curves (multiple nodes) form a path. Those names may sound awkward at first, but you'll get used to them quickly.
Select the select tool  or click F1. Click on your path once. You'll notice a box, the bounding box, appear around your path. Click and hold to drag your path around. Outside the bounding box arrows have appeared. Click an arrow to scale it into the intended direction. Clicking the path again will replace those arrows by another set. These will let you rotate and shear your path.
Select the edit path tool  or by hitting F2. Now select your path again. You'll see small boxes appear where the nodes are. You can drag those boxes around and the connecting curves will folow. Hover over a curve will make a hand appear along side your icon. This allows you to drag around the curve. The nodes won't move but you can now change the curvature of the bezier curve. Antenna should have appeared at the nodes belonging to the curve you manipulated. These are xontrol points. you can move them around to exert finer control over the curve.
With the basics out of the way we can now dive right into creating decals. Delete your line and lock the layer agin.
Start by adding a new layer below the current layer. Let's call it reference. Take the minifig reference picture you've prepared and drag it into Inkscape, choosing embeded when asked. Images can be linked, meaning the svg notes the location. Embedding copies the picture into the svg, so if you ever change the location of files, you don't have to worry about broken image links.
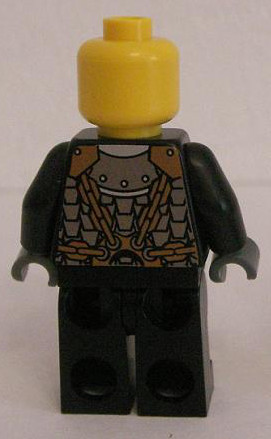
I'll be using this dragon knight from the Lego Kingdom Chess Set as reference, which Stiel from Eurobricks allowed me to use.
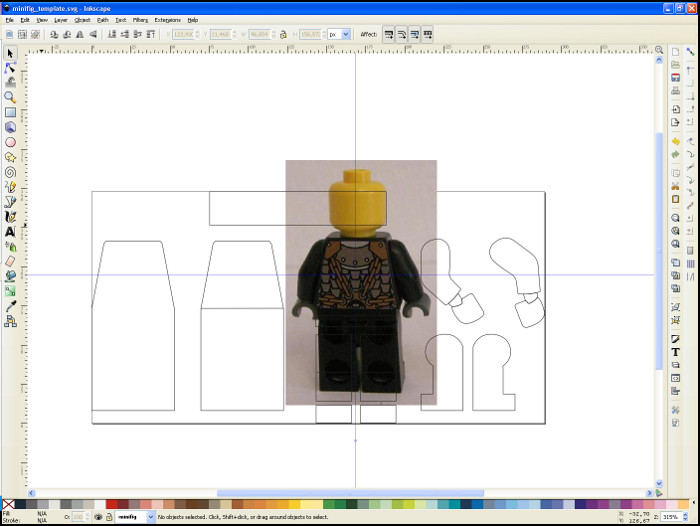
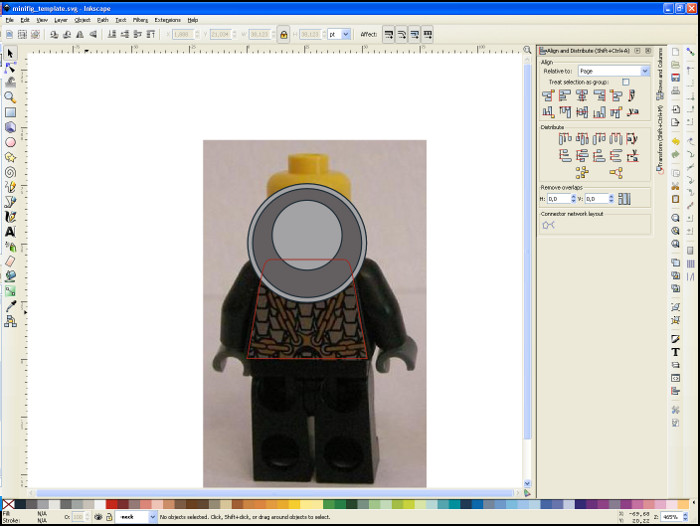
Use the select tool to resize it until the torso of your reference fills out the torso of the template. Hold down the ctrl button to scale it with ratios locked. Hold down shift to scale it around it's center. The combination of both ctrl and shift works as expected.
Your workspace now should look like this
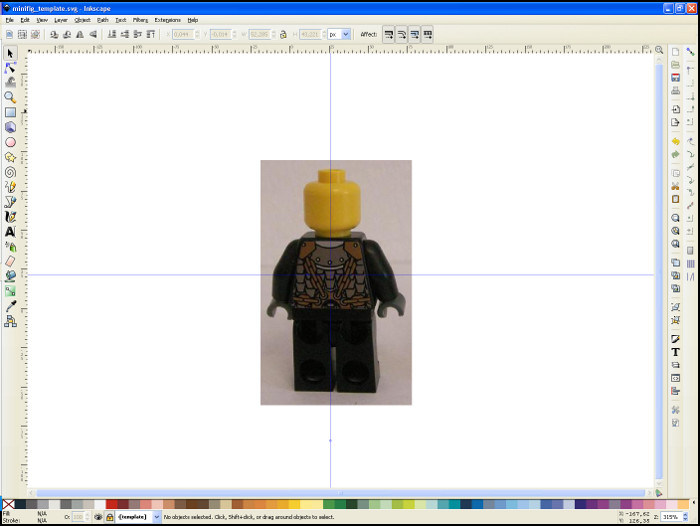
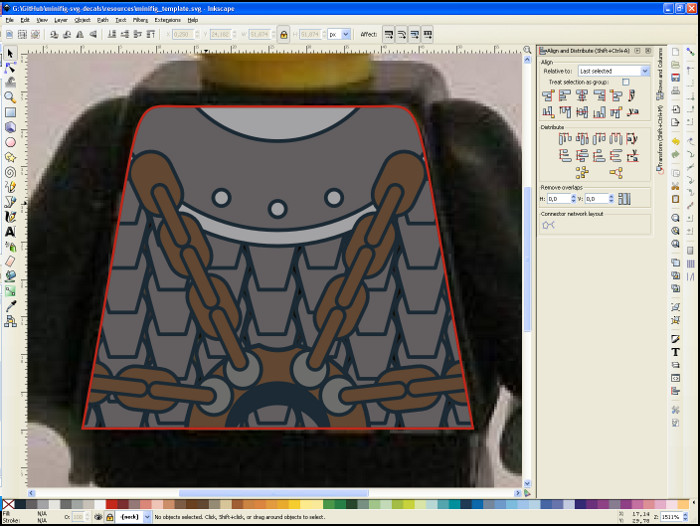
This step is optional, but I like working in a clutter free environment. Lock the reference layer and unlock the template layer delete everything except for the torso template. Select the torso template and goto File > document properties and resize the document to the selected content. Your workspace now should look like this.
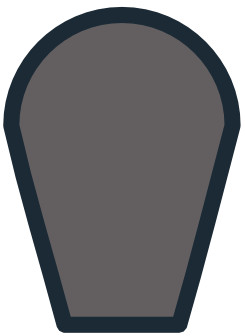
Looking at that, the torso template is hard to see. With the torso selected right click on the bright red color in the swatch and select set as stroke.

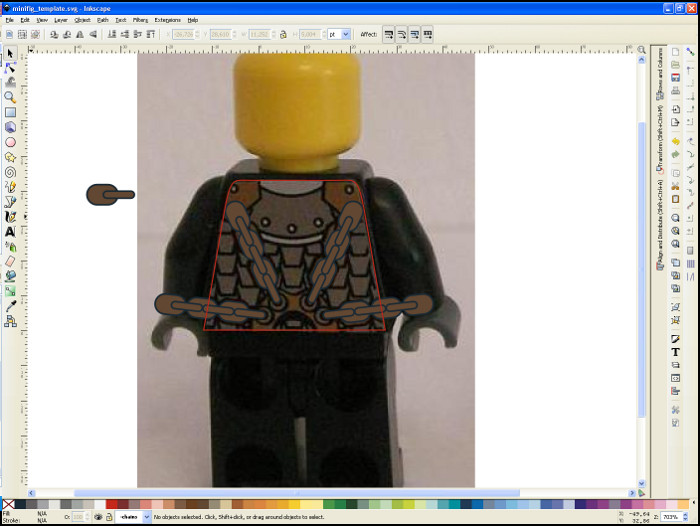
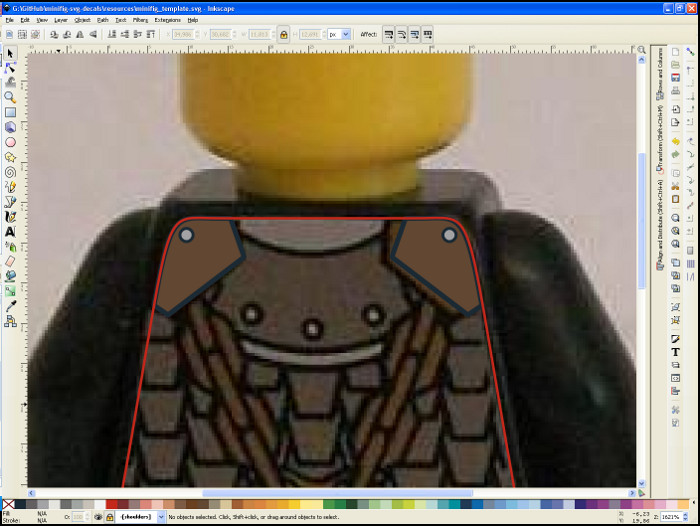
Now lock the reference layer and create a new one called minifig. This layer should be between the reference and the template layers. Now push 5 or click  . This will make the page fill out the drawing area. Take a minute and have a good look at that figure. It consist of an scale armor, chains connected to a center piece, a neck piece and shoulder pieces. We'll tackle these individualy and start with the armor.
Looking at the armor it consists of overlapping scales; flat at the bottom but rounded at the top and mirrored along the vertical axis. So what we need to do first is to draw a scale. Zoom in until one of the scales fills your drawing area. Start by drawing a circle (push F5 or click  ) hold down ctrl to make it a perfect circle. After some experimenting I ended up with a circle that is 6pt high and 6pt wide. Make sure that it is centered on one of the scales.
Now switch to the bezier tool. For the next part you want to hold down the ctrl button. Holding down the ctrl button will limit you to the horizontal or vertical axis or to steps of 15 degrees between them. From the center of the circle go left and set a node on the circle path. go down in a 15 degree angle and put a node on the corner of the scale. The next point goes to the right (a bit over the scales middle) and ends at the first node. Duplicate this path by hitting ctrl + d. Now flip it horizontally by pushing h. Move the duplicate to the left holding down ctrl. The duplicate should touch the circle's path just like the originasl does. Select both the duplicate and the original by holding down shift. Use ctrl + (ctrl and the plus sign) to join them.
Using this mirror technique here is abit superfluous, but it's a neat technique to have anyway. With the ctrl button pressed it should be easy to draw that parallelogram by hand.
Make sure the parallelogram is also 6pt wide. Select the parallelogram and the circle. Open Object > Align and Distribute. Set "Relative to:" to selection and center the two elements on their vertical axis. Then join your elements to finish the form of the scale. Open the format toolbox by hitting ctrl+shift+f and set the stroke style width to 0.4pt and the join to round. Using the swatch set the stroke color to black and set the fill to dark stone gray.
Your scale should look close to this
[b]Tip:[/b] Lego rarely uses sharp edges. Usually corners are rounded. This give the decals a soft and friendly touch.
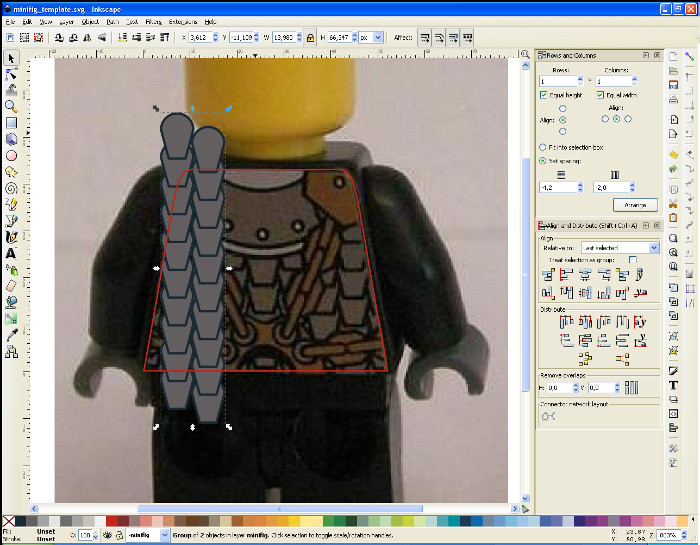
Make 9 copies of the scale, so you end up with a total of 10 scales. Select them all by clicking on a free space and while holding the left mouse button drag a box around your scales. This is called multi-select.
Go to Object > Row and Columns. We want to create a column of 10 rows. Hit arrange. Your scales are probably spaced incorrectly adjust the soacing and arrange them again. Repeat until you have the desired result. For me a vertical spacing of -4.2 did it.
If youre scales are stacked incorrectly choose one after the other and use the stacking tools  to stack them correctly. It's probably easiest to select the last scale an put it all the way in front and work your way up. Select all scales and push ctr + g to group them.
By grouping elements together they will act as a single element. This is useful if you have different elements that should stay together, like our scales.
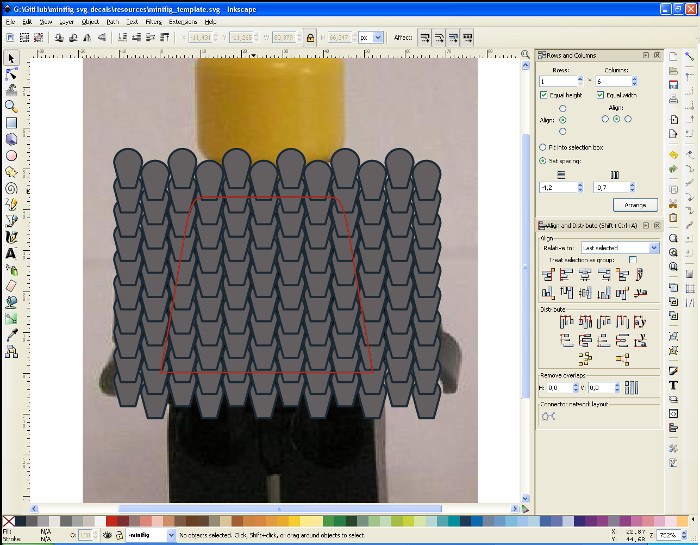
We have our first row of scales. Now let's look at the next. The next uses the same scales and the same vertical distance. However the scales are moved down and to the left. Duplicate our scale group and place the duplicate so it matches the second row.
Select both groups of scales and group them together. Create 5 duplicate of this group. Go back to the Rows and Columns tool. We are now trying to align them in 1 row and 6 columns. Again play with the spacing until you have the desired result.
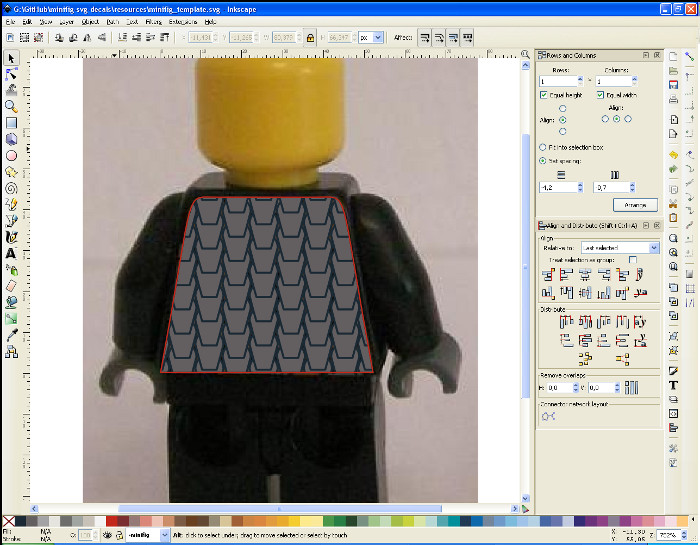
We got the scales all done. But we have more than we need. For this we are going to clip the scales to the form of the torso. Select all scale groups and group them. Groups are really handy as you notice.
Open the layer dialog with ctrl + shift + l (l like layer). Adjust the opacity of the minifig layer to 50% and correct the placement of your scales if you want to. Set the opacity back to 100%.
Unlock the template layer and duplicate the torso template and push the duplicate to the layer below (the minifig layer) by pushing shift + pgdwn. Lock the template layer again. Set the fill of the torso template duplicate to pure white. To do this select the duplicate and push ctrl+shift+f to open the format dialog. Set the hex value of the fill to ffffffff (that are 8 f).
Now select the scales and the duplicate. The object on top (our torso duplicate) will act as mask for the element below it (the scales). Go to Object > Mask > Set.
Now that the scales are done we should move on to the chains. But we can't make out the reference image anymore. We could adjust the layer's opacity, but all those lines are gonna be confusing. In the layer dialog select the minifig layer and right click on it. Select to add a layer, name it scales and position it as a sublayer of the current layer.
Select the scales and push shift + pgdwn to move them to the scales layer. Lock the scales layer and toggle its visibility (the eye) to hide it. With the scales layer still selected add a chains layer above it. Your layers should now be stacked like this:
+template
+minifig
+-+chains
+-+scales
+reference
Look at the four chains on the torso. All for are the same except for length. So we can reduce our problem to creating a single chain and then duplicating it. Great, that will save us a lot of work. So pick a chain and get to work. Knowing that the tools in Inkscape work best with horizinal or vertical images I'll ignore the diagonal ones and pick the right one as my template.
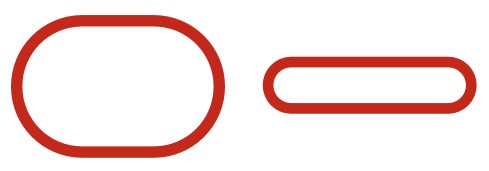
Now look at that chain. It consists of two type of links that are repetitive. Also both links seem to be rectangles with rounded corners. So we can reduce our four chains to two links, which are simple shapes. That's awesome. The two links are the one flat on the minifigs back and the one rotated 90 degrees to his back.
Push F4 or click  to change to the rectangle tool. Now draw a rectangle that is about the size of a flat link. Once your done you'll see that the rectangle is defined by two nodes (the squares in the corners) and that the corner radius is defined by manipulating those round markers in one of the other corners. The two links I created look the following. for me they are both 7.5pt wide, one is 5pt high the other 2pt. The stroke is 0.4pt wide. It's important to make both the same width. Otherwise we'll get gaps or overlaps once we start to repeat them. The two links also represent two rotations of the same links. Naturally they are the same length.
Select both chain links and using the Align and Distribute dialog center them both vertical and horizontal. The Links now sit on each other. Select the rotated link and open Object > Transform. This dialog let's you do the same as the select and transform tool, but you have much finer control. Move the rotated link half a link width along the horizontal axis. Select both links and start playing with the colors. I used black as stroke and earth orange as fill. Group both links together.
Basically we can just repeat the same we did with the scales, but I want to show you an alternative, that could be handy to know. Move our chain prototype out of the picture and clone it by pushing alt + d or by clicking  . Move the clone away from the prototype and create two more clones. The longest chain on the torso seems to be just that long. We'll ignore the prototype for now. Select the clones and using the Row and Columns tool align them into a chain. Just like we did the scales. I used 1 row and 3 columns and set the horizontal spacing to -5.0 (the width of a link). Group the links.

Go back to the link prototypes and change the color and resize them. See what the chain does? Everything you do to the prototype is applied to all clones. A nifty tool to have in ones arsenal. Imagine we would have done that to the scales. Changing the scale prototype would change all scales. It would be ridiculously easy to change all scales to ovals or squares, to make it silver or white. That is a powerful technique!
Back to the chains. Rotate your chain with the select tool to match the first chain. Clone it and match that to the chain going up the minifigs back. Select both chains, clone them and flip the horizontally and lay them over the other two chains.
We flip the clones horizontally instead of aligning them by hand for two reasons. The fist is that it is obviously easier for us. The second and more important reason is that the original artist intended the torso to be mirrored horizontally. So if the chains don't match the picture 100% don't worry. No reference image is perfect (though this is pretty close). We want to match the original artists intention not the lines on the torso.
It seems I made the links too small. I wont bother correcting it for this tutorial. If it bothers you then do correct it.
Tip: If you click on the chain twice using the select tool (don't double click!) you can rotate it. Look at the center of the chain. There is a crosshair, that is the center of rotation. Drag it to the tip of the chain, to rotate it around that point. This will make aligning the chain easier.
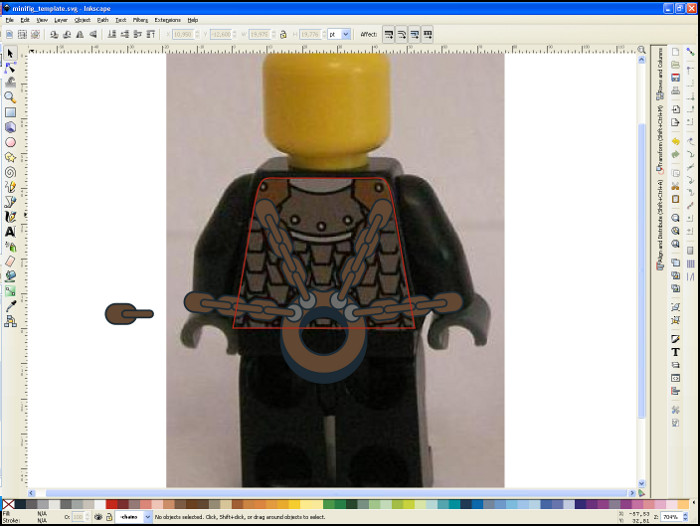
Let's take care of the centerpiece all chains are connected to. Its a half ring with four circles on it. Also there is a dent at the top and a thick shadow underneath. Let's start with the smaller circles. Using the circle tool create a circle (hold ctrl so it's an actual circle and no oval) and place it underneath the first chain. Copy it three times and put them under the other chains. This isn't a very acurate method. But it's okay. If we'd been smart we'd made that circle part of the chain. Oh, well.
Draw another circle to match the inner radius of the ring. Copy it and holding ctrl and shift resize the copy to match the outer circle. Use the stacking tools to put it behind the first circle. Select both and push ctrl + - (ctrl and minus) This will subtract the upper path from the lower. We just created our basic ring shape. Set the opacity of the layer to 50% so we can start working on that dent.
Looking at the dent. I think it's just a oval tha was subtracted from the ring. So using the circle tool draw an oval that matches the dent. Before subtracting the dent center the oval along the rings horizontal axis using the Align and Distribute tool. Now subtract the oval from the ring.
Now we'll take care of that shadow. Copy the ring and set the fill of the copy to black and move it down the vertical axis a bit (holding ctrl will make it easier). Now stack the black ring behind the other. Select everything (except for the chain prototype) and group it. Set the layers opacity back to 100%.
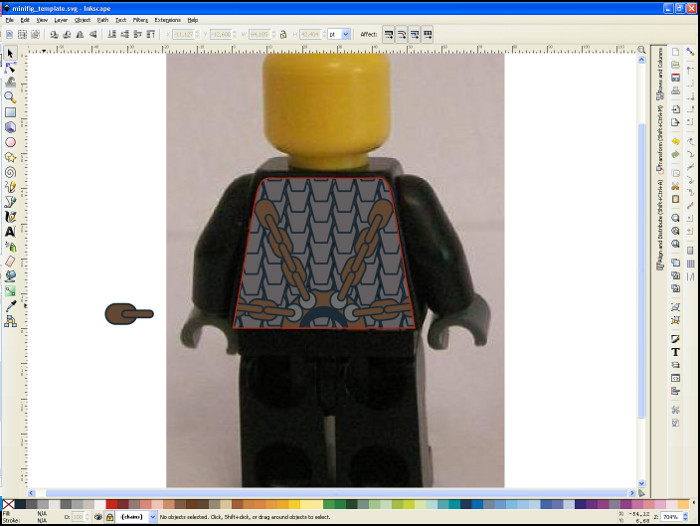
Clip the chains along the torso as we did before. Copy the torso template, move it to the chains layer, set the fill to perfect white (ffffffff) and slect both the chains and the mask. Object > Mask > Set
Lock the chain layer and create another one between the chains layer and the scales layer. Call it neck.
Now look at the neck armor. Those dents' on the sides are part of the chains. If we ignore them, the neck armor seems to consist of three concentrical circles. Three more circle act as bolts.
Set the layers opacity to 50% and draw a circle holding down ctrl. The circle should match the curvature of the lowest outline. Mine ended up being 1.5pt in diameter. copy the circle and holding down ctrl + shift match the copy to the second outline. Repeat for the third. Hm. Seems that third circle isn't concentric after all. Draw the circle large enough to match the curvature and place it correctly.
Select all three circles and center them horizontaly relative to the page. Since we fit the page to the torso template this will center it on the torso. If the circles don't line up with the lines anymore, don't worry. No reference image is perfect (though this is pretty close). Don't worry about the lines too much, concentrate on the origonal artists inention. Now set the stroke of all three circles to 0.4pt black and choose appropriate fill colors.
With the layers transparency still set to 50% draw the bolts. Select all six circles and group them. Mask them the same way we did the scales and chains.
Create another layer called shoulders. It should be just above the chains layer.
+template
+minifig
+-+shoulders
+-+chains
+-+neck
+-+scales
+reference
Lock and hide all minifig sublayers except for shoulders. Looking at the shoulder pads, they seem to be part of pentagons standing on their tip. But just using the bezier tool for the shoulders is perfectly valid.
So click  and create a pentagon. The star tool allows you to set the number of tips as well as ratios and curvatures. It's a good tool and you should know it. The number of tips is 5 and also set the shape to regular polygon. These settings can be found above the drawing area once you have the star tool selected.
Once you have your pentagon and placed it correctly unlock the template layer. Duplicate the torso template. Choose the duplicate and your pentagon. Push ctrl + shift + + (ctrl, shift and plus) to create an intersection of the two paths. I set the stroke of this new path tp 0.5pt black and the fill to earth orange.
Lock the template layer and set the opacity of the shoulder layer to 50%. draw the bolt on the shoulder pad. Select both the shoulder pad and the bolt and duplicat them. Flip the duplicate horizontally and place it on the other shoulder.
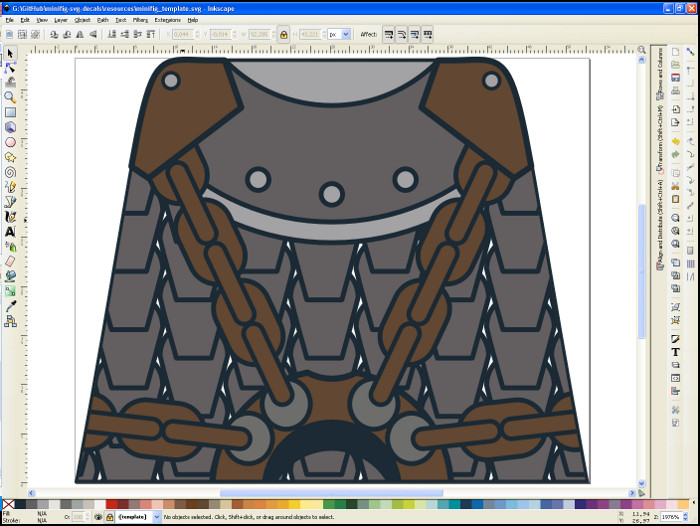
Hide the reference layer and change the color of the torso template to black. Make all the minifig layers visible again.
If you haven't done so yet. Save! You should've saved after each larger step. Hitting the save button often is a sign of wisdom.
Go to File > Export Bitmap. Select page and set the dpi to 600 or 1200. I'm usually not that wise and set the width to 1000px. Export it and you are done with your first decal.
Well this tutorial hopefully showed you the basics of creating a decal with inkscape. Of course there is a lot more to it, but we covered the basics. If you want to continue making decals then experiment with all the tools, filers and extensions inkscape has to offer. I'd start with the edit nodes command. We barely touched it, even though it's probably the most useful tool.
Looking at the decal we made I'm not really satisfied. The scales are too far left. The links of the chains too small. The dent in the chain center piece doesn't seem big enough and the shadow goes down too far. Also the shoulders weren't based on pentagons after all. It actually is a stretched hexagon. Finally I'd stack a copy of the torso template behind the scales and fill it black.