Team_Website - johnelwart/Projects GitHub Wiki
For this lab there were three main software components that we used: Hypertext Markup Language (HTML) and Cascading Style Sheets (CSS), CommentBox, and Heroku. HTML and CSS were used to design and connect the static web pages together. CommentBox was used to implement a comment box feature at the bottom of every personal profile page. Heroku was used to publish this site publicly for anyone to see and use.
Setting up the HTML and CSS styling was a slight learning curve for everyone. By following YouTube tutorials and reading articles on CSS, it was simple designing our website flow and layout. There are six HTML files (home.html, about.html, isaac.html, john.html, pamela.html, and mitch.html) and one CSS file (style.css). There is an extra HTML file (index.html) and an extra CSS file (main.css) as well. These two files were not associated with our final webpage; instead, they were used as practice to understand how HTML and CSS work.
In the home.html, you are introduced to Team Binary Beasts. There is a “Learn More” button that navigates you to the “About the Binary Beasts” page, or you can navigate to this page by clicking “About” on the navigation bar in the upper right corner. When you scroll down on the home page, you can click on any team member’s photo to navigate to their respective page. You can also click on the media icons in the footer to navigate to the Iowa engineering social media pages.

Figure 1: Home page
<body>
<section class="header">
    <nav>
        <a href="home.html"><img src="./images/logo.png"></a>
        <div class="nav-links">
            <ul>
                <li><a href="about.html">ABOUT</a></li>
            </ul>
        </div>
    </nav>
<div class="text-box">
    <h1>Team Binary Beasts</h1>
    <a href="about.html" class="hero-btn">Learn More</a>
</div>
</section>
Figure 2: HTML code for the navigation bar and home page image with "Learn More" button

Figure 3: home page continued on scroll down
<section class="about">
    <h1>Meet the Team</h1>
    <h3>Click on a team member to learn more</h3>
    <div class="space"></div>
    <div class="row">
        <div class="pfp isaac">
            <a href="isaac.html">
                <img src="./images/isaac.JPG">
            </a>
        </div>
        <div class="pfp john">
            <a href="john.html">
                <img src="./images/john.JPG">
            </a>
        </div>
        <div class="pfp pamela">
            <a href="pamela.html">
                <img src="./images/pamela.JPG">
            </a>
        </div>
        <div class="pfp mitch">
            <a href="mitch.html">
                <img src="./images/mitch.JPG">
            </a>
        </div>
    </div>
    <div class="space"></div>
    <div class="space"></div>
</section>
Figure 4: HTML code for the "Meet the Team" row that displays each team member
<section class="footer">
    <div class="icons">
        <a href="https://www.facebook.com/UIowaEngineering/" style="text-decoration:none;">
            <i class="fa fa-facebook"></i>
        </a>
        <a href="https://www.twitter.com/UIowaEngr/" style="text-decoration:none;">
            <i class="fa fa-twitter"></i>
        </a>
        <a href="https://www.instagram.com/uiowa_engineering/" style="text-decoration:none;">
            <i class="fa fa-instagram"></i>
        </a>
        <a href="https://www.linkedin.com/school/the-university-of-iowa---college-of-engineering/" style="text-decoration:none;">
            <i class="fa fa-linkedin"></i>
        </a>
    </div>
    <p>Made with <i class="fa fa-heart-o"></i> by Team Binary Beasts</p>
</section>
Figure 5: HTML code for the footer of the home page with media icons
/* background image */
.header{
    background-image: url('./images/homepage.jpg');
    background-position: center;
    background-size: cover;
    background-repeat: no-repeat;
    height: 100vh;
    position: relative;
}
Figure 6: CSS styling for the home page image
/* making the button to 'Learn More' look like an actual button and not just a hyperlink */
.hero-btn{
    display: inline-block;
    text-decoration: none;
    color: #fff;
    border: 1px solid #fff;
    padding: 12px 34px;
    font-size: 16px;
    background: transparent;
    position: relative;
    cursor: pointer;
}
/* creating an effect to change color of button when you hover the mouse over it */
.hero-btn:hover{
    border: 1px solid #f5f0ae;
    background: #f5dfae;
    transition: 1s;
}
Figure 7: CSS styling for the "Learn more" button
/* logo image in corner */
nav img{
    width: 70px;
    height: 70px;
    position: absolute;
    top: 0;
    left: 0;
    padding: 2% 2%;
    filter: invert(100%);
}
.nav-links{
    flex: 1;
    text-align: right;
}

.nav-links ul li{
    list-style: none;
    display: inline-block;
    padding: 8px 12px;
    position: relative;
}

/* color and font of 'HOME' and 'ABOUT' on nav bar */
.nav-links ul li a{
    color: #fff;
    text-decoration: none;
    font-size: 16px;
}
/* bottom line that appears under 'HOME' and 'ABOUT' on nav bar */
.nav-links ul li::after{
    content: '';
    width: 0%;
    height: 2px;
    background: #f5dfae;
    display: block;
    margin: auto;
    transition: 0.5s;
}
/* have bottom line appear only if you hover over 'HOME' or 'ABOUT' on nav bar */
.nav-links ul li:hover::after{
    width: 100%;
}
.nav-links-isaac{
    flex: 1;
    text-align: right;
}
Figure 8: CSS styling for the navigation bar
In the about.html, there is code regarding the team as a whole. There is a small paragraph on the page that describes the team. Again, you may click on any team member’s photo to navigate to their respective page. On the about page and each individual team member’s page, you can navigate back to the home page in two ways. One way is by clicking the team logo in the upper left corner. Another way is by clicking “Home” on the navigation bar in the upper right corner.
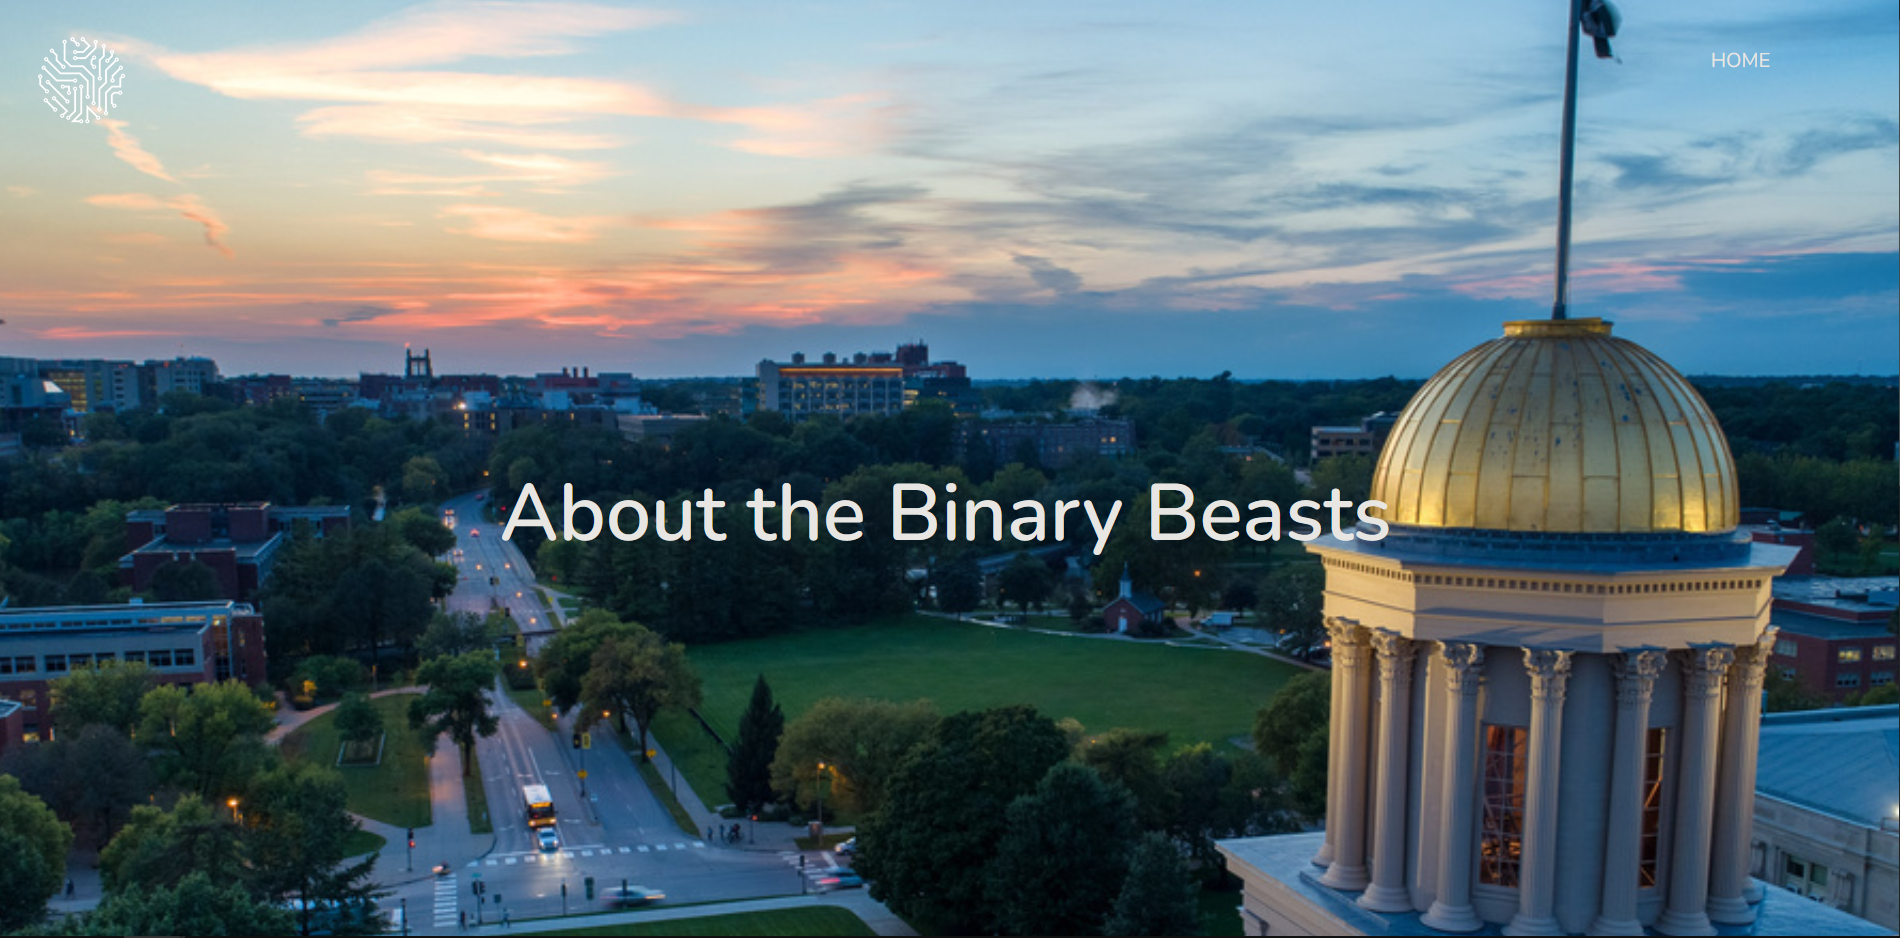
Figure 9: About page
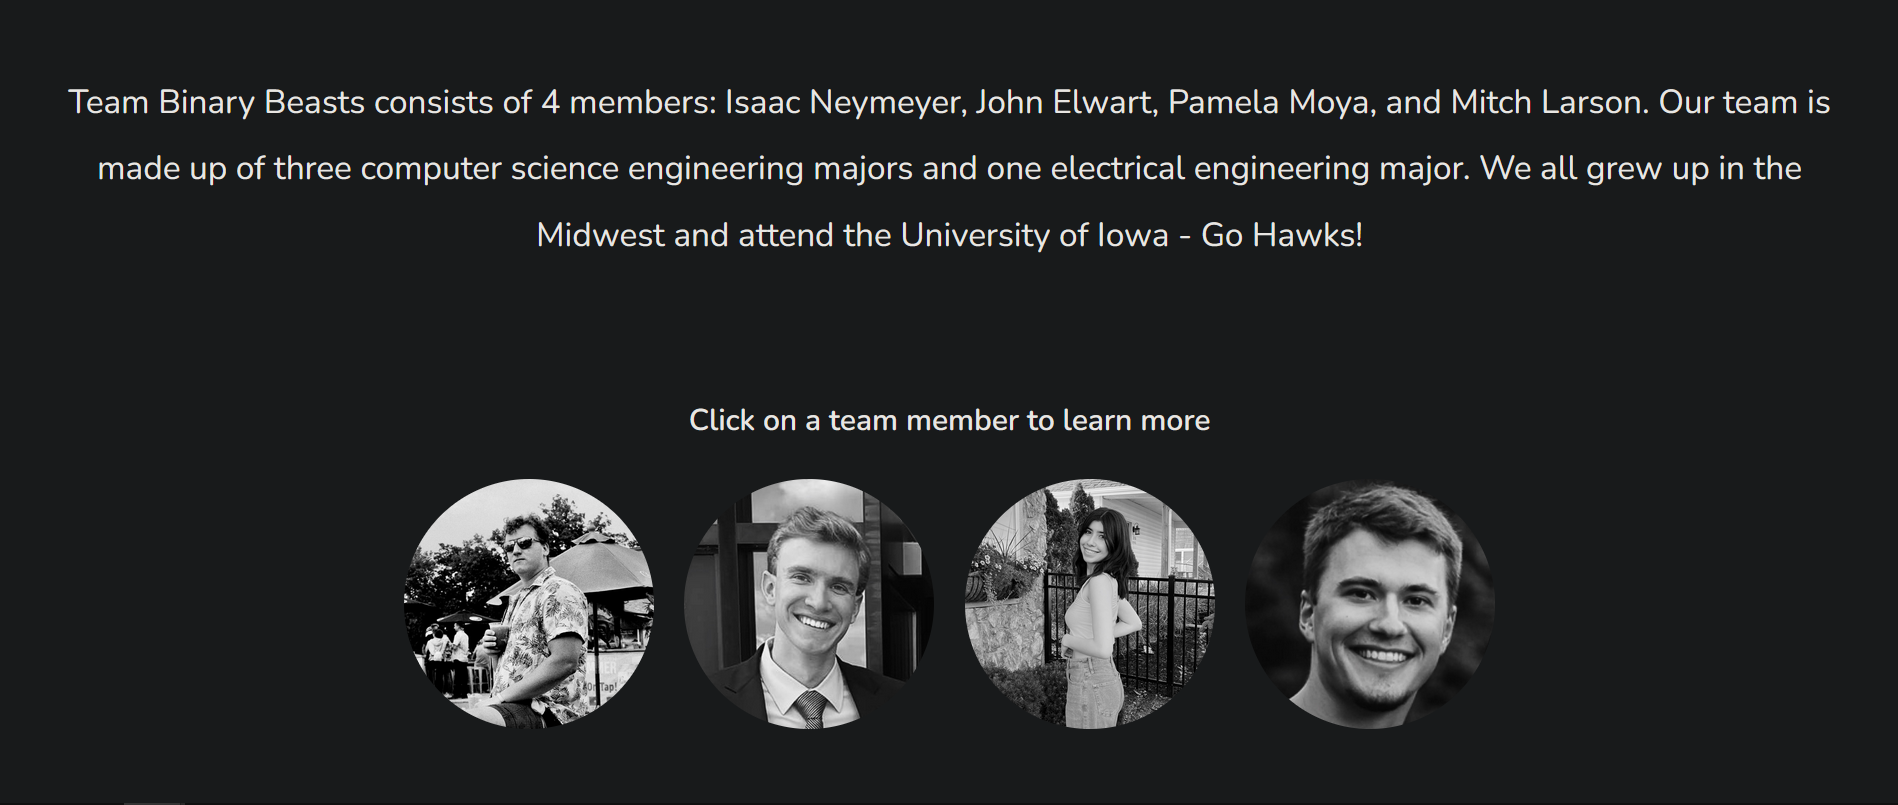
Figure 10: About page continued on scroll down
<section class="aboutheader">
    <nav>
        <a href="home.html"><img src="./images/logo.png"></a>
        <div class="nav-links">
            <ul>
                <li><a href="home.html">HOME</a></li>
            </ul>
        </div>
    </nav>
<div class="text-box">
    <h1>About the Binary Beasts</h1>
</div>
</section>

<section>
    <div class="container">
        <div class="text">
            Team Binary Beasts consists of 4 members: Isaac Neymeyer, John Elwart, Pamela Moya, and Mitch Larson. Our team is made up of three
            computer science engineering majors and one electrical engineering major. We all grew up in the Midwest and attend the University of Iowa -
            Go Hawks!
        </div>
        <div class="clear"></div>
    </div>
</section>

<section class="about">
    <h2>Click on a team member to learn more</h2>
    <div class="space"></div>
    <div class="row">
        <div class="pfp isaac">
            <a href="isaac.html">
                <img src="./images/isaac.JPG">
            </a>
        </div>
        <div class="pfp john">
            <a href="john.html">
                <img src="./images/john.JPG">
            </a>
        </div>
        <div class="pfp pamela">
            <a href="pamela.html">
                <img src="./images/pamela.JPG">
            </a>
        </div>
        <div class="pfp mitch">
            <a href="mitch.html">
                <img src="./images/mitch.JPG">
            </a>
        </div>
    </div>
    <div class="space"></div>
    <div class="space"></div>
</section>
Figure 11: HTML code for the about page
<style>
     .container {
          display:table;
          width:100%;
          height:auto;
          margin:10px 0px;
      }
      .container .text {
          display: table-cell;
          height:100%;
          vertical-align:middle;
          text-align: center;
          padding-top: 3%;
          padding-left: 3%;
          padding-right: 3%;
          padding-bottom: 3%;
          color: black;
          font-size: 20pt;
          line-height: 2;
      }
</style>
Figure 12: CSS styling for the about page
In the isaac.html, john.html, pamela.html, and mitch.html, there is code for each individual team member’s page. The only difference between the four is the content displayed on the page: the header image, the embedded pictures, and the text descriptions that go with those pictures. For this report, the example that will be used is John’s page.
When you navigate to John’s page, you are greeted with a small description of John: his major, hometown, and interests. When you scroll down, you can read through his interests and view the embedded pictures to go along with them. At the bottom of the page, you can comment your thoughts. Again, you can navigate to the home and about pages by utilizing the navigation bar.
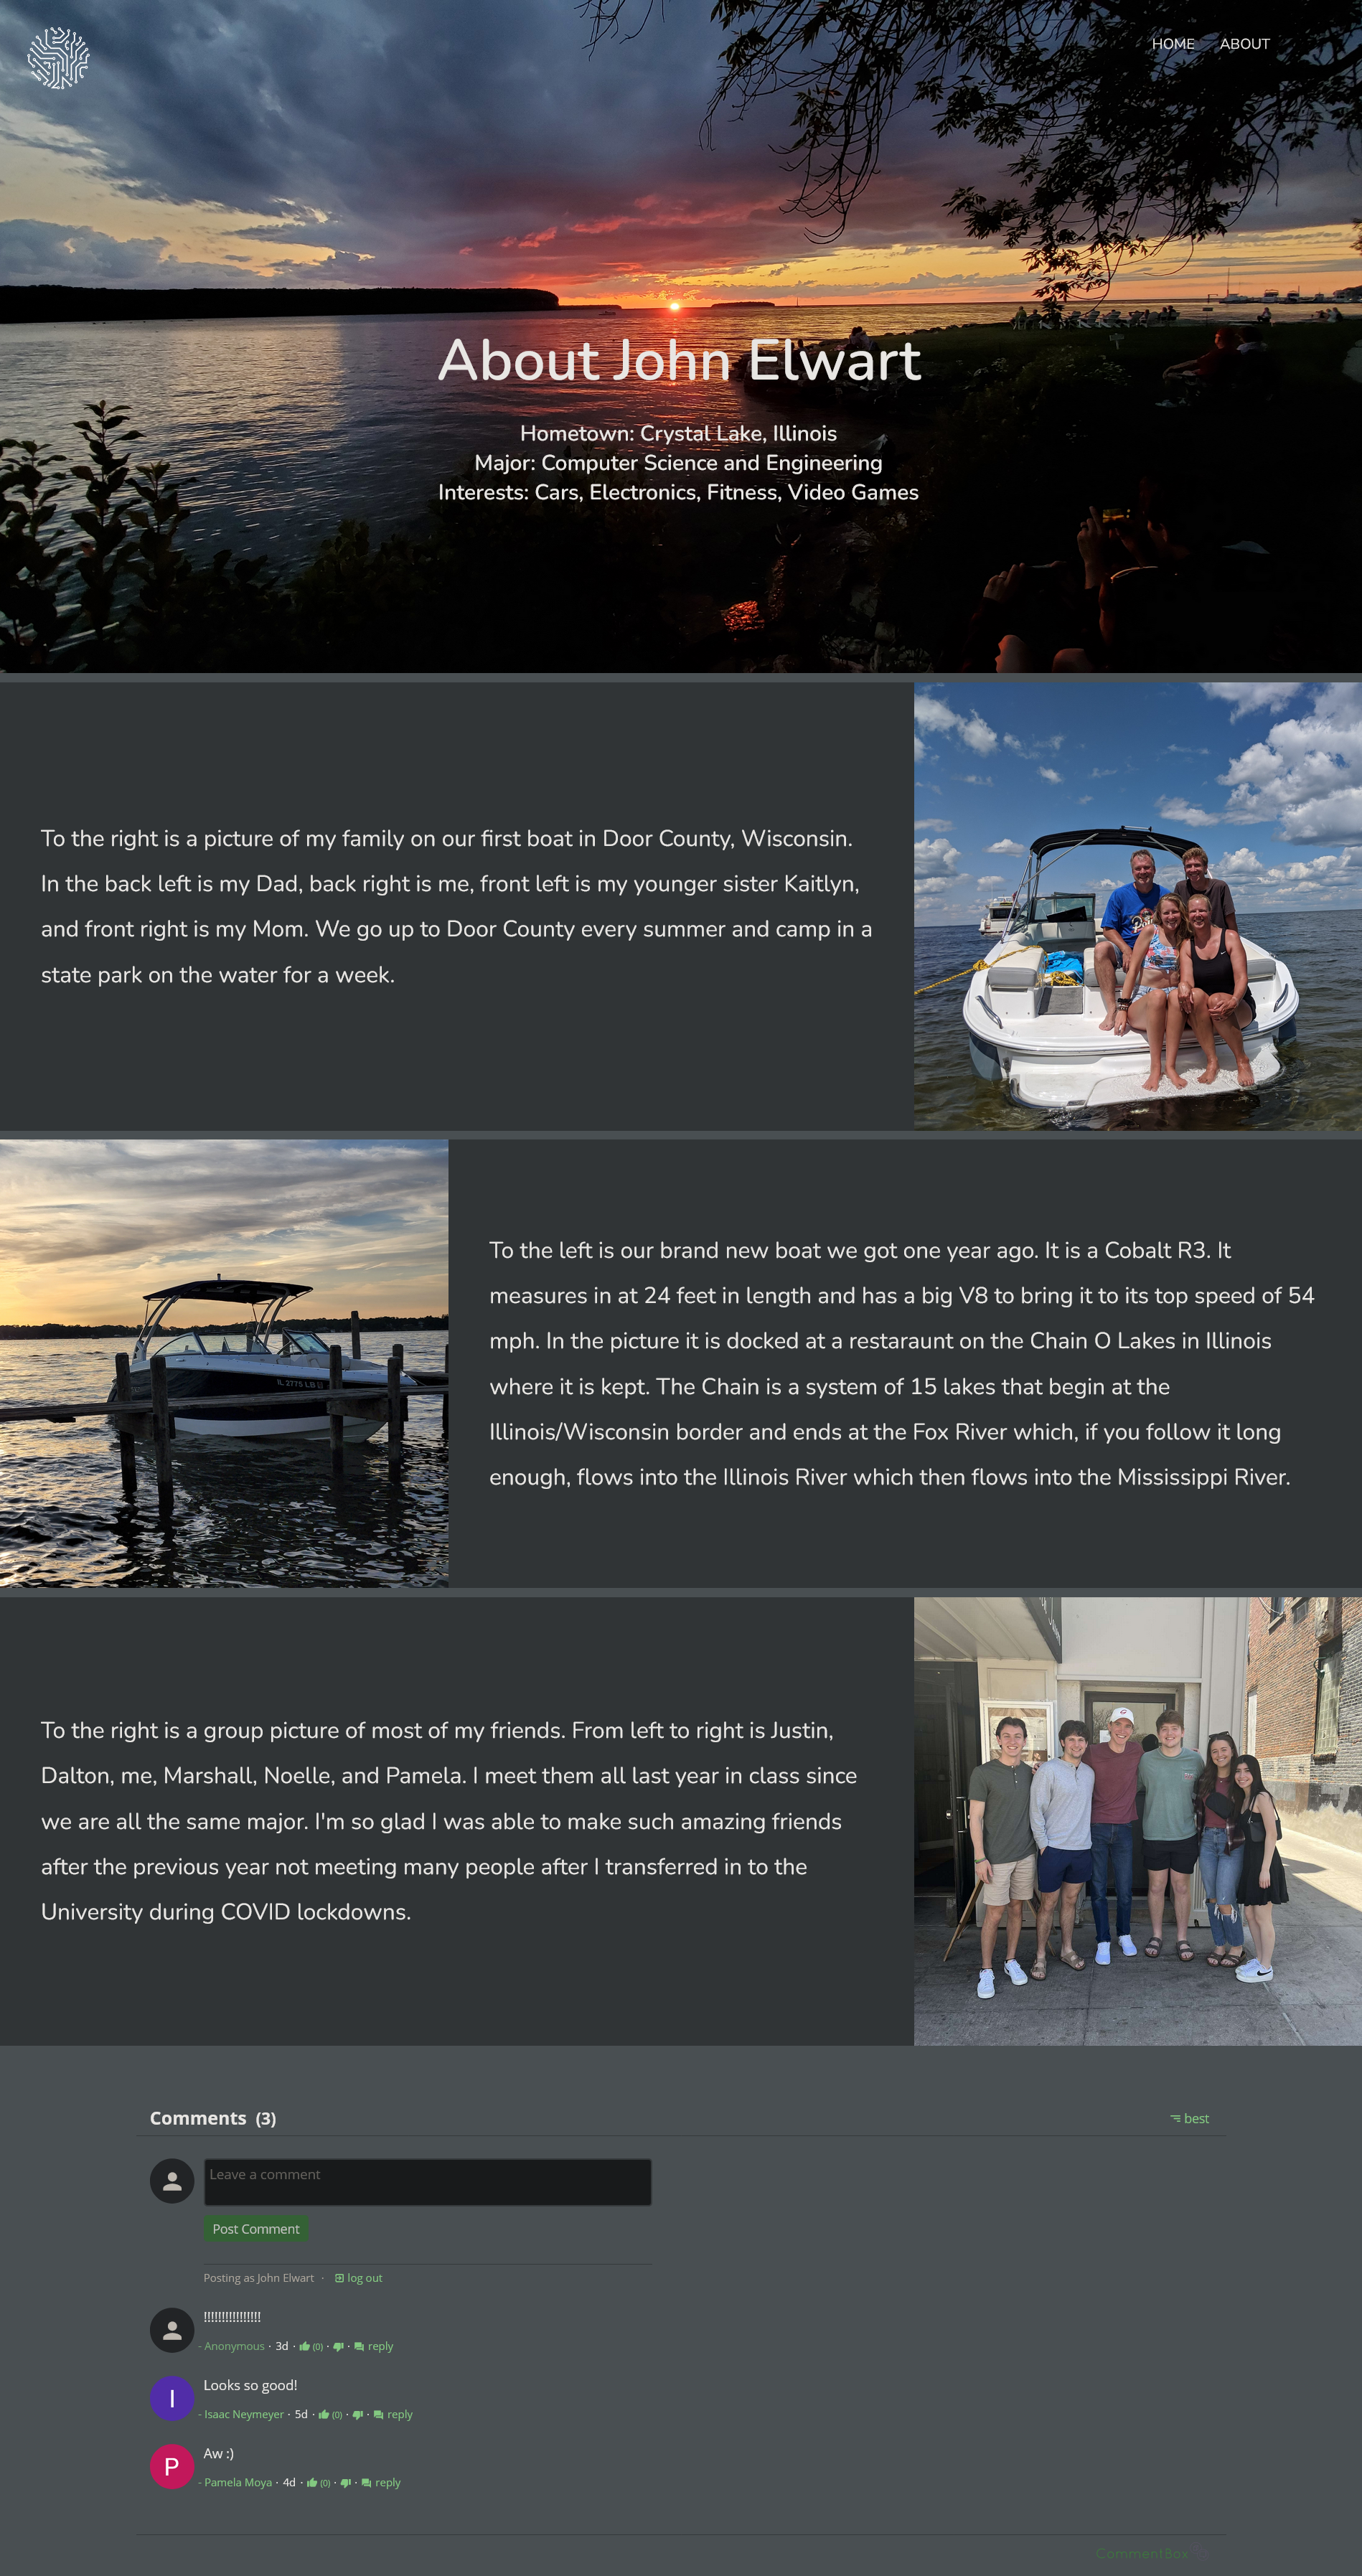
Figure 13: Johns personal page including the CommentBox feature
<section class="johnheader">
    <nav>
        <a href="home.html"><img src="./images/logo.png"></a>
        <div class="nav-links">
            <ul>
                <li><a href="home.html">HOME</a></li>
                <li><a href="about.html">ABOUT</a></li>
            </ul>
        </div>
    </nav>
    <div class="text-box">
        <h1>About John Elwart</h1>
        <br>
        <h2>Hometown: Crystal Lake, Illinois</h2>
        <h2>Major: Computer Science and Engineering</h2>
        <h2>Interests: Cars, Electronics, Fitness, Video Games</h2>
    </div>
</section>
Figure 14: HTML code for Johns header
<section>
    <div class="container">
        <div class="text">
            To the right is a picture of my family on our first boat
            in Door County, Wisconsin. In the back left is my Dad, back right is me,
            front left is my younger sister Kaitlyn, and front right is my Mom. We go up
            to Door County every summer and camp in a state park on the water for a week.
        </div>
        <img src="./images/johnfamily.jpg"/>
        <div class="clear"></div>
    </div>
</section>
<section>
    <div class="container1">
        <img src="./images/johnboat.jpg"/>
        <div class="text">
            To the left is our brand new boat we got one year ago. It is a Cobalt R3. It measures in
            at 24 feet in length and has a big V8 to bring it to its top speed of 54 mph. In the
            picture it is docked at a restaraunt on the Chain O Lakes in Illinois where it is kept.
            The Chain is a system of 15 lakes that begin at the Illinois/Wisconsin border and ends at the Fox River
            which, if you follow it long enough, flows into the Illinois River which then flows into the
            Mississippi River.
        </div>
        <div class="clear"></div>
    </div>
</section>
<section>
    <div class="container2">
        <div class="text">
            To the right is a group picture of most of my friends. From left to right is Justin, Dalton, me, Marshall, Noelle, and Pamela.
            I meet them all last year in class since we are all the same major. Im so glad I was able to make such amazing friends after the
            previous ywar not meeting many people after I transferred in to the University during COVID lockdowns.
        </div>
        <img src="./images/johnfriends.jpg"/>
        <div class="clear"></div>
    </div>
</section>
<section class="comment">
    <div class="commentbox"></div>
    <script src="https://unpkg.com/commentbox.io/dist/commentBox.min.js"></script>
    <script>commentBox('5659520256704512-proj')</script>
</section>
Figure 15: HTML code for Johns text descriptions, embedded figures, and CommentBox
The first step of setting up the comment feature was setting up a new project on the commentbox.io website. To do this you had to pick a name for your project, enter the domain of the project, and then choose how you wanted comments approved (automatically or manually by an admin account). For this project, we decided to have comments approved automatically. After setting up the project, CommentBox gives you a project ID and an HTML snippet to put in your code with the ID in the snippet. Then, you simply paste that snippet of code wherever you want a comment box. CommentBox provides everything for you and creating your own comment area with HTML and CSS is not needed.
Heroku is a cloud platform that lets developers deploy and manage code to run applications. Once the static HTML pages were created, it was easy and efficient to upload the most recent code from the Github repository onto the project on Heroku. Heroku compiles this code and allows anyone with a browser and internet connection access to the site. Heroku used to be free but, unfortunately, it is now $5 a month to host simple websites. However, we had no problem paying this fee because Heroku provides a seamless experience. In order to push the most recent repository, you simply just run the command “git push heroku main” in the terminal. Now, the most updated code is hosted and live on the Heroku site.
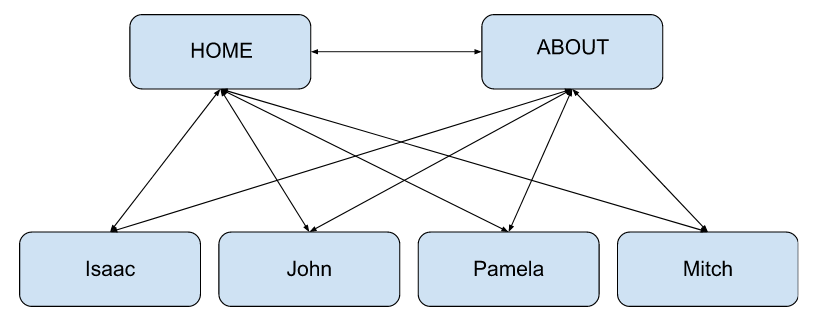
Figure 16: Website flow
The design process was very straightforward. We were given a rubric for this lab with very concrete standards to follow. We needed a home page, group information page, and individual pages for each member. We thus decided immediately as a group to just have six separate pages that would all connect somehow.
We wanted a simple flow to satisfy the UI requirement of the lab. We initially decided from the home page to link all of the other pages at the same time and found this very efficient and practical. The home page is meant to be a central navigation point of the website, so it is a good idea to have all pages directly linked from the home page.
We also, upon discussion, have our individual profile pages linked from the ABOUT page as well. When the reader is on the ABOUT page reading about the group as a whole, we figure we might as well give easy access to each individual team member. That way, the reader can learn more about each particular team member.
The decision using CommentBox was not even a decision at all. We were exposed to the resource in lecture and after a quick video tutorial, we implemented it. It provided everything we needed to satisfy the requirement of a comment box feature.
To deploy our site publicly, we were going to go with the recommendation of Gatsby from the lecture. This, however, did not go in our favor. Isaac was in charge of setting up the website publicly, and, no matter what he tried to accomplish the task with Gatsby, he could not get the site to accept our Github repository. Half of the team had previous experience using another source called Heroku to deploy applications with, so we gave that a try. Isaac was able to get the already almost completed site up on Heroku within ten minutes. Heroku provided a very easy and efficient interface to get our website deployed with, which really helped out with the completion of all of the requirements for this lab.
In the end, the project turned out very well. The final website was a very elegant, easy flowing website that was pleasing to the eye and fun to navigate. The decision of using HTML with CSS was a very smart choice with the skillset of the group. None of us had much web development experience beforehand so using HTML with CSS was a great introduction into creating a website. We were all able to contribute efficiency using a git repository and simply pulling and pushing from and to the main branch. If there were any merge conflicts between files, changing HTML code was extremely easy.
There were no requirements that we did not fulfill. The only critique we can think of was using a more sophisticated design tool such as Bootstrap. This could allow for a smoother and interactive website with lots of cool features and graphics. In the future, if we had more time and stricter design requirements, we would like to use Bootstrap to make an incredible looking website. However, for this lab and since we had no experience with web development, we are all proud of the outcome.
Every team member had some sort of role for this lab. Pamela did a great job with the original creation of the homepage. The homepage looked great with our individual photos and layout of the background. This initial layout of the homepage strongly influenced the other HTML pages for everything else. Isaac was in charge of getting the website public using Heroku. Unfortunately, the free trial of Heroku expired on 11/28/2022, this meant a new account creation would cost a small fee. John implemented the comment box feature for all of the individual pages. Lastly, we can all proudly say that our individual pages are our own. Mitch, John, Pamela, and Isaac all fully customized their own pages to add their own unique taste and information.
Overall, there was a fairly even distributed workload between each member. Aside from the initial creation of the site, every team member did their own pages. Below is a screenshot from Github indicating the number of commits each team member did. Although it says John only has three commits, every team member did commits differently. For example, Isaac has a significantly higher amount of commits because whenever Heroku was to be updated with new code, Isaac had to commit to his local main branch every time. The size of the commits are important as well. Someone may have 50 lines of code for a commit, while someone else may have 10 lines of code for a single commit.
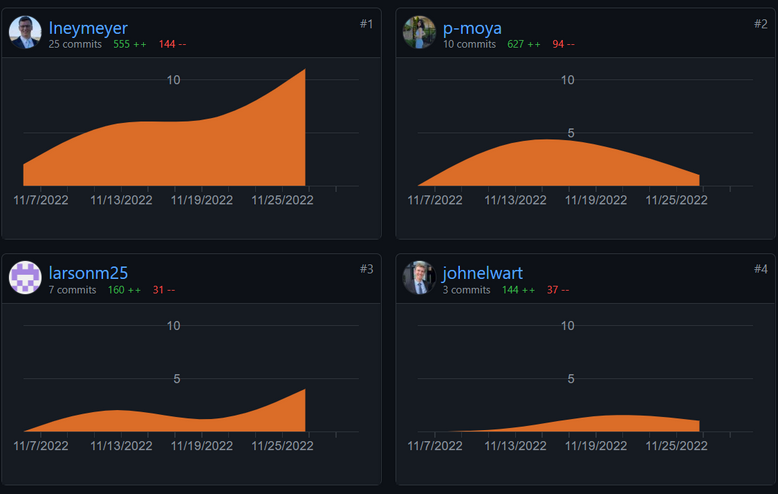
Figure 17: Project contributions
For project management, our group used an agile approach. We would start with a plan and then design and develop that plan. After the design and development stage, we would move forward to the testing and deployment stage to make sure we were satisfying the requirements for this lab. After deploying the current website to Heroku, we reviewed and reflected on how our website design did or did not satisfy the necessary requirements. If changes were needed, we discussed what changes were needed and implemented them. Due to the simplicity of this lab, we were able to directly follow our initial Gantt Chart projections shown in Figure 18.
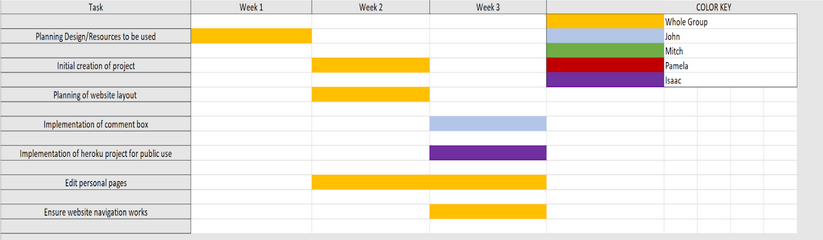
Figure 18: Gantt chart
| Test Number | Description | Requirements | Results | Notes |
|---|---|---|---|---|
| 1 | The website should be hosted publicly | Anyone with a browser and access to the internet should be able to access and explore the website. | Pass | The site is currently launched on an application called Heroku. Heroku connects to our Git repository and runs the code provided, allowing anyone on the internet to access it. |
| 2 | The website has a portfolio homepage | The website must have a home page that acts as an introductory page for anyone visiting the site. | Pass | When the site is first loaded, the home page is shown first. This allows the user to see how to access all of our personal pages and some information about the team itself. |
| 3 | Each member has their own page | The website must have four portfolio pages, one representing information for each team member. | Pass | Each team member has their own page with information and photos about them. |
| 4 | Each member has at least one embedded figure on their page | Each team member's individual page must have at least one embedded object that is relevant to the page. | Pass | Every member’s page has multiple photos that are relevant to who they are and what they are interested in. |
| 5 | Each member’s page has a good and pleasing layout | Each individual team member’s page has to be attractive to look at. There should be good flow and layout that is easy to follow and read. | Pass | Each team member’s page has a simple and elegant layout. Colors mix and blend well, with easy to read fonts to go along with each photo. |
| 6 | Each member’s page has relevant and effective information about themselves | Each team member’s page has to represent them. This is a portfolio page, the reader should be able to learn a little bit about each team member. There should not just be irrelevant information that doesn’t apply to the team members. | Pass | Each team member’s page has relevant and effective information about them as a person. |
| 7 | The website has a team members intro page | The website must have a page that gives a brief introduction to the group members as a whole. Information such as their majors should also be present. | Pass | From any of the pages, if the user clicks the “ABOUT” at the top right, this will bring you to the team members intro page. |
| 8 | There is a comment feature for each member’s page | Must have a feature that allows for anyone to comment on the individual team member’s pages. | Pass | CommentBox was successfully implemented - the user just has to sign in with some sort of account for identification. |
| 9 | The website has understandable and efficient flow between the pages | When the user first loads the website, there must be no confusion on how to navigate around. The flow of the website must be understandable from someone who has minimal experience creating/using a website. | Pass | Navigation is a priority. There are big text and picture icons that link the pages together. It is extremely hard to miss and not understand how to navigate. |
| 10 | The website has an attractive and effective UI design | The website has to be pleasing to the eye and not drive any viewers away. | Pass | All the pages look really well and fit together well. There is a common layout between the individual pages and lots of images to represent creativity on the home and about pages. |